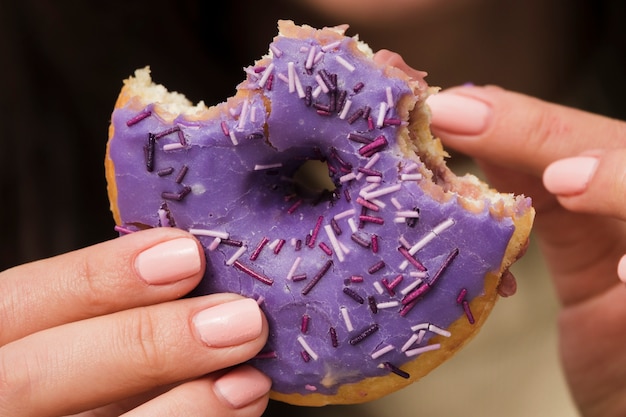
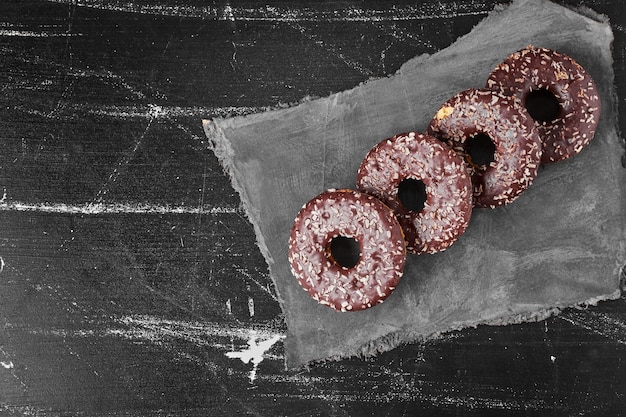
Let's be honest, who doesn't love a good donut? Those fluffy, sweet treats are a classic for a reason. But sometimes, you just crave that warm-from-the-fryer goodness, and that's where homemade donuts come in. It's a rewarding experience, from the comforting aroma of rising dough to the golden-brown perfection of the finished product. So, grab your apron, gather your ingredients, and get ready to embark on a donut-making adventure!
(Part 1) The Dough: The Heart of Your Donut Dream

The secret to a truly delicious donut lies in the dough. It needs to be just right – soft, slightly chewy, and airy enough to hold its shape when fried. I've been making donuts for years, and I've learned a thing or two about getting the dough perfect.
The Classic Yeast Dough: A Time-Honored Tradition
There's a reason yeast dough is a classic. It's a tried-and-true method that delivers a beautifully light and fluffy texture. It might seem a bit intimidating, but trust me, it's simpler than you think. Here's what you need to know:
Yeast Needs a Cozy Spot
Yeast is a living organism, and it thrives in warmth. When activating your yeast, you want the water to be lukewarm, not hot. A quick dip of your finger – it should feel pleasantly warm, not too hot or cold – is a good indicator.
Don't Overwork the Dough
You want a smooth, elastic dough, but don't go overboard with the kneading. Overworking the dough can make it tough and chewy. I usually knead for about 10 minutes, until it's smooth and slightly tacky.
Rest Time is Sacred
After kneading, you need to give the dough some rest. This is where the yeast works its magic, creating those airy pockets we all love. I typically cover the dough with a tea towel and let it rise in a warm spot in my kitchen. The dough will double in size, indicating it's ready for the next step.
The Quick and Easy No-Yeast Dough: A Busy Baker's Best Friend
Let's be real, sometimes you just don't have the time for a long rise with yeast. Don't worry, there's a fantastic alternative: no-yeast dough. It's just as delicious, but requires less fuss and is perfect for those evenings when you need a quick treat.
Keep it Cool for a Lighter Dough
The key to a successful no-yeast dough is keeping the ingredients cold. This helps prevent the dough from becoming too soft and sticky. I use cold milk and cold butter to achieve the right texture.
Don't Overhandle the Dough
With no-yeast dough, you don't need to knead it for hours. A gentle fold or two until it's smooth and comes together is all you need. Less is definitely more in this case.
Your Dough Essentials Checklist
Before you start mixing, make sure you've got all your ingredients ready:
- Yeast Dough: Flour, sugar, yeast, salt, milk, butter, eggs (optional).
- No-Yeast Dough: Flour, sugar, baking powder, baking soda, salt, milk, butter, eggs (optional).
Let's Get Baking
Now that you're equipped with the knowledge, let's dive into some delicious recipes. Here are some classic recipes for both yeast and no-yeast donuts to get you started:
[Insert Recipes Here - Provide links to relevant resources for both yeast and no-yeast donut recipes]
(Part 2) Crafting the Perfect Donut Shape

Let's be honest, the joy of a donut is all about the shape. Those classic ring shapes, the adorable mini versions, or even those inventive twists—it all adds to the experience.
The Iconic Ring Donut: A Timeless Classic
There's a reason why the ring donut is so iconic. It's simple, elegant, and provides the perfect space for a generous glaze.
Rolling It Out: The Traditional Method
The classic way to shape ring donuts is with a rolling pin. You roll out the dough into a rectangle, cut out circles using a cookie cutter, and then use a smaller cutter to create the hole in the center. It's simple, efficient, and produces beautifully shaped donuts.
Donut Cutter: A Time-Saving Tool
If you want to skip the rolling and cutting, a dedicated donut cutter is a game-changer. It's a real time-saver, and it creates beautifully uniform donuts. If you make donuts regularly, consider investing in one—it's worth every penny.
Mini Donuts: Bite-Sized Delights
Mini donuts are too cute to resist! They're perfect for parties, snacks, or simply satisfying a sweet craving.
Muffin Tin Magic: The Easy Way
The easiest way to make mini donuts is to use a muffin tin. Drop spoonfuls of dough into each cup, then bake until golden brown. You can use a mini donut pan for a perfectly shaped mini donut, but a regular muffin tin works just as well.
The Twist: A Fun and Festive Shape
If you're feeling adventurous, try shaping your donuts into twists. It's a fun and visually appealing way to present your treats.
The Braid Method: A Little More Effort, Worth Every Bite
The braid method involves shaping two strips of dough and twisting them together. It takes a bit of practice, but the result is incredibly satisfying. There are tons of tutorials online to guide you through the steps.
Shape It Up! Tips for Donut Success
Before you start shaping, remember these tips:
- Keep the dough cold: Cold dough is easier to work with. You can even chill the dough in the fridge for a few minutes before shaping.
- Dust your surface with flour: This will prevent the dough from sticking to the counter.
- Don't overwork the dough: Once you've shaped your donuts, leave them alone! Overhandling will make them tough.
(Part 3) The Frying Process: Bringing Your Donuts to Life

Now comes the exciting part—frying! This is where your donuts transform from doughy shapes into fluffy, golden-brown delights. It's an art form that takes practice, but trust me, the results are worth the effort.
The Oil and Temperature: A Crucial Duo
First, you need the right oil. I prefer vegetable oil because it has a high smoke point, meaning it can withstand high temperatures without burning. canola oil and peanut oil are good alternatives as well.
The temperature is crucial. The oil should be hot enough to cook the donuts through without burning them. I usually heat it to around 350-375°F (175-190°C). You can test the temperature by dropping a small piece of dough into the oil. It should sizzle immediately.
Frying Your Donuts: A Step-by-Step Guide
Now, let's fry those donuts:
Work in Batches for Even Cooking
Don't overcrowd the pan. Too many donuts will lower the temperature and make them greasy. Fry in batches of 2-3 donuts at a time, depending on the size of your pan.
Flip, Flip, Flip: For Golden Brown Perfection
Donuts need to cook on both sides. As soon as you drop a donut into the oil, you'll see bubbles forming around it. That's your cue to flip it! Fry each side for about 1-2 minutes, or until they're golden brown and cooked through. To check for doneness, gently press the center of the donut. If it springs back, it's ready.
Don't Neglect the Hole
Pay attention to the hole in the center. It needs to cook evenly too. If it starts to brown too quickly, reduce the heat slightly.
Your Frying Essentials
Make sure you have these items on hand:
- Large, heavy-bottomed pot: For even heat distribution
- Thermometer: A must-have for accurate temperature control
- Slotted spoon or spider: For safely removing the donuts from the oil
- Wire rack: For draining the donuts and letting them cool
(Part 4) The Sweet Glaze: Adding the Finishing Touch
Your donuts are fried to perfection, now it's time for the glaze! This is where you can let your creativity shine, adding a pop of color and flavor to your homemade treats.
The Classic Sugar Glaze: A Timeless Delight
You can't go wrong with a classic sugar glaze. It's simple, incredibly versatile, and allows the donut's natural flavor to shine.
Powdered Sugar Base: A Simple Start
The base of a classic sugar glaze is powdered sugar mixed with milk. I use whole milk, but you can use water or even a milk alternative like almond milk.
The Perfect Glaze Consistency: Not Too Thick, Not Too Thin
The key is finding the right consistency. It should be thick enough to coat the donuts but thin enough to drizzle easily. Adjust the thickness by adding more powdered sugar or milk as needed.
The Chocolate Glaze: For the Chocolate Lovers
For those who prefer a richer indulgence, a decadent chocolate glaze is a must-have. It's a classic pairing with donuts and can be elevated with different flavor variations.
Melting the Chocolate: Gentle and Smooth
I prefer to melt my chocolate glaze in a double boiler. This gentle method prevents the chocolate from burning. You can also use a microwave, but be careful not to overheat it.
A Smooth Finish: A Little Milk Does the Trick
For a perfectly smooth chocolate glaze, whisk in a little milk or cream. It helps loosen the glaze and makes it easier to spread. A pinch of salt can also enhance the chocolate flavor.
Glaze Creativity: Endless Possibilities
Don't be afraid to experiment with different flavors! There's a world of possibilities when it comes to glazing donuts:
- Lemon Glaze: Mix a tablespoon of lemon juice into the classic sugar glaze for a tangy twist.
- Coffee Glaze: Stir in a tablespoon of strong coffee for a bold and aromatic glaze.
- maple glaze: Mix maple syrup with powdered sugar and a little milk for a decadent and flavorful glaze.
Glaze Checklist: Everything You Need
Before you start drizzling, make sure you have everything on hand:
- Powdered Sugar
- Milk or Milk Alternative
- Chocolate Chips or Chocolate Bar (for chocolate glaze)
- Whisk or Mixing Spoon
- Pastry Brush or Spoon (for spreading the glaze)
(Part 5) The Donut Toppings: Elevate Your Sweet Creation
You've got the perfect donut and a delicious glaze. Now it's time for the final touches—the toppings! This is where you can have fun and personalize your donuts, adding extra layers of flavor and texture.
The Classics: Sprinkles and Chopped Nuts
Let's face it, sprinkles are a donut must-have. They add a burst of color and a playful crunch. For a touch of nuttiness, chopped nuts like pecans or walnuts are always a welcome addition.
Crunchy Crunch: Granola and Cereal
For a unique twist, try topping your donuts with crushed granola or your favorite cereal. It adds a satisfying crunch and a hint of extra flavor. I've even used crushed graham crackers for a hint of cookie flavor.
Fruity Flavour: Fresh Fruit and Dried Fruit
Fresh fruit slices, like strawberries or raspberries, add a bright and juicy element. Dried fruit, like cranberries or blueberries, bring a concentrated sweetness and a chewy texture. Just be sure to chop the fruit into bite-sized pieces for easy eating.
Sweet and Salty: Caramel and Sea Salt
This combination is irresistible. Drizzle your donuts with a little caramel sauce and sprinkle with a pinch of sea salt. The sweet and salty combination is a real winner.
The Extra Touch: Whipped Cream and Chocolate Shavings
For a decadent touch, top your donuts with a dollop of whipped cream. You can also add a few chocolate shavings for extra chocolatey goodness.
Topping Time: Get Creative!
Ready to create your own topping masterpiece? Here are a few tips:
- Start with a base: Use your glaze as a base for your toppings. It will help them stick and create a more cohesive look.
- Go for variety: Don't be afraid to mix and match your toppings. A sprinkle of color here, a few chopped nuts there—it's all about finding your perfect combination.
- Keep it simple: Sometimes the simplest toppings are the best. A few sprinkles and a drizzle of glaze can be just as delicious as a more elaborate creation.
(Part 6) Storage and Serving: Keeping Your Donuts Fresh and Delicious
You've got your beautiful donuts, now you need to know how to keep them fresh and delicious. Here are some tips for storing and serving your homemade treats:
Storage: Freshness and Longevity
The best way to store donuts is in an airtight container at room temperature. They'll stay fresh for about 2-3 days. For longer storage, freeze them for up to 2-3 months. Wrap them individually in plastic wrap or foil before placing them in a freezer-safe bag.
Reheating: Reviving Those Delicious Donuts
If your donuts have lost their freshness, you can easily revive them. I like to reheat them in a preheated oven at 300°F (150°C) for a few minutes. You can also microwave them for a quick and easy solution. Just be careful not to overheat them!
Serving: Donut Delight for Everyone
When it comes to serving, the sky's the limit! I love to set up a donut bar with a variety of toppings and let my guests create their own donut masterpieces. You can also serve them with a cup of coffee or tea, or even a glass of cold milk.
(Part 7) FAQs: Your Donut Questions Answered
You've probably got a few questions about making donuts. Let's dive into some frequently asked questions and their answers.
1. Can I use a different type of flour?
You can definitely experiment with different types of flour. I usually use all-purpose flour, but you can also try using bread flour or cake flour. Just keep in mind that the type of flour will affect the texture of your donuts. Bread flour will create a denser donut, while cake flour will result in a lighter and fluffier donut.
2. What if my donuts are too dense?
If your donuts are too dense, it could be because the dough was over-kneaded or because the yeast was not active. You can try adding a bit more baking powder or baking soda to the dough next time. It's also a good idea to let the dough rise for a little longer.
3. What if my donuts are greasy?
If your donuts are greasy, it could be because the oil was not hot enough. Make sure to heat the oil to the correct temperature before frying your donuts. It's also a good idea to avoid overcrowding the pan, as this can lower the temperature of the oil.
4. Can I freeze the dough?
Yes! You can definitely freeze donut dough. Just make sure to wrap it tightly in plastic wrap or foil before placing it in a freezer-safe bag. You can freeze it for up to 3 months. When you're ready to use it, simply thaw it in the refrigerator overnight.
5. What are some other fun topping ideas?
The possibilities are endless! You can use anything from chopped candy bars to crumbled cookies. Try topping your donuts with crushed Oreos, crumbled pretzels, or even a sprinkle of cinnamon sugar.
(Part 8) Conclusion: Embrace the Joy of Donut Baking
There you have it—you're now equipped with all the knowledge you need to make delicious homemade donuts. Remember, the key is to have fun and experiment. Don't be afraid to try new things and create your own unique donut creations.
So, what are you waiting for? Gather your ingredients, put on your apron, and let the donut magic begin.
Everyone is watching

Corn on the Cob: The Ultimate Guide to Perfectly Cooked Ears
Healthy MealsAh, corn on the cob. Just the name evokes images of sunny days, barbecues, and that sweet, juicy flavour that ...

Scallops: The Ultimate Guide to Perfect Cooking
Healthy MealsAh, scallops. Those delicate, sweet, and utterly delicious morsels of the sea. They hold a special place in my...

Spaghetti Squash: The Ultimate Guide to Cooking and Serving
Healthy MealsRemember that time you saw spaghetti squash at the supermarket, looking all bumpy and strange, and thought, "W...

Salmon Cooking Times: Perfect Guide for Every Recipe
Healthy MealsLet me tell you, cooking salmon is an art form. It's all about getting that perfect balance: juicy and tender,...

Ham Cooking Time: How Long to Bake, Smoke, or Boil a Delicious Ham
Healthy MealsAh, ham. It's a classic, isn't it? A real crowd-pleaser, especially around holidays. And when done right, it'...
