Ah, chocolate lava cakes. Just the name conjures up images of warm, gooey chocolate, a symphony of textures and tastes that's simply irresistible. For years, making these little beauties has been a personal ritual, a culinary adventure that always brings a smile to my face. The rich aroma of melted chocolate filling my kitchen, the anticipation as they bake, and that glorious moment when you slice into the molten centre – pure bliss!
So, gather your ingredients, put on your apron, and let's embark on a journey to create the most decadent chocolate lava cakes you've ever tasted. We'll explore everything from the perfect ingredients to mastering the baking technique, leaving no stone unturned in our quest for chocolate perfection.
(Part 1) Choosing the Right Ingredients
The Star of the Show: Chocolate
Let's start with the obvious – chocolate. It's the heart and soul of a lava cake, the driving force behind its decadent charm. Now, I'm a dark chocolate fanatic, drawn to its rich, intense flavour. But hey, everyone has their own preferences. Milk chocolate or even white chocolate can work wonders too, just make sure it's at least 70% cocoa solids. That way, you'll ensure a good balance of sweetness and a truly rich, chocolatey flavour.
Eggs: The Binding Force
Eggs are the unsung heroes of a lava cake. They add a beautiful richness, acting as a binding force to hold everything together. Choose large eggs, and always use them at room temperature. This allows for better emulsification, resulting in a batter that's velvety smooth and easy to work with.
Butter: The Indulgent Touch
Butter, oh butter! It's the ingredient that elevates lava cakes to a whole new level of decadence. Unsalted butter is the way to go here, giving you complete control over the saltiness of the cake. Let it come to room temperature, so it's nice and soft, making it easier to work with and incorporate into the batter.
Sugar: The Sweetness
Sugar is the balancing act, the counterpoint to the chocolate's richness. It adds sweetness, making the cake more palatable and allowing the chocolate flavours to shine. Granulated sugar is the best choice here, providing the right balance of sweetness and texture. Remember, you don't want to overpower the chocolate, so keep the sugar in check.
Flour: The Structure
Flour is the secret ingredient for a cake that holds its shape, a delicate balance that keeps it from spreading out like a pancake. Don't worry, we're not looking for a dense cake here, just enough structure to maintain that iconic lava cake form. I usually use all-purpose flour, but a blend of cake flour and all-purpose can create a lighter texture.
Other Ingredients:
A pinch of salt: This may seem insignificant, but it enhances the chocolate flavour, bringing out its complexity.
Vanilla extract: A little goes a long way, adding a subtle warmth and complexity that complements the chocolate perfectly.
Espresso powder (optional): For a true chocolate lover, a teaspoon of espresso powder adds an extra kick of flavour, deepening the chocolate intensity.
(Part 2) Getting Ready to Bake
Preparing the Baking Dish
You'll need individual ramekins for baking these delightful little cakes. I prefer using ramekins, as they give each cake its own space to rise and create that iconic lava flow. However, a larger baking dish can work too. Whatever you choose, make sure it's well-greased and dusted with flour. This will prevent the cakes from sticking and ensure a clean release.
Preheating the Oven
Preheating the oven is an absolute must. Imagine this: you've meticulously prepared your batter, only to have it bake unevenly because the oven wasn't preheated properly. Not a good look! I use a conventional oven, and preheat it to 350°F (175°C). This ensures even heat distribution, leading to perfectly cooked cakes.
And one more thing – don't be tempted to peek at the cakes while they're baking. The sudden change in temperature can disrupt the baking process, potentially affecting the outcome. Patience, my friend!
(Part 3) Mixing the Batter
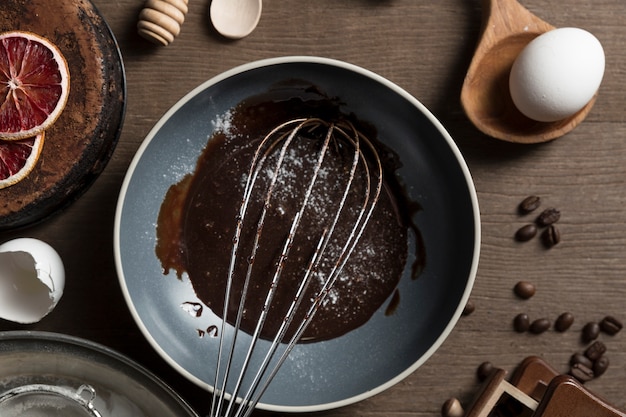
This is where the magic happens. It's all about combining the chosen ingredients to create a batter that's smooth, velvety, and oh-so-delicious. Follow these steps carefully, and you'll be well on your way to chocolate perfection.
The Method:
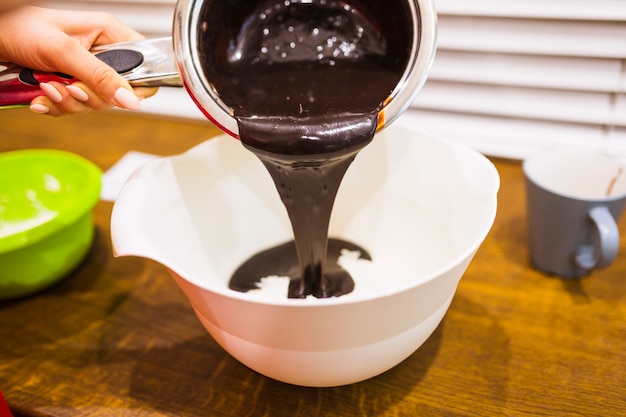
1. Melt the chocolate and butter: This is the foundation of our lava cake. You can melt the chocolate and butter together in a bain-marie (a double boiler) or in the microwave. If you use the microwave, do it in 30-second intervals, stirring in between to ensure even melting. Don't let the chocolate scorch!
2. Whisk in the sugar: Once the chocolate and butter are melted, add the sugar and whisk until it's completely incorporated. This will create a smooth, luscious base for the batter.
3. Add the eggs one at a time: This is crucial! Don't add all the eggs at once, as it can make the batter too runny. Whisk well after each egg addition, ensuring that everything is perfectly combined.
4. Stir in the vanilla extract: Just a touch of vanilla extract is all you need. Add it to the batter and whisk it in gently.
5. Fold in the flour: Gently fold in the flour with a spatula. Don't overmix; just enough to combine the ingredients. Overmixing will make the cakes tough and chewy. The key is to maintain that light, airy texture.
6. Add the espresso powder (optional): If you're feeling adventurous, whisk in a teaspoon of espresso powder. It'll amplify the chocolate flavour, creating a truly intense chocolate experience.
(Part 4) Baking the Lava Cakes
The Timing is Everything
Now comes the moment of truth – baking the cakes. This is where a bit of finesse comes in. The baking time depends on the size of your ramekins and your oven, so be mindful of those factors. As a general rule, I bake them for 12-15 minutes.
Testing for Doneness:
The best way to know if the cakes are done is by the toothpick test. Insert a toothpick into the centre of a cake. If it comes out with just a few moist crumbs attached, the cake is done. If it comes out with a lot of wet batter, it needs a few more minutes in the oven.
(Part 5) The Grand Finale: Serving
Resting and Cooling
Once the cakes are baked, let them rest in the ramekins for a few minutes before serving. This allows the centre to set slightly, preventing a complete lava flow when you slice into it.
Serving Suggestions
Here's where the fun really begins! You can serve these lava cakes with a variety of toppings, each adding its own unique flavour dimension. Personally, I adore a generous dollop of whipped cream, a delicate sprinkle of powdered sugar, and a drizzle of rich chocolate sauce. But feel free to get creative! Fresh berries, chopped nuts, a scoop of vanilla ice cream – the possibilities are endless.
(Part 6) Troubleshooting
Okay, so we've covered the basics. But what if things don't go according to plan? Don't fret, even the best bakers have their moments. Here are a few common problems and solutions:
Problem 1: The Cake Is Overcooked
Symptoms: The cake has a dry, crumbly texture. It's lost that beautiful moistness and softness.
Solution: Next time, reduce the baking time by a couple of minutes. Check the cakes earlier to avoid overbaking.
Problem 2: The Cake Is Undercooked
Symptoms: The centre is still runny, and the cake may not hold its shape.
Solution: Bake the cake for a few more minutes. Keep an eye on it, and test for doneness using the toothpick method.
Problem 3: The Cake Sticks to the Ramekin
Symptoms: The cake doesn't come out cleanly from the ramekin, leaving a sticky mess.
Solution: Make sure the ramekins are well-greased and dusted with flour. This will help create a non-stick surface for the cakes to bake on.
(Part 7) Variations
Chocolate Lava Cake Variations
Let's be honest, sometimes we crave a little something extra, a twist on the classic. Here are some exciting variations on the chocolate lava cake:
Salted Caramel Lava Cake: Add a swirl of salted caramel sauce to the centre of the cake before baking. The salty caramel complements the chocolate perfectly, creating a delightful contrast of flavours.
Peanut Butter Lava Cake: Substitute half of the chocolate with peanut butter. The nutty richness of peanut butter blends beautifully with the chocolate, adding a new dimension of flavour.
White Chocolate Raspberry Lava Cake: Use white chocolate instead of dark chocolate and add a spoonful of raspberry jam to the centre of the cake. The sweetness of the white chocolate combined with the tartness of the raspberry jam creates a truly unique and delicious experience.
(Part 8) Beyond the Basics: Tips for Success
Don't Overmix the Batter
Overmixing the batter is a common mistake that can lead to tough, chewy cakes. The key is to gently fold in the flour until just combined.
Use Quality Chocolate
Remember, the chocolate is the star of the show. Don't skimp on quality. Using high-quality chocolate will result in a richer, more intense flavour that will truly elevate your lava cakes.
Let the Ingredients Come to Room Temperature
This simple step ensures that the ingredients blend smoothly and create a silky texture. It's the difference between a cake that's smooth and luscious and one that's clumpy and uneven.
Don't Overbake
Overbaking is a common problem, leading to dry, crumbly cakes. Bake the cakes until they are just set, and the toothpick comes out with a few moist crumbs attached.
Enjoy!
There you have it! A complete guide to creating those delectable chocolate lava cakes. Remember, baking is an art, not an exact science. Experiment, find what works best for you, and most importantly, have fun!
(Part 9) FAQs
1. Can I make the lava cake batter ahead of time?
Yes, you can make the batter ahead of time. Cover the bowl tightly with plastic wrap and refrigerate it for up to 24 hours. When you're ready to bake, bring the batter to room temperature for about 30 minutes. This allows the ingredients to come together properly and ensures a smooth, even texture.
2. Can I use a different type of chocolate?
Absolutely! You can use milk chocolate or white chocolate. Just make sure it's at least 70% cocoa solids. This will ensure a rich chocolate flavour without being too sweet.
3. Can I use a different type of flour?
Yes, you can use a blend of cake flour and all-purpose flour for a lighter texture. Cake flour is known for its finer texture, which can make the cakes more delicate and airy.
4. What are some other topping ideas?
Let your imagination run wild! You can try chopped nuts, fresh berries, a drizzle of caramel sauce, or a scoop of ice cream.
5. Why are my lava cakes flat?
This could be due to overmixing the batter or using too much flour. Try gently folding in the flour until just combined, and don't overbake the cakes.
With this comprehensive guide, you'll be a chocolate lava cake pro in no time! Just remember to have fun with it and enjoy the process. The journey to culinary perfection is a rewarding one. Happy baking!
Everyone is watching

Corn on the Cob: The Ultimate Guide to Perfectly Cooked Ears
Healthy MealsAh, corn on the cob. Just the name evokes images of sunny days, barbecues, and that sweet, juicy flavour that ...

Scallops: The Ultimate Guide to Perfect Cooking
Healthy MealsAh, scallops. Those delicate, sweet, and utterly delicious morsels of the sea. They hold a special place in my...

Spaghetti Squash: The Ultimate Guide to Cooking and Serving
Healthy MealsRemember that time you saw spaghetti squash at the supermarket, looking all bumpy and strange, and thought, "W...

Salmon Cooking Times: Perfect Guide for Every Recipe
Healthy MealsLet me tell you, cooking salmon is an art form. It's all about getting that perfect balance: juicy and tender,...

Ham Cooking Time: How Long to Bake, Smoke, or Boil a Delicious Ham
Healthy MealsAh, ham. It's a classic, isn't it? A real crowd-pleaser, especially around holidays. And when done right, it'...