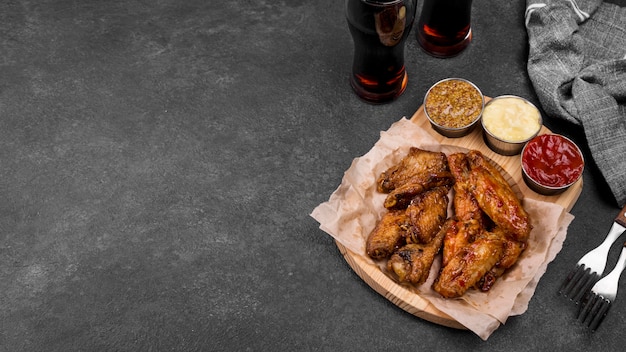
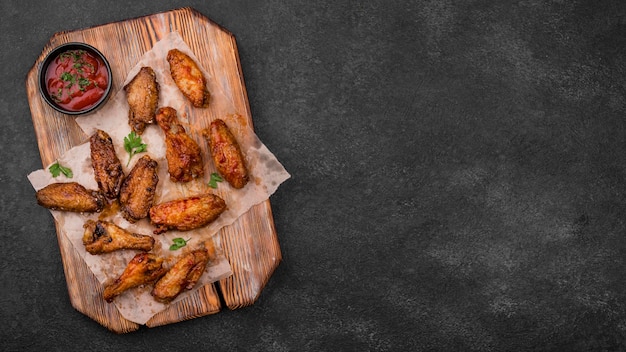
Let's be honest, everyone loves a good Buffalo wing. Those crispy, juicy pieces of chicken, coated in a fiery, tangy sauce, are a classic for a reason. But getting them just right, with that perfect balance of crispness and flavour, is a true art form. As someone who's spent years perfecting my own Buffalo wing recipe, I’m here to share my secrets to help you create wings that'll have your guests begging for more.
Part 1: The Wings - Choosing the Perfect Starting Point

You can’t make amazing wings without starting with the right ingredients. Choosing the right wings is crucial, and it all comes down to personal preference.
Whole Wings vs. Split Wings: The Great Debate
I'm a firm believer in using whole chicken wings. They offer a great mix of drumettes (the small drumstick), flats (the larger part of the wing), and wing tips. The flavours just seem to meld together better. But if you're short on time or prefer a more manageable size, split wings are a good alternative. They're pre-cut into drumettes and flats, making them easier to handle and cook.
Beyond Size: Choosing Quality Wings
No matter which type you choose, make sure you're getting good quality wings. Look for wings that are plump and firm, with a good amount of meat. Avoid wings that look dry or have any discoloration.
Part 2: Preparing the Wings - The Foundation for Flavor

Once you’ve got your wings, it's time to prep them for cooking. This is about more than just a quick rinse – it's about maximizing flavour.
The Rinse and Pat Down
First, give your wings a good rinse under cold water. This removes any impurities and helps ensure the batter adheres properly. Next, pat them dry thoroughly with paper towels. This is important for achieving a nice crispy skin.
Trimming the Tips: A Matter of Taste
Now, for the wing tips. These tend to be a bit chewy and don't have much meat. So, if you're feeling fancy, give them a quick trim. But honestly, some people love the extra crispy flavour they add, so it's a matter of personal preference.
The Crucial Cut: Whole Wing Advantage
If you're using whole wings, it's a good idea to cut them into drumettes and flats. This helps them cook more evenly and makes them easier to handle. To do this, you'll need a sharp knife or kitchen shears. Locate the joint where the drumette meets the flat, and make a clean cut through the bone. Then, carefully separate the two pieces.
Part 3: The Batter - Building a Crispy Crust

Now, let's talk about the batter, the secret to creating that gloriously crispy skin. There are a million variations out there, but I've always found that a simple flour-based batter works best. Here's how I do it:
The Classic Flour Batter: Simple and Effective
My go-to batter is a simple blend of all-purpose flour, cornstarch, salt, pepper, and a touch of garlic powder and paprika for that extra flavour boost. The cornstarch helps create a lighter, crispier crust.
Finding the Right Consistency
The key is to achieve the right consistency. You want a batter that's thick enough to adhere to the wings but not so thick that it becomes clumpy. Start with a small amount of cold water and gradually add more, stirring constantly, until you reach the desired consistency. Think of it like a thick, creamy sauce.
Part 4: The Fry - Achieving Crispy Perfection
Now comes the fun part: frying. This is where the magic happens. But remember, high heat is essential for that crispy texture.
The Power of High Heat
Heat your oil to around 375°F (190°C) before you add the wings. Using a thermometer is essential here. You want the oil to be hot enough to cook the wings quickly and evenly, creating that golden-brown crust.
Frying in Batches: The Key to Even Cooking
Don't overcrowd the pan! Fry the wings in batches, ensuring there's enough space between them for the oil to circulate freely. This will prevent them from sticking together and ensure they cook evenly.
Time and Temperature: The Signs of Doneness
The frying time will depend on the size of the wings, but generally, it'll take about 8 to 10 minutes. You'll know they're ready when they're golden brown and cooked through. To test, pierce the thickest part of a wing with a fork. If the juices run clear, they're done.
Part 5: The Sauce - The Fire and Flavor
We're finally here, the moment you've been waiting for – the sauce. This is what makes Buffalo wings truly special. The classic Buffalo sauce is simple but powerful.
The Classic: Tangy Heat
The classic Buffalo sauce is a blend of hot sauce, butter, and vinegar. I like to use a good quality hot sauce with a nice kick, but you can adjust the heat level to your liking.
Adding Sweetness: A Touch of Balance
For those who prefer a touch of sweetness, a teaspoon or two of honey or brown sugar can really round out the flavours. This creates a nice balance between the heat and tang of the sauce.
Homemade Goodness: Unleashing Your Creativity
If you're feeling adventurous, making your own Buffalo sauce from scratch is a great way to personalize your wings. Start with a good quality hot sauce, add butter, vinegar, garlic powder, and any other spices that tickle your fancy. It's incredibly easy and allows you to tailor the flavour profile to your taste.
Part 6: The Finishing Touches - Elevate Your Wings
The wings are cooked, they're sauced, now it's time to bring it all together.
Serving with Style: Drained and Ready
Once the wings are out of the fryer, let them drain on a wire rack to remove any excess oil. This helps ensure they stay crispy and prevents them from becoming soggy.
The Ultimate Accompaniment: Blue Cheese Dressing
No Buffalo wing experience is complete without a good blue cheese dressing. The tangy, creamy flavour cuts through the heat of the sauce perfectly. You can find pre-made options, but making your own is a breeze. Just combine blue cheese, mayonnaise, sour cream, and a touch of vinegar. It's a real game-changer.
Beyond Blue Cheese: Other Dipping Options
For those who aren't fans of blue cheese, there are plenty of other dipping options. Ranch dressing is a classic choice, as is honey mustard. Even barbecue sauce can be a tasty alternative.
Part 7: Variations - Taking Buffalo Wings to New Heights
Buffalo wings are a versatile canvas, allowing you to experiment with different flavours and textures.
Spicy Garlic Buffalo Wings: A Garlicky Delight
For a punch of garlic flavour, add a generous amount of garlic powder to your batter and sauce. You can also add minced garlic to the sauce for an extra kick. These wings are seriously flavourful.
Honey Sriracha Buffalo Wings: Sweet and Spicy Synergy
If you love a sweet and spicy combination, try adding a splash of sriracha and a drizzle of honey to your sauce. The sriracha adds a fiery kick, while the honey balances out the heat with a touch of sweetness.
Lemon Pepper Buffalo Wings: A Tangy Twist
For a tangy twist, add lemon pepper seasoning to your batter and a squeeze of fresh lemon juice to your sauce. The citrus flavour pairs perfectly with the heat of the sauce.
Part 8: FAQs - The Answers You Need
Here are some common questions about making the perfect buffalo wings:
What is the best way to store leftover Buffalo wings?
Leftover Buffalo wings can be stored in an airtight container in the refrigerator for up to 3 days. Just make sure to reheat them thoroughly before serving. You can reheat them in the oven at 350°F (175°C) for about 10-15 minutes, or until they're heated through.
Can I bake Buffalo wings instead of frying them?
Yes, absolutely! Preheat your oven to 400°F (200°C) and bake the wings for about 25 to 30 minutes, or until they're cooked through and crispy.
What are some other ways to serve Buffalo wings?
Buffalo wings are incredibly versatile. They can be served as appetizers, snacks, or even main courses. You can also use them in salads, sandwiches, or wraps.
What's the best way to reheat Buffalo wings?
The best way to reheat Buffalo wings is to bake them in the oven. Preheat your oven to 350°F (175°C) and bake the wings for about 10 to 15 minutes, or until they're heated through.
How can I make Buffalo wings even crispier?
To get extra-crispy buffalo wings, try using a double-coating method. After dipping the wings in batter, place them in the freezer for 15 to 20 minutes to allow the batter to set. Then, dip them in batter again before frying.
Part 9: The Final Word - The Joy of Buffalo Wings
Making delicious Buffalo wings is about finding the right balance of flavours and textures. It's about experimentation and tweaking your recipe to suit your tastes. Don't be afraid to try new things, and most importantly, have fun! After all, Buffalo wings are all about enjoying good food with good company.
Everyone is watching

Corn on the Cob: The Ultimate Guide to Perfectly Cooked Ears
Healthy MealsAh, corn on the cob. Just the name evokes images of sunny days, barbecues, and that sweet, juicy flavour that ...

Perfect Pork Roast Oven Cooking Time: A Guide to Delicious Results
Healthy MealsThere's something truly satisfying about a perfectly roasted pork. The aroma alone is enough to make your mout...

Ham Cooking Time: How Long to Bake, Smoke, or Boil a Delicious Ham
Healthy MealsAh, ham. It's a classic, isn't it? A real crowd-pleaser, especially around holidays. And when done right, it'...

Scallops: The Ultimate Guide to Perfect Cooking
Healthy MealsAh, scallops. Those delicate, sweet, and utterly delicious morsels of the sea. They hold a special place in my...

Spaghetti Squash: The Ultimate Guide to Cooking and Serving
Healthy MealsRemember that time you saw spaghetti squash at the supermarket, looking all bumpy and strange, and thought, "W...
