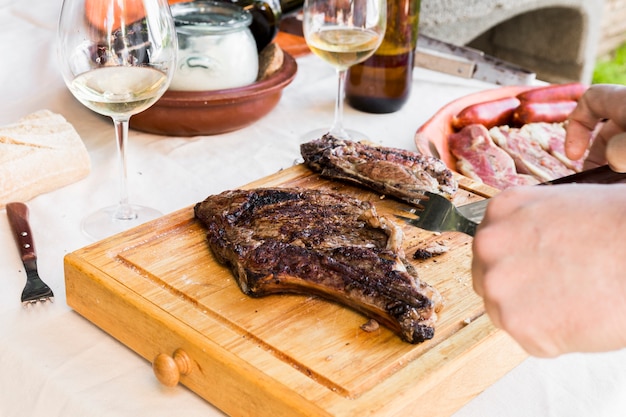
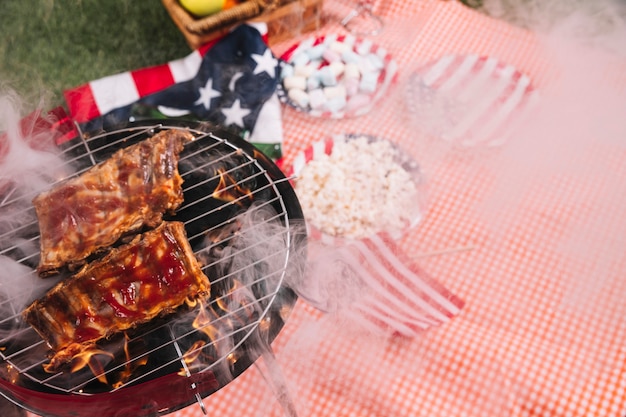
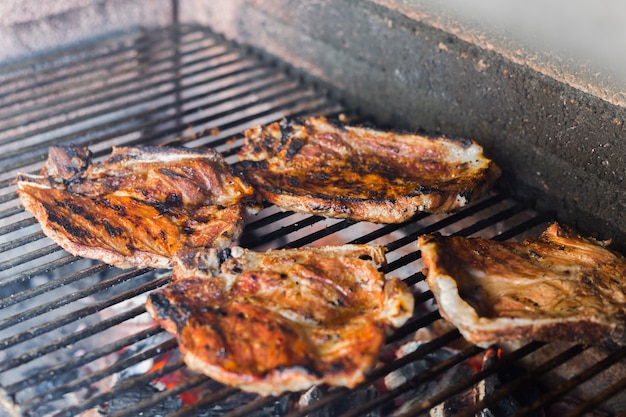
Ribs. Just the word conjures up images of smoky, tender meat falling off the bone, dripping with a sweet and tangy sauce. It's the kind of food that brings people together, sparking conversations and leaving everyone wanting more. It's a grilling experience that takes you beyond just throwing meat on the fire; it's about mastering a craft, achieving that perfect balance of smoky flavour and tender texture.
I'm not a professional chef, but I've spent years honing my skills on the grill, trying different techniques and experimenting with flavours. Along the way, I've learned a thing or two about what makes a truly outstanding rib. Now, I want to share those secrets with you, guiding you through the entire process, from choosing the right cut to creating the perfect sauce. This guide is for anyone who wants to elevate their grilling game and become a rib-grilling superstar.
(Part 1) The Foundation: Choosing Your Ribs

The first step is crucial. You wouldn't build a house without a solid foundation, would you? The same goes for your rib masterpiece.
Choosing Your Cut: Baby Back vs. spare ribs
When it comes to ribs, there are two main contenders: baby back ribs and spare ribs. Both offer delicious flavours, but they have distinct characteristics.
baby back ribs: These ribs are smaller and more tender, boasting a good meat-to-bone ratio. They're the go-to choice for a quicker grilling experience. They're perfect for a weeknight dinner or when you want something a little less substantial.
Spare Ribs: These ribs are larger, with a more substantial amount of meat, including the "spare" portion, which is a bit tougher. They require a bit more time to cook but offer a more robust, intense flavour. They're perfect for a weekend barbecue or when you want a hearty, meaty meal.
My personal preference? Baby back ribs. They cook quicker, they're consistently tender, and they're a crowd-pleaser. But if you're looking for a challenge and a truly meaty experience, spare ribs are the way to go.
Inspecting the Ribs: What to Look For
Once you've settled on your cut, it's time to examine the rack. You want ribs that are:
Fresh: Look for a bright pink colour and firm texture. You want the ribs to be fresh and have a healthy, pleasant smell.
Well-Marbled: You want to see fat running through the meat. This fat renders down during cooking, keeping the ribs moist and adding to their flavour. A good balance of fat and lean meat is key for achieving that perfect rib.
Evenly Shaped: A rack that's not too thin or too thick ensures even cooking. This means all parts of the rib will cook consistently, resulting in a more satisfying experience.
Avoid ribs that are discoloured, have an off-putting smell, or are excessively dry. These signs could indicate poor quality, and you'll want to choose a different rack to guarantee a successful outcome.
(Part 2) The Prep Work: Getting Your Ribs Ready

You've got your ribs, now it's time to prepare them for their starring role on the grill. This is where you lay the groundwork for a flavour explosion.
The Membrane Removal: A Crucial Step
The thin, tough membrane on the back of the ribs, called the "silver skin," needs to go. Why? It acts like a barrier, preventing the rub from penetrating the meat and making it difficult for the ribs to achieve that melt-in-your-mouth tenderness.
Here's how to remove the membrane:
1. Locate the Membrane: It's a thin, white sheet on the back of the ribs. It's a little easier to spot if you carefully trim the fat from the back of the rack.
2. Use a Sharp Knife or Paper Towel: Gently slide the knife or paper towel under the membrane and pull it off. You can use a firm grip, but be careful not to tear the meat.
3. Patience is Key: It might take a little effort, but don't rush it. Removing the entire membrane is crucial for achieving optimal results.
The Rub Down: A Flavor Explosion
With the membrane gone, it's time to coat those ribs in a flavourful rub. This is where you'll unleash a symphony of tastes that will make your ribs irresistible.
The beauty of rubs is the endless possibilities. You can buy pre-made rubs, or you can craft your own unique blend. I like to keep things simple with a basic blend of:
Paprika: Adds a sweet, smoky flavour and beautiful colour to the ribs.
Salt: Enhances the natural flavour of the meat.
Black Pepper: Adds a bit of heat and depth of flavour.
Garlic Powder: Contributes a subtle, savory flavour.
Onion Powder: Adds a touch of sweetness and complexity.
Here's how to apply the rub:
1. Generously Rub the Ribs: Make sure to coat both sides of the ribs evenly. Don't be shy! The rub is your flavour foundation.
2. Let it Rest: Let the ribs rest in the refrigerator for at least 30 minutes, or even better, overnight. This allows the rub to penetrate the meat and develop those intense flavours.
(Part 3) The Grill Master's Toolkit: What You'll Need

Now, let's talk about the essential equipment you need to transform your ribs into a grilling masterpiece.
The Grill: The Foundation of Your Operation
First and foremost, you need a grill. There are several options:
Gas Grill: Offers convenience and consistent heat control, making it ideal for beginners.
charcoal grill: Provides a classic smoky flavour that can't be replicated. It's a bit more hands-on but delivers incredible results.
Smoker: Specifically designed for low and slow cooking, resulting in smoky, tender ribs.
My personal preference is a charcoal grill. The smoky flavour it produces is unmatched. But any grill will work; the key is to choose the one that best suits your needs and preferences.
Temperature Control: The Key to Success
No matter your grill choice, temperature control is crucial. You need to be able to maintain a consistent heat to ensure even cooking and prevent your ribs from burning.
The Thermometer: Your Grilling Guardian
A meat thermometer is your trusty companion for grilling ribs. It helps you monitor the internal temperature of the meat and ensure it's cooked to perfection. A consistent internal temperature of around 190°F (88°C) will result in ribs that are tender and juicy.
Other Essential Tools: A Grilling Arsenal
Tongs: For flipping the ribs, moving them around the grill, and removing them safely from the heat.
Grill Brush: For cleaning the grill before and after cooking, ensuring a clean surface and preventing unwanted flavours from transferring to your ribs.
Spatula: For lifting the ribs off the grill, especially when they're tender and falling apart.
Foil: For wrapping the ribs during the cooking process, creating a moist environment that helps achieve tenderness.
barbecue sauce: For glazing the ribs and adding a sweet and smoky finish.
(Part 4) The Grilling Process: From Raw to Rib-alicious
Okay, your ribs are prepped, your tools are ready, and it's time to start grilling! This is where the magic happens, the transformation from raw meat to a symphony of flavour.
The Initial Smoke: Building That Flavour
Start by preheating your grill to medium heat. If you're using a charcoal grill, add a few pieces of soaked wood chips to the coals for a smoky flavour. Hickory, applewood, and pecan are popular choices, each offering a distinct taste profile.
Once the grill is hot, place the ribs on the grill, making sure they are not directly over the heat source, and close the lid. Cook for about 30 minutes, flipping them halfway through. This initial cooking period helps to develop a flavorful crust on the ribs while beginning the tenderizing process.
The Wrap-up: Reaching That Tenderness
After 30 minutes, it's time to wrap those ribs in foil. This creates a moist, steamy environment that helps the meat become incredibly tender.
Here's how to wrap your ribs:
1. Lay Down Foil: Place a large piece of heavy-duty aluminum foil on the grill's grate.
2. Add Some Liquid: Pour a bit of apple cider vinegar, beer, or water onto the foil. The liquid will help create steam, keeping the ribs moist and tender.
3. Wrap it Up: Carefully wrap the ribs in the foil, sealing it tightly. Make sure to create a pouch that prevents the liquid from escaping.
4. Return to the Grill: Place the wrapped ribs back on the grill and cook for another 1-2 hours, or until the meat is tender. Check the tenderness by gently pulling on a rib bone. If it comes away easily, they're ready.
The Final Glaze: Adding a Touch of Sweetness
Once the ribs are cooked, it's time to give them that irresistible glaze with barbecue sauce. This step adds a touch of sweetness and smoky flavour that elevates the ribs to new heights.
Here's how to glaze your ribs:
1. Remove from Foil: Carefully remove the ribs from the foil, being cautious of the steam.
2. Apply the Sauce: Brush the ribs with barbecue sauce on both sides. Use a good quality sauce that complements your rub and grilling style.
3. Back to the Grill: Place the ribs back on the grill for the last 15 minutes, or until the sauce is caramelized and slightly sticky.
(Part 5) The Art of Barbecue Sauce: A World of Flavour
Barbecue sauce is an essential component of the rib experience. It's a flavour enhancer, adding a sweet, tangy, or smoky dimension to the ribs. The world of barbecue sauce is vast, offering endless possibilities.
The Essential Ingredients: Sweet, Savoury, and Smoky
A good barbecue sauce typically combines these key elements:
Sweetness: From sugar, molasses, honey, or brown sugar, it balances the savoury and smoky flavours.
Acidity: From vinegar, lemon juice, or tomato sauce, it adds brightness and cuts through the richness of the sauce.
Savoury: From spices like garlic, onion, paprika, pepper, or a blend of spices, it creates a complex flavour profile.
Smoke: From smoked paprika, liquid smoke, or a smoky barbecue base, it adds a depth of smoky flavour that complements the grilled ribs.
Different Styles: Finding Your Favourite
There are many regional styles of barbecue sauce, each with its own unique character:
Kansas City-style: Sweet and tangy, with a good balance of sugar, vinegar, and tomato. This style is known for its rich, well-rounded flavour.
Memphis-style: Dry and tangy, with a heavier emphasis on vinegar. This style is known for its bright, acidic flavour.
Carolina-style: Mustard-based, with a tangy and spicy kick. This style is known for its bold, unique flavour.
Texas-style: Thick and smoky, with a heavier emphasis on pepper and other spices. This style is known for its rich, smoky flavour.
Homemade vs. Store-Bought: The Choice is Yours
You can buy pre-made barbecue sauce, but making your own allows for more control over the flavour and ingredients. There are countless recipes online and in cookbooks, and you can experiment with different flavour combinations to find what you like best.
(Part 6) The After-Grill: Serving and Storing Your Ribs
Your ribs are cooked to perfection, glistening with a delicious glaze, and now it's time to enjoy the fruits of your labour.
Serving Suggestions: Ribs with Sides
Ribs are incredibly versatile and pair well with a variety of sides. Here are a few ideas to create a delicious barbecue spread:
Coleslaw: A classic pairing that adds a refreshing crunch and tangy flavour.
Baked Beans: A hearty and comforting side that complements the smoky flavour of the ribs.
Macaroni and Cheese: A rich and creamy side that everyone loves.
Cornbread: A sweet and fluffy side that adds a touch of Southern charm.
potato salad: A classic side that's perfect for any barbecue.
Storing Leftovers: Keeping the Ribs Fresh
If you have any leftover ribs, store them in an airtight container in the fridge. They should last for 3-4 days.
You can also freeze leftover ribs for up to 3 months. To freeze, wrap them tightly in foil and then place them in a freezer bag. To reheat frozen ribs, thaw them overnight in the refrigerator, then reheat them in a preheated oven at 350°F (175°C) for about 15 minutes.
(Part 7) The Ultimate Rib-grilling tips: From a Pro to You
Over years of grilling, I've learned a few tips and tricks that have helped me grill ribs like a pro. Here are some of my favourites:
Temperature Control: The Key to juicy ribs
Maintain a consistent temperature throughout the cooking process. If the grill is too hot, the ribs will burn before they have a chance to cook through. If the grill is too cold, the ribs will take forever to cook and might not get tender.
The Importance of Indirect Heat: Avoiding Direct Flame
Use indirect heat for grilling ribs. This means placing the ribs over an area of the grill that isn't directly over the heat source. This helps to cook the ribs evenly and prevents them from burning.
The Wrap Trick: Moisture and Tenderness
Wrapping the ribs in foil during the cooking process creates a moist environment that helps the meat become tender and juicy.
Don't Overcook: Tenderness is King
Overcooking ribs is a common mistake that can result in dry and tough ribs. Use a meat thermometer to check the internal temperature of the ribs and ensure they're cooked to perfection. Aim for an internal temperature of around 190°F (88°C).
Patience is Key: Allow the Ribs to Rest
Once the ribs are cooked, let them rest for 10-15 minutes before serving. This allows the juices to redistribute and the meat to become more tender.
Don't Be Afraid to Experiment: Find Your Style
There are countless ways to grill ribs. Experiment with different rubs, sauces, and cooking methods to find what you like best. The beauty of grilling ribs is that there's no right or wrong way to do it. Embrace the journey of discovery!
(Part 8) FAQs: Your Rib-Grilling Questions Answered
Let's address some of the most common rib-grilling questions:
1. Can I grill ribs on a gas grill?
Yes, you can! You might not get the same smoky flavour as you would with a charcoal grill, but you can add smoky flavour by using wood chips or liquid smoke.
2. What if my ribs are too dry?
Don't panic! Even if your ribs are a bit dry, there are a few things you can do to salvage them. You can wrap them in foil with a bit of liquid (like apple cider vinegar or beer) for the last 30 minutes of cooking. This will help to rehydrate the meat.
3. How do I tell if my ribs are done?
Use a meat thermometer to check the internal temperature of the ribs. Aim for an internal temperature of around 190°F (88°C). The meat should also be tender enough to pull off the bone with a fork.
4. What should I do if my ribs are falling apart?
It's not a bad thing! Rib meat should be tender and pull off the bone easily. It might be a bit messy to eat, but that's part of the fun!
5. What's the best way to reheat ribs?
You can reheat ribs in the oven at 350°F (175°C) for about 15 minutes. You can also reheat them on the grill over low heat.
(Part 9) The Final Verdict: Your Rib-Grilling Journey Begins
There you have it, your ultimate guide to grilling ribs like a pro. From choosing the perfect rack to mastering the art of barbecue sauce, I've shared everything I've learned over the years.
Remember, grilling ribs is a journey, not a race. It takes time, practice, and a bit of patience. But I promise, the results are well worth the effort.
So, get out there, fire up your grill, and start grilling some ribs like a pro! I guarantee you'll become the grill master of your neighbourhood in no time. Let the smoke rise, the aroma fill the air, and enjoy the fruits of your labour. Happy grilling!
Everyone is watching

Corn on the Cob: The Ultimate Guide to Perfectly Cooked Ears
Healthy MealsAh, corn on the cob. Just the name evokes images of sunny days, barbecues, and that sweet, juicy flavour that ...

Perfect Pork Roast Oven Cooking Time: A Guide to Delicious Results
Healthy MealsThere's something truly satisfying about a perfectly roasted pork. The aroma alone is enough to make your mout...

Scallops: The Ultimate Guide to Perfect Cooking
Healthy MealsAh, scallops. Those delicate, sweet, and utterly delicious morsels of the sea. They hold a special place in my...

Ham Cooking Time: How Long to Bake, Smoke, or Boil a Delicious Ham
Healthy MealsAh, ham. It's a classic, isn't it? A real crowd-pleaser, especially around holidays. And when done right, it'...

Spaghetti Squash: The Ultimate Guide to Cooking and Serving
Healthy MealsRemember that time you saw spaghetti squash at the supermarket, looking all bumpy and strange, and thought, "W...
