You're staring down a corned beef brisket, eh? That's a brave choice! It's a real showstopper, especially when you're feeding a crowd. After years of cooking, I can tell you, there's nothing more satisfying than pulling apart a flawlessly cooked brisket, all tender and juicy. It's not always a walk in the park, mind you, with all that boiling and slow cooking. But trust me, the effort is worth it. You'll be the hero of the day, I promise.
I'm going to break this down step-by-step, taking you from choosing the perfect brisket to that glorious moment when you carve it up. I'll be sharing my tips and tricks, the things I've learned over the years, along with my personal preferences. So, grab a cuppa, get comfy, and let's get this brisket cooking!
Part 1: Choosing the Right Brisket
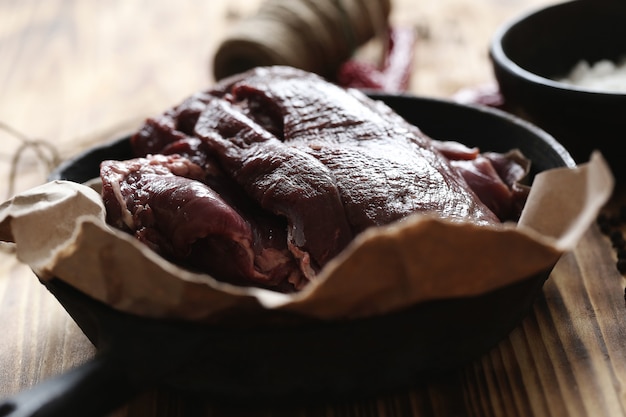
The journey to a delicious corned beef brisket begins with selecting the right cut. Think of it like choosing the perfect canvas for your masterpiece. You wouldn't use a rusty old pan for a fancy dinner, would you? The same applies here. You need a brisket with a good balance of fat and lean meat to achieve that ideal melt-in-your-mouth texture.
Flat vs. Point: The Great Debate
First things first, there are two main cuts of brisket: the flat and the point. Both have their own unique characteristics.
- Flat: The flat is a leaner cut, meaning it has less marbling. It's a more uniform cut, perfect for slicing, and ideal if you want a leaner brisket.
- Point: Now, the point is where the flavour party happens. It's packed with fat and marbling, which gives it a richer, juicier flavour. It's the champion of tender, melt-in-your-mouth brisket.
Honestly, it's a matter of personal preference. Some people adore the leaner flat, while others can't resist the rich, fatty point. It all depends on your taste buds and what you're looking for.
Size Matters: Feed the Crowd
Once you've decided on the cut, you need to consider the size. A smaller brisket is perfect for a small gathering, but you'll need a larger one if you're feeding a hungry crowd. It's a good idea to plan ahead and calculate how much brisket you'll need per person. As a general rule of thumb, allow about 1/2 pound of brisket per person. And remember, there's always a bit of shrinkage during cooking. So, it's always better to err on the side of caution and get a little extra.
Don't Forget the Fat Cap: Your Brisket's Best Friend
Here's a little secret from the pros: that fat cap on top of the brisket? It's your friend! It's not just for show. The fat cap acts like a protective blanket, keeping the meat moist and flavourful throughout the cooking process. So, don't trim it all off. Just make sure it's not too thick, maybe about 1/4 inch. You can always trim any excess later.
Get a Second Opinion: Seek Expert Advice
If you're feeling a bit lost in the meat aisle, don't be afraid to ask your butcher for advice. They're the experts, after all! They can help you choose the right size and cut for your needs. Plus, they know their meat! They can tell you which brisket has the best marbling and whether it's been properly cured.
Part 2: Prepping the Brisket
Now that you've got your perfect brisket, it's time to prepare it for the cooking journey ahead. This involves a few simple steps to ensure a delicious and flavourful result.
The Great Rinse: A Clean Slate
First things first, give the brisket a good rinse under cold water. This is mainly to remove any excess salt or cure from the corning process. Just a quick rinse will do the trick. No need to soak it or anything fancy.
Trimming Time: The Fat Cap's Makeover
Now for the trimming. As I mentioned earlier, we want to keep that fat cap, but we need to trim any excess. This includes any tough, thick parts of the fat cap and any excess fat around the edges. You want a nice, even layer. Use a sharp knife and carefully trim away the excess. Don't worry, you can always use those trimmings to make a delicious stock later!
Seasoning Secrets: A Flavor Explosion
Alright, let's talk about seasoning. This is your chance to unleash your creativity and add your personal touch. The traditional method is to use black peppercorns, bay leaves, and a few other spices. But I like to add my own twist! My secret weapon is a mix of garlic powder, onion powder, paprika, and a pinch of cayenne pepper. It gives the brisket a nice smoky flavour without being too spicy.
You can also rub the brisket with a bit of mustard before adding the seasoning. The mustard helps the seasoning stick and adds another layer of flavour. It's really up to you and your taste buds. Experiment and find a blend that tickles your fancy.
Let it Rest: Patience is a Virtue
Before you jump into the cooking process, it's a good idea to let the brisket rest in the fridge for at least a couple of hours. This allows the seasoning to penetrate the meat, resulting in a more even flavour. It's like giving the seasonings time to mingle and get to know each other, creating a harmonious flavour profile.
Part 3: The Boiling Process
You've got your prepped brisket, and you're ready to go. Now it's time for the boiling stage. This is where the brisket begins its transformation into tender, juicy perfection.
The Pot: A Vessel for Flavor
You'll need a large pot, big enough to hold the brisket comfortably. A dutch oven is ideal for this task, but any large stock pot will do. Just make sure it's big enough to hold the brisket and plenty of brine.
The Brine: The Flavor Foundation
The brine is the heart and soul of corned beef brisket. It's what gives it that signature salty, flavorful taste. I like to make a simple brine with water, salt, peppercorns, bay leaves, and a few other spices. You can find countless brine recipes online, so experiment and find one that suits your taste.
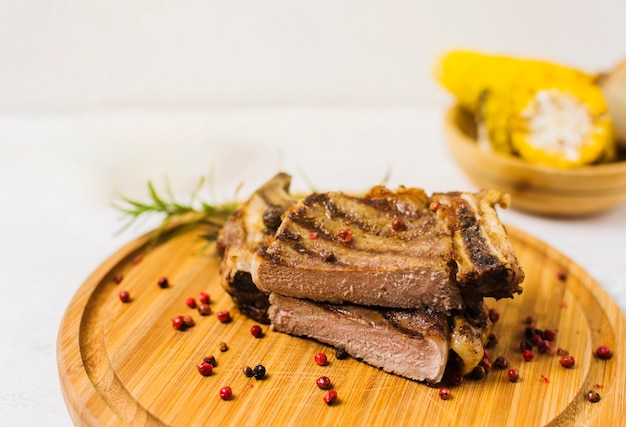
Here's a tip: for a deeper, more complex flavor, try using a combination of different types of peppercorns, like black, white, and pink.
Bring It to a Boil: A Gentle Heat
Once you've got your brine ready, add the brisket to the pot and bring it to a boil. Make sure the brisket is completely submerged in the brine. You might need to add a bit more water if your brisket is too large for your pot.
The Simmer: Patience is Key
Once the brine reaches a boil, reduce the heat to low and let the brisket simmer gently for about 3-4 hours, or until it's tender enough to pierce with a fork. You'll know it's done when the meat starts to pull apart easily.
Don't be tempted to peek at the brisket too often. It needs to simmer undisturbed to cook properly. Just trust the process! It's like letting a good wine age in a cellar - it takes time and patience to reach its full potential.
The Fat: A Sign of Flavor
You'll notice that a layer of fat will rise to the top of the brine. This is perfectly normal. It's actually a good thing, as the fat adds flavour and moisture to the brisket. It's like the brisket's own internal moisturiser, keeping it soft and succulent.
Part 4: The Slow Cooking Magic
You've boiled the brisket, and it's starting to look tender. Now, it's time for the slow cooking stage. This is where the real magic happens, where the brisket transforms into a culinary masterpiece.
The Oven: A Gentle Heat
Preheat your oven to 325 degrees Fahrenheit (165 degrees Celsius). This gentle heat allows the brisket to cook slowly and evenly, resulting in a tender, flavorful result.
The Braising: A Flavor Bath
Carefully transfer the brisket to a roasting pan or Dutch oven. You can use the same pot you boiled it in, if it's oven-safe. Now, for the braising liquid, you've got two main options:
- Brine Braising: This is the traditional method. The brisket will continue to absorb the flavour of the brine, resulting in a deliciously salty, robust flavour.
- Alternative Braising Liquids: You can get creative here. Some people prefer to braise the brisket in beer, apple cider, or even a mix of wine and broth. The key is to choose a liquid that complements the flavor of the brisket.
Once you've chosen your braising liquid, pour it over the brisket. You want to make sure the liquid comes about halfway up the brisket.
The Time: Patience is the Spice of Life
Cover the roasting pan tightly with foil and bake the brisket for about 3-4 hours, or until it's incredibly tender and pulls apart easily. You can check for tenderness by using a fork to pierce the meat. If it goes in easily, it's done.
Don't worry if you need to add more braising liquid during the cooking process. Just make sure the brisket is always submerged in liquid.
The Fat Again: A Sign of Success
Just like during the boiling stage, you'll notice a layer of fat rising to the top during braising. It's a sign that the brisket is getting good and juicy. This fat adds richness and depth of flavor to the meat. It's like a culinary hug, wrapping the brisket in a flavorful embrace.
Part 5: The Resting Ritual
Your brisket is done, but the job isn't over yet. The resting stage is crucial for achieving that perfect, melt-in-your-mouth texture. Think of it as a reward for all your hard work.
The Wrap: Locking in the Flavor
Carefully remove the brisket from the oven and let it rest for at least an hour, wrapped tightly in foil. This allows the juices to redistribute throughout the meat, creating a more even texture and a richer flavour. It's like giving the brisket a chance to catch its breath and relax after its long cooking journey.
The Patience: A Culinary Pause
I know it's tempting to carve up that brisket right away, but trust me, it's worth the wait. Be patient, and let those juices settle back into the meat. Think of it as a little bit of culinary meditation.
The Warmth: Keeping Things Cozy
You can keep the brisket warm by wrapping it in foil and placing it in a cooler, or by simply leaving it in the roasting pan with the braising liquid. Just make sure it stays warm. This will prevent it from getting cold and dry.
Part 6: Carving Time
Alright, the moment you've all been waiting for: carving time. This is your chance to show off your brisket skills and reveal the deliciousness hidden within.
The Tools: Essential Equipment
You'll need a sharp carving knife and a cutting board. A meat thermometer is also handy for checking the internal temperature, especially if you're unsure if the brisket is cooked through.
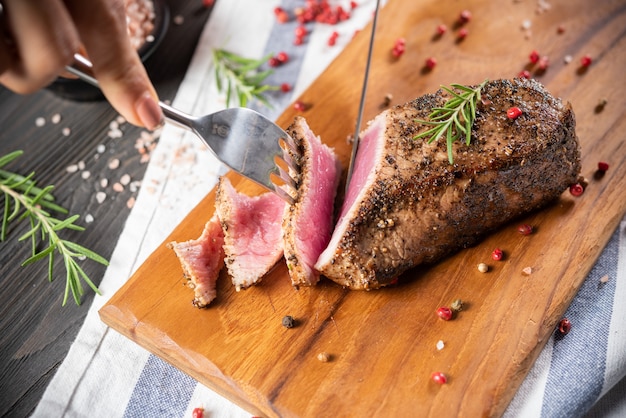
The Technique: Slicing with Skill
The key is to slice the brisket against the grain. This means slicing across the lines of muscle fibres. It's a bit like slicing a loaf of bread, you want to cut across the slices rather than with them. This technique results in tender, easily chewable slices.
You can either slice the brisket thinly, perfect for sandwiches, or cut it into thicker chunks. It's all up to you. Just remember, the brisket should pull apart easily. If it's still tough, you might need to cook it for a bit longer.
The Drippings: Flavor Gold
Don't forget about the delicious drippings! They're packed with flavour, and you can use them to make a gravy that will elevate your brisket to another level. Simply strain the drippings through a fine-mesh sieve and whisk in some cornstarch or flour to thicken them up.
Part 7: Serving Up the Feast
You've put in the time and effort, now it's time to enjoy the fruits of your labor! Serving up your corned beef brisket is a real celebration, a culinary triumph.
The Sides: Complementary Companions
Corned beef brisket is best enjoyed with classic comfort food sides. Think mashed potatoes, sauerkraut, roasted vegetables, or even a simple coleslaw. These sides provide a perfect counterpoint to the rich, salty flavor of the brisket. It all comes down to personal preference. But one thing's for sure, the brisket is the star of the show.
The Presentation: A Culinary Work of Art
There's something truly satisfying about slicing up a beautiful brisket and arranging it on a platter. You can make it even more visually appealing by adding some greenery, like parsley or chives. And don't forget the gravy! A generous pour of gravy will really bring the whole dish together, creating a symphony of flavors.
The Enjoyment: A Moment of Culinary Bliss
Now, relax, and enjoy the fruits of your labour. This is the moment you've been waiting for. Take your time, savor each bite, and appreciate all the hard work that went into creating this masterpiece.
Part 8: Storing the Leftovers
You've enjoyed your feast, and you've got some leftovers. Don't worry, they're just as delicious the next day! Here's how to store them properly.
The Fridge: Short-Term Storage
Allow the brisket to cool down completely, then wrap it tightly in foil or plastic wrap and store it in the fridge for up to 4 days. The colder temperatures slow down the growth of bacteria, keeping the brisket safe to eat.
The Freezer: Long-Term Storage
If you want to store the brisket for longer, you can freeze it. Simply wrap it tightly in foil or plastic wrap and place it in a freezer-safe bag. It will keep in the freezer for up to 3 months.
Reheating Tips: Bringing Back the Flavor
When you're ready to enjoy those leftovers, you can reheat the brisket in the oven or microwave. If you're reheating it in the oven, wrap it tightly in foil and bake it at 325 degrees Fahrenheit (165 degrees Celsius) for about 30 minutes, or until it's heated through. If you're reheating it in the microwave, cover it with a damp paper towel and microwave on high for about 1 minute per slice.
Part 9: FAQs
Now that we've covered all the basics, let's address some common questions about cooking the perfect corned beef brisket.
Q: What if the brisket is too salty?
If you find your brisket is a bit too salty, you can try soaking it in cold water for a few hours before cooking. This will help to remove some of the excess salt. You can also try adding more liquid to the braising process, which will help to dilute the saltiness.
Q: Can I use a slow cooker?
Absolutely! A slow cooker is a great option for cooking a corned beef brisket. Simply follow the same steps as you would for braising, but place the brisket and braising liquid in the slow cooker and cook on low for 8-10 hours. You can also use a slow cooker to reheat leftover brisket.
Q: Can I add vegetables to the pot?
Yes, you can absolutely add vegetables to the pot while boiling and/or braising the brisket. Carrots, potatoes, onions, and cabbage are all great additions. They will absorb the flavour of the brisket and create a delicious side dish. It's like creating a one-pot meal, with the brisket as the star and the vegetables as the supporting cast.
Q: What can I do with the leftover brine?
Don't throw away that flavorful brine! You can use it to make a delicious soup or stew. Simply strain it and use it as the base for your soup. You can also use it to cook other meats, like chicken or pork. It's like a flavor bomb, ready to add depth and complexity to any dish.
Q: How do I know when the brisket is done?
The best way to tell if the brisket is done is by checking its tenderness. It should be so tender that it pulls apart easily with a fork. You can also use a meat thermometer to check the internal temperature. It should reach an internal temperature of 190 degrees Fahrenheit (90 degrees Celsius) for a medium-rare brisket.
I hope this comprehensive guide has inspired you to give cooking a corned beef brisket a go. It's a rewarding process that results in a truly delicious and impressive meal. So, grab your ingredients, put on your apron, and get ready to create a culinary masterpiece! Happy cooking!
Everyone is watching

Corn on the Cob: The Ultimate Guide to Perfectly Cooked Ears
Healthy MealsAh, corn on the cob. Just the name evokes images of sunny days, barbecues, and that sweet, juicy flavour that ...

Perfect Pork Roast Oven Cooking Time: A Guide to Delicious Results
Healthy MealsThere's something truly satisfying about a perfectly roasted pork. The aroma alone is enough to make your mout...

Ham Cooking Time: How Long to Bake, Smoke, or Boil a Delicious Ham
Healthy MealsAh, ham. It's a classic, isn't it? A real crowd-pleaser, especially around holidays. And when done right, it'...

Scallops: The Ultimate Guide to Perfect Cooking
Healthy MealsAh, scallops. Those delicate, sweet, and utterly delicious morsels of the sea. They hold a special place in my...

Spaghetti Squash: The Ultimate Guide to Cooking and Serving
Healthy MealsRemember that time you saw spaghetti squash at the supermarket, looking all bumpy and strange, and thought, "W...