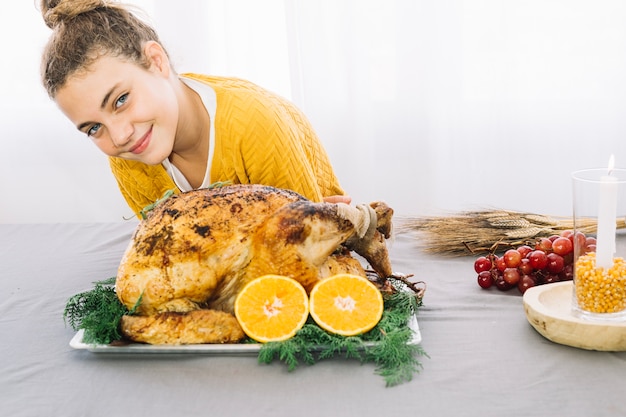
Ah, the humble turkey. A symbol of festive feasts and family gatherings, it's a culinary challenge that can either bring joy or utter despair. We've all been there, staring at that enormous frozen bird, wondering how on earth we're going to transform it into a succulent, golden-brown masterpiece without ending up with a dry, leathery nightmare. Fear not, my friends, because this is your ultimate guide to conquering that frozen turkey and turning it into a delicious Christmas dinner (or any other celebratory meal) that will have your guests clamoring for seconds.
This guide isn't just about the technicalities of cooking. It's about the whole shebang – the journey from that frosty package in your freezer to the glorious moment you carve the bird, and everyone's oohing and aahing over your culinary prowess. We'll delve into the art of defrosting, master the perfect roast, explore foolproof stuffing recipes, and even provide some side dish suggestions that will make your dinner table truly sing. And trust me, there's a wealth of insider knowledge I'll be sharing, gleaned from years of experience – because even seasoned cooks have their fair share of kitchen mishaps! So grab a cuppa, get comfy, and get ready to become a turkey-roasting pro.
(Part 1) The Great Turkey Defrosting Debate
Let's get one thing straight – there's no room for shortcuts when it comes to defrosting a turkey. It's a crucial step, and messing it up can lead to disastrous results. You can't just chuck it in the microwave or try to cook it frozen. Trust me, I've learned the hard way. We're talking dry, unevenly cooked meat that's about as appealing as a soggy biscuit. The only safe and reliable way to defrost a turkey is to give it plenty of time in the fridge.
The Cold Hard Facts
Here's the deal: you need about 24 hours of fridge time for every 5 pounds of turkey. So, a 10-pound turkey will take about 48 hours to defrost. That's a lot of waiting, but it's worth it. And the best part? You can just pop it in the fridge and forget about it – no need to worry about keeping an eye on it. The key is to plan ahead and make sure you have ample time for the defrosting process.
The Fridge Defrosting Method: A Step-by-Step Guide
1. The Big Move: First things first, you need to make sure that turkey is safely tucked away in the fridge – on a low shelf, ideally. This prevents it from being squashed or leaking onto other foods.
2. Keep it Clean: Now, here's where it gets a bit technical. You want to make sure your fridge is set at 40 degrees Fahrenheit (4 degrees Celsius) or below. This ensures the turkey defrosts safely and prevents the growth of harmful bacteria.
3. Give it Room: The most important thing is to give your turkey ample space to breathe – don't cram it into a tiny spot or try to speed up the defrosting process with a hair dryer (I've seen this attempted, and it's a recipe for disaster, trust me).
4. The Drip Tray: You'll likely see some liquid dripping out as the turkey defrosts, so you want to use a large, shallow dish to catch it. Just make sure you empty the dish regularly, or you'll be swimming in a turkey-juice lake by the time you're ready to cook.
5. Patience is Key: Remember, patience is key here. It takes time for a frozen turkey to defrost properly. And trust me, a properly defrosted turkey will make all the difference in the world when it comes to flavor and texture.
(Part 2) Choosing the perfect turkey
Once you've tackled the defrosting process, it's time to choose your turkey. This might seem like a straightforward task, but there are a few things you need to consider.
Fresh or Frozen?
The first decision is whether to go for a fresh turkey or a frozen one. While I'm a big fan of fresh turkeys, especially when it comes to flavor and texture, frozen turkeys are generally more readily available and can be stored for longer, making them a practical choice, particularly if you're planning ahead for a big holiday. Ultimately, the choice depends on your personal preferences and the availability of fresh turkeys in your area.
Size Matters
Now, let's talk about size. This is crucial. You want to make sure you have enough turkey to feed your guests, but you don't want to end up with a mountain of leftovers. As a general rule of thumb, you can estimate that you'll need about 1 pound of turkey per person. But remember, if you're having a big crowd or you know your guests have hearty appetites, it's always better to err on the side of having a little extra. Don't forget to factor in any leftovers you might want to use for sandwiches or other dishes later on.
The "Gobble-worthy" Look
Look for a turkey with a plump breast and drumsticks, and make sure it doesn't have any signs of discoloration or freezer burn. I always give the turkey a good sniff - it should smell clean and fresh, with no hint of sourness.
The All-Important Weight
Once you've chosen your turkey, it's time to get it weighed. This is important for calculating the cooking time, so don't skip this step. Use a kitchen scale to get the most accurate weight.
(Part 3) The Art of Brining
Brining is a technique that involves soaking the turkey in a salty solution, which helps to retain moisture and enhance flavor. Honestly, if you're aiming for the ultimate succulent turkey, you simply can't skip brining. It's a game-changer, transforming a potentially dry bird into a juicy, flavorful masterpiece.
Why Bother with Brining?
Here's why brining is so brilliant:
Juicy, Juicy, Juicy: The salt in the brine draws moisture from the air into the turkey, resulting in a juicy, flavorful bird. No more dry, stringy meat here!
Flavor Boost: Brining adds a subtle saltiness and enhances the natural flavor of the turkey. It's like a secret ingredient that makes all the difference.
The Brine Recipe I Swear By
1 gallon of cold water
1 cup of kosher salt
1/2 cup of brown sugar
1/4 cup of black peppercorns
1 tablespoon of dried thyme
1 tablespoon of dried rosemary
The Brining Process: A Step-by-Step Guide
1. Combine the Ingredients: In a large bowl or container, combine the water, salt, sugar, peppercorns, thyme, and rosemary. Stir until the salt and sugar dissolve completely.
2. The Big Soak: Submerge the turkey in the brine, making sure it's completely covered. If your container is too small, you can brine the turkey in two separate batches. The key is to make sure the entire turkey is immersed in the brine.
3. Chilling Out: Cover the container and refrigerate for 12-24 hours. I know it seems like a long time, but trust me, it's worth it. Brining time can be adjusted depending on the size of the turkey.
4. Rinse and Dry: After brining, remove the turkey from the brine and rinse it thoroughly under cold water. Pat it dry with paper towels.
5. Ready to Roast: Your brined turkey is now ready to be roasted.
(Part 4) The Perfect Turkey Roast
Now comes the exciting part – roasting your turkey. It's all about getting the timing right and making sure that turkey cooks evenly, resulting in a juicy, golden-brown masterpiece.
Get Ready to Roasting
1. Preheating is Key: Preheat your oven to 325°F (163°C). This ensures the turkey cooks evenly and gets that lovely, crispy skin.
2. The Stuffing Strategy: If you're stuffing your turkey, make sure to stuff it loosely, leaving a little space for the stuffing to expand as it cooks. Stuff the turkey about 30 minutes before roasting.
roasting time!
Now, you'll need to calculate the roasting time based on your turkey's weight. Here's a handy guide:
| turkey weight (lbs) | Roasting Time (hrs) |
|---|---|
| 10-12 | 3-3.5 |
| 12-14 | 3.5-4 |
| 14-16 | 4-4.5 |
Remember, these are just guidelines. Always check the internal temperature of the turkey to ensure it's cooked through.
The turkey thermometer: Your Culinary Compass
A meat thermometer is your best friend when roasting a turkey. You need to make sure the turkey reaches a safe internal temperature of 165°F (74°C) in the thickest part of the thigh. Insert the thermometer into the thickest part of the thigh, avoiding bones.
The Basting Routine: Keeping Things Moist
I love a good basting routine – it keeps the turkey moist and adds a beautiful golden color. Baste the turkey with pan drippings every 30 minutes to an hour during roasting. You can use a basting brush or a spoon to distribute the pan juices.
Resting Time: A Culinary Pause
Once the turkey is cooked, let it rest for at least 15-20 minutes before carving. This allows the juices to redistribute, resulting in a more tender and flavorful turkey. Cover the turkey loosely with foil to keep it warm while it rests.
(Part 5) The Ultimate Stuffing Recipe
A classic turkey dinner just isn't complete without stuffing. But let's be honest – stuffing can be tricky, especially if you're aiming for a moist, flavorful stuffing that doesn't dry out. This recipe is my go-to for delicious, perfectly cooked stuffing.
My Secret Stuffing Recipe
1 cup of chopped onion
1 cup of chopped celery
1 cup of chopped carrots
1/2 cup of butter
1/2 cup of chopped fresh parsley
1 teaspoon of dried thyme
1 teaspoon of dried sage
1 teaspoon of salt
1/2 teaspoon of black pepper
1/2 cup of chicken broth
8 cups of cubed bread
Making the Stuffing: A Step-by-Step Guide
1. Sauté the Vegetables: In a large skillet, melt the butter over medium heat. Add the onions, celery, and carrots and sauté until softened, about 5-7 minutes.
2. Add the Aromatics: Stir in the parsley, thyme, sage, salt, and pepper.
3. The Bread Factor: In a large bowl, combine the cubed bread with the sautéed vegetables and chicken broth. Stir to combine.
4. Stuffing Time: Gently spoon the stuffing into the turkey cavity, making sure to leave some space for it to expand as it cooks.
(Part 6) The Best side dishes: A Culinary Symphony
No turkey dinner is complete without a selection of delicious side dishes. Here are some of my favourites:
1. Roasted Vegetables: A Seasonal Delight
Autumnal Delight: Roasted butternut squash, Brussels sprouts, and sweet potatoes are perfect for a seasonal turkey dinner. You can even throw in some cranberries for added sweetness.
Spice it Up: For a bit of heat, add some chopped jalapenos or chipotle peppers.
Herb Infusion: Don't forget the herbs! Fresh rosemary, thyme, and sage elevate the flavor of roasted vegetables.
2. Creamy mashed potatoes: comfort food Perfection
Creamy Perfection: Mashed potatoes are a classic side dish for a reason. They're creamy, comforting, and always a crowd-pleaser.
Garlic Love: Add a generous amount of roasted garlic for an extra flavour punch.
Cheese Dreams: For a cheesy twist, stir in some shredded cheddar or Gruyere.
3. Gravy, Gravy, Gravy: The Flavor Booster
Pan Drippings Magic: homemade gravy made from the pan drippings is the ultimate flavour booster.
Thick and Savoury: Use a mixture of flour and cornstarch to achieve the perfect gravy consistency.
Don't Forget the Seasonings: Add salt, pepper, and a pinch of herbs for extra flavour.
(Part 7) The Carving Ceremony: Unveiling the Masterpiece
Once the turkey is rested, it's time for the big reveal. carving a turkey can seem daunting, but it's actually quite straightforward with a few simple steps.
1. The Cutting Board: Place the turkey on a large cutting board, making sure it's secure.
2. The Drumstick First: Start by cutting the drumsticks from the turkey at the joint.
3. The Breast Slice: Use a sharp carving knife to slice the turkey breast into thin slices.
4. The Wing Action: Carefully detach the wings from the turkey.
(Part 8) Leftover Turkey Magic: Culinary Alchemy
Leftover turkey is a culinary gold mine! Here are some ideas for using up your turkey leftovers:
1. turkey sandwiches: Classic turkey sandwiches are always a good choice. Add some cranberry sauce, mayonnaise, and lettuce for a flavourful and satisfying lunch.
2. turkey soup: Turn your leftover turkey into a delicious and comforting soup. Add some vegetables, herbs, and noodles for a hearty meal.
3. turkey salad: Chop up the leftover turkey and combine it with mayonnaise, celery, onions, and your favourite seasonings. Serve on bread, crackers, or lettuce leaves.
4. Turkey Pizza: Get creative and make a turkey pizza! Top your pizza dough with marinara sauce, leftover turkey, mozzarella cheese, and your favourite vegetables.
FAQs: Your Turkey-Related Questions Answered
1. Can I defrost a turkey in cold water?
While this method is faster than fridge defrosting, it's not recommended. This method can lead to uneven thawing and increase the risk of bacteria growth. Stick to fridge defrosting for the safest results.
2. How long can I keep a defrosted turkey in the fridge?
Once a turkey is defrosted, it should be cooked within 1-2 days. Don't try to refreeze a defrosted turkey, as this can lead to bacteria growth and food poisoning.
3. What if my turkey is a little undercooked?
Don't take any chances! If the turkey's internal temperature isn't at least 165°F (74°C), it needs to be cooked further. You can always pop it back in the oven for a few more minutes to ensure it's cooked through. Use a meat thermometer to check the temperature.
4. Can I use a roasting bag for my turkey?
A roasting bag can be helpful for keeping the turkey moist, but it might prevent the skin from getting crispy. If you want that crispy skin, I recommend roasting the turkey uncovered for the last 30 minutes of cooking.
5. How do I prevent my stuffing from drying out?
To keep your stuffing moist, ensure you use enough broth or stock and make sure you don't over-stuff the turkey. You can also add some chopped vegetables to the stuffing to help retain moisture.
Now, my friend, you're all set to conquer that frozen turkey. Remember, it's all about preparation, timing, and a little bit of patience. And with these tips and tricks, you're sure to create a delicious and impressive turkey dinner that will leave your guests saying, "Wow, that's the best turkey I've ever had!" And let's be honest, isn't that what we all strive for?
Everyone is watching

Corn on the Cob: The Ultimate Guide to Perfectly Cooked Ears
Healthy MealsAh, corn on the cob. Just the name evokes images of sunny days, barbecues, and that sweet, juicy flavour that ...

Scallops: The Ultimate Guide to Perfect Cooking
Healthy MealsAh, scallops. Those delicate, sweet, and utterly delicious morsels of the sea. They hold a special place in my...

Spaghetti Squash: The Ultimate Guide to Cooking and Serving
Healthy MealsRemember that time you saw spaghetti squash at the supermarket, looking all bumpy and strange, and thought, "W...

Salmon Cooking Times: Perfect Guide for Every Recipe
Healthy MealsLet me tell you, cooking salmon is an art form. It's all about getting that perfect balance: juicy and tender,...

Ham Cooking Time: How Long to Bake, Smoke, or Boil a Delicious Ham
Healthy MealsAh, ham. It's a classic, isn't it? A real crowd-pleaser, especially around holidays. And when done right, it'...