Let's face it, pork belly is a culinary chameleon. It can be the star of a decadent dinner, the heart of a comforting stew, or the hero of a crispy, crackling snack. But let's be honest, sometimes it can be a bit of a culinary challenge. Those fatty, flavour-packed slabs can end up tough, dry, or just plain disappointing. I've been there – trust me, I've wrestled with chewy pork belly more times than I care to admit. But after countless trials and errors (and a few burnt pans!), I finally cracked the code to achieving that melt-in-your-mouth, flavour-bomb experience we all crave.
This guide is your one-stop shop for mastering the art of cooking pork belly strips, from choosing the right cut to nailing the perfect cooking technique. I'll be sharing all my secrets, from my favourite recipes to the little tricks I've learned along the way. So grab a cuppa, settle in, and get ready to elevate your pork belly game.
Part 1: Choosing the Right Pork Belly - The Foundation of Flavor
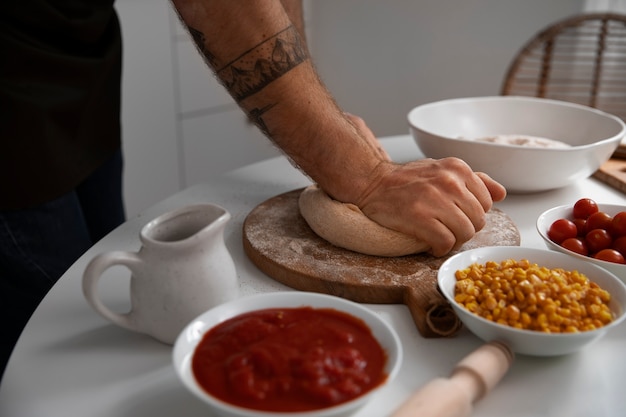
Before you even think about picking up a knife, you need the right pork belly. Choosing the right cut is crucial to achieving that tender, flavourful result you're after. It's like building a house – you can't expect a sturdy structure if the foundation is weak. Here's what to look for when you're at the butcher counter:
1. Fat is Your Friend:
You might think a leaner cut is better, but trust me, that layer of fat is what makes pork belly so special. It's not just about adding flavour; it renders down during cooking, creating that luscious, melt-in-your-mouth texture we all love. Ideally, you want a good balance of fat to lean meat. Too much fat can be overpowering, and too little can lead to dry, tough pork belly. I always aim for a cut with about a 1/2 inch to 3/4 inch layer of fat.
2. The Feel Test:
Grab the pork belly and give it a gentle squeeze. It should feel firm and springy to the touch, not mushy or overly soft. This indicates it's fresh and hasn't been sitting around too long. If you press on it, it should rebound slightly. Avoid any cuts that feel slimy or have a strange smell.
3. Color Matters:
The skin should be a pale pink colour, indicating freshness. Avoid any cuts that have a grayish or yellowish tint. A slight marbling of white fat throughout the meat is a good sign, suggesting good marbling and a richer flavour.
4. Packaging Points:
If you're buying pre-packaged pork belly, check the expiry date and make sure it's stored at the correct temperature. Also, have a look at the packaging for any signs of damage or leaks, which could indicate the meat hasn't been stored properly.
Part 2: Prepping Your Pork Belly - Unlocking its Potential
Alright, so you've got your perfect cut of pork belly. Now it's time to prep it for cooking. This might seem like a simple step, but getting it right is crucial for a successful dish. Think of it like tuning up a musical instrument – you need to prepare it before it can truly shine.
1. Dry It Out:
Before you do anything else, pat the pork belly thoroughly with paper towels. Excess moisture can lead to steaming instead of crisp skin, which is not what we want. It's a simple step that makes a big difference.
2. The Art of Scoring:
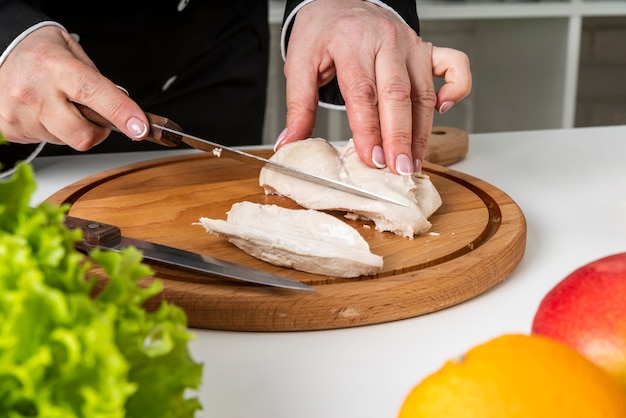
Scoring the skin is a game-changer! It allows the fat to render out more efficiently and prevents the skin from curling up during cooking. Use a sharp knife to make shallow, diagonal cuts about 1/4 inch apart, making sure not to cut into the meat. This step really helps to achieve that crispy, crackly skin we all crave.
3. Seasoning is Key:
This is your chance to really flavour the pork belly. Don't be shy with the seasoning! I love using a simple salt and pepper rub, but feel free to get creative with herbs, spices, or even a dry rub. Remember, flavour is key, so don't hold back.
Part 3: cooking techniques - Unlocking the Magic
Right, you've prepped your pork belly, now it's time to cook it! There are several methods you can choose from, each with its own pros and cons. I'll break down my favourite methods and offer some tips for success.
1. slow cooking - Tenderness Takes Time
This is my go-to method for achieving the most tender, melt-in-your-mouth pork belly. It's hands-off and perfect for a busy weeknight. Just pop it in your slow cooker with some aromatics like onions, garlic, and ginger, and let it cook on low for 6-8 hours. The result is a gloriously tender, juicy pork belly that practically falls apart at the touch. The fat renders out beautifully, creating a rich and flavorful sauce you can serve with the pork belly.
Tips for Slow Cooking:
- Use a slow cooker with a large enough capacity to accommodate the pork belly.
- Don't overcrowd the slow cooker, as this can prevent the pork belly from cooking evenly.
- Add some liquid to the slow cooker, such as broth, apple cider, or even water, to prevent the pork belly from drying out.
- Use a meat thermometer to check the internal temperature of the pork belly. It should be at least 145°F (63°C) for safe consumption.
2. Roasting - A crispy skin Symphony
Roasting is another excellent method for cooking pork belly. It allows the skin to get beautifully crispy while the meat stays tender and juicy. The key is to start with a high heat to crisp the skin and then lower the temperature to cook the meat through.
Tips for Roasting:
- Preheat your oven to 450°F (232°C).
- Place the pork belly on a roasting rack set over a baking sheet to allow for air circulation and even cooking.
- Roast for 30-45 minutes, or until the skin is nicely browned and crisp.
- Reduce the oven temperature to 350°F (177°C) and continue roasting for another 1-2 hours, or until the internal temperature reaches 145°F (63°C).
3. Pan-Frying - Quick and Delicious
This is a quick and easy method for cooking pork belly strips. It's perfect for a weeknight dinner or a quick appetizer. Simply heat some oil in a large skillet over medium-high heat and sear the pork belly strips for 3-4 minutes per side, or until they are golden brown and crispy.
Tips for Pan-Frying:
- Use a heavy-bottomed skillet to prevent uneven cooking.
- Don't overcrowd the skillet, as this can prevent the pork belly from browning properly.
- Flip the pork belly strips only once to prevent them from sticking to the pan.
- Reduce the heat to low once the pork belly strips are browned and continue cooking for another 5-7 minutes, or until the meat is cooked through.
4. Braising - Tenderness in a Broth
Braising is a wonderful method for achieving melt-in-your-mouth pork belly. It involves searing the pork belly first, then simmering it in a flavorful broth or sauce for a long time until it's tender. It's a technique that rewards patience with incredible results.
Tips for Braising:
- Sear the pork belly in a dutch oven or other heavy-bottomed pot over medium-high heat until it's browned on all sides.
- Add your braising liquid, such as broth, wine, or sauce, to the pot and bring it to a simmer.
- Cover the pot and braise in the oven at 325°F (163°C) for 2-3 hours, or until the meat is very tender.
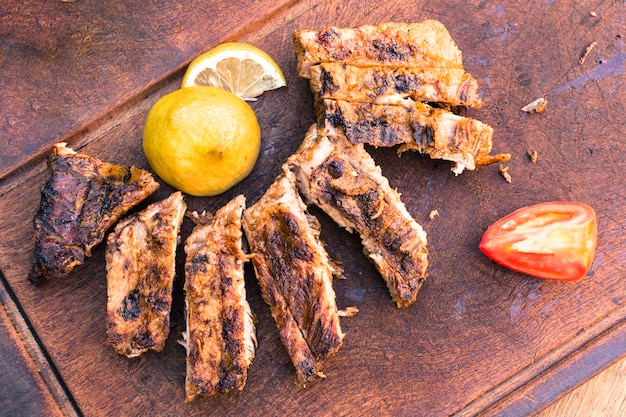
Part 4: The Quest for Crispy Skin - A Crackling Symphony
Okay, let's talk about that crispy skin. It's the crowning glory of any pork belly dish. So how do you achieve that coveted crackling? It takes a bit of patience and attention to detail, but the results are worth it. Here's my guide to getting that perfect crispy skin:
1. Dryness is Key:
The first step to crispy skin is making sure it's completely dry. Pat the pork belly thoroughly with paper towels, removing any excess moisture. Remember, water and fat don't mix, and any lingering moisture will prevent the skin from crisping up.
2. Scoring for Success:
As mentioned earlier, scoring the skin is essential for achieving crispy skin. It allows the fat to render out more efficiently and prevents the skin from curling up during cooking. Make sure your knife is sharp and use it to make shallow, diagonal cuts about 1/4 inch apart, making sure not to cut into the meat.
3. Salt's Secret:
Salt is a key ingredient for crispy skin. Sprinkle the scored skin generously with salt, ensuring it covers every surface. This draws out moisture from the skin, making it crispier and more flavorful.
4. High Heat Power:
You need high heat to achieve that crackle. Whether you're roasting, pan-frying, or braising, make sure you start with a high temperature to render the fat and crisp the skin. For roasting, preheat your oven to 450°F (232°C). For pan-frying, use high heat and a heavy-bottomed skillet.
5. Patience is a Virtue:
Don't rush the process! It takes time for the fat to render and the skin to become crispy. Don't be tempted to check the skin too frequently, as this can disrupt the cooking process. Trust the process, and you'll be rewarded with that perfect crackling sound when you finally slice into it.
Part 5: Finishing Touches - Elevating the Flavor
Okay, you've cooked your pork belly to perfection, and now it's time to finish it off with some delicious touches. These final steps will elevate your pork belly to a whole new level of deliciousness. Here are some ideas:
1. The Glaze Game:
A glaze can add a burst of sweetness and shine to your pork belly. There are endless options here, but I love a simple honey-soy glaze or a tangy balsamic glaze. Brush the glaze onto the pork belly in the last 15-20 minutes of cooking to let it caramelize and create a beautiful finish.
2. Herby Goodness:
Fresh herbs can add a fragrant and flavourful touch to your pork belly. I love using rosemary, thyme, sage, or parsley. Add the herbs to your braising liquid or sprinkle them on the pork belly in the last few minutes of cooking.
3. Serving it Right:
Think about how you're going to serve your pork belly. It can be a star on its own, or you can pair it with sides that complement its flavour. Some of my favorite pairings include:
- mashed potatoes
- Roasted vegetables
- Green salad
- fruit salad
- Steamed rice
- Noodles
Part 6: Leftover Love - Don't Waste a Bite
You know the drill. Pork belly is so good that you're likely to have leftovers. Don't let them go to waste! Here's how to make the most of them:
1. Storage Secrets:
Let the pork belly cool completely before storing it in an airtight container in the refrigerator. It should stay good for 3-4 days.
2. Sandwich Savvy:
Slice the leftover pork belly and use it in sandwiches. It's delicious with sharp cheddar cheese, mustard, and pickles. You can also add some crunchy coleslaw or shredded cabbage for a nice contrast in texture.
3. Soup Symphony:
Leftover pork belly can be a great base for a hearty and flavorful soup. Chop it up and add it to your favorite soup recipe, or simmer it with some vegetables, herbs, and broth for a simple and satisfying meal.
4. Stir-Fry Delight:
Slice the leftover pork belly into bite-sized pieces and add it to your next stir-fry. It will add a delicious savory and fatty flavor to your dish.
5. Pasta Power:
Chop up the leftover pork belly and add it to a creamy pasta sauce. It's delicious with a simple tomato sauce, or you can add some cream and Parmesan cheese for a richer flavor.
Part 7: Recipe Inspiration - Flavors to Explore
Alright, let's get down to business. Here are some of my favourite recipes for cooking pork belly strips.
1. Honey-Soy Glazed Pork Belly - Sweet and Savory Delight
This recipe is a crowd-pleaser, featuring a sweet and savory honey-soy glaze. It's simple to make and produces melt-in-your-mouth pork belly with crispy skin. Here's what you'll need:
Ingredients:
- 1 pound pork belly, skin on
- 1/4 cup soy sauce
- 1/4 cup honey
- 2 tablespoons rice vinegar
- 1 tablespoon sesame oil
- 1 teaspoon grated ginger
- 1/2 teaspoon garlic powder
- 1/4 teaspoon black pepper
Instructions:
- Preheat oven to 400°F (204°C).
- Score the skin of the pork belly and pat it dry with paper towels.
- Place the pork belly in a roasting pan, fat-side up.
- In a small bowl, whisk together the soy sauce, honey, rice vinegar, sesame oil, ginger, garlic powder, and black pepper.
- Pour the glaze over the pork belly and rub it in with your hands.
- Roast for 1 hour and 15 minutes, or until the pork belly is cooked through and the skin is crispy.
- Let the pork belly rest for 10 minutes before slicing and serving.
2. crispy pork belly with Apple Slaw - A Textural Delight
This recipe combines crispy pork belly with a refreshing apple slaw. The sweet and tangy slaw is a perfect counterpoint to the rich and savory pork belly. Here's what you'll need:
Ingredients:
- 1 pound pork belly, skin on
- 1 tablespoon olive oil
- 1/2 teaspoon salt
- 1/4 teaspoon black pepper
- 1/2 cup mayonnaise
- 1/4 cup apple cider vinegar
- 1 tablespoon sugar
- 1/4 teaspoon salt
- 1/4 teaspoon black pepper
- 1 apple, thinly sliced
- 1/2 cup shredded red cabbage
- 1/4 cup chopped fresh parsley
Instructions:
- Preheat oven to 400°F (204°C).
- Score the skin of the pork belly and pat it dry with paper towels.
- Place the pork belly in a roasting pan, fat-side up.
- Drizzle the pork belly with olive oil and season with salt and pepper.
- Roast for 1 hour and 15 minutes, or until the pork belly is cooked through and the skin is crispy.
- While the pork belly is roasting, make the slaw. In a large bowl, whisk together the mayonnaise, apple cider vinegar, sugar, salt, and pepper.
- Add the apple, red cabbage, and parsley to the bowl and toss to combine.
- Let the pork belly rest for 10 minutes before slicing.
- Serve the pork belly with the apple slaw.
3. braised pork belly with Ginger-Scallion Sauce - Asian Inspired
This recipe features tender, melt-in-your-mouth pork belly braised in a flavorful ginger-scallion sauce. It's a perfect dish for a special occasion or a cozy dinner at home. Here's what you'll need:
Ingredients:
- 1 pound pork belly, skin on
- 1 tablespoon olive oil
- 1/2 cup chopped onion
- 2 cloves garlic, minced
- 1 inch ginger, minced
- 1/2 cup soy sauce
- 1/4 cup mirin
- 1/4 cup brown sugar
- 1/4 cup water
- 1/4 cup chopped scallions
Instructions:
- Score the skin of the pork belly and pat it dry with paper towels.
- Heat the olive oil in a large Dutch oven over medium heat.
- Add the pork belly to the Dutch oven and cook for 5-7 minutes per side, or until browned.
- Remove the pork belly from the Dutch oven and set aside.
- Add the onion, garlic, and ginger to the Dutch oven and cook for 5 minutes, or until softened.
- Add the soy sauce, mirin, brown sugar, and water to the Dutch oven and bring to a simmer.
- Return the pork belly to the Dutch oven, making sure it's submerged in the sauce.
- Cover the Dutch oven and braise in the oven at 325°F (163°C) for 2-3 hours, or until the pork belly is very tender.
- Remove the pork belly from the Dutch oven and let it rest for 10 minutes before slicing.
- Skim any excess fat from the braising liquid and add the scallions.
- Serve the pork belly with the ginger-scallion sauce.
Part 8: FAQs - Answers to Your Burning Questions
I know, you're probably bursting with questions. So here are some answers to the most common queries about cooking pork belly.
1. Can I cook pork belly without scoring the skin?
While not essential, scoring the skin helps it become crispy. Without scoring, the fat will render less efficiently, and the skin might curl up during cooking. You can still achieve crispy skin without scoring, but it might take longer and require a bit more patience. Just make sure to pat the skin dry and roast it at a high temperature.
2. How long does it take to cook pork belly?
The cooking time for pork belly depends on the cooking method and the size of the cut. Slow cooking typically takes 6-8 hours on low, while roasting takes 1-2 hours. Pan-frying takes about 10-15 minutes, and braising takes 2-3 hours.
3. How do I know when the pork belly is cooked?
The internal temperature of the pork belly should reach at least 145°F (63°C) for safe consumption. You can use a meat thermometer to check the temperature in the thickest part of the meat. The pork belly should also be tender and easily pierced with a fork.
4. What can I do with the rendered fat from pork belly?
The rendered fat from pork belly, also known as lard, is a versatile ingredient that can be used in cooking. It's perfect for frying, baking, and adding richness to sauces and soups. You can also store it in the refrigerator or freezer for future use.
5. Can I make pork belly ahead of time?
Yes, you can definitely make pork belly ahead of time. You can cook it and store it in the refrigerator for 3-4 days. When you're ready to serve it, reheat it in the oven at 350°F (177°C) for 15-20 minutes.
There you have it, folks. Your ultimate guide to cooking tender and delicious pork belly strips. I hope this guide has given you the confidence to tackle this versatile ingredient and create some truly mouthwatering meals. Remember, practice makes perfect, so don't be afraid to experiment and find what works best for you. Happy cooking!
Everyone is watching

Corn on the Cob: The Ultimate Guide to Perfectly Cooked Ears
Healthy MealsAh, corn on the cob. Just the name evokes images of sunny days, barbecues, and that sweet, juicy flavour that ...

Scallops: The Ultimate Guide to Perfect Cooking
Healthy MealsAh, scallops. Those delicate, sweet, and utterly delicious morsels of the sea. They hold a special place in my...

Spaghetti Squash: The Ultimate Guide to Cooking and Serving
Healthy MealsRemember that time you saw spaghetti squash at the supermarket, looking all bumpy and strange, and thought, "W...

Salmon Cooking Times: Perfect Guide for Every Recipe
Healthy MealsLet me tell you, cooking salmon is an art form. It's all about getting that perfect balance: juicy and tender,...

Ham Cooking Time: How Long to Bake, Smoke, or Boil a Delicious Ham
Healthy MealsAh, ham. It's a classic, isn't it? A real crowd-pleaser, especially around holidays. And when done right, it'...