(Part 1) The Picanha: Understanding the Cut
What Makes Picanha So Special?
First things first, let's dive into what makes picanha so incredibly special. It's a cut of beef that hails from the top sirloin cap, the area just above the rump. This cut is renowned for its beautiful marbling, a network of fat streaks that add an explosion of flavor and incredible tenderness, making it a crowd-pleasing star.
Why is Picanha a Brazilian Treasure?
There's a reason why picanha is a staple in Brazilian cuisine. It boasts a phenomenal combination of qualities that make it truly irresistible:
- Intense Flavor Symphony: Picanha is a symphony of rich, savory flavors. Those fat marbling streaks simply burst with juicy deliciousness, creating a flavor explosion in your mouth.
- Tender Texture Nirvana: Thanks to its generous fat content, picanha cooks up incredibly tender, especially when cooked correctly. Forget chewy bits; it's all melt-in-your-mouth goodness.
- Versatile Culinary Champion: You can grill it, pan-sear it, roast it, you name it! Picanha adapts beautifully to different cooking methods, making it a versatile culinary hero.
Finding the Perfect Picanha: A Butcher's Tale
Now, the key to a truly sensational picanha is starting with a high-quality cut. Look for a piece that has a nice, even layer of fat on top, which is called the "cap". This fat is crucial! It melts down during cooking, creating a flavorful basting that gives the meat its amazing juiciness.
When you're at the butcher, don't be afraid to ask for advice. They're experts in this stuff and can help you pick out the perfect picanha for your culinary adventure.
(Part 2) Preparing for the Feast: Tools and Techniques
Essential Tools for Picanha Perfection: Your culinary arsenal
Gather your weapons, my friend! You're going to need a few essential tools to help you achieve Brazilian steakhouse-level greatness:
- A Heavy-Duty Grill or cast iron pan: Your Searing Champions: This is your primary tool for achieving that perfect char and sear. A good grill, whether gas or charcoal, will give you those beautiful grill marks and smoky flavors. If you're going the pan-searing route, a trusty cast iron pan is your best bet for that perfect crust.
- meat thermometer: Your Doneness Guardian: This is your trusty sidekick for ensuring your picanha is cooked to your liking. You want to hit that sweet spot between medium-rare and medium, with the fat rendered perfectly.
- Sharp Knife: Your Slicing Maestro: For slicing your picanha into thin, even slices. It's all about that visual appeal, and the ability to showcase the beautiful marbling within.
- Tongs: Your Grilling Allies: You'll be using these to maneuver your picanha on the grill, ensuring even cooking and preventing it from sticking.
Preparing the Picanha: It's All About the Trim
Now, before you start sizzling, there's a little bit of prep work involved. Think of it as getting your canvas ready for a masterpiece. You're going to want to trim away any excess fat, but keep that crucial cap intact. It's like a protective blanket that will keep the meat juicy and flavorful.
Here's how I do it:
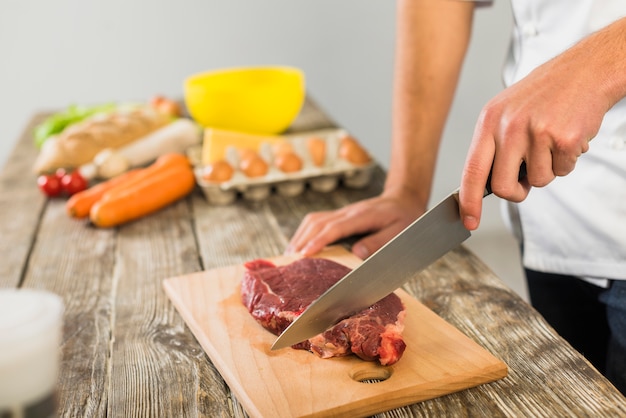
- Remove Excess Fat: Shaping Your Picanha: Using a sharp knife, trim away any excess fat from the sides and bottom of the picanha, leaving a nice even layer on top. The goal is to create a smooth surface for grilling and prevent any unwanted burning or uneven cooking.
- Score the Fat Cap: Unlocking Flavor and Beauty: Make shallow cuts across the fat cap, about half an inch apart. This helps the fat render more evenly and creates those beautiful grill marks that tell a story of deliciousness.
- Seasoning It Up: A Simple Symphony of Flavors: Now comes the fun part! Salt and pepper are your basic friends, but feel free to experiment with other spices like garlic powder, paprika, or even a sprinkle of chili flakes. Keep it simple, and let the natural flavors of the picanha shine through.
(Part 3) The Art of the Sear: Achieving that Perfect Crust
Grilling: Embracing the Smoky Char
Now, here's where the real magic happens. It’s all about that scorching, smoky sear that'll turn your picanha into a masterpiece.
- Hot Grill is Key: Sizzle and Smoke: If you're grilling, get those coals blazing or crank up the gas burner to high heat. You want that intense heat to create a beautiful char and seal in the juices, creating a symphony of flavors.
- Sear on All Sides: Creating a Crispy Crust: Place your seasoned picanha on the preheated grill and sear for about 2-3 minutes per side. The key is to create those gorgeous grill marks and a nice, crispy crust that’s irresistible.
- Fat Rendering: The Basting Magic: You'll notice the fat cap starting to melt and sizzle. This is exactly what you want! It’s going to baste the meat, making it incredibly juicy and flavorful.
Pan-Searing: A Stovetop Solution
Don't have a grill? No worries! You can achieve that incredible sear in a pan. A good cast iron pan will deliver that same smoky, crispy crust. Just remember to preheat the pan over high heat before adding your picanha. The hot pan will create a delicious sear, locking in the flavors and giving your picanha that irresistible crust.
(Part 4) The Finishing Touch: Reaching That Perfect Doneness
Cooking to Perfection: The Art of Doneness
Now that you’ve got that perfect sear, it's time to bring the heat down a bit and cook your picanha to perfection. The goal is to achieve a beautiful medium-rare to medium doneness.
Here’s a tip: Don't be tempted to cut into the picanha to check for doneness. This lets out valuable juices and can lead to uneven cooking. Trust your thermometer!
- Reduce Heat: A Gentle Touch: If you're grilling, move the picanha to a cooler part of the grill or lower the heat. If you're pan-searing, reduce the heat to medium.
- Cook to Your Preference: Finding Your Flavor Sweet Spot: Aim for an internal temperature of 130-135°F (54-57°C) for medium-rare or 140-145°F (60-63°C) for medium. It's all about personal preference. Just make sure the juices run clear when you poke it with a fork.
Resting: Letting the Flavors Settle
Once your picanha has reached the desired doneness, it's important to let it rest for at least 10 minutes before slicing. This allows the juices to redistribute, ensuring a juicy and tender piece of meat. Cover it loosely with foil to keep it warm and allow the flavors to meld beautifully.
(Part 5) The Grand Finale: Slicing and Serving
Carving Like a Pro: A Slicing Masterclass
Now comes the exciting part! It's time to slice that beautiful picanha. Here's how to do it like a true Brazilian barbecue master:
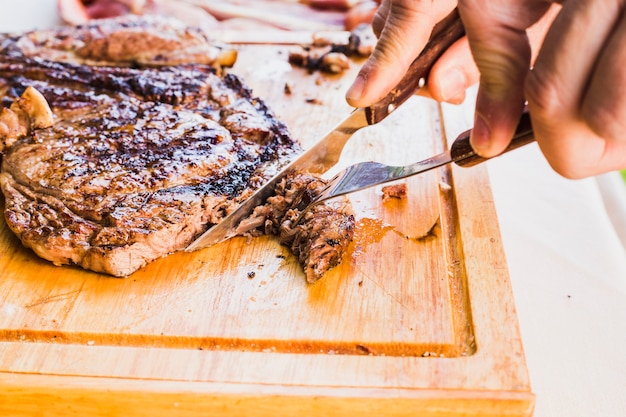
- Slice Against the Grain: Unlocking Tenderness: cut across the grain of the meat to ensure that each slice is tender and easy to chew. Think about how the fibers are running in the meat, and slice perpendicular to them.
- Thin and Even Slices: A Visual Feast: Aim for slices that are about 1/4 inch thick. This will allow the meat to cook evenly and showcase the beautiful marbling, making it visually stunning and mouthwatering.
- Stack It High: A Culinary Masterpiece: Arrange your sliced picanha on a platter or serving board, creating a beautiful, eye-catching presentation. The height and the thin, even slices will make it a true culinary masterpiece.
The Perfect Accompaniments: A Brazilian Feast
Of course, no picanha feast is complete without the perfect accompaniments.
Here are some Brazilian favorites that I love:
- Farofa: A Crunchy, Nutty Delight: This toasted cassava flour dish is a classic side for picanha. It adds a crunchy texture and nutty flavor that complements the meat beautifully.
- Feij??o Tropeiro: A Hearty Bean Stew: This hearty bean stew is another Brazilian staple, packed with flavor and heartiness. It’s the perfect complement to the richness of the picanha.
- Vinaigrette: A Bright and Refreshing Touch: A simple vinaigrette made with olive oil, vinegar, and fresh herbs can really elevate the flavors of the picanha.
- fresh greens: Balancing the Richness: A simple side salad with fresh greens and a light dressing will help cut through the richness of the meat, creating a balanced and refreshing palate cleanser.
(Part 6) Picanha Variations: Exploring the Possibilities
Picanha in the slow cooker: A Hands-Off Approach
Want a hands-off approach? No problem! You can cook your picanha in the slow cooker for a super tender and flavorful result. Just trim and season your picanha as usual, then place it in the slow cooker on low for 6-8 hours, or on high for 3-4 hours. You can even add some vegetables to the slow cooker for a complete meal. The slow cooker will break down the connective tissues, creating melt-in-your-mouth tenderness.
Picanha Sandwiches: A Deliciously Simple Option
Who doesn't love a good sandwich? Slice up your cooked picanha and layer it on toasted bread with your favorite toppings. Think cheese, caramelized onions, or even a little bit of chimichurri sauce. It's a delicious and easy way to enjoy your picanha, perfect for a quick and satisfying meal.
Picanha Stir-Fry: A Light and Flavorful Choice
Looking for something a little lighter? You can easily use cooked picanha in a stir-fry. Just slice it thin and stir-fry it with your favorite vegetables and sauce. It's a quick and flavorful meal that's perfect for a weeknight dinner, providing a burst of protein and deliciousness in a flash.
(Part 7) Picanha FAQs: Getting Your Questions Answered
FAQs
Here are some common questions about picanha and my answers:
| Question | Answer | |
| What’s the best way to tell if my picanha is cooked to the right doneness? | The best way to tell is by using a meat thermometer. Aim for an internal temperature of 130-135°F (54-57°C) for medium-rare or 140-145°F (60-63°C) for medium. You can also check for doneness by pressing on the meat. It should spring back slightly when poked and the juices should run clear. | |
| Can I cook picanha in the oven? | Absolutely! You can roast your picanha in the oven at 350°F (175°C) for about 1-1.5 hours, or until it reaches your desired doneness. Make sure to use a meat thermometer to check the internal temperature. Roasting is a great way to achieve a tender and juicy picanha. | |
| What if I don’t have a grill or a cast iron pan? | No worries! You can still get a nice sear on your picanha by using a regular skillet or even a heavy-bottomed pot. Just make sure to preheat the pan or pot over high heat before adding the picanha. The key is to get that pan super hot to create the desired sear. | |
| What are some other spices I can use to season my picanha? | Feel free to experiment with different spices! Some popular choices include garlic powder, paprika, cumin, chili powder, oregano, and thyme. You can also add a little bit of salt and pepper to taste. Go with your flavor preferences! | |
| How long does picanha last in the fridge? | Cooked picanha can last for 3-4 days in the fridge. Just make sure to store it in an airtight container or wrap it tightly in plastic wrap. You can also freeze cooked picanha for up to 3 months. This way you can enjoy it later! |
(Part 8) The Journey Continues: Embrace the Picanha Spirit
Well, there you have it, my friend! You've got the knowledge, the tools, and the confidence to turn your kitchen into a Brazilian steakhouse oasis. Remember, cooking picanha is all about embracing the experience. Enjoy the sizzling sounds, the smoky aromas, and the sheer joy of tearing into that perfectly cooked cut of beef.
Go on, unleash your inner Brazilian barbecue master! You’ve got this!
Everyone is watching

Corn on the Cob: The Ultimate Guide to Perfectly Cooked Ears
Healthy MealsAh, corn on the cob. Just the name evokes images of sunny days, barbecues, and that sweet, juicy flavour that ...

Perfect Pork Roast Oven Cooking Time: A Guide to Delicious Results
Healthy MealsThere's something truly satisfying about a perfectly roasted pork. The aroma alone is enough to make your mout...

Ham Cooking Time: How Long to Bake, Smoke, or Boil a Delicious Ham
Healthy MealsAh, ham. It's a classic, isn't it? A real crowd-pleaser, especially around holidays. And when done right, it'...

Scallops: The Ultimate Guide to Perfect Cooking
Healthy MealsAh, scallops. Those delicate, sweet, and utterly delicious morsels of the sea. They hold a special place in my...

Spaghetti Squash: The Ultimate Guide to Cooking and Serving
Healthy MealsRemember that time you saw spaghetti squash at the supermarket, looking all bumpy and strange, and thought, "W...