Paneer. Just the word conjures up images of creamy curries, vibrant salads, and those satisfyingly chewy cubes. It's a staple in my kitchen, and I reckon it should be in any decent Indian cook's arsenal. But let's be honest, making paneer can feel a bit daunting, especially for beginners. The whole "curdling milk" thing can seem a bit intimidating, right? Don't worry, I've been there, and trust me, with the right tips and tricks, it's actually a doddle.
So, whether you're a complete newbie or just looking to level up your paneer game, this guide's got you covered. We're going to delve deep into the secrets of making perfect paneer, from choosing the right milk to nailing those perfect cubes. I'm going to share my personal experiences, my tried-and-tested methods, and even a few of my favourite paneer recipes. Let's get started, shall we?
(Part 1) Choosing the Right Milk: The Foundation of Your Paneer

The first step to making great paneer is choosing the right milk. It's the foundation of your entire dish, and believe me, it makes a difference. I've been through my fair share of milk trials, and let me tell you, not all milk is created equal. The milk you use affects the texture, flavour, and overall quality of your paneer. So, choosing wisely is crucial.
Full-Fat Milk: The Cream of the Crop
I'm a firm believer in using full-fat milk for my paneer. It gives it that rich, creamy flavour and a lovely, firm texture that just melts in your mouth. I've tried skimmed milk before, and let's just say it wasn't a hit. The paneer came out rather crumbly and lacked that satisfying bite. Stick with full-fat, I say!
Fresh Milk vs. UHT Milk
Now, this is where it gets interesting. I'm a die-hard fan of fresh milk for the best results. It's got that natural flavour and a lovely creaminess that you just can't get from UHT milk. But if you're stuck with UHT, don't despair! Just make sure to let it warm up to room temperature before you start the curdling process. This helps to soften the milk and makes it easier to separate the curds from the whey.
(Part 2) The Curdling Process: Turning Milk into Paneer

Alright, so you've got your milk ready. Now we're getting to the fun part: curdling it! This is where you transform your humble milk into creamy, delicious paneer. Don't worry, it's not as complicated as it sounds. It's all about a bit of chemistry and a steady hand.
The Acid Trick: A Simple Chemical Reaction
The classic method for curdling milk is using lemon juice or vinegar. It's quick, simple, and works like a charm. The acid reacts with the proteins in the milk, causing them to clump together and form those lovely curds. Just add a bit of acid to your hot milk, and watch as it magically separates into a solid mass and a watery liquid – the whey.
Tips for Success: A Steady Hand and Careful Observation
Now, here's where my experience comes in. When adding acid, do it slowly and steadily. Don't dump it all in at once, or you'll risk ending up with a lumpy mess. I usually add a tablespoon at a time, stirring constantly. You'll know it's done when the milk starts to curdle and separate into a solid mass and a watery liquid.
Here's a little trick: if the milk doesn't start curdling after adding a few tablespoons of acid, you can gently heat it up again, but be careful not to let it boil. Just a gentle simmer will do the trick.
(Part 3) The Drain and Press Technique: Forming Your Perfect Paneer

Right, the milk has curdled, and you've got a delicious, creamy mixture. Now it's time to separate the curds from the whey and get those perfect paneer cubes ready. This is where we start shaping the magic!
Draining the Whey: A Crucial Step
The first step is draining the whey. I use a fine-mesh sieve lined with cheesecloth. Pour the curdled milk into the sieve, and let the whey drain away. It's best to let it sit for at least 30 minutes, to ensure that all the excess whey is gone. Don't discard the whey! It's packed with nutrients and can be used for cooking or making other delicious dishes.
Pressing the Curds: For Firm and Delicious Paneer
Now comes the fun part! Pressing the curds helps to remove any remaining moisture and gives the paneer that firm texture we all love. I usually use a heavy weight to press the curds, like a large saucepan or a big plate filled with heavy cans. Wrap the cheesecloth around the curds, and then place the weight on top. Let it sit for at least an hour, or even longer for a firmer paneer. The longer you press, the less moisture it retains, resulting in a firmer and more flavourful paneer.
(Part 4) The Final Step: Cutting and Storing Your Paneer
You've drained, you've pressed, and now you're ready for the grand finale. The paneer is ready, and it's time to shape it into those beautiful cubes.
Cutting the Paneer: From Cubes to Slices
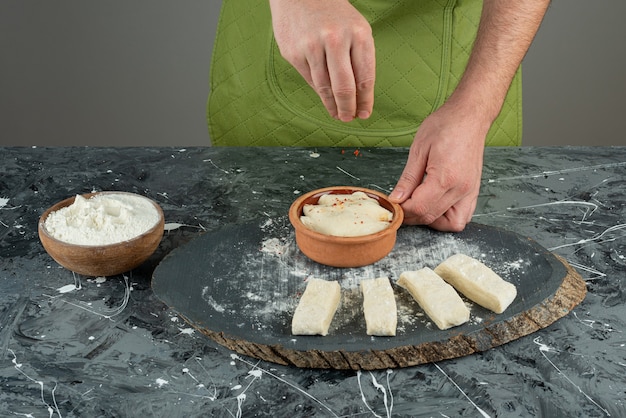
Once the paneer is pressed, remove it from the cheesecloth and cut it into cubes, slices, or however you prefer. I usually go for a good 1-inch cube, perfect for stir-fries and curries. But feel free to experiment! If you're making a salad, thin slices might be more suitable, while for a sandwich, thick slices would be ideal.
Storing the Paneer: Keeping it Fresh
Store the paneer in a sealed container in the refrigerator for up to 3 days. Keep it submerged in cold water to help it stay fresh and prevent it from drying out. If you're planning to use it later, you can also freeze it. Just make sure to wrap it tightly and thaw it in the refrigerator overnight before use. Frozen paneer might become a bit crumbly, so it's best used in dishes where texture isn't as important.
(Part 5) Paneer Recipes: A Feast for Your Taste Buds
Okay, now that we've got the basics sorted, it's time for some inspiration. Paneer is so versatile, you can use it in countless dishes, from simple salads to elaborate curries. I'm going to share some of my all-time favourite paneer recipes, the ones that always get rave reviews from my friends and family.
Classic Paneer Butter Masala: A Creamy Delight
This is a true classic and a must-try for any paneer enthusiast. The rich, creamy sauce with a touch of sweetness is a true delight. The key to a good butter masala is using high-quality butter and fresh spices. The paneer should be tender and melt-in-your-mouth. If you're a beginner, this recipe is an excellent place to start your paneer journey.
Palak Paneer: A Green and Creamy Dream
Another classic, and for good reason. The creamy, spinach-based sauce is a perfect match for the soft, pillowy paneer. This dish is packed with flavour and nutrition, making it a favourite among health-conscious foodies. I love adding a dollop of fresh cream for that extra richness.
Paneer Tikka Masala: A Spice-Lover's Paradise
This is a bolder, spicier option for those who enjoy a good kick. The paneer is marinated in a blend of aromatic spices, giving it a delicious flavour and a lovely golden colour. The creamy tomato-based sauce is a perfect complement to the spicy paneer. This dish is great for a special occasion or a family gathering.
Paneer Biryani: A Flavorful Feast
If you're feeling adventurous, try making paneer biryani. This layered rice dish is a flavour explosion, with aromatic spices, tender paneer, and fluffy rice. It's a perfect dish for a special occasion, or a satisfying weeknight dinner.
Paneer Salad: A Light and Refreshing Option
Paneer is not just for curries! It's also a great addition to salads. I love a simple salad with grilled paneer, fresh vegetables, and a light vinaigrette. It's a healthy and satisfying meal that's perfect for a summer day.
(Part 6) Tips and Tricks for Perfect Paneer: Mastering the Art
Okay, so you've got the basics down, but how can you take your paneer game to the next level? Here are a few of my tips and tricks that I've picked up over the years.
1. Temperature Matters: Getting it Just Right
The temperature of your milk is crucial for successful paneer. It needs to be hot enough to curdle properly, but not so hot that it burns. I always bring my milk to a simmer, just before it starts to bubble. If the milk is too cold, the acid might not work effectively, and the curds might not form properly.
2. Patience is Key: Pressing for Perfection
Remember, the key to firm, well-formed paneer is pressing. Don't rush this step. The longer you press the paneer, the less moisture it will retain, resulting in a firmer and more flavourful paneer. If you're short on time, you can try pressing the paneer for a shorter duration, but it might be a bit softer.
3. Don't Be Afraid to Experiment: Exploring the Possibilities
Paneer is so versatile! Don't be afraid to experiment with different flavours, spices, and cooking techniques. You might be surprised at what you discover. You can try adding different herbs and spices to the curds before pressing, or even marinating the paneer in a flavorful blend before cooking.
(Part 7) Storing and Using Your Paneer: Maximizing Flavor
You've made your perfect paneer, now how do you store it and use it for maximum flavour? Here’s my advice.
Storing Paneer: Keeping it Fresh
Once your paneer is ready, store it in a sealed container in the refrigerator for up to 3 days. Keep it submerged in cold water to help it stay fresh and prevent it from drying out.
Using Paneer: A Versatile Ingredient
Paneer is a great addition to a variety of dishes. It can be crumbled, diced, or sliced to your liking. I often use it in curries, stir-fries, salads, and even sandwiches. It's a good source of protein and calcium, making it a healthy and versatile ingredient.
(Part 8) FAQs: Your Paneer Questions Answered
Let’s tackle some of your most frequently asked paneer questions.
1. Can I use almond milk or soy milk to make paneer?
Yes, you can use alternative milks to make paneer, but it might require some adjustments to the recipe. Almond milk and soy milk have a different protein content than cow's milk, so the curdling process might be slightly different. You might need to use a bit more acid or adjust the cooking time.
You can also try using a plant-based rennet, which is specifically designed for curdling alternative milks. This will give you a smoother, more consistent paneer. Experiment and see what works best for you!
2. What if my paneer is too soft?
If your paneer is too soft, it likely didn't press long enough. Don't worry, you can press it again for a longer period, You can also try adding a bit more salt to the curds before pressing to help firm them up. Salt helps to draw out moisture and create a firmer texture.
3. Can I freeze paneer?
Yes, you can freeze paneer. It's best to freeze it in a sealed container or freezer-safe bag. When you're ready to use it, thaw it in the refrigerator overnight. Frozen paneer might become a bit crumbly, so it's best used in dishes where texture isn't as important, like curries or stews.
4. What if my paneer tastes acidic?
If your paneer tastes acidic, it's likely because you used too much acid during the curdling process. You can try rinsing the paneer with cold water to reduce the acidity. You can also try adding a pinch of baking soda to the curds before pressing. Baking soda helps to neutralize the acid and create a more neutral flavor.
5. Can I use store-bought paneer?
Absolutely! If you're short on time or just don't feel like making paneer yourself, store-bought paneer is a great option. You can find it in most Indian grocery stores. Just be sure to choose a high-quality brand for the best results.
Here's a little tip: when choosing store-bought paneer, look for a brand that doesn't have any added preservatives or artificial flavors. The fresher the paneer, the better it will taste.
Conclusion: Embracing the Art of Paneer
Making paneer is a journey, and it's one that gets more rewarding with every batch you make. Remember, practice makes perfect. Don't be afraid to experiment, try different recipes, and discover your own unique style.
Now, go out there and conquer those paneer recipes. And remember, if you ever have any questions or need a little guidance, don't hesitate to reach out. Happy cooking!
Everyone is watching

Corn on the Cob: The Ultimate Guide to Perfectly Cooked Ears
Healthy MealsAh, corn on the cob. Just the name evokes images of sunny days, barbecues, and that sweet, juicy flavour that ...

Perfect Pork Roast Oven Cooking Time: A Guide to Delicious Results
Healthy MealsThere's something truly satisfying about a perfectly roasted pork. The aroma alone is enough to make your mout...

Ham Cooking Time: How Long to Bake, Smoke, or Boil a Delicious Ham
Healthy MealsAh, ham. It's a classic, isn't it? A real crowd-pleaser, especially around holidays. And when done right, it'...

Scallops: The Ultimate Guide to Perfect Cooking
Healthy MealsAh, scallops. Those delicate, sweet, and utterly delicious morsels of the sea. They hold a special place in my...

Spaghetti Squash: The Ultimate Guide to Cooking and Serving
Healthy MealsRemember that time you saw spaghetti squash at the supermarket, looking all bumpy and strange, and thought, "W...
