Let’s face it, we all love a good egg. Whether it’s a simple breakfast staple, a luxurious brunch treat, or a key ingredient in a gourmet dish, eggs have a way of bringing joy to any meal. But achieving that perfect egg, with a silky smooth yolk and firm, but tender white, can feel like a culinary quest. I've been there, folks! From my disastrous early attempts at scrambled eggs (let's just say the kitchen resembled a battlefield) to those beautifully runny poached eggs that made my brunch guests gasp, I've learned a thing or two about mastering the art of egg cookery.
This guide is your personal egg coach, packed with practical tips and tricks, seasoned with my own experiences and opinions. We'll cover everything from choosing the right eggs to the best techniques for different cooking methods, all while avoiding stuffy culinary jargon and embracing a friendly, conversational tone. So, grab your favourite spatula, crack open a couple of eggs, and let's embark on this delicious journey!
(Part 1) The Eggsploration Begins: Choosing Your Eggs

Before we even touch a pan, let's talk about the foundation of any great egg dish: the egg itself. We're not talking about some generic, faceless egg here, but a carefully selected, high-quality specimen that will make all the difference in the final flavour and texture.
The Great Egg Debate: Free-Range vs. Cage
Ah, the age-old question! Free-range or caged? You'll see both options on the supermarket shelves, and it’s not just about animal welfare (though that's definitely a factor).
Personally, I'm a staunch advocate for free-range eggs. I love the idea of chickens having a bit more space to roam, and I've found that free-range eggs tend to have a richer flavour and a slightly firmer yolk, which makes a noticeable difference in cooking. That said, if you're on a tight budget, caged eggs are perfectly fine and widely available.
The Egg Colour Conundrum
Next up, the shell colour. Some people swear by brown eggs, others by white. But let me tell you, the colour of the shell has absolutely no impact on the flavour or cooking properties of the egg. It's simply a matter of the breed of chicken. So, choose what you like, and don't worry about colour being a sign of quality.
Freshness Matters
The most crucial factor, however, is freshness. Always check the ‘best before’ date and go for eggs with a date that’s further away. The fresher the egg, the more robust the yolk, and the whiter the white. This translates to richer flavour and better cooking results.
(Part 2) boiling eggs to Perfection

Boiling eggs is a classic culinary technique, perfect for a quick snack, a protein-packed breakfast, or even as a base for deviled eggs. But as many of us know, boiling eggs can be a tricky business. Those rubbery, hard-boiled eggs or those runny yolks that threaten to ooze out all over the place can be frustrating. But fear not! I've got the tips and tricks to guarantee perfectly cooked boiled eggs every time.
The Perfect Timing
Timing is everything when it comes to boiling eggs. Here's a simple guide based on the type of boiled egg you’re after:
| Type of Egg | Time (minutes) |
|---|---|
| Soft Boiled | 3-4 |
| Medium Boiled | 6-7 |
| Hard Boiled | 8-10 |
The Key to Successful Boiling:
Start with cold water: This is essential. Begin with cold water so the egg heats up gradually and prevents cracking.
Add salt to the water: A pinch of salt helps to prevent the shell from cracking and creates a slightly firmer white.
Bring the water to a gentle boil: Avoid a raging boil, as this can create uneven cooking.
Submerge the eggs gently: Don't drop them in! Gently slide them into the water to prevent any cracking.
Cool the eggs down immediately: After cooking, plunge the eggs into cold water. This stops the cooking process and makes the shell easier to peel.
Peeling with Ease:
The tap method: Crack the shell lightly all over and roll the egg on a hard surface. This creates small cracks, making the shell easier to peel.
The spoon method: Use a spoon to gently lift a small section of the shell and peel from there.
(Part 3) Scrambled Eggs: A Breakfast Classic

Scrambled eggs are a breakfast icon, but they can be either a fluffy delight or a rubbery mess, depending on your technique. Let's explore how to achieve those velvety smooth, perfectly cooked scrambled eggs you've always dreamed of.
The Right Pan:
Non-stick is your friend: A good quality non-stick pan is essential for smooth, creamy scrambled eggs. No need to fuss with a mountain of butter.
The Ingredients:
fresh eggs: Go for the freshest eggs you can find. They'll have a richer flavour and a better texture.
Milk or cream: A splash of milk or cream adds richness and helps create a smoother texture.
Butter: A knob of butter in the pan adds a lovely flavour and prevents the eggs from sticking.
Seasoning: Salt and pepper are essential, of course. I also like to add a pinch of freshly grated nutmeg for a touch of warmth.
The Technique:
Crack the eggs into a bowl: Beat them gently with a fork, not too vigorously. You want a slight airiness, not a frothy mess.
Add the milk or cream: Stir it through the eggs until it's evenly combined.
Warm the pan and add the butter: Over medium heat, melt the butter in the pan.
Pour in the egg mixture: Let it cook gently, stirring frequently, scraping the bottom of the pan to ensure even cooking.
Don’t overcook: Scrambled eggs should be moist, not dry. Remove them from the heat when they are just set, and still slightly runny. The residual heat will finish cooking them nicely.
(Part 4) The Art of Poaching
poached eggs are the ultimate breakfast indulgence, perfect for a luxurious brunch or a sophisticated dinner. They're not as intimidating as they may seem, and with a little practice, you’ll be a poaching pro in no time.
The Essential Equipment:
A saucepan: A medium-sized saucepan is all you need.
Vinegar: A splash of vinegar helps the egg whites to coagulate and form a nice, neat shape.
Slotted spoon: This is essential for removing the poached eggs from the water without breaking them.
The Poaching Technique:
Fill the saucepan with water: Bring it to a gentle simmer.
Add the vinegar: Just a tablespoon or two will do.
Crack the egg into a small bowl: This makes it easier to slide it into the water without breaking the yolk.
Gently slide the egg into the water: Try to do it as smoothly as possible.
Cook for 3-4 minutes: For a runny yolk, cook for 3 minutes. For a slightly firmer yolk, cook for 4 minutes.
Remove the egg with a slotted spoon: Gently lift the egg from the water and place it on a plate lined with kitchen paper to absorb any excess water.
(Part 5) Mastering the Omelette
The humble omelette is a blank canvas, waiting to be transformed into a culinary masterpiece. It’s all about combining simplicity with flavour, and it’s a great way to showcase your favourite ingredients.
The Omelette Pan:
Medium-sized and non-stick: A good omelette pan should be medium-sized, with a non-stick surface. Avoid anything too big, as it will make it difficult to cook the omelette evenly.
The Key Ingredients:
Fresh eggs: These are the foundation of any good omelette.
Milk or cream: A splash of milk or cream adds moisture and helps create a soft, fluffy omelette.
Butter: A knob of butter in the pan adds flavour and prevents sticking.
The Technique:
Crack the eggs into a bowl: Beat them gently with a fork. You don’t want them to be frothy, just lightly blended.
Add the milk or cream: Stir it in until it’s evenly combined.
Season the egg mixture: Salt and pepper are essential, but you can also add other seasonings like herbs, spices, or cheese.
Heat the pan and add the butter: Over medium heat, melt the butter in the pan.
Pour in the egg mixture: Swirl it around the pan to create an even layer.
Cook until the bottom is set: This will take about 2 minutes.
Fill the omelette: Slide your favourite fillings onto one side of the omelette, leaving the other side empty.
Fold the omelette in half: Gently slide it onto a plate and serve immediately.
(Part 6) Fry-Ups: The British Breakfast Essential
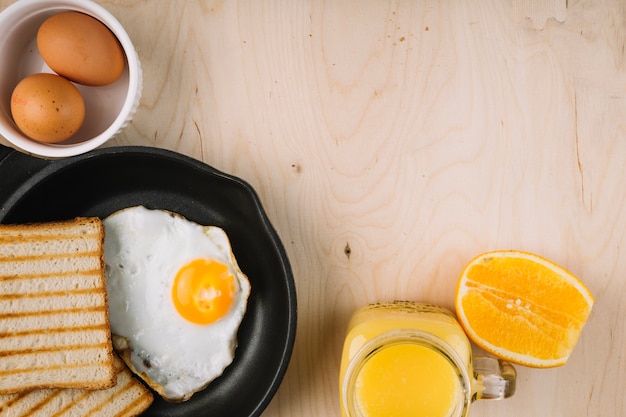
There's nothing quite like a proper fry-up, a hearty British breakfast that's sure to satisfy. The key to a perfect fry-up lies in the eggs, and that's where we come in.
The Perfect Fry-Up Egg:
Medium heat is key: Avoid too high a heat, as this will make the egg cook too quickly and result in a rubbery yolk.
A little oil or butter: A thin film of oil or butter will help to prevent the egg from sticking to the pan.
Cook until the white is set: You want the white to be set and the yolk to be still runny.
Flip the egg with care: To flip the egg, gently lift it with a spatula and let it fall back into the pan.
(Part 7) Beyond the Basics: Other Egg Delights
Now that we've covered the fundamentals, let's explore some more creative ways to cook eggs. These techniques may seem a bit more adventurous, but they're all about adding a little extra oomph to your egg dishes.
The French Toast Experience:
Sweet, delicious, and simple: French toast is a great way to use up stale bread and create a sweet, decadent breakfast.
The key is soaking: Soak slices of bread in a mixture of eggs, milk, sugar, and vanilla extract.
Cook in a skillet: Until golden brown and crispy. Serve with maple syrup, fruit, or whipped cream.
The Frittata Fiesta:
A versatile and flavourful dish: A frittata is an Italian dish that's essentially a baked omelette. You can add any ingredients you like, from vegetables to cheese to meat.
The secret is in the baking: Bake the frittata in a preheated oven until it’s set and golden brown on top.
The Deviled Egg Discovery:
A classic appetizer: Deviled eggs are a classic party appetizer.
The trick is in the filling: The yolks are mashed with mayonnaise, mustard, and seasonings, then piped back into the egg whites.
(Part 8) FAQs: Your Egg-cellent Questions Answered
Now that you're armed with all this egg knowledge, you might have a few questions lingering. Here are some of the most common ones:
Q: Can I use old eggs?
A: It's best to use fresh eggs for the best flavour and texture. Old eggs may have a weaker yolk and a more watery white. But, they are still edible, and you can use them for baking.
Q: What are the green rings around the yolk?
A: The green rings are caused by a chemical reaction that happens when eggs are cooked for too long or at too high a temperature. They are perfectly safe to eat, but they can indicate that the egg has been overcooked.
Q: How do I store eggs properly?
A: Keep eggs in the refrigerator, preferably in their original carton.
Q: Can I freeze eggs?
A: While you can freeze eggs, they don't always have the same texture after thawing. You can freeze them whole, beaten, or as yolks or whites separately.
Q: What happens if I accidentally eat a raw egg?
A: There's a small risk of salmonella poisoning from eating raw eggs. However, the risk is relatively low, especially if you’re buying eggs from a reputable source.
(Part 9) Egg-ceptional Conclusion
There you have it, my guide to cooking perfect eggs every time. From the basics of boiling and scrambling to more adventurous techniques like poaching and making frittatas, we've covered it all. Remember, practice makes perfect. So, don't be afraid to experiment and find the methods that work best for you. With a little patience and practice, you'll be making egg-cellent dishes in no time. Enjoy!
Everyone is watching

Corn on the Cob: The Ultimate Guide to Perfectly Cooked Ears
Healthy MealsAh, corn on the cob. Just the name evokes images of sunny days, barbecues, and that sweet, juicy flavour that ...

Perfect Pork Roast Oven Cooking Time: A Guide to Delicious Results
Healthy MealsThere's something truly satisfying about a perfectly roasted pork. The aroma alone is enough to make your mout...

Scallops: The Ultimate Guide to Perfect Cooking
Healthy MealsAh, scallops. Those delicate, sweet, and utterly delicious morsels of the sea. They hold a special place in my...

Ham Cooking Time: How Long to Bake, Smoke, or Boil a Delicious Ham
Healthy MealsAh, ham. It's a classic, isn't it? A real crowd-pleaser, especially around holidays. And when done right, it'...

Spaghetti Squash: The Ultimate Guide to Cooking and Serving
Healthy MealsRemember that time you saw spaghetti squash at the supermarket, looking all bumpy and strange, and thought, "W...
