Right, let’s talk chickpeas. You know, those little beige beauties that have been around for millennia and are quietly making their way into the hearts (and stomachs) of foodies everywhere. I've been a chickpea enthusiast for years, drawn to their versatility and ability to transform into something utterly delicious. But, I'll admit, it took me a while to master the art of cooking chickpeas. There were times when they ended up mushy, undercooked, or just plain bland. But, fear not, my fellow chickpea enthusiasts! I've done the experimenting, made the mistakes, and now I'm sharing my wisdom with you.
This is your ultimate guide to cooking perfect chickpeas, a guide that goes beyond basic instructions and delves into the secrets that will elevate your chickpea game. Get ready to explore the ins and outs of these humble legumes, from selecting the right chickpeas to mastering different cooking methods, all while adding your own personal touch. It's going to be a journey, and I'm so glad you're here for it.
(Part 1) Choosing the Right Chickpeas: The Foundation for Success
Alright, let's start at the beginning. Picking the right chickpeas is like choosing the right ingredients for any great dish – it sets the foundation for success. You might be tempted to grab the first bag of chickpeas you see, but there's a bit more to it than that.
types of chickpeas: Understanding the Options
You'll encounter different types of chickpeas in the supermarket, each with its own characteristics and best uses. Let's break them down:
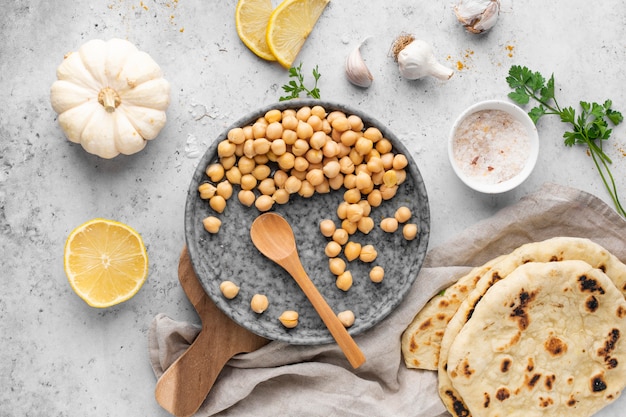
- dried chickpeas: These are the most common type and come in two varieties: Kabuli and Desi. Kabuli chickpeas are larger, lighter in color, and have a smoother skin. They tend to be the preferred choice for salads and dips due to their size and smooth texture. Desi chickpeas are smaller, darker, and have a rougher skin. They are often used in stews, curries, and other dishes where texture isn't as critical. You'll often find Kabuli chickpeas in the "garbanzo bean" section. Both are versatile, but Kabuli tends to be the preferred choice for salads and dips due to their size and smooth texture.
- canned chickpeas: Pre-cooked and ready to go! These are incredibly convenient, but you'll need to watch out for the sodium content. If you're watching your salt intake, opt for low-sodium canned chickpeas.
How to Choose the Best Dried Chickpeas: A Guide to Quality
Dried chickpeas are my go-to because they allow for complete control over the final flavor and texture. Here's what to look for when selecting dried chickpeas:
- Check for color: Look for chickpeas that are a uniform creamy beige color. Avoid any that are discolored or have dark spots, as this could indicate they've been stored improperly.
- Give them a sniff: Fresh chickpeas should have a neutral smell. If you notice a musty or sour aroma, steer clear.
- Feel the texture: Run your fingers over the chickpeas. They should be firm and dry, not soft or mushy. You're looking for chickpeas that are plump and well-hydrated, which indicates freshness.
Storing Your Chickpeas: Ensuring Freshness
Whether you're using dried or canned, proper storage is essential to ensure freshness and prevent any unwanted flavors or textures. Here's what I recommend:
- Dried chickpeas: Store dried chickpeas in an airtight container in a cool, dry place. A pantry or cupboard is ideal. They'll last for several months.
- Canned chickpeas: Store unopened cans in the pantry until you're ready to use them. Once opened, transfer them to an airtight container and keep them in the refrigerator. They'll stay fresh for up to 3-4 days.
(Part 2) Preparing Dried Chickpeas: The Art of Soaking
Dried chickpeas need a good soak before they're ready to cook. This is where things get interesting. Think of soaking as a vital step in the transformation process, where these tiny beans are gently coaxed into plump, flavorful goodness.
Why Soak? Understanding the Benefits
Soaking serves several important purposes, resulting in chickpeas that are more tender, easier to digest, and bursting with flavor:
- Reduces cooking time: Soaking helps soften the chickpeas, cutting down on the cooking time significantly. This means you can enjoy delicious chickpeas sooner!
- Improves digestibility: Soaking breaks down some of the complex sugars in the chickpeas, making them easier to digest. This is especially helpful for individuals with digestive sensitivities.
- Enhances flavor: The soaking process allows the chickpeas to absorb water, which helps them develop a more robust flavor. They become more flavorful and less "beany" tasting.
The Soaking Method: My Tried and True Technique
This is where I'll share my little secret to consistently tender and flavorful chickpeas. I’ve tried different soaking methods over the years, and this one has always delivered the goods:
- Rinse the chickpeas: Give them a good rinse under cold water to remove any debris or dust.
- Soaking Ratio: Use a 2:1 ratio of water to chickpeas. For example, for 1 cup of chickpeas, use 2 cups of water. This ensures the chickpeas are fully submerged and have enough room to plump up.
- Add salt (optional): I'm a firm believer in salting the water. It seems to make a difference in the final flavor, but this is entirely up to you. Some people prefer to add salt after cooking, but I find that salting the soaking water helps the chickpeas absorb a deeper flavor.
- Soak for 8-12 hours: This is the magic number. Soak them overnight for best results. Allowing them to soak for a longer time ensures optimal hydration and softening.
- Drain and rinse: After soaking, drain the chickpeas and rinse them thoroughly. This removes any excess starch or sediment that may have accumulated during soaking.
(Part 3) The Art of Cooking Chickpeas: Different Methods, Different Results
Now that your chickpeas are prepped, let’s talk about the different ways to cook them. There’s no one-size-fits-all method – it really depends on the dish you’re making and the desired texture. So, get ready to experiment and find your favorite!
1. Pressure Cooking: Fast and Furious
This is my go-to for when I need chickpeas in a hurry. Pressure cooking is a game-changer. It cuts down the cooking time significantly, resulting in tender and fluffy chickpeas in a fraction of the time. Here's the breakdown:
- Add soaked chickpeas: Place the drained and rinsed chickpeas in the pressure cooker. Make sure there's enough space for the chickpeas to move around freely.
- Add water or broth: Cover the chickpeas with about 2 inches of water or broth. Use enough liquid to create enough steam to cook the chickpeas evenly.
- Add seasonings: You can add a bay leaf, a few peppercorns, or a pinch of cumin for extra flavor. This is where you can get creative! Use your favorite herbs and spices to infuse your chickpeas with delicious aromas.
- Pressure cook: Cook on high pressure for 20-30 minutes. The exact time depends on the age and size of your chickpeas. Older chickpeas may take a bit longer to cook.
- Natural release: Let the pressure release naturally for about 10 minutes before releasing the remaining pressure manually. This allows the steam to slowly dissipate, preventing the chickpeas from becoming mushy.
- Drain and serve: Drain the chickpeas and use them in your favorite recipes. They'll be perfectly cooked and ready to use.
2. Stovetop Cooking: The Classic Approach
Stovetop cooking is a tried and true method. It's simple and doesn't require any fancy equipment. Here’s how it works:
- Combine chickpeas and water: Place the drained and rinsed chickpeas in a large pot. Add enough water to cover them by about 2 inches. The pot should be large enough to allow the chickpeas to move freely while cooking.
- Bring to a boil: Bring the pot to a boil over high heat. This helps to initiate the cooking process and soften the chickpeas.
- Reduce heat and simmer: Reduce heat to a gentle simmer. Keep the pot uncovered for the first 30 minutes. This helps evaporate some of the water and enhances the flavor. After 30 minutes, cover the pot and continue simmering for another 1-2 hours, or until the chickpeas are tender. The longer simmering time allows the chickpeas to absorb the flavor of the cooking liquid and become incredibly tender.
- Check for doneness: To test if they're cooked through, mash a chickpea with a fork. It should easily mash without being mushy. If it's still too firm, continue simmering for another 15-20 minutes.
3. slow cooker Cooking: The Set-It-and-Forget-It Method
Slow cookers are amazing! They’re perfect for those busy days when you need a hands-off approach. The slow cooking process allows the chickpeas to simmer gently, resulting in incredibly tender and flavorful chickpeas. Here’s how to do it:
- Combine chickpeas and broth: Place the drained and rinsed chickpeas in your slow cooker. Add enough broth or water to cover them. You can use vegetable broth, chicken broth, or even water for a simpler flavor.
- Add seasonings: Season the chickpeas with salt, pepper, and any other herbs and spices you like. I love throwing in a few garlic cloves or some onion powder. Experiment with your favorite flavor combinations!
- Cook on low heat: Cook on low heat for 6-8 hours. This long cooking time allows the chickpeas to absorb all the flavors and become incredibly tender. The slow cooker does all the work for you, resulting in delicious chickpeas without any fuss.
- Check for doneness: After 6-8 hours, test the chickpeas for tenderness using a fork. If they're still too firm, cook for another hour or two.
(Part 4) Master the Art of Chickpea Texture: From Creamy to Firm
Let's face it, the texture of your chickpeas is crucial. Whether you're aiming for creamy hummus, chunky salads, or crispy snacks, getting the texture right is key. Here's how to nail it:
Creamy and Tender Chickpeas
These are perfect for dips, spreads, and creamy soups. To achieve this, you can use a pressure cooker, slow cooker, or cook them on the stovetop for a longer period. Here's my tip: When cooking on the stovetop, add a tablespoon or two of olive oil towards the end of cooking. It helps to create a smoother, creamier texture.
Firm and Chunky Chickpeas
For salads, stews, and roasted chickpeas, you want them firm and chunky. Cook them for a shorter period of time, or use a slightly firmer cooking method like pressure cooking. The key is to make sure they're cooked through but not overly soft. If you're unsure, test them with a fork. They should be tender but still hold their shape.
Crispy and Crunchy Chickpeas
Crispy chickpeas are my weakness! They’re a perfect snack or an amazing topping for salads and bowls. You'll need to roast them in the oven. Here's how to make them irresistible:
- Preheat the oven: Preheat your oven to 400 degrees Fahrenheit (200 degrees Celsius). Make sure the oven is fully heated to ensure even browning and crispiness.
- Prepare the chickpeas: Rinse and pat dry the cooked chickpeas. Toss them with a little olive oil, salt, and any other spices you enjoy. I love adding smoked paprika, garlic powder, and onion powder. The olive oil helps to create a crispy exterior, while the spices add depth of flavor.
- Spread on a baking sheet: Spread the seasoned chickpeas in a single layer on a baking sheet. This ensures that they roast evenly and don't steam, which can prevent them from becoming crispy.
- Roast until crispy: Roast for 20-30 minutes, tossing them halfway through to ensure even browning. They’re done when they're golden brown and crispy. Keep an eye on them, as they can quickly go from crispy to burnt.
(Part 5) Beyond the Basics: Flavoring Your Chickpeas
Now that you've got the cooking down, let’s talk flavor. Chickpeas are like a blank canvas for your culinary creativity. Here are some ideas to get you started:
Herbs and Spices: A World of Flavor
A little bit of herbs and spices can go a long way. Experiment with these combinations to elevate your chickpea dishes:
- Mediterranean Flavors: Rosemary, thyme, oregano, garlic, lemon zest, and red pepper flakes. These herbs and spices add a bright, aromatic touch to chickpeas, perfect for Mediterranean-inspired dishes.
- Indian Inspired: Cumin, coriander, turmeric, garam masala, ginger, and chili powder. These spices create a warm, complex, and slightly spicy flavor profile that is characteristic of Indian cuisine.
- Smoky Goodness: Smoked paprika, chipotle powder, and cayenne pepper. These spices add a smoky depth and a touch of heat, perfect for dishes with a bolder flavor profile.
Flavorful Liquids: Elevating Your Chickpea Cooking
Don’t just use water to cook your chickpeas. Swap it out for flavorful broths, stocks, or even coconut milk. Here are some ideas to enhance the taste of your chickpeas:
- Vegetable broth: For a classic and versatile flavor base. This is a great all-around option, adding a subtle savory depth to your chickpeas.
- Chicken broth: Adds a savory and comforting flavor. This creates a richer, more complex flavor profile that is ideal for soups, stews, and curries.
- Tomato broth: Adds a tangy and earthy flavor. This is a great option for dishes with a Mediterranean twist, adding a vibrant and slightly acidic note to your chickpeas.
- Coconut milk: For a creamy and exotic twist. Coconut milk adds a rich, creamy texture and a subtle sweetness to your chickpeas, perfect for Thai-inspired dishes or even desserts.
Add-Ins for Extra Flavor: Taking Your Chickpeas to the Next Level
Don’t be afraid to experiment with adding other ingredients to your chickpeas while they’re cooking. Some favorites include:
- Garlic and Onion: For a classic flavor boost. These aromatics add a savory depth and a subtle sweetness to your chickpeas.
- Ginger: Adds a warm and spicy flavor. Ginger complements a variety of spices, adding a unique warmth and complexity to your chickpea dishes.
- Bay Leaf: For a subtle aroma. A bay leaf adds a delicate, slightly herbal aroma that complements a variety of flavors.
- Vegetables: Carrots, celery, and onions can be added to the cooking liquid for extra flavor. These vegetables create a more complex broth that infuses your chickpeas with a deeper, richer flavor.
(Part 6) Chickpea Creativity: Delicious Recipe Ideas
Alright, let's talk about the delicious ways you can use your perfectly cooked chickpeas. They are so versatile! Here’s a taste of what’s possible:
Hummus: A Chickpea Classic
The classic chickpea dish! It's simple to make, and you can experiment with different flavor combinations. Hummus is a delicious and healthy dip or spread that can be enjoyed in a variety of ways. Here's a basic recipe to get you started:
| Ingredient | Quantity |
|---|---|
| Cooked Chickpeas | 1 can (15 ounces) |
| Tahini | 1/4 cup |
| Lemon Juice | 2 tablespoons |
| Garlic Cloves | 2 |
| Olive Oil | 2 tablespoons |
| Salt | To taste |
| Paprika (for garnish) | 1/2 teaspoon |
Combine all the ingredients in a food processor and blend until smooth. Adjust the seasoning as needed. You can add more lemon juice for a tangier flavor or more tahini for a creamier texture.
Salads and Bowls: A Protein Boost with Flavor
Chickpeas add a satisfying protein boost and a delightful texture to any salad. They're great in both warm and cold salads. Here are a few ideas:
- Mediterranean chickpea salad: Combine chickpeas, chopped cucumbers, tomatoes, red onion, olives, feta cheese, and a lemon vinaigrette. This salad is a light and refreshing option, bursting with Mediterranean flavors.
- Roasted Vegetable and Chickpea Salad: Toss roasted sweet potatoes, broccoli, chickpeas, and a maple Dijon dressing. This salad is hearty and satisfying, with a combination of sweet and savory flavors.
- Curried Chickpea Salad: Combine chickpeas, chopped apples, celery, raisins, and a creamy curry dressing. This salad is a flavorful and exotic option, with a creamy texture and a touch of sweetness.
Soups and Stews: Hearty and Comforting
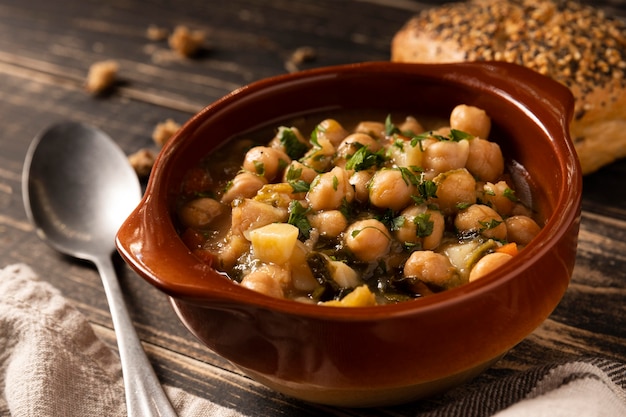
Chickpeas lend their creamy texture and earthy flavor to soups and stews. They're especially great in vegetarian and vegan recipes. Chickpeas add a hearty texture and a delicious, earthy flavor to soups and stews, making them a perfect addition to any comforting meal. Here are a couple of ideas:
- Lentil and Chickpea soup: A hearty and satisfying soup with a rich flavor. This soup is packed with protein and fiber, perfect for a cold winter day.
- Tomato and Chickpea Stew: A flavorful and comforting stew with a Mediterranean twist. This stew is full of bright, bold flavors, perfect for a warm and satisfying meal.
Curries: A Taste of India
Chickpeas are a staple in Indian cuisine. They're used in various curries, adding a hearty texture and a subtle nutty flavor. Chickpeas are a perfect addition to curries, adding a hearty texture and a unique flavor that complements the bold spices used in Indian cuisine. Here's a classic chickpea curry recipe to try:
- Sauté the aromatics: In a large pot or dutch oven, heat oil over medium heat. Add onions, garlic, and ginger and sauté until softened. This creates a flavorful base for the curry.
- Add spices: Stir in cumin, coriander, turmeric, chili powder, and garam masala. Cook for a few minutes, until fragrant. These spices create a warm, complex, and aromatic flavor profile that is essential for a delicious curry.
- Add chickpeas and broth: Add the cooked chickpeas and vegetable broth. Bring to a simmer and cook for 15-20 minutes, until the flavors meld. The broth allows the flavors to blend and creates a creamy, comforting sauce for the curry.
- Garnish and serve: Garnish with chopped cilantro and serve with rice or naan bread. Cilantro adds a fresh and bright flavor that contrasts beautifully with the rich spices in the curry.
Falafel: A Middle Eastern Delight
Falafel is a popular Middle Eastern street food made from chickpeas. It's a delicious and satisfying treat. You can find pre-made falafel in the freezer section of most supermarkets, or you can make your own from scratch. Here’s a simple recipe:
- Combine chickpeas and spices: In a food processor, combine cooked chickpeas, onion, garlic, parsley, cilantro, cumin, coriander, and salt. Pulse until well combined. This mixture will be the base for your falafel.
- Shape the falafel: Form the mixture into small balls or patties. Use your hands to gently shape the mixture into small, bite-sized falafel.
- Fry or bake: Fry the falafel in hot oil until golden brown and crispy. Alternatively, bake them in a preheated oven until golden brown and cooked through. Both methods work well, but frying results in a crispier exterior.
- Serve: Serve falafel in pita bread with tahini sauce, hummus, and vegetables. Falafel is a delicious and versatile treat that can be enjoyed in a variety of ways.
(Part 7) Mastering the Art of Chickpea Substitutions: Vegan and Gluten-Free Options
Chickpeas are a great option for vegan and gluten-free cooking. They're naturally vegan, and they can be used to substitute for various ingredients in recipes. This makes them a versatile and inclusive ingredient that can be enjoyed by everyone. Here are some ideas:
chickpea flour: A Versatile Ingredient
Chickpea flour, also known as besan, is made from ground chickpeas. It's a versatile ingredient that can be used in both sweet and savory dishes. Chickpea flour is a gluten-free alternative to wheat flour, adding a unique nutty flavor and a slightly grainy texture. Here are some ways to use it:
- Pancakes and Crepes: Make delicious and fluffy vegan pancakes or crepes using chickpea flour. Chickpea flour pancakes are light and fluffy, with a delicate nutty flavor.
- Bread and Crackers: Create gluten-free bread and crackers with chickpea flour. Chickpea flour breads are dense and flavorful, with a slightly chewy texture.
- Breading: Coat vegetables and other foods in a crispy chickpea flour breading. This creates a crispy, golden-brown coating that is both delicious and gluten-free.
Chickpeas in Baking: Adding Moisture and Protein
Chickpeas can be used to add moisture and protein to baked goods. They're especially useful in vegan recipes. Chickpeas are a great addition to baked goods, adding a unique texture and a subtle nutty flavor. Here's how to use them:
- Brownies: Add a handful of cooked chickpeas to your brownie batter for a fudgy and chewy texture. You won’t even taste them! The chickpeas add moisture and a slightly chewy texture to brownies, making them richer and more satisfying.
- Muffins and Cookies: Use mashed chickpeas as a replacement for eggs in muffins or cookies. Mashed chickpeas act as a binder and add moisture to baked goods, providing a delicious and healthy alternative to eggs.
Chickpea Pasta: A Gluten-Free Delight
Chickpea pasta is a fantastic gluten-free alternative to traditional pasta. It has a slightly nutty flavor and a firm texture. Chickpea pasta is a delicious and healthy alternative to traditional pasta, with a slightly nutty flavor and a firm texture that holds up well to sauces. Here are some ways to enjoy it:
- Pasta Salads: Toss chickpea pasta with your favorite vegetables, herbs, and a dressing. Chickpea pasta is a great base for salads, adding a hearty texture and a unique flavor.
- pasta dishes: Use chickpea pasta in any of your favorite pasta recipes, from spaghetti and meatballs to mac and cheese. Chickpea pasta is versatile and can be used in a variety of pasta dishes, adding a delicious and nutritious twist to your favorite meals.
(Part 8) FAQs: Your Chickpea Questions Answered
I’ve been there, I’ve asked those questions too. Let’s clear up some common chickpea inquiries.
1. Can I Use Canned Chickpeas Instead of Dried?
Absolutely! Canned chickpeas are a convenient option, especially when you need them quickly. Just drain and rinse them before using them in your recipe. Canned chickpeas are already cooked and ready to use, making them a great option for quick and easy meals.
2. How Do I Know If My Chickpeas Are Done Cooking?
Use a fork to test for tenderness. If the chickpea easily mashes without being mushy, it’s ready! Overcooked chickpeas will become mushy, so it's important to check for tenderness before they become overcooked.
3. What Happens If I Overcook My Chickpeas?
Overcooked chickpeas become mushy. If this happens, you can still use them in recipes like hummus or dips, where the texture isn’t as critical. While overcooked chickpeas may not be ideal for salads or other dishes where texture is important, they can still be used in recipes where a smoother texture is desired.
4. Can I Freeze Cooked Chickpeas?
Yes! Freeze cooked chickpeas in an airtight container for up to 3 months. Thaw them overnight in the refrigerator before using them. Freezing cooked chickpeas is a great way to save time and prevent waste. Thaw them overnight in the refrigerator for the best results.
5. How Do I Make Crispy Chickpeas?
Roast them in the oven! Toss them with olive oil, salt, and spices, and bake them until golden brown and crispy. Roasted chickpeas are a delicious and healthy snack or a crunchy topping for salads and bowls.
There you have it, my friends! My ultimate guide to cooking perfect chickpeas. I hope this has inspired you to get creative and explore the world of chickpeas. So, grab a can (or a bag) and let’s get cooking!
Everyone is watching

Corn on the Cob: The Ultimate Guide to Perfectly Cooked Ears
Healthy MealsAh, corn on the cob. Just the name evokes images of sunny days, barbecues, and that sweet, juicy flavour that ...

Perfect Pork Roast Oven Cooking Time: A Guide to Delicious Results
Healthy MealsThere's something truly satisfying about a perfectly roasted pork. The aroma alone is enough to make your mout...

Ham Cooking Time: How Long to Bake, Smoke, or Boil a Delicious Ham
Healthy MealsAh, ham. It's a classic, isn't it? A real crowd-pleaser, especially around holidays. And when done right, it'...

Scallops: The Ultimate Guide to Perfect Cooking
Healthy MealsAh, scallops. Those delicate, sweet, and utterly delicious morsels of the sea. They hold a special place in my...

Spaghetti Squash: The Ultimate Guide to Cooking and Serving
Healthy MealsRemember that time you saw spaghetti squash at the supermarket, looking all bumpy and strange, and thought, "W...