(Part 1) Choosing the Right Cut: The Foundation of a Great Pastrami

The first step on your pastrami journey is picking the right cut of meat. It's the foundation of your masterpiece, so you want to get this right. Now, I'm not going to lie, you're probably going to want a brisket. It's the classic choice for a reason: it has the perfect balance of fat and lean, which gives you that amazing flavour and texture we all crave. Think of the marbling as a delicious symphony, each note of fat adding richness and depth to the lean meat.
The Brisket Breakdown: What to Look For
When you're picking your brisket, keep an eye out for these things:
- Marbling: You want to see a good amount of marbling – those lovely streaks of fat running through the meat. This fat renders down during cooking, adding flavour and keeping your pastrami juicy. Imagine those little veins of fat turning into succulent pools of flavour as your pastrami cooks. Delicious!
- Thickness: Aim for a brisket that's at least 2 inches thick. This will give you enough room for the curing process and prevent it from drying out during cooking. A thicker brisket ensures the flavours have room to penetrate and the meat won't dry out, leaving you with a tender and juicy result.
- Color: The meat should be a bright red, with no signs of discoloration or off-colour patches. This indicates freshness and quality. Think of the colour as a sign of the meat's health. A vibrant red colour tells you the meat is fresh and ready to be transformed into a delicious pastrami.
You can usually find brisket in the butcher section of your local supermarket. If you're unsure, ask your butcher for advice - they're usually happy to help you pick the best one. They are experts after all, and can help you choose a brisket that's perfect for your pastrami dreams.
(Part 2) The Cure: A Journey in Flavour

Okay, so you've got your brisket, it's time to get serious about the cure. This is where the magic really happens, where the flavour gets infused into the meat. You've got a few options here: a wet cure (brine) or a dry cure. We're going to focus on the dry cure - it's a bit more hands-on, but it's worth the effort. The dry cure allows for a deeper penetration of flavour, creating a more intense and complex pastrami experience.
Creating a Flavorful Symphony: The Dry Cure Recipe
Here's a recipe that I've come to rely on over the years. It's a blend of salt, pepper, paprika, garlic powder, coriander, and a touch of sugar. This combination gives you that classic pastrami taste, with a touch of sweetness and warmth. You can adjust the proportions based on your own taste preferences, but this recipe is a great starting point.
To create the cure, just mix the ingredients in a bowl and then rub it all over the brisket. Get right into the nooks and crannies, you want that flavour to penetrate every bit of the meat. Then, place the brisket on a rack in a container (I use a plastic tub) and make sure it's completely covered with the cure. You want to cover the meat completely, ensuring all surfaces are in contact with the cure for even flavour distribution.
Curing Time: Patience is Key
This is where you need to have a bit of patience. The curing process takes time. I usually cure my brisket for at least 4-5 days, but some people prefer to cure for even longer. I like to keep it in the fridge, making sure it's kept at a steady temperature. The fridge provides a stable environment that allows the cure to work its magic without spoiling the meat.
The Rinse: A Clean Slate for Flavor
Once the curing is done, it's time to give the brisket a good rinse. This removes any excess salt and helps to prepare the meat for the smoking process. Rinse it thoroughly under cold running water, pat it dry with kitchen paper and then leave it to air dry for a few hours. This step is crucial for ensuring a clean palate for the smoky flavours to come.
(Part 3) The Smoke: Bringing Out the Pastrami's Essence

You're in the home stretch now. You've got your cured brisket, it's time to add that smoky flavour. I recommend using a smoker for the best results. But if you don't have a smoker, don't worry, you can get amazing results in your oven.
Smoker Magic: Embracing the Flavours
If you're using a smoker, start by adding your favourite wood chips. I like to use hickory or apple wood for a classic pastrami flavour. Hickory delivers a bold, smoky aroma that complements the pastrami perfectly. Apple wood, on the other hand, brings a subtle sweetness that adds another dimension to the flavour profile. Soak the chips in water for about 30 minutes, then drain them. This helps them to smolder and create more smoke. The soaking process prevents the chips from burning too quickly, ensuring a steady stream of smoke throughout the smoking process.
Place the brisket in the smoker and maintain a steady temperature of around 225°F for about 6-8 hours. You'll want to watch the temperature closely, making sure it stays consistent. You can add more wood chips as needed, and keep an eye out for the bark forming on the brisket. The bark is a beautiful crust that forms on the surface of the brisket during smoking, adding a layer of texture and flavour.
Oven Inspiration: Bringing the Smoke Home
Don't have a smoker? Don't despair. You can still get that smoky flavour using your oven. The key is to create a "smoking environment." You can do this using wood chips or even a smoker box.
To use wood chips, place them in a pan on the bottom rack of your oven. Sprinkle a little water on the chips. This will help create smoke. Then, place your brisket on a rack in the oven, and cook it at 225°F for 6-8 hours. You might want to add more water to the pan as needed. The water helps to keep the wood chips smoldering and producing smoke, giving your pastrami that desired smoky flavour.
If you're using a smoker box, simply fill it with wood chips, place it on the bottom rack of your oven, and follow the same instructions as above. A smoker box is a specialized container designed to hold wood chips and produce smoke, providing a more concentrated smoking experience.
(Part 4) The Steam: Tenderizing the Pastrami to Perfection
You've smoked your brisket, but it's still a little tough. That's where steaming comes in. It's going to soften the meat, making it deliciously tender and juicy. You can steam your pastrami in a large pot or in your oven.
Potted Perfection: A Simple Steam
For a simple steam, place your pastrami in a large pot. Add enough water to cover the brisket by a few inches. Bring the water to a boil, then reduce the heat to a simmer. Cover the pot with a lid, and let the brisket steam for about 2-3 hours. You want to make sure it's tender enough to easily shred.
Oven Magic: Using a dutch oven
If you want a more hands-off approach, you can steam your pastrami in your oven. Place the brisket in a Dutch oven, add a cup or two of water, cover it tightly, and bake it at 250°F for 2-3 hours.
The Check: Testing for Tenderness
You're going to want to check your pastrami for tenderness. Use a fork to pierce the meat, if it goes in easily, you're good to go. If it's still tough, steam it for another 30 minutes. You want your pastrami to be tender enough to melt in your mouth, so don't be afraid to steam it a bit longer if needed.
(Part 5) Slicing and Serving: Showcasing Your Pastrami
The moment you've been waiting for! It's time to slice and serve your pastrami. There's a bit of an art to slicing, but once you get the hang of it, you'll be a pro.
Slicing Perfection: Thin and Even Slices
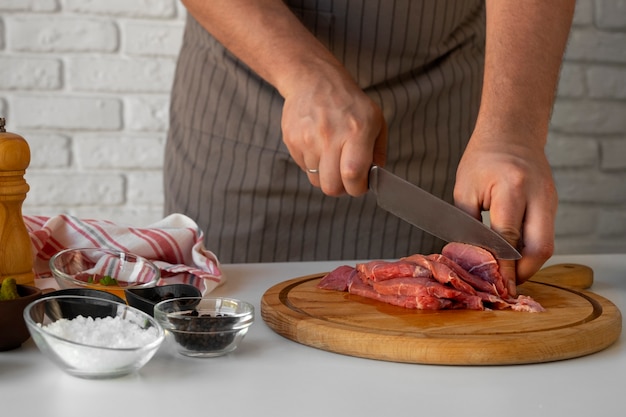
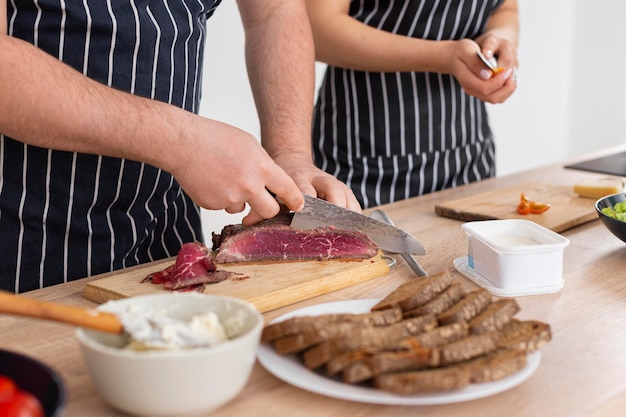
The best way to slice pastrami is to use a sharp knife. I like to use a carving knife or a good quality chef's knife. Slice against the grain of the meat, this helps to create a tender, easy-to-chew texture. Aim for slices that are about 1/4 inch thick.
Serving Suggestions: A Delicious Journey
There are so many ways to enjoy your homemade pastrami! You can serve it on sandwiches with mustard, make a classic Reuben, add it to a salad, or simply eat it on its own.
And remember, you can always experiment with different toppings and sauces to find your own favourite combinations.
(Part 6) Storing Your Pastrami: Keeping the Goodness
You've worked hard to make your pastrami, now you want to make sure it stays fresh and delicious. You can store it in the fridge for up to 5 days. Wrap it tightly in plastic wrap or aluminum foil, this helps to keep it moist and prevent freezer burn.
(Part 7) The Common Pitfalls: Avoiding the Unexpected
Let's be honest, even the most experienced cook can stumble sometimes. Here are a few common pitfalls to watch out for:
- Over-curing: If your pastrami is overly salty, you've probably cured it for too long. The next time, cure for a shorter period. Remember that the salt is there to enhance the flavour, not overpower it.
- Dryness: If your pastrami is too dry, you might have overcooked it. Make sure you keep a close eye on the temperature, and don't cook it for too long. Remember that the goal is to create a juicy and tender pastrami, not a dry and tough one.
- Under-smoked: If your pastrami doesn't have enough of a smoky flavour, you might have not smoked it long enough. The next time, increase the smoking time. Don't be shy about letting the smoke work its magic, you want your pastrami to have that delicious smoky aroma.
(Part 8) Tips and Tricks: Making Your Pastrami Even Better
Here are a few tips and tricks I've picked up over the years:
- Use a meat thermometer: A meat thermometer is essential for ensuring your pastrami cooks evenly and reaches the right internal temperature. It's your safety net, ensuring that the pastrami is cooked through and safe to eat.
- Don't be afraid to experiment: Try different spices and woods for smoking to create your own unique pastrami flavour. Remember, cooking is a journey of exploration, so don't be afraid to try new things and find what suits your taste.
- Be patient: Making pastrami takes time, so be patient and don't rush the process. The curing, smoking, and steaming all take time, but the result is worth the wait.
(Part 9) FAQs: Your Pastrami Questions Answered
We've covered a lot of ground, so let's address some of the most common questions you might have:
Q: Can I freeze pastrami?
Yes, you can absolutely freeze pastrami. To freeze it, wrap it tightly in plastic wrap or aluminum foil, then place it in a freezer-safe bag. It will keep in the freezer for up to 3 months. Just remember to defrost it in the fridge overnight before you use it. This ensures the pastrami defrosts slowly and evenly, maintaining its quality and texture.
Q: What is the best temperature to smoke pastrami?
The ideal temperature for smoking pastrami is around 225°F. This low and slow cooking method helps to render the fat, create a tender texture, and infuse the meat with smoky flavour. Think of it as a slow dance between heat and time, working together to create a delicious pastrami experience.
Q: What if my pastrami is too salty?
If your pastrami is too salty, you can try soaking it in cold water for a few hours. This will help to draw out some of the salt. You can also try slicing it thinly and serving it with a tangy sauce like mustard or horseradish to help balance out the saltiness. Remember, sometimes a little creativity can solve a culinary dilemma.
Q: What kind of wood should I use for smoking pastrami?
Hickory and apple wood are popular choices for smoking pastrami. Hickory gives a strong, smoky flavour, while apple wood provides a more subtle, sweet flavour. Experiment with different woods to find what you like best. The choice of wood is a personal preference, so feel free to explore different options and find your perfect smoking wood.
Q: How do I know when my pastrami is done?
You'll know your pastrami is done when the internal temperature reaches 150°F for a brisket. You can also check for tenderness by using a fork to pierce the meat. If it goes in easily, it's done.
I hope this ultimate guide to cooking pastrami has been helpful. Now go forth and create your own delicious masterpiece!
Everyone is watching

Corn on the Cob: The Ultimate Guide to Perfectly Cooked Ears
Healthy MealsAh, corn on the cob. Just the name evokes images of sunny days, barbecues, and that sweet, juicy flavour that ...

Perfect Pork Roast Oven Cooking Time: A Guide to Delicious Results
Healthy MealsThere's something truly satisfying about a perfectly roasted pork. The aroma alone is enough to make your mout...

Ham Cooking Time: How Long to Bake, Smoke, or Boil a Delicious Ham
Healthy MealsAh, ham. It's a classic, isn't it? A real crowd-pleaser, especially around holidays. And when done right, it'...

Scallops: The Ultimate Guide to Perfect Cooking
Healthy MealsAh, scallops. Those delicate, sweet, and utterly delicious morsels of the sea. They hold a special place in my...

Spaghetti Squash: The Ultimate Guide to Cooking and Serving
Healthy MealsRemember that time you saw spaghetti squash at the supermarket, looking all bumpy and strange, and thought, "W...
