Right, you're ready to tackle the corned beef brisket, eh? It's a commitment, that's for sure. But let me tell you, the reward is worth every bit of the effort. Imagine this: a plate piled high with succulent, melt-in-your-mouth brisket, the kind that practically falls apart with the slightest touch. That's what we're aiming for, and I'm here to guide you, every step of the way.
(Part 1) The Meat: A Brisket's Tale
First things first, you need a good brisket. Now, I've learned the hard way that not all briskets are created equal. You want a decent chunk of meat, preferably from a trusted butcher or a quality supermarket.
Flat vs. Point: Choosing Your Partner in Crime
Think of a brisket like a two-piece puzzle: the flat and the point.
The Flat: This is the leaner, more rectangular piece. It's like the sensible sibling, with a consistent texture and ideal for slicing. A good choice if you prefer a leaner cut.
The Point: Now, the point is the fattier, triangular part, the party animal of the duo. It's full of flavour and has a marbled texture that practically begs to be slow-cooked. This is your pick if you want a super tender, juicy experience.
Picking Your perfect brisket:
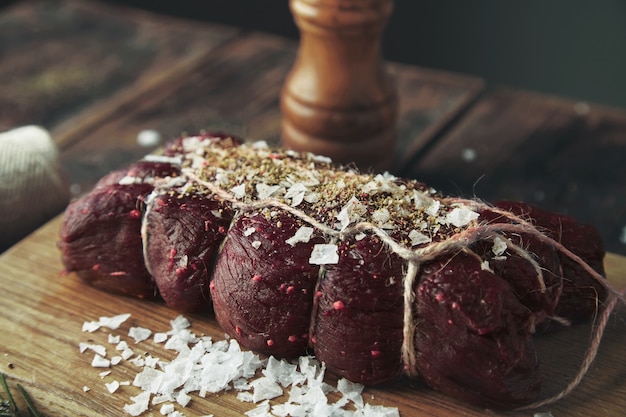
Marble It Up: Look for a brisket with good marbling, meaning streaks of fat running through the meat. This is your secret weapon for a moist, tender brisket.
Size Matters: Aim for a brisket that's at least 2 inches thick. This gives you enough space for that glorious bark to form, which is the crispy, flavorful crust that develops during cooking.
Freshness First: Check for any discoloration or strange smells. This could indicate that the brisket isn't fresh, and trust me, you don't want that.
(Part 2) The Brine: A Salt-Kissed Transformation
Now, let's talk about the real magic: the brine. This is where you unlock the secret to that melt-in-your-mouth texture.
Why Brine? It's a Love Story
Moisture is the Key: Brining adds a whole lot of moisture to the meat, preventing it from drying out during the long cook.
Flavour Party: Brining allows the spices and flavours to penetrate the meat, giving it a deeper, more complex taste.
Tenderness is the Goal: The salt in the brine breaks down those tough muscle fibres, making your brisket unbelievably tender.
Mastering the Brine:
1. The Brine Mix: I use a simple mix of water, salt, sugar, and spices. Feel free to add anything you like: black peppercorns, bay leaves, garlic, juniper berries – the world is your oyster!
2. The Soak: Submerge your brisket in the brine for 12-24 hours, chilling it in the fridge. Remember, the longer you brine, the more flavour and tenderness you'll get.
3. Rinse and Dry: After the brine party, rinse the brisket thoroughly under cold water to get rid of any excess salt. Pat it dry with paper towels, ready for its next adventure.
(Part 3) The Rub: A Spicy Symphony
Next up, the rub. This is where your brisket goes from good to glorious. I keep it simple, but you can go wild with your spice blends.
Essential Ingredients: The Power Trio
Salt: Essential for both flavour and texture. I use kosher salt for its larger crystals, which help the rub adhere better.
Black Pepper: A classic pairing for brisket, it adds a satisfying punch.
Paprika: This gives a hint of sweetness and a beautiful reddish hue.
Optional Flavour Boosters:
Chili Powder: A touch of heat for those who like it spicy.
Onion Powder: Adds a subtle sweetness that complements the brisket.
Brown Sugar: A touch of sweetness balances out the saltiness of the rub.
Applying the Rub:
1. Generous is Good: Rub the brisket all over with your spice mix, ensuring it's evenly coated.
2. Pat it In: Gently pat the rub into the meat to help it stick.
3. Rest and Relax: Let the brisket sit in the fridge for at least an hour, allowing the flavours to mingle and settle in.
(Part 4) The Cook: The Brisket's Grand Finale
The big day is here! Time to cook that brisket. This is where patience is your best friend.
Low and Slow: The Secrets to Success
oven method: Preheat your oven to 325°F (160°C). Place the brisket fat-side up on a roasting rack in a baking pan.
slow cooker method: Place the brisket in your slow cooker, fat-side up. Add a cup of broth or water to keep it from drying out.
Smoker Method: This is my personal favourite! Set your smoker to 225°F (110°C) and smoke that brisket for 6-8 hours, or until it reaches an internal temperature of 203°F (95°C).
Timing is Everything:
Brisket Size: The cooking time depends on the size of your brisket. A larger brisket will naturally take longer.
Internal Temperature: Use a meat thermometer to check the internal temperature of the brisket. This is how you know it's cooked through.
Tenderness Test: The brisket is done when it's so tender it shreds easily with a fork. This is the ultimate sign of a perfectly cooked brisket.
(Part 5) The Rest: Let the Brisket Relax
After your brisket has reached the desired internal temperature, it's time for a well-deserved rest. This is crucial for that melt-in-your-mouth texture.
Why Rest?
Moisture Magic: The juices that were drawn out during cooking will redistribute back into the meat, making it unbelievably moist.
Tenderness Time: The meat relaxes during the rest, becoming even more tender.
How to Rest:
Wrap and Relax: Wrap the cooked brisket tightly in foil and let it rest for at least 2 hours, ideally in a warm place.
(Part 6) The Slice: Unveiling the Beauty
The moment you've been waiting for: slicing your brisket. This is a satisfying moment, but it takes a bit of finesse.
The Right Tools:
Sharp Knife: A good, sharp knife is essential for clean, even slices.
Cutting Board: Use a sturdy cutting board to protect your counter and keep everything neat.
Slicing Techniques:
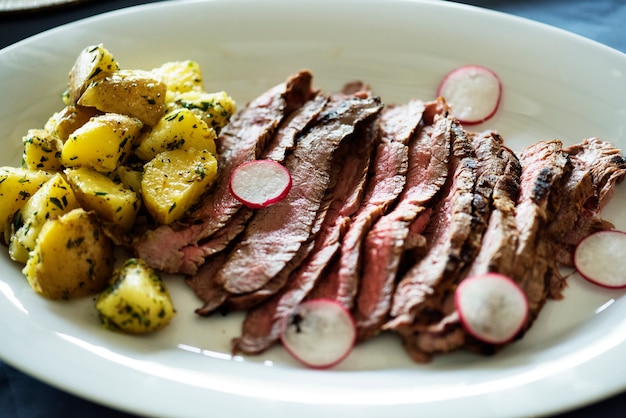
Against the Grain: Slice the brisket against the grain, which means cutting perpendicular to the muscle fibres. This makes it easier to chew and prevents it from being tough.
Thin is the Word: Aim for thin slices, about 1/4 inch thick. This allows the meat to practically melt in your mouth.
(Part 7) The Serving: A Symphony of Flavors
You've got your perfectly cooked and sliced brisket, now it's time to assemble your masterpiece.
Classic Accompaniments:
pickled onions: The tangy zing of pickled onions cuts through the richness of the brisket, creating a delicious balance.
potato salad: A classic comfort food pairing that complements the brisket perfectly.
Cole Slaw: Adds a refreshing crunch and some welcome lightness to the meal.
Cornbread: The sweetness of cornbread creates a delightful contrast with the savory brisket.
Creative Variations:
Sandwiches: Pile the brisket onto crusty bread with your favorite toppings for a satisfying sandwich.
Tacos: Shred the brisket and use it as a filling for tacos.
Nachos: Top your nachos with brisket for a hearty, flavor-packed snack or meal.
(Part 8) The Leftovers: Making the Most of Your Bounty
You're likely going to have leftovers, and let me tell you, they're almost as good as the original!
Reheating Options:
Oven: Reheat the brisket in a low oven (250°F/120°C) for 30 minutes.
Slow Cooker: Place the brisket in a slow cooker on low heat for a few hours.
Microwave: Reheat in the microwave for short bursts, checking the temperature frequently to prevent overcooking.
Creative Leftover Ideas:
Brisket Hash: Dice the leftover brisket and mix it with potatoes, onions, and your favorite spices for a hearty breakfast or brunch.
Brisket Soup: Add the leftover brisket to a pot of soup for a flavour-packed meal.
Brisket Pizza: Top your pizza with leftover brisket for a unique and delicious twist.
(Part 9) FAQs: Answering Your Burning Questions
Q1: Can I freeze leftover brisket?
Absolutely! Wrap the brisket tightly in foil or plastic wrap, then place it in a freezer-safe bag or container. It will last for up to 3 months.
Q2: What's the best way to prevent a dry brisket?
Brining is key! It adds moisture to the meat, preventing it from drying out during the long cook. Plus, don't overcook it! Make sure to monitor the internal temperature and remove it from the oven when it reaches the desired tenderness.
Q3: How do I tell if my brisket is done?
Use a meat thermometer to check the internal temperature. It should reach 203°F (95°C). The brisket should also be tender enough to shred easily with a fork.
Q4: What should I do if my brisket is tough?
Don't worry, you can still salvage a tough brisket. Shred it and use it in a dish like chili, tacos, or sandwiches.
Q5: What's the best cut of brisket for making corned beef?
The point cut is the most traditional choice for corned beef brisket. It's fattier and more tender, resulting in a more flavorful and juicy dish.
Conclusion: Embark on Your Brisket Adventure
And there you have it, my guide to conquering the mighty corned beef brisket. It's a journey, for sure, but one that's worth every bit of effort. Remember to be patient, follow the steps, and most importantly, have fun! With a bit of practice, you'll be serving up melt-in-your-mouth brisket in no time.
Everyone is watching

Corn on the Cob: The Ultimate Guide to Perfectly Cooked Ears
Healthy MealsAh, corn on the cob. Just the name evokes images of sunny days, barbecues, and that sweet, juicy flavour that ...

Perfect Pork Roast Oven Cooking Time: A Guide to Delicious Results
Healthy MealsThere's something truly satisfying about a perfectly roasted pork. The aroma alone is enough to make your mout...

Ham Cooking Time: How Long to Bake, Smoke, or Boil a Delicious Ham
Healthy MealsAh, ham. It's a classic, isn't it? A real crowd-pleaser, especially around holidays. And when done right, it'...

Scallops: The Ultimate Guide to Perfect Cooking
Healthy MealsAh, scallops. Those delicate, sweet, and utterly delicious morsels of the sea. They hold a special place in my...

Spaghetti Squash: The Ultimate Guide to Cooking and Serving
Healthy MealsRemember that time you saw spaghetti squash at the supermarket, looking all bumpy and strange, and thought, "W...