There's something truly satisfying about cooking a whole chicken. It's a centerpiece, a symbol of home-cooked meals, and it always brings a smile to the table. But let's be honest, getting the temperature just right can feel like a culinary tightrope walk. You don't want it undercooked, obviously, but you also don't want it dry and tough. That's where I come in, armed with years of trial and error and a passion for perfectly cooked poultry. This is your guide to achieving a juicy, flavorful, and safe roast chicken, every time.
(Part 1) Understanding the Science of a perfect roast
The Importance of internal temperature
Let's get scientific for a moment. When you cook a whole chicken, you're aiming for a specific internal temperature that ensures safety and tenderness. The USDA recommends an internal temperature of 165°F (74°C) for safe consumption, but that's just the minimum. To achieve that delicious, fall-off-the-bone tenderness, you want to shoot for a temperature between 160°F (71°C) and 165°F (74°C).
The Role of Oven Temperature
The oven temperature is your secret weapon. It controls how quickly and evenly the chicken cooks. A lower temperature, like 325°F (163°C), results in a slow, gentle cooking process, allowing the chicken to cook through evenly and retain its moisture. A higher temperature, like 400°F (204°C), cooks the chicken faster, but you risk overcooking the outside before the inside is cooked through, leading to a dry, disappointing bird. Think of it like a slow simmer versus a quick sear – both have their place, but you need to understand the differences to achieve your desired results.
(Part 2) Choosing the Right Oven Temperature: It's All About Balance
Now that we've established the importance of oven temperature, let's dive into the details. The perfect temperature ultimately depends on your preferences and the size of the chicken.
325°F (163°C): The Classic Approach
This is my go-to temperature, particularly for larger chickens (think 5 pounds or more). It ensures even cooking, allowing the chicken to cook slowly and gently, yielding incredibly moist and tender meat. You'll need a bit more patience with this method, as it takes a bit longer, but trust me, the results are worth the wait. I typically find that a 5-pound chicken cooked at 325°F (163°C) takes about 1 hour and 45 minutes to 2 hours.
400°F (204°C): The Fast Track for Smaller Birds
If time is of the essence, 400°F (204°C) is a great option, especially for smaller chickens (around 3-4 pounds). It cooks the chicken faster, but remember, this method requires a closer eye. A chicken cooked at 400°F (204°C) can go from perfectly cooked to dry in a matter of minutes. Expect to cook a 3-4 pound chicken at this temperature for around 45 minutes to 1 hour.
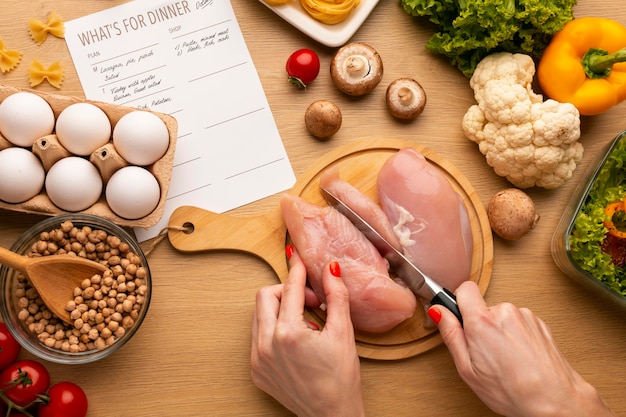
(Part 3) Prepping Your Chicken for a Winning Roast
Now, here's where we can get creative and really elevate your chicken game. These techniques are all about enhancing flavor and moisture, transforming your roast chicken from good to unforgettable.
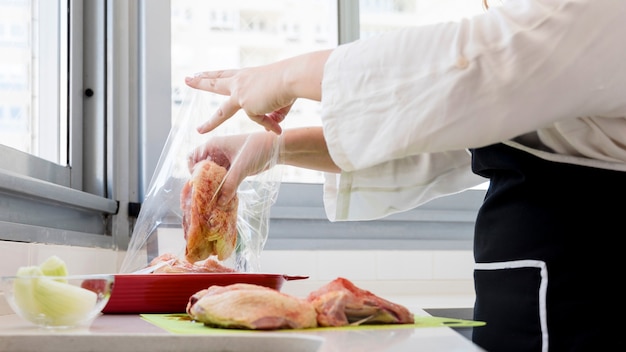
The Art of Brining: A Secret Weapon for Tenderness
Brining is a game-changer, folks. It's a simple process that involves soaking your chicken in a salt-water solution for a few hours. The salt draws moisture out of the chicken, then re-absorbs it back into the meat, making it incredibly juicy and flavorful. It's a bit of a commitment, as it takes a few hours to brine, but trust me, it's worth the effort. The results are astounding.
- Choose your container: You'll need a large container, like a stockpot or a large bowl, to hold the brine and your chicken.
- Create the brine: In your chosen container, dissolve 1/2 cup of salt in 4 cups of cold water. You can add a tablespoon of sugar if you want a sweeter taste.
- Submerge your chicken: Carefully place your chicken in the brine, ensuring it's completely submerged.
- Refrigerate: Cover the container and refrigerate the chicken for 2-4 hours (no longer than 4 hours).
- Rinse and dry: After brining, remove the chicken from the brine, rinse it thoroughly with cold water, and pat it dry with paper towels.
Butter and Herbs: A Symphony of Flavor
Butter, oh, butter! It's a culinary magic ingredient, and it's perfect for roast chicken. My go-to is a mixture of melted butter and herbs rubbed under the skin of the chicken. This creates a layer of flavor that permeates the meat and keeps it incredibly moist during roasting. Don't be afraid to experiment with different herb combinations. I love rosemary, thyme, sage, and parsley, but you can add your personal touch with a blend of your favorite herbs.
Veggies for a Complete Meal: One-Pan Wonders
For a complete, one-pan meal, add your favorite vegetables around the chicken. Potatoes, carrots, onions, and garlic create a delicious symphony of flavors, and they're incredibly easy to prepare. Simply chop them into bite-sized pieces, toss them with a little olive oil, salt, and pepper, and arrange them around the chicken on the roasting pan. As the chicken cooks, the vegetables will absorb the juices and roast to perfection, creating a wonderfully flavorful side dish.
(Part 4) Roasting Your Chicken to Perfection: Step-by-Step
Now it's time to get your chicken into the oven. Follow these steps, and you'll be on your way to a perfectly cooked roast chicken.
Step 1: Preheat Your Oven
This is crucial. Preheating your oven to the desired temperature before you put the chicken in is essential. It ensures even cooking and prevents the chicken from losing too much moisture.
Step 2: Prepare the Roasting Rack
Place your chicken on a roasting rack positioned over a baking sheet. This allows air to circulate around the chicken, ensuring even cooking and preventing the chicken from sitting in its own juices, which can lead to a soggy bottom.
Step 3: The Time is Now
Now for the big reveal – the cooking time. Remember, every chicken is different, so it's best to check the internal temperature to ensure doneness. However, here are some general guidelines to get you started:
| Chicken Size (Weight) | Oven Temperature | Cooking Time |
|---|---|---|
| 3-4 lbs | 325°F (163°C) | 1 hour 15 minutes - 1 hour 30 minutes |
| 4-5 lbs | 325°F (163°C) | 1 hour 30 minutes - 1 hour 45 minutes |
| 5-6 lbs | 325°F (163°C) | 1 hour 45 minutes - 2 hours |
| 3-4 lbs | 400°F (204°C) | 45 minutes - 1 hour |
| 4-5 lbs | 400°F (204°C) | 1 hour - 1 hour 15 minutes |
Remember, these are just estimates. Use a meat thermometer to check for doneness, especially if you're new to roasting chicken.
Step 4: Checking for Doneness
Here's where you put your culinary detective hat on. Insert the meat thermometer into the thickest part of the thigh, making sure it doesn't touch any bone. The internal temperature should reach 160°F (71°C) to 165°F (74°C) for a perfectly cooked chicken. If it's not quite there, pop it back in the oven for a few more minutes and check again.
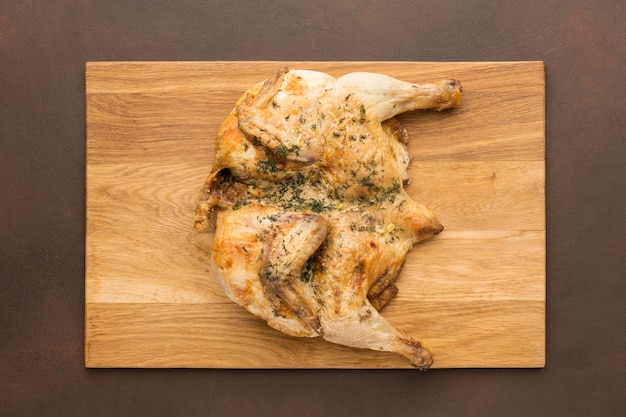
Step 5: The Rest is Golden
Once the chicken reaches the desired internal temperature, don't rush to carve it. Let it rest for about 10 minutes before carving. This allows the juices to redistribute throughout the meat, resulting in a juicier, more flavorful chicken.
(Part 5) Carving Your Roasted Chicken: A Masterclass in Precision
Time to enjoy the fruits of your labor! Carving a roast chicken might seem daunting, but it's actually quite simple with a sharp knife and a little confidence.
Step 1: Separating the Legs
Place your chicken on a cutting board. Use your sharp knife to cut between the leg and the body, following the natural joint. Twist the leg to separate it from the body.
Step 2: Removing the Thighs
Place the leg on its side, and cut through the joint where the thigh meets the drumstick.
Step 3: Separating the Breasts
Hold the chicken with one hand, and cut along the breastbone to separate the breasts from the rib cage. You can then carve the breast into slices or leave it whole, depending on your preference.
(Part 6) Leftover Love: Making the Most of Your Roast Chicken
You've cooked a beautiful chicken, and now you have delicious leftovers. Here's how to turn those leftovers into even more delicious meals.
chicken salad: A Classic with Endless Variations
There's nothing quite like a classic chicken salad. Chop up your leftover chicken, combine it with mayonnaise, celery, onion, and your favorite herbs. Get creative with add-ins like chopped grapes, walnuts, or a touch of curry powder. It's a delicious and versatile lunch or light dinner option.
Chicken Soup: A Warm Hug in a Bowl
Turn your leftover chicken into a soul-warming chicken soup. Simmer the bones with water, carrots, celery, onion, and herbs to make a rich broth. Then, add the chicken and your favorite vegetables to create a truly comforting meal.
chicken tacos: A Tex-Mex Delight
Spice things up with chicken tacos. Shred the leftover chicken, toss it in your favorite taco seasoning, and serve it in tortillas with your favorite toppings. Add some salsa, guacamole, sour cream, and fresh cilantro for a truly delicious Tex-Mex experience.
Chicken Quesadillas: A quick and easy meal
Make a quick and easy dinner with chicken quesadillas. Combine shredded chicken with cheese and your favorite toppings, and grill them to perfection. Add some salsa, sour cream, or guacamole for a satisfying and flavorful meal.
(Part 7) Chicken cooking tips and Tricks: Mastering the Art of Roast Chicken
I've learned a few tricks along the way that can make a big difference in your roast chicken results. Here are some extra tips to enhance your cooking experience.
Roasting with a Pan of Water: A Moisture Boost
Place a baking sheet filled with water in the bottom of the oven to create a humid environment. The steam from the water will circulate in the oven, helping to keep the chicken moist and tender.
The "Spatchcock" Method: Maximizing Flavor and Crispness
The "spatchcock" method involves butterflying the chicken by removing the backbone and flattening it. This allows for faster cooking and creates more surface area for browning, resulting in crispy skin and flavorful meat. It's a great technique for smaller chickens.
Don't Overcrowd the Oven: Give Your Chicken Space
Give your chicken some room to breathe. Don't cram it in with other dishes, as this can interfere with the air circulation and prevent the chicken from cooking evenly.
(Part 8) FAQs: Your Burning Questions Answered
I've compiled some of the most frequently asked questions about roasting chicken, so you're prepared to tackle any culinary challenges.
1. Can I Cook a frozen chicken?
It's not recommended. Cooking a frozen chicken from frozen can lead to uneven cooking and a dry bird. It's always best to thaw the chicken thoroughly before roasting.
2. How Long Can I Keep Leftover Chicken in the Fridge?
Keep leftover chicken in the fridge for 3-4 days. Make sure to store it properly in an airtight container or wrap it tightly in plastic wrap. After that, it's best to freeze it or discard it.
3. How do I know if my Chicken is Undercooked?
If the chicken is pink in the middle, it's not cooked through and should not be eaten. Always use a meat thermometer to ensure the internal temperature reaches 165°F (74°C).
4. What Happens if My Chicken is Overcooked?
You'll end up with dry, tough meat. It's best to avoid overcooking by using a meat thermometer and checking for doneness at the appropriate time.
5. How Can I Make My Chicken Skin Crispy?
Pat the chicken dry with paper towels, and then rub it with a little bit of oil or butter. Roast the chicken at a higher temperature, like 400°F (204°C), for the first 15 minutes to encourage crispy skin. You can also elevate the chicken on a roasting rack to allow for better air circulation around the bird.
So there you have it, my comprehensive guide to cooking the perfect whole chicken. With a bit of knowledge, some practice, and a touch of confidence, you'll be creating a delicious and impressive roast chicken in no time. Happy cooking!
Everyone is watching

Corn on the Cob: The Ultimate Guide to Perfectly Cooked Ears
Healthy MealsAh, corn on the cob. Just the name evokes images of sunny days, barbecues, and that sweet, juicy flavour that ...

Perfect Pork Roast Oven Cooking Time: A Guide to Delicious Results
Healthy MealsThere's something truly satisfying about a perfectly roasted pork. The aroma alone is enough to make your mout...

Ham Cooking Time: How Long to Bake, Smoke, or Boil a Delicious Ham
Healthy MealsAh, ham. It's a classic, isn't it? A real crowd-pleaser, especially around holidays. And when done right, it'...

Scallops: The Ultimate Guide to Perfect Cooking
Healthy MealsAh, scallops. Those delicate, sweet, and utterly delicious morsels of the sea. They hold a special place in my...

Spaghetti Squash: The Ultimate Guide to Cooking and Serving
Healthy MealsRemember that time you saw spaghetti squash at the supermarket, looking all bumpy and strange, and thought, "W...