As a seasoned home cook, I've always held a deep passion for burgers. There's just something about that satisfying combination of juicy meat, crispy bun, and flavorful toppings that makes me happy. But perfecting the art of burger-making is no easy feat. Over the years, I've discovered that the secret to a truly memorable burger lies in achieving the ideal cook time. That delicate balance that guarantees a patty that's cooked through without being dry, a feat that can be surprisingly tricky to master, especially on the stovetop. So, let's embark on a journey together, exploring the intricacies of crafting the perfect stovetop burger, uncovering the secrets to juicy results every single time.
(Part 1) Choosing the Right Meat: The Foundation of Flavor

A delicious burger starts with the right foundation: the meat. Over the years, I've experimented with countless blends, from lean ground beef to fatty chuck, but I've found that an 80/20 blend of chuck and sirloin consistently delivers the perfect balance of flavor and juiciness. The chuck provides that robust, beefy taste that we crave, while the sirloin brings a touch of leanness, preventing the burger from becoming overly greasy. It's a combination that consistently produces patties that are both flavorful and satisfying.
The Art of Ground Meat: Freshness Matters
Freshness is key when it comes to ground meat. I always make a beeline for my local butcher, where I can request a custom grind. Butchers are masters of their craft, and their expertise ensures that the meat is ground perfectly, resulting in burgers with a distinct texture and superior flavor. However, if a butcher isn't readily accessible, opting for pre-ground meat from a reputable source is a perfectly acceptable alternative. Just ensure you choose the best quality available, and you'll be rewarded with a noticeable difference in taste.
The No-No's of Burger Meat: Avoiding Common Mistakes
There are a few common mistakes that can ruin a burger before it even hits the pan. Here's what I've learned to avoid:
- Too Lean: While the idea of a leaner burger might sound appealing, it's more likely to result in a dry and crumbly patty. The fat content is essential for keeping the meat juicy and flavorful.
- Too Fatty: On the flip side, a burger with too much fat can lead to a greasy, messy experience, leaving you feeling more weighed down than satisfied. Aim for a balance, and you'll be rewarded with a juicy burger that doesn't leave your plate swimming in oil.
- Pre-seasoned: I prefer to season my patties myself. Pre-seasoned meat can be overly salty, and it's impossible to control the precise flavor profile you're aiming for. I like to start with a simple salt and pepper, then add a pinch of smoked paprika or other spices for a personalized touch.
(Part 2) Preparing the Perfect Patty: Shaping a Culinary Masterpiece

Now that you've chosen your meat, it's time to transform it into perfect patties. Here's my approach to achieving that ideal texture and shape.
Tips for Patty Perfection: A Gentle Touch is Key
- Don't overwork the meat: Gently form your patties with your hands, using a light touch. Avoid overmixing, which can lead to tough and dense burgers. The goal is to keep the meat loose and airy, allowing it to retain its natural moisture.
- Create a well: For even cooking, I make a slight indentation in the center of each patty. This helps the meat cook uniformly, preventing the center from bulging and ensuring a consistent texture throughout.
- Chill the patties: Refrigerate the patties for at least 30 minutes before cooking. This helps them hold their shape better on the grill and prevents them from falling apart. The cold temperature also helps to seal in the moisture, resulting in a juicier burger.
- Seasoning: Salt and pepper are the classic seasonings for a burger, but I always add a pinch of smoked paprika. It adds a subtle smokiness that elevates the flavor of the beef. Feel free to experiment with other spices like garlic powder, onion powder, or even a touch of chili powder, depending on your taste preferences.
(Part 3) The Stovetop Cook-Off: Mastering the Heat

The stovetop is where the magic happens. The heat transforms the raw meat into a delicious, flavorful burger. Here's how I achieve that perfect sear.
Choosing the Right Heat: A Balancing Act
The key to a juicy burger is achieving a good sear, but that doesn't mean blasting the stove to the highest setting. I start by heating the pan over medium-high heat. A cast iron skillet is my weapon of choice, but any heavy-bottomed pan will do. The key is ensuring even heat distribution throughout the pan. Once the pan is sizzling hot, add a tablespoon of oil. Let it heat up before adding the patties, ensuring a nice crust develops quickly.
The Art of the Sear: Patience is a Virtue
Gently place the patties in the hot pan, being careful not to overcrowd. The goal is to give each patty ample space to cook evenly. Let them cook undisturbed for 3-4 minutes per side. Resist the urge to press them down with a spatula. That will only squeeze out the precious juices, resulting in a dry and disappointing burger. Instead, allow the heat to work its magic, creating a delicious crust on the outside while keeping the inside juicy and tender.
(Part 4) The internal temperature: A Guide to Perfection
Visual cues can be deceiving, especially when it comes to cooking meat. To ensure your burgers are cooked to your exact liking, I highly recommend using an instant-read thermometer.
The Importance of an Instant-Read Thermometer: Taking the Guesswork Out
An instant-read thermometer takes the guesswork out of burger cooking. It's the most accurate way to ensure the patties are cooked through without overdoing it. No more worrying about undercooked burgers or dry, overcooked patties. A thermometer provides the peace of mind that your burger is cooked perfectly.
Temperature Chart for Burger Perfection:
| Doneness | Internal Temperature |
|---|---|
| Rare | 125°F (52°C) |
| Medium-Rare | 130-135°F (54-57°C) |
| Medium | 140-145°F (60-63°C) |
| Medium-Well | 150-155°F (65-68°C) |
| Well-Done | 160°F (71°C) |
Beyond the Thermometer: Visual Cues
While a thermometer is the most reliable method, visual cues can offer additional insights.
- Rare: The center will be bright red and soft to the touch. The patty will be tender and have a distinct "raw" feel.
- Medium-Rare: The center will be pink and slightly firm. The patty will have a slight give when pressed, and the juices will run clear.
- Medium: The center will be a light brown and firm. The patty will be springy to the touch, and the juices will run clear with a slight pink tinge.
- Medium-Well: The center will be brown and firmer. The patty will be firm and springy, with a slight resistance when pressed.
- Well-Done: The center will be completely brown and firm. The patty will be very firm and almost rubbery, with no signs of pinkness.
(Part 5) The Resting Game: Let Those Juices Settle In
After cooking, it's crucial to let the burgers rest for 5-10 minutes before serving. It's a step that many people skip, but it makes a world of difference in the final result. Allowing the burgers to rest allows the juices to redistribute throughout the patty, ensuring a juicier and more flavorful burger.
Why Resting Makes All the Difference: Science Behind the Juiciness
When you remove the burgers from the heat, the juices continue to cook inside the patty. Resting allows those juices to settle back into the meat, ensuring a more even distribution and a juicier bite. The rest period also helps the meat relax, making it easier to slice without causing those precious juices to spill out.
How to Rest a Burger: A Simple Trick for a Juicy Result
Place the cooked patties on a cutting board and loosely cover them with aluminium foil. The foil will trap in the heat, keeping the burgers warm while they rest. You'll be amazed at the difference this simple step makes!
(Part 6) Mastering the Bun: A Worthy Counterpart
The bun is the stage for your burger masterpiece. It needs to be a worthy counterpart, complementing the flavors of the patty and toppings without overpowering them. The perfect bun is soft, fluffy, and holds up to the juicy burger without falling apart.
The Perfect Bun: Finding the Right Balance
My go-to bun is a brioche bun, its rich, buttery flavor pairs perfectly with the savory beef. But sesame seed buns are equally delicious, offering a delightful crunch with a touch of nutty flavor. Ultimately, the choice is yours, but make sure the bun you choose complements the flavors of your burger.
Toasting to Perfection: A Touch of Crispy Goodness
For that irresistible crispy texture, I always toast the bun. I lightly brush the cut sides with butter and toast them in a dry skillet until golden brown. The toasting process not only adds a delightful crunch but also helps absorb any excess juices from the burger, preventing the bun from becoming soggy.
(Part 7) Toppings: The Finishing Touches
Now it's time to unleash your creativity. The topping possibilities are endless, allowing you to personalize your burger to your heart's content. Experiment with your favorites, but remember that less is often more when it comes to toppings.
Classic Toppings: A Timeless Combination
Some classic toppings that never fail to deliver:
- Cheese: Cheddar, American, and Swiss are all great choices, adding a creamy and tangy element to the burger.
- Lettuce: Adds a refreshing crunch and a touch of green goodness, balancing the richness of the meat.
- Tomato: A juicy and tangy addition, providing a burst of fresh flavor.
- Onion: Red onion adds a bit of sweetness and sharpness, cutting through the richness of the burger.
- Pickles: Dill pickles provide a salty and tangy contrast, adding a delightful complexity of flavors.
Beyond the Classics: Get Creative!
Don't be afraid to experiment with unique toppings. caramelized onions, roasted red peppers, sautéed mushrooms, and even a touch of balsamic glaze can elevate your burger to new heights. Experiment with different combinations and find what works best for you.
(Part 8) The Final Assembly: A Culinary Masterpiece
With your perfectly cooked burger and toasted bun ready, it's time to assemble your masterpiece.
The Order Matters: Building a Flavorful Symphony
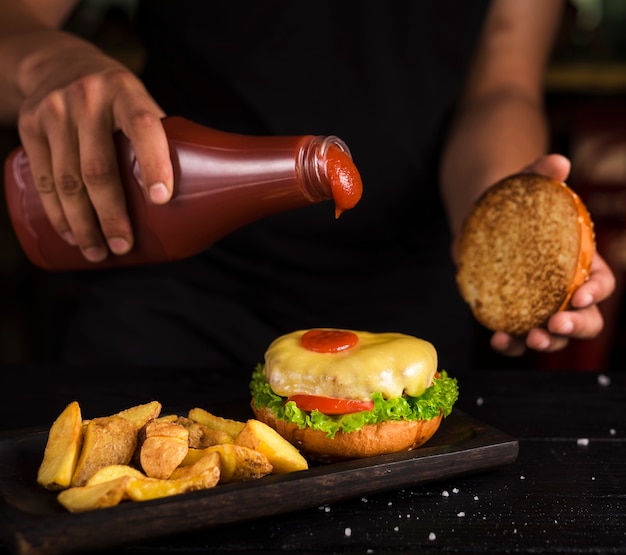
I like to start with a base of lettuce and tomato, followed by the juicy patty and melted cheese. Then, I add my favourite toppings, such as pickles, onions, and a dollop of sauce. Finally, I top it off with the toasted bun. The layering of flavors and textures creates a symphony of taste that is both satisfying and memorable.
Enjoy Your Creation!
Once your burger is assembled, take a bite and savour the deliciousness. Every element – the perfectly cooked patty, the toasted bun, and the flavourful toppings – should come together in a symphony of taste. And remember, the best burgers are often the ones made with love and a touch of creativity. So, experiment, have fun, and enjoy the journey of crafting the perfect stovetop burger.
FAQs
1. How can I tell if my stovetop is hot enough for burger cooking?
The easiest way to test if your stovetop is hot enough is to place a few drops of water on the pan. If the water sizzles and evaporates immediately, you're good to go. If it takes longer than a few seconds, you'll need to increase the heat. A hot pan is crucial for achieving that perfect sear, so don't rush the process.
2. What if my burgers are sticking to the pan?
This can happen if the pan isn't hot enough or if you're using a pan that's not properly seasoned. Make sure the pan is sizzling hot before you add the patties, and use a little extra oil if needed. cast iron skillets are known for their non-stick properties, but they do require proper seasoning. If you're using a different type of pan, a nonstick spray or a light coating of oil can help prevent sticking.
3. Can I cook burgers in a nonstick pan?
You can, but a cast iron skillet is the ideal choice for achieving that perfect sear. Nonstick pans can sometimes make the burgers stick, and they don't retain heat as well as cast iron. If you're using a nonstick pan, ensure it's properly heated before adding the burgers and watch them carefully to prevent burning.
4. Should I flip the burgers more than once?
Flipping the burgers more than once can result in a dry patty, as it allows the juices to escape. Ideally, flip them only once, after they've developed a good crust. Patience is key here, as the initial sear is crucial for locking in the juices and creating a delicious crust.
5. What are some good burger sauces?
Ketchup, mayonnaise, mustard, and barbecue sauce are all classic choices. But feel free to get creative! I love to use a homemade aioli or a spicy sriracha mayo. Experiment with different combinations, adding a touch of sweetness, tanginess, or spice to complement your burger creation.
Everyone is watching

Corn on the Cob: The Ultimate Guide to Perfectly Cooked Ears
Healthy MealsAh, corn on the cob. Just the name evokes images of sunny days, barbecues, and that sweet, juicy flavour that ...

Scallops: The Ultimate Guide to Perfect Cooking
Healthy MealsAh, scallops. Those delicate, sweet, and utterly delicious morsels of the sea. They hold a special place in my...

Spaghetti Squash: The Ultimate Guide to Cooking and Serving
Healthy MealsRemember that time you saw spaghetti squash at the supermarket, looking all bumpy and strange, and thought, "W...

Salmon Cooking Times: Perfect Guide for Every Recipe
Healthy MealsLet me tell you, cooking salmon is an art form. It's all about getting that perfect balance: juicy and tender,...

Ham Cooking Time: How Long to Bake, Smoke, or Boil a Delicious Ham
Healthy MealsAh, ham. It's a classic, isn't it? A real crowd-pleaser, especially around holidays. And when done right, it'...
