roast chicken. The mere mention of it conjures up images of warm, golden-brown skin, succulent meat falling off the bone, and the comforting aroma that fills your home. It's a dish that speaks of cozy evenings, family gatherings, and simple pleasures. But achieving that perfect roast chicken, the kind that leaves everyone licking their fingers and wanting more, can feel like a culinary quest.
I've been there, struggling with dry, overcooked birds despite my best efforts. Recipes seemed to fail me, and even my trusty meat thermometer couldn't prevent those disappointing results. It felt like I was cursed with the roast chicken gene, doomed to produce dry, disappointing dinners. But then, something shifted. I began paying attention to the subtle nuances, the little details that made all the difference. And guess what? My roast chicken game went from "meh" to "wow!"
Today, I'm going to share my secrets for consistently achieving that perfect roast chicken, the kind that makes you wonder how you ever lived without it. We'll delve into the science behind roasting, explore the best techniques, and most importantly, unravel the mystery of how long to cook it for juicy, flavorful results every time. So, grab your apron, gather your ingredients, and let's get cooking!
Part 1: Cracking the Code: Understanding the Science of Roasting
Before we get our hands dirty, let's unravel the science behind roasting. Understanding how heat interacts with chicken is crucial for mastering this art.
1.1 Temperature and Time: The Perfect Dance
roasting chicken involves cooking the bird using dry heat, relying on convection to distribute heat evenly. It's a slow, gentle process that allows the meat to tenderize while the skin develops that beautiful, crispy exterior. The key to achieving that perfect balance lies in the interplay of temperature and time.
When you roast a chicken, heat penetrates the bird from the outside in. As the temperature rises, the proteins in the meat denature and contract, causing the meat to firm up. This happens within a specific temperature range. We want to cook the chicken at a temperature that allows the internal temperature to reach 165°F (74°C) without drying out the meat. It's a delicate dance, my friend, and timing is everything.
The longer you roast the chicken, the more time the heat has to penetrate the meat. This ensures more even cooking, but also increases the risk of dryness. Finding that sweet spot, where the chicken is cooked through and still succulent, is the key to success.
1.2 The Rest is Golden: Why Resting is Crucial
You've cooked your chicken to perfection, but before you carve into that beautiful bird, give it a chance to rest. I know, the anticipation is intense, but trust me on this one. Resting is absolutely crucial, and here's why:
First, it allows the juices to redistribute evenly throughout the meat. During cooking, the heat forces those delicious juices towards the center. Carving immediately after cooking releases those precious juices, leaving you with a dry, flavorless bird. Resting gives those juices time to soak back into the meat, creating a more succulent and flavorful experience.
Second, resting allows the chicken to cool down slightly, making it easier to carve. The meat will be less likely to fall apart, ensuring beautiful, presentable slices for everyone at the table.
Part 2: Picking Your Perfect Bird: Choosing the Right Chicken
Now that we've laid the scientific foundation, let's talk about choosing the right chicken. You can't expect to achieve a delicious roast chicken if you start with a subpar bird.
2.1 whole chicken vs. chicken pieces: A Matter of Preference
You have two options: roast a whole chicken or individual pieces like breasts, legs, or thighs. Personally, I prefer roasting a whole chicken. The meat cooks more evenly, and the skin tends to get crispier. It's just a more satisfying experience for me. But if you're cooking for a smaller group or crave specific cuts, roasting individual pieces is a fantastic option.
2.2 Fresh vs. Frozen: A Matter of Quality
Fresh chicken is generally believed to have better flavor and texture than frozen chicken. However, frozen chicken is a perfectly acceptable choice if that's what you have on hand. Just make sure to thaw it completely before roasting. It's all about using what you have and making the best of it.
2.3 Size and Weight: Adjusting the Timing
The size and weight of your chicken directly impact the cooking time. A larger chicken needs more time than a smaller one. Most recipes assume a 3-4 lb (1.4-1.8 kg) chicken. If your chicken is bigger or smaller, adjust the cooking time accordingly. We'll explore those adjustments in detail later.
2.4 Beyond the Scale: Looking for the Perfect Candidate
Take a moment to examine your chicken. The skin should be smooth and shiny, with a healthy, plump appearance. The meat should feel firm and springy to the touch. Avoid any chicken that has a foul odor, discoloration, or feels slimy. You're looking for a bird that exudes quality, a sign of a delicious roast to come.
Part 3: Getting Ready: Prepping Your Chicken for Roasting
You've chosen your perfect bird, now it's time to get ready for the roasting process. Proper preparation is crucial for a delicious, juicy outcome.
3.1 Patting it Dry: The Key to crispy skin
The first step is to pat your chicken dry with paper towels. This crucial step ensures that the skin crisps up beautifully during roasting. Damp skin will steam instead of crisp, leading to a soggy, disappointing result. So, don't skip this step!
3.2 Salt, Pepper, and the Symphony of Spices
Salt and pepper are the foundation of any good roast chicken seasoning. I like to generously season the chicken inside and out, letting those flavors penetrate the meat. You can also experiment with other herbs and spices like thyme, rosemary, garlic, or paprika. My personal favorite is a simple blend of salt, pepper, and dried herbs. It's a classic combination that never fails to please.
3.3 Trussing: Tying it Together for Even Cooking
Trussing the chicken is often skipped, but I highly recommend it. It involves tying the chicken legs and wings together using kitchen twine. This ensures even cooking, preventing the wings from burning while allowing the heat to penetrate the entire bird more evenly. It also helps the chicken maintain a more compact shape, which is aesthetically pleasing and makes carving easier.
If you're unsure about trussing, there are plenty of excellent online tutorials available. It's not as complicated as it seems. Basically, you tie the legs together and then tie the wings to the legs, securing the entire bird.
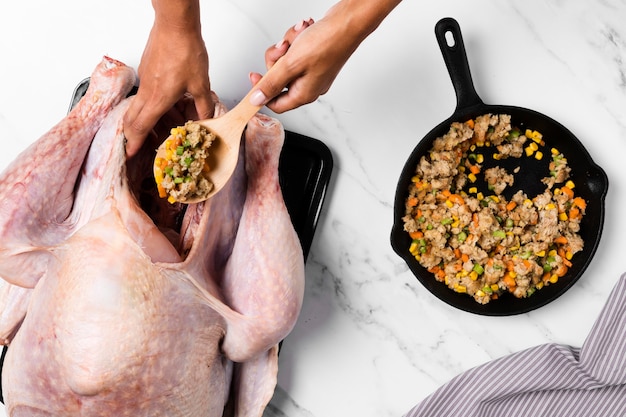
3.4 Stuffing: A Flavorful Option
Stuffing your chicken is optional, but it can add an extra dimension of flavor. I prefer a simple breadcrumb stuffing, made with onions, celery, and herbs. But feel free to experiment with your favorite stuffing recipes. If you decide to stuff your chicken, ensure it cooks to an internal temperature of 165°F (74°C), just like the rest of the bird.
Part 4: The Right Tools for the Job: Choosing the Perfect roasting pan
Your chicken is prepped and ready to go. Now, it's time to choose the right roasting pan. The right pan can make a significant difference in the final result, ensuring even cooking and that perfect crispy skin.
4.1 Size Matters: Finding the Right Fit
Select a roasting pan that's large enough to comfortably accommodate your chicken with some space around it. You don't want the chicken crammed in, as this can hinder airflow and prevent the skin from crisping up properly.
4.2 Material Matters: Exploring Your Options
Roasting pans come in various materials like stainless steel, cast iron, and ceramic. I prefer stainless steel because it heats up quickly and distributes heat evenly. Cast iron is another great option, though it's heavier and might require more effort to clean. Ceramic pans offer a lighter, more non-stick option for those who prefer it.
4.3 The Rack Advantage: Elevating Your Chicken
A roasting rack is essential for achieving that beautiful crispy skin. It lifts the chicken off the bottom of the pan, allowing air to circulate around it and preventing it from steaming. This ensures even cooking on all sides. If you don't have a roasting rack, improvise by placing the chicken on a bed of vegetables like onions, carrots, and celery. This elevates the chicken and adds flavor to your dish.
Part 5: The Countdown Begins: roasting time and Temperature
Now, let's address the big question: how long do you cook a roast chicken? The answer, my friend, is not as straightforward as you might think. The cooking time depends on the size of your chicken, the oven temperature, and the method you choose.
5.1 Oven Temperature: Finding Your Sweet Spot
Most recipes suggest roasting at 400°F (200°C). It's a good starting point, but you can adjust the temperature based on your preferences. A higher temperature leads to crispier skin, but also increases the risk of overcooking the meat. You have to find the perfect balance that suits your taste and your chicken.
5.2 General Roasting Time: A Starting Point
Here's a general guide for roasting time based on chicken weight:
| Chicken Weight | Roasting Time |
|---|---|
| 3-4 lbs | 1 hour 30 minutes to 1 hour 45 minutes |
| 4-5 lbs | 1 hour 45 minutes to 2 hours |
| 5-6 lbs | 2 hours to 2 hours 15 minutes |
Remember, these are just starting points. The actual cooking time can vary depending on your oven and the specific size and thickness of your chicken.
5.3 The Meat Thermometer: Your Trusty Guide
While the general roasting times are helpful, the most reliable way to determine if your chicken is cooked through is to use a meat thermometer. The internal temperature of the chicken should reach 165°F (74°C) in the thickest part of the thigh, ensuring that the entire bird is cooked to a safe temperature.
5.4 Signs of Doneness: A Visual Inspection
Here are some additional visual clues that your chicken is cooked through:
- The juices run clear when you pierce the chicken with a knife.
- The skin is golden brown and crispy, indicating that it has been cooked properly.
- The legs move freely, indicating that the meat is cooked through.
Part 6: Finishing Touches: Elevating Your Roast Chicken
Your chicken is cooked, but we're not done yet! A few final touches can make a significant difference in the final outcome.
6.1 Basting: Keeping it Moist and Delicious
Basting your chicken during roasting helps to keep the meat moist and the skin beautifully crisp. Use a spoon to scoop up the drippings from the pan and pour them over the chicken every 30 minutes or so. This will create a delicious, flavorful crust and ensure a juicy, tender bird.
6.2 Resting: Giving It Time to Shine
Remember what we discussed earlier? Resting is essential for a truly juicy roast chicken. Let your chicken rest for 10-15 minutes before carving. This allows the juices to redistribute throughout the meat, resulting in a more flavorful and tender final product. It's a simple step that makes a big difference.
Part 7: Serving Up Perfection: Enjoying Your Roast Chicken
Congratulations! You've done it. You've cooked the perfect roast chicken. Now it's time to enjoy the fruits of your labor.
7.1 Carving: A Masterful Presentation
Use a sharp knife to carve the chicken into serving portions. Start by removing the legs and thighs, then carefully carve the breast into slices. Present your masterpiece beautifully on a platter, with the crispy skin glistening in the light. It's a sight to behold and a feast for the senses.
7.2 Accompaniments: Completing the Culinary Symphony
Roast chicken pairs beautifully with a variety of accompaniments. Some of my favorites include:
- Roasted vegetables, like potatoes, carrots, and Brussels sprouts, enhance the flavor of the chicken and add a colorful touch to your plate.
- Gravy, made with the drippings from the pan, adds a rich, savory flavor that elevates the entire dish. It's a classic pairing that everyone loves.
- A simple salad, like a green salad with a light vinaigrette, provides a refreshing contrast to the richness of the chicken.
- Bread, to soak up the delicious juices and gravy, is a perfect accompaniment for any roast chicken dinner.
- Cranberry sauce, with its tart and sweet flavors, provides a delightful balance to the savory richness of the chicken.
7.3 Leftovers: Putting Them to Good Use
If you have any leftovers, store them in the refrigerator for up to 4 days. leftover roast chicken is a versatile ingredient. It can be used in salads, sandwiches, or soups. It's a delicious way to stretch your meal and enjoy the flavors of your roast chicken for days to come.
Part 8: Unraveling the Mysteries: FAQs
Here are some frequently asked questions about roasting chicken, to address any lingering doubts and ensure you're fully equipped for culinary success.
8.1 Can I roast a chicken in a slow cooker?
Yes, you can roast a chicken in a slow cooker. However, it won't achieve that crispy skin you get from oven roasting. Slow cookers are fantastic for creating tender, flavorful chicken, but they lack the high heat needed for that satisfying crunch.
8.2 Can I freeze a roast chicken?
Yes, you can freeze a roast chicken. Just wrap it tightly in plastic wrap or aluminum foil before freezing. To defrost, place it in the refrigerator for 24 hours. This way, you can enjoy a delicious roast chicken whenever you crave it.
8.3 What can I do with the leftover bones?
Those leftover bones are a treasure trove of flavor! Use them to make a delicious chicken stock. Simply add the bones to a pot of water and simmer for a few hours. The resulting stock is a perfect base for soups, stews, and sauces, infusing your dishes with the essence of your roast chicken.
8.4 How long can I keep a roasted chicken in the refrigerator?
A roasted chicken can be stored in the refrigerator for up to 4 days. Make sure to store it properly, wrapped tightly to prevent drying out. You can enjoy those delicious leftovers for a few days, stretching the enjoyment of your culinary masterpiece.
8.5 Can I use a brine for my roast chicken?
Yes, brining your chicken can help it stay more moist during roasting. It's not essential, but it can enhance the flavor and tenderness of the meat. If you choose to brine, do so for at least 4 hours, but ideally overnight. Brining adds a subtle saltiness and helps retain moisture, ensuring a truly succulent roast chicken.
Part 9: The Journey Continues: A culinary adventure
There you have it! Armed with this knowledge, you have everything you need to cook the perfect roast chicken, the kind that will have everyone begging for seconds. Remember, it's all about understanding the science, choosing the right chicken, preparing it properly, and cooking it for the perfect amount of time. With a little practice, you'll be turning out delicious, juicy roast chickens every time.
So, next time you're looking for a comforting, flavorful meal, embrace the challenge and give roast chicken a try. It's a dish that will impress your family and friends and become a cherished part of your culinary repertoire. Enjoy the journey and happy roasting!
Everyone is watching

Corn on the Cob: The Ultimate Guide to Perfectly Cooked Ears
Healthy MealsAh, corn on the cob. Just the name evokes images of sunny days, barbecues, and that sweet, juicy flavour that ...

Perfect Pork Roast Oven Cooking Time: A Guide to Delicious Results
Healthy MealsThere's something truly satisfying about a perfectly roasted pork. The aroma alone is enough to make your mout...

Ham Cooking Time: How Long to Bake, Smoke, or Boil a Delicious Ham
Healthy MealsAh, ham. It's a classic, isn't it? A real crowd-pleaser, especially around holidays. And when done right, it'...

Scallops: The Ultimate Guide to Perfect Cooking
Healthy MealsAh, scallops. Those delicate, sweet, and utterly delicious morsels of the sea. They hold a special place in my...

Spaghetti Squash: The Ultimate Guide to Cooking and Serving
Healthy MealsRemember that time you saw spaghetti squash at the supermarket, looking all bumpy and strange, and thought, "W...