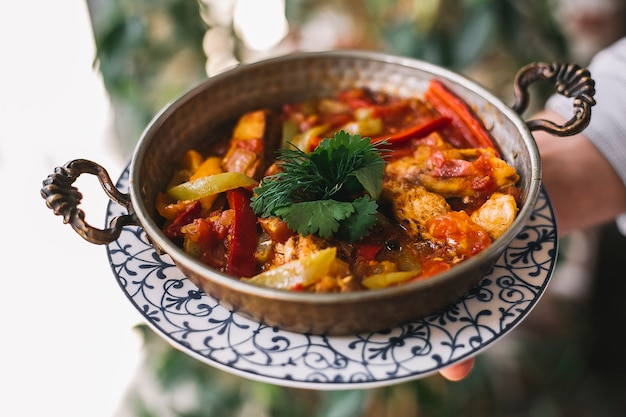
Gumbo, oh gumbo! It’s a dish that evokes warm memories of family gatherings, spicy aromas filling the air, and hearty bowls of soul-satisfying goodness. But let’s be honest, the foundation of any truly amazing gumbo is the roux. It’s not just about thickening the broth; it’s about building layers of flavour, creating a rich tapestry of taste that makes your taste buds sing.
Now, I’ve been making gumbo for longer than I care to admit. I’ve tried every method under the sun, from the traditional, slow-cooked roux that requires patience and dedication, to those quick-and-easy shortcuts that seem too good to be true. And trust me, there’s a real art to getting it right. But don’t fret, I’m here to guide you through the process, sharing my secrets and tips, the little tricks I’ve picked up along the way, so you can create a roux that will make your gumbo truly exceptional.
(Part 1) The Heart of the Matter: Understanding the Roux
Before we dive into the nitty-gritty, let's talk about what a roux actually is. It’s the fundamental building block of gumbo, a simple mixture of fat and flour cooked together. But it’s not as simple as it sounds, my friend. The magic lies in the cooking process, how you nurture that mixture over time, coaxing out a symphony of flavour.
A Roux is More Than Just Thickening
Think of the roux as the backbone of your gumbo, the foundation upon which you build your culinary masterpiece. It’s not just about thickening the broth, though that’s certainly a crucial aspect. A well-made roux adds a depth of flavour, a richness that’s simply impossible to achieve with a simple flour-and-water slurry. The longer you cook it, the darker it gets, and the more complex and intense those flavours become.
It’s like a slow-burning fire, releasing subtle aromas and deepening the taste as time goes by. A good roux gives your gumbo that unmistakable, vibrant colour, from a gentle golden hue to a deep, almost black mahogany. It’s a visual cue that tells everyone, "This is a gumbo made with love and patience."
(Part 2) Gather Your Tools and Ingredients: A Roux-Making Arsenal
Okay, now that you’re excited about the potential of a good roux, let’s gather our tools and ingredients. It’s not a complicated operation, but there are a few key players that will make all the difference.
1. The Pot of Power: Choosing the Right Vessel
You’ll need a pot, and not just any old pot will do. You want something sturdy, something that can handle the heat without buckling under pressure. A cast iron pot is a classic choice, radiating even heat and adding a touch of rustic charm to your kitchen. If you’re a stainless steel enthusiast, opt for a pot with a thick bottom and high sides, ensuring even heat distribution and plenty of room for your roux to dance.
2. The Whisk Whisperer: A Vital Tool
Next up, the trusty whisk. This is your partner in crime, the one who will tirelessly stir, prevent lumps, and ensure that your roux cooks evenly. Get a whisk that’s long enough to reach the bottom of your pot, with sturdy wires that won’t bend under the strain. You’ll be doing a lot of whisking, so make sure it’s comfortable in your hand!
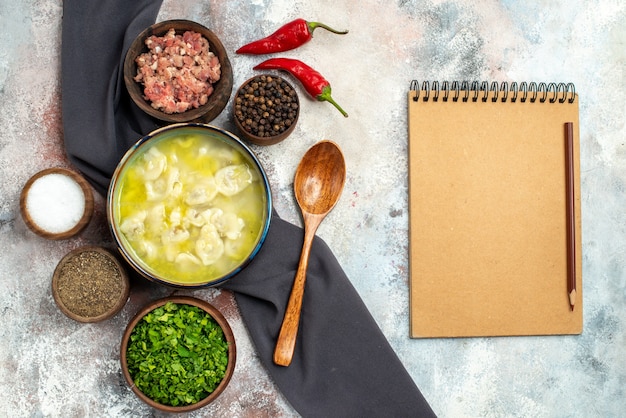
3. The Magic Duo: Fat and Flour
Now, the stars of the show: the fat and the flour. These are the ingredients that, when combined and nurtured, will create the foundation of your gumbo.
- Fat: You’ve got a few options here. For a traditional roux, lard or vegetable shortening are the classic choices, known for their high smoke points, meaning they can withstand the heat without burning. If you're looking for a lighter option, go for a refined oil like peanut oil or canola oil.
- Flour: All-purpose flour is the workhorse, readily available and perfect for making a roux. But if you’re feeling adventurous, you can experiment with a blend of all-purpose flour and a touch of cornstarch. This will give your gumbo a smoother, silkier texture.
Remember, the ratio of fat to flour is crucial. A classic ratio is 1:1, but feel free to adjust it to your preference. If you want a thinner roux, use a little more fat. If you prefer a thicker roux, increase the flour slightly. It's all about finding that perfect balance that suits your taste buds.
(Part 3) The Roux-Making Ritual: A Step-by-Step Journey
Okay, here we are, at the heart of the matter. This is where the real magic happens. Follow these steps carefully, and you'll be well on your way to crafting the perfect roux.
1. Melting the Fat: A Gentle Start
Start by adding your chosen fat to your pot. Heat it over medium heat, allowing it to melt completely and become gently shimmering. You don’t want to rush the process. The fat needs to be hot enough to incorporate the flour smoothly, but not so hot that it starts to smoke.
2. Whisking in the Flour: A Steady Hand
Once the fat is melted and shimmering, slowly whisk in the flour. This is where your whisk skills are put to the test. You'll need a steady hand and a firm wrist, ensuring that the flour is fully incorporated into the fat. There should be no lumps or clumps, just a smooth, creamy mixture.
3. The Cook and Stir Symphony: A Transformation in Progress
Now, the waiting game begins. You need to cook the roux over medium heat, whisking constantly, for at least 30 minutes, but often longer. This is where your patience and dedication will be rewarded. As you stir, the mixture will undergo a remarkable transformation. The colour will deepen, shifting from a pale blonde to a golden brown, then a rich mahogany, and finally, to a deep, almost black hue.
4. Embrace the Patience: The Roux is Not a Sprint
Patience, my friend, is key. Don’t be tempted to rush the process. You’re not just cooking the roux; you’re developing its soul, its flavour, its character. If you cook it too fast, it might burn. And a burnt roux is a disaster waiting to happen, leaving a bitter aftertaste that will ruin your entire gumbo. Keep the heat low and steady, and let the roux transform at its own pace.
5. The "Smell" Test: A Sensory Guide
As you stir and watch the colour change, trust your senses. You'll start to smell a nutty, almost toasted aroma emanating from the pot. This is a sign that you're approaching the perfect depth of flavour. You might even hear a slight popping or crackling sound, which is perfectly normal.
If you’re still unsure, take a tiny taste. It should be slightly nutty and slightly bitter, a hint of complexity that suggests you’re on the right track.
6. The Cooling Down Period: A Crucial Step
Once you're satisfied with the colour and aroma, remove the pot from the heat. But don’t be too eager to add it to your gumbo just yet. Let it cool down for a few minutes. This will help it thicken up and prevent lumps when you introduce it to your simmering broth.
(Part 4) The Roux Colour Chart: A Guide to Choosing the Right Tone
So, there you are, stirring away, watching the colour of your roux deepen. You’re probably wondering, "How dark should it be?" It's a common question, and the answer, my friend, lies in the style of gumbo you’re creating.
Here's a handy colour chart to guide you:
| Roux Colour | Gumbo Style | Characteristics |
|---|---|---|
| Light Blonde | Seafood Gumbo | Mild flavour, lighter in colour, ideal for delicate seafood dishes. |
| Golden Brown | Chicken Gumbo | Medium flavour, well-rounded, perfect for chicken and sausage gumbo. |
| Mahogany | Okra Gumbo | Deep flavour, robust, enhances the flavour of okra. |
| Dark Brown/Almost Black | Beef Gumbo | Intense flavour, bold, perfect for rich beef dishes. |
Remember, this is just a guideline. The final decision comes down to your personal preference. If you enjoy a more subtle flavour, a lighter roux will be your best bet. If you crave a bold, rich taste, embrace a darker roux.
(Part 5) Common Roux Mistakes: Avoiding the Pitfalls
We’ve all been there, haven’t we? We’ve all made our fair share of culinary blunders. And the roux is no exception. But don’t fret, I’m here to help you avoid those common mistakes, those pitfalls that can derail your gumbo dreams.
1. The Burning Threat: Avoiding a Roux-Disaster
The most common mistake is burning the roux. It's easy to get distracted, especially when you're stirring for what feels like an eternity. The key is to keep the heat low and maintain constant, even stirring. If you see any signs of smoking or browning too quickly, immediately lower the heat. You can always add a little more fat if the mixture starts to get too thick.
2. The Undercooked Roux: A Symphony of Undeveloped Flavour
On the other hand, don’t be afraid to cook the roux long enough. Many people think they need to rush the process, but the beauty of a slow-cooked roux lies in its fully developed flavour. Remember, the longer you cook it, the deeper the flavour and colour. Don’t stop stirring until you’re satisfied with the colour and aroma, until you sense that the flavour is truly blossoming.
3. Lumps of Despair: A Smooth Roux is a Happy Roux
Nobody wants lumps in their roux, do they? They can make your gumbo grainy and unpleasant, a culinary faux pas. The secret is to whisk constantly, ensuring the flour is fully incorporated into the fat, creating a smooth, creamy mixture. If you do get lumps, try pressing them against the bottom of the pot with a spatula to break them down. You can even strain the roux if you're really determined to eliminate all those stubborn lumps.
(Part 6) Expanding Your Horizons: Roux Variations and Beyond
Who says you have to stick to the traditional fat-and-flour roux? There’s a whole world of roux variations waiting to be explored, each with its own unique flavour profile. Get creative, experiment, and discover the roux that sings to your soul.
1. The Quick Fix: Roux for the Impatient
If you’re short on time, a "quick" roux might be your best bet. This method involves cooking the roux over high heat for a shorter period. It’s not as flavourful as the traditional method, but it’s a good option when time is of the essence. Just be incredibly careful not to burn it.
2. The "No-Cook" Miracle: Roux in a Flash
Yes, you heard that right! There’s even a "no-cook" roux, a culinary shortcut that’s ideal for the busiest of cooks. It simply involves whisking together cold fat and flour. It’s super quick and easy, but it doesn’t have the same depth of flavour as the traditional method. It’s best used for lighter, quicker gumbo recipes.
3. The Vegan Revolution: Roux for Every Lifestyle
For those following a vegan lifestyle, there’s no need to miss out on the joys of a delicious roux. Simply replace the lard or shortening with vegan butter or oil. It’s a flavourful alternative that’s kind to both your taste buds and your ethical convictions.
(Part 7) The Final Touch: Adding the Roux to Your Gumbo
Okay, you've created your perfect roux, and you’re ready to bring it all together, to infuse your gumbo with its deliciousness. But how do you do it without ruining all your hard work?
1. A Gentle Introduction: Slow and Steady Wins the Race
The most important thing is to add the roux gradually to the simmering broth. You want to whisk it in slowly, ensuring it's fully incorporated and doesn't form any lumps. Don’t dump it all in at once. That's a recipe for disaster!
2. Simmering Time: A Symphony of Flavours
Once the roux is added, let your gumbo simmer for at least 30 minutes. This allows the flavours to blend and meld beautifully, creating a harmonious symphony of taste.
3. Finding the Perfect Balance: Adjusting the Consistency
As your gumbo simmers, keep an eye on the consistency. If it’s too thick, add a little more broth. If it’s too thin, add a little more roux. It’s all about finding that perfect balance, that ideal texture that feels just right in your mouth.
(Part 8) FAQs: Your Roux Questions Answered
I know you’re probably buzzing with questions, ready to delve deeper into the world of roux. So, let’s address those common queries:
1. Can I Make the Roux Ahead of Time?
Absolutely! You can make the roux ahead of time and store it in the refrigerator for up to a week. Just let it cool completely before storing it in an airtight container. To use it, simply reheat it over low heat before adding it to your gumbo. You can even freeze the roux for up to 3 months. Just defrost it in the refrigerator overnight before using it.
2. How Much Roux Should I Use?
The amount of roux you need will depend on the size of your pot and the desired thickness of your gumbo. A general rule of thumb is to use about 1/2 cup of roux for every 6 cups of broth. But feel free to adjust it to your liking. It's your gumbo, so make it your own!
3. Can I Use a Roux in Other Dishes?
Yes, absolutely! A good roux is incredibly versatile. It can be used to thicken sauces, soups, stews, and even gravy. It’s a real kitchen staple, adding depth and richness to a variety of dishes.
4. Can I Substitute the Fat?
If you're concerned about the fat content, you can use a combination of butter and oil. But remember, the higher the smoke point, the better. You don’t want your roux to burn. If you're using butter, be sure to cook it over low heat to prevent it from burning.
5. What Should I Do with Leftover Roux?
Never throw away leftover roux! It's a culinary treasure! Store it in an airtight container in the refrigerator for up to a week. You can use it to make a quick and easy gumbo, or add it to soups, stews, or sauces to boost the flavour. It’s a versatile ingredient that will add depth and richness to any dish.
There you have it, my friend. A complete guide to making the perfect gumbo roux. Armed with this knowledge and a bit of culinary courage, you’re ready to create a roux that will elevate your gumbo to new heights. Remember, it’s all about taking your time, embracing the process, and letting the roux reveal its magic. Happy gumbo-making!
Everyone is watching

Corn on the Cob: The Ultimate Guide to Perfectly Cooked Ears
Healthy MealsAh, corn on the cob. Just the name evokes images of sunny days, barbecues, and that sweet, juicy flavour that ...

Perfect Pork Roast Oven Cooking Time: A Guide to Delicious Results
Healthy MealsThere's something truly satisfying about a perfectly roasted pork. The aroma alone is enough to make your mout...

Ham Cooking Time: How Long to Bake, Smoke, or Boil a Delicious Ham
Healthy MealsAh, ham. It's a classic, isn't it? A real crowd-pleaser, especially around holidays. And when done right, it'...

Scallops: The Ultimate Guide to Perfect Cooking
Healthy MealsAh, scallops. Those delicate, sweet, and utterly delicious morsels of the sea. They hold a special place in my...

Spaghetti Squash: The Ultimate Guide to Cooking and Serving
Healthy MealsRemember that time you saw spaghetti squash at the supermarket, looking all bumpy and strange, and thought, "W...