As a self-proclaimed egg enthusiast, I've spent countless hours in the kitchen perfecting my egg-cooking skills. There's something deeply satisfying about achieving that perfect yolk—whether it's the silky smooth texture of a runny yolk in a poached egg or the firm, golden perfection of a hard-boiled egg. But let's be honest, cooking eggs can be a bit of a culinary gamble. One minute you're aiming for a soft-boiled egg, the next you're staring at a rubbery mess. So, I've decided to share my hard-earned wisdom and guide you through the world of egg cooking, demystifying the art of achieving the perfect egg, every single time.
Part 1: Understanding Egg Doneness
The key to cooking the perfect egg lies in understanding the different stages of doneness. It's all about knowing how long to cook an egg to achieve your desired texture. It's not just about the cooking time though; the texture of the yolk and white is also influenced by the freshness of the egg and the cooking method.
1.1. The Science Behind Egg Cooking
Eggs are essentially a protein structure held together by a thin membrane. The white, or albumen, is primarily composed of water and protein, while the yolk is rich in fat, protein, and other nutrients. When heat is applied, the protein molecules in both the white and yolk start to unravel and bind together, forming a solid structure. The longer you cook the egg, the more proteins solidify, leading to a firmer texture.
This process is affected by the temperature of the cooking water or oil. A lower temperature allows the proteins to solidify more gradually, resulting in a smoother, creamier texture. A higher temperature causes the proteins to solidify more rapidly, leading to a firmer, sometimes rubbery texture.
1.2. Different Egg Doneness Levels
Here's a breakdown of the different levels of egg doneness, from the most runny to the firmest, along with examples of when each level might be preferred:
- Soft-boiled: The white is set, but the yolk remains runny and creamy. This is perfect for a classic breakfast egg, dipping into toast soldiers, or for making deviled eggs where a creamy, spreadable texture is desired.
- Medium-boiled: The white is fully set, and the yolk is still soft but slightly firm, with a slightly thicker texture than a soft-boiled egg. This is a good option for those who like a runny yolk with a bit more structure, or for adding to salads where a little more firmness is desired.
- Hard-boiled: Both the white and yolk are fully set, resulting in a firm egg. This is ideal for making egg salad, deviled eggs, or for adding to salads where a firmer texture is preferred. It's also the ideal texture for slicing for sandwiches or salads.
It's important to note that these are just general guidelines, and personal preferences play a big role in determining the ideal egg doneness. Some people prefer a slightly runny yolk, while others enjoy a firm yolk. Experimenting is key to finding what you like best!
Part 2: The Importance of fresh eggs
Before we delve into the specific cooking times, it's crucial to understand the importance of using fresh eggs. Fresh eggs are crucial for achieving the perfect texture, especially when it comes to soft-boiled eggs.
2.1. The Freshness Factor
Fresh eggs have a thicker white, which means it takes longer for the proteins to solidify. This results in a smoother, creamier texture. As eggs age, the white becomes thinner and more watery, and the yolk also becomes more watery. This can lead to a rubbery white and a runny yolk, especially when cooking for a soft-boiled consistency.
The age of the egg also affects the color of the yolk. Fresh eggs have a bright, vibrant yellow yolk, while older eggs have a paler, less vibrant yolk. This is because the yolk loses its color as it ages.
2.2. How to Tell if an Egg is Fresh
There are a few simple ways to check if an egg is fresh:
- The Float Test: Place the egg in a bowl of cold water. If the egg sinks to the bottom and lies flat, it's very fresh. If it sits upright, it's a bit older, and if it floats, it's definitely past its prime. The air sac inside the egg increases in size as the egg ages, causing it to float.
- The Smell Test: Fresh eggs have a mild, pleasant aroma. If you notice a strong, sulfurous odor, the egg is likely spoiled. This odor is a sign of bacterial growth inside the egg.
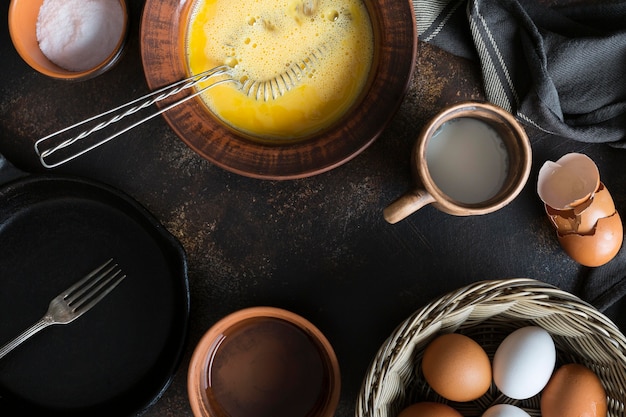
- The Break Test: Crack an egg into a bowl. A fresh egg will have a thick, firm white and a round, yellow yolk. An older egg will have a thinner white and a flatter yolk. The yolk of an older egg may also be more watery and may break easily.
Remember, using fresh eggs will make a world of difference in the texture and flavor of your cooked eggs. So, always check your eggs before you start cooking, and use the freshest ones you can find!
Part 3: The Different Egg-Cooking Methods
Now that we've discussed the basics, let's dive into the different methods for cooking eggs. Each method has its unique characteristics and requires slightly different timing.
3.1. boiling eggs
Boiling eggs is the most classic method, and it's incredibly versatile. You can use boiled eggs for everything from breakfast to salads to deviled eggs. Boiling is a simple, reliable method, perfect for creating a wide range of dishes.
3.2. poaching eggs
Poaching is a slightly more delicate method, but the results are truly exquisite. poached eggs have a wonderfully soft, silky texture, and they're perfect for adding a touch of elegance to any meal. Poaching is a great way to create a "restaurant-quality" egg that's perfect for serving over avocado toast, salads, or in a hearty breakfast bowl.
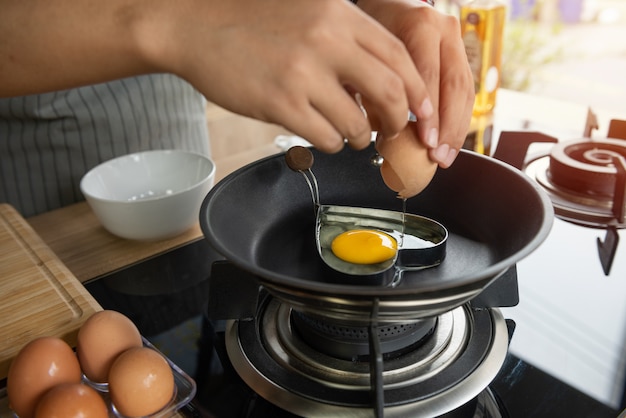
3.3. frying eggs
Frying eggs is the quickest and easiest method. It's perfect for a quick breakfast or for adding a flavorful topping to your favorite dishes. The crispy edges of a fried egg add a satisfying crunch to any meal.
3.4. Baking Eggs
Baking eggs is a less common method, but it can be surprisingly effective. It's ideal for cooking a large batch of eggs, such as for a brunch buffet or for making a quiche. Baking eggs in a muffin tin creates perfectly portioned eggs that are ideal for individual servings.
Part 4: The Ultimate Guide to Boiling the Perfect Egg
Boiling eggs is a staple in many households, and for good reason. It's a simple, reliable method for cooking eggs, and it's perfect for creating a wide range of dishes.
4.1. The Essential Equipment
You don't need much to boil eggs, but there are a few essential items that will make the process easier:
- A Large Pot: Ensure your pot is large enough to hold all the eggs comfortably without overcrowding. This prevents the eggs from bumping against each other and cracking.
- A Slotted Spoon: This will help you safely and easily remove the eggs from the boiling water. A slotted spoon allows the water to drain away, making it easier to handle the hot eggs.
- A Timer: Precise timing is crucial for achieving the perfect egg doneness, so a timer is essential. A timer ensures you don't overcook the eggs, which can lead to a rubbery texture.
- Cold Water: You'll need a bowl of ice water to quickly cool the eggs and prevent overcooking. Cooling the eggs immediately after cooking stops the cooking process and prevents the yolk from turning green.
4.2. The Boiling Process
Here's a step-by-step guide to boiling the perfect egg:
- Gather your ingredients: Gather your fresh eggs, a large pot, a slotted spoon, a timer, and a bowl of ice water. Make sure your eggs are at room temperature before you start cooking. This will help to prevent them from cracking in the boiling water.
- Fill the pot: Fill the pot with enough water to cover the eggs by about an inch. Bring the water to a rolling boil over high heat. The water should be boiling vigorously before you add the eggs.
- Add the eggs: Carefully add the eggs to the boiling water using a slotted spoon. It's important to gently lower the eggs into the water to avoid cracking the shells.
- Reduce the heat: Once the eggs are in the water, reduce the heat to a simmer. The water should be gently bubbling, but not vigorously boiling. The gentle simmer ensures that the eggs cook evenly without overcooking.
- Set the timer: Depending on your desired doneness, set your timer accordingly:
| Doneness | Cooking Time |
|---|---|
| Soft-boiled | 3-4 minutes |
| Medium-boiled | 6-8 minutes |
| Hard-boiled | 8-10 minutes |
- Remove the eggs: Once the timer goes off, carefully remove the eggs from the boiling water using a slotted spoon and transfer them to the bowl of ice water. This will stop the cooking process and prevent the yolk from turning green.
- Cool the eggs: Allow the eggs to cool in the ice water for at least 5 minutes. This will also make them easier to peel.
- Peel the eggs: Once the eggs are cool, carefully peel them under cold running water. This will make peeling much easier. You can also gently tap the egg on a hard surface to crack the shell before peeling.
4.3. Tips for Perfectly Boiled Eggs
Here are a few additional tips for achieving the perfect boiled egg:
- Use older eggs: If you're aiming for a hard-boiled egg, use slightly older eggs, as they will have a firmer white and a less runny yolk. Older eggs also tend to peel more easily.
- Add salt to the water: Adding a teaspoon of salt to the boiling water can help prevent the eggs from cracking. The salt helps to raise the boiling point of the water, making it less likely to cause the eggs to crack.
- Don't overcook: Overcooked eggs will have a rubbery texture. It's better to err on the side of undercooking slightly, as you can always cook them a bit longer if necessary. If you're unsure, start with a shorter cooking time and adjust as needed.
- Chill the eggs: Chill the boiled eggs in the refrigerator for at least 30 minutes before peeling. This will help make peeling easier and prevent the yolk from turning green.
Part 5: The Delicate Art of Poaching Eggs
Poaching eggs is a skill that takes a bit of practice, but the effort is well worth it. The result is a truly exquisite egg with a velvety soft yolk and a perfectly cooked white. Poaching is a great way to create a "restaurant-quality" egg that's perfect for serving over avocado toast, salads, or in a hearty breakfast bowl.
5.1. The Poaching Essentials
For successful poaching, you'll need a few essential tools:
- A Small Saucepan: Choose a saucepan that's just large enough to hold the desired amount of water for poaching. A small saucepan helps to ensure that the water boils evenly, which is important for successful poaching.
- A Slotted Spoon: This will be used to gently lower the eggs into the water and to remove them once they're cooked. A slotted spoon allows the water to drain away, making it easier to handle the hot eggs.
- A Ladle: A ladle will come in handy for gently swirling the water to create a whirlpool that helps keep the egg whites together. The whirlpool helps to prevent the egg whites from spreading too much in the water.
- White Vinegar: Adding a splash of white vinegar to the poaching water helps the egg whites coagulate more quickly and prevents them from spreading too much. The vinegar also helps to create a smoother, more even texture in the white.
5.2. The Poaching Process
Follow these steps to create perfectly poached eggs:
- Gather your ingredients: Gather your fresh eggs, a small saucepan, a slotted spoon, a ladle, and white vinegar. Make sure your eggs are at room temperature before you start poaching. This will help to prevent them from cracking in the hot water.
- Fill the saucepan: Fill the saucepan with about 2 inches of water. Bring the water to a simmer over medium heat. The water should be gently bubbling, but not vigorously boiling. A gentle simmer ensures that the eggs cook evenly without overcooking.
- Add the vinegar: Add a tablespoon of white vinegar to the simmering water. This helps the egg whites coagulate more quickly and prevents them from spreading too much. The vinegar also helps to create a smoother, more even texture in the white.
- Crack the eggs: Carefully crack each egg into a small bowl. You want to ensure that the yolk remains intact. If the yolk breaks, the egg will be more difficult to poach.
- Create a whirlpool: Gently swirl the water in the saucepan with a ladle to create a whirlpool. This helps to keep the egg whites together as you add the eggs. The whirlpool helps to prevent the egg whites from spreading too much in the water.
- Add the eggs: Carefully slide each egg into the swirling water using a slotted spoon. Make sure the yolk remains intact. Gently lower the eggs into the water to avoid breaking the yolks.
- Adjust the heat: Reduce the heat to a low simmer to prevent the water from boiling too vigorously. You want the water to be just gently bubbling. This ensures that the eggs cook evenly without overcooking.
- Cook the eggs: Cook the eggs for 3-4 minutes for a soft yolk or 4-5 minutes for a firmer yolk. The cooking time will vary depending on the size of the eggs and the desired level of doneness.
- Remove the eggs: Carefully remove the poached eggs from the water using a slotted spoon and place them on a paper towel-lined plate. Pat them dry gently. The paper towels will absorb any excess water and help to keep the eggs warm.
5.3. Tips for Perfect Poaching
Here are some helpful tips to improve your poaching skills:
- Use fresh eggs: Fresh eggs will have a thicker white, which helps to keep the egg whites together while poaching. Fresh eggs also have a more vibrant yolk color.
- Don't overcrowd the pan: Poach only one or two eggs at a time to avoid overcrowding the pan and ensure even cooking. Overcrowding the pan can cause the eggs to cook unevenly and can also make it difficult to poach the eggs properly.
- Add the eggs gently: Carefully slide the eggs into the water to avoid breaking the yolks. Gentle handling is crucial for poaching eggs successfully.
- Adjust the cooking time: The cooking time will vary depending on the size of the eggs and the desired level of doneness. Start with a shorter cooking time and adjust as needed. It's better to undercook the eggs slightly than to overcook them.
- Use a slotted spoon: A slotted spoon helps to prevent the eggs from sticking to the bottom of the pan. It also makes it easier to remove the eggs from the water without breaking them.
Part 6: Mastering the Art of Frying Eggs
Frying eggs is a quick and easy method that's perfect for breakfast or for adding a flavorful topping to your favorite dishes. It's a simple technique, but there are a few key steps that can elevate your fried egg game.
6.1. The Frying Essentials
You'll only need a few basic tools to fry eggs:
- A Non-Stick Skillet: A good quality non-stick skillet is essential for preventing the eggs from sticking and ensuring easy cleanup. A non-stick skillet will also help to prevent the eggs from sticking to the bottom and burning.
- Butter or Oil: Use a small amount of butter or oil to lubricate the skillet and prevent the eggs from sticking. The type of fat you use will affect the flavor of the eggs. Butter will add a rich, buttery flavor, while oil will provide a more neutral flavor.
- A Spatula: A spatula will be used to flip the eggs and to remove them from the skillet once they're cooked. A thin, flexible spatula is ideal for flipping eggs without breaking the yolk.
6.2. The Frying Process
Follow these steps to create perfectly fried eggs:
- Gather your ingredients: Gather your fresh eggs, a non-stick skillet, butter or oil, and a spatula. Make sure your eggs are at room temperature before you start frying. This will help to prevent them from cracking in the hot skillet.
- Heat the skillet: Place the skillet over medium heat. Add a small amount of butter or oil to the skillet, swirling it around to coat the bottom evenly. The skillet should be hot enough for the butter or oil to sizzle when you add it.
- Crack the eggs: Carefully crack each egg into a small bowl. You want to ensure that the yolk remains intact. If the yolk breaks, the egg will be more difficult to fry and the yolk may spread out too much.
- Add the eggs: Carefully slide each egg into the hot skillet. Make sure the yolk remains intact. Gently lower the eggs into the skillet to avoid breaking the yolks.
- Cook the eggs: Cook the eggs for 2-3 minutes for a runny yolk, 3-4 minutes for a slightly firm yolk, or 4-5 minutes for a firm yolk. The cooking time will vary depending on the size of the eggs and the desired level of doneness.
- Flip the eggs: If you prefer your yolks cooked, use a spatula to carefully flip the eggs after about 2-3 minutes of cooking. Make sure the yolk remains intact. If you prefer a runny yolk, you don't need to flip the eggs.
- Remove the eggs: Once the eggs are cooked to your liking, carefully remove them from the skillet using a spatula and place them on a plate.
6.3. Tips for Perfectly Fried Eggs
Here are a few tips to enhance your fried egg experience:
- Use fresh eggs: Fresh eggs will have a thicker white, which helps to keep the egg whites together while frying. Fresh eggs also have a more vibrant yolk color.
- Don't overcrowd the pan: Fry only one or two eggs at a time to avoid overcrowding the pan and ensure even cooking. Overcrowding the pan can cause the eggs to cook unevenly and can also make it difficult to fry the eggs properly.
- Heat the skillet properly: Ensure the skillet is heated to medium heat before adding the eggs. This helps to prevent the eggs from sticking to the pan. The skillet should be hot enough for the butter or oil to sizzle when you add it.
- Use butter or oil sparingly: A small amount of butter or oil is sufficient to lubricate the skillet and prevent the eggs from sticking. Too much butter or oil will make the eggs greasy.
- Flip the eggs carefully: Use a spatula to carefully flip the eggs to prevent breaking the yolk. If you prefer a runny yolk, you don't need to flip the eggs.
Part 7: The Surprising Benefits of Baking Eggs
Baking eggs is often overlooked, but it's a surprisingly effective method, especially for larger batches. It's perfect for making a quiche or for creating a beautiful presentation for a brunch buffet. Baking eggs creates a consistent texture and is a great option for serving a crowd.
7.1. The Baking Essentials
To bake eggs, you'll need a few basic tools:
- A Baking Sheet: Use a baking sheet that's large enough to hold all the eggs you plan to bake. A baking sheet allows for even cooking and is ideal for baking multiple eggs at once.
- Muffin Tins: Muffin tins are ideal for baking individual eggs. If you're baking a larger batch, you can use a baking dish. Muffin tins create perfectly portioned eggs that are ideal for individual servings.
- Butter or Oil: A small amount of butter or oil will help to prevent the eggs from sticking to the baking sheet or muffin tins. Butter or oil will help to create a non-stick surface, making it easier to remove the eggs from the pan.
7.2. The Baking Process
Follow these steps to create perfectly baked eggs:
- Preheat the oven: Preheat your oven to 350°F (175°C). Preheating the oven ensures that the eggs cook evenly and quickly.
- Grease the baking sheet or muffin tins: Gently grease the baking sheet or muffin tins with a small amount of butter or oil. This will help prevent the eggs from sticking. You can also use cooking spray for a quick and even coating.
- Crack the eggs: Carefully crack each egg into a small bowl. You want to ensure that the yolk remains intact. If the yolk breaks, the egg may spread too much in the oven.
- Add the eggs: Carefully pour the eggs into the greased baking sheet or muffin tins. Pour the eggs gently to avoid breaking the yolks.
- Bake the eggs: Bake the eggs for 15-20 minutes for a firm yolk, or for a longer time if you prefer a firmer yolk. The cooking time will vary depending on the size of the eggs and the desired level of doneness.
- Serve the eggs: Once the eggs are cooked to your liking, carefully remove them from the oven and serve immediately. The eggs will be hot and delicious!
7.3. Tips for Perfectly Baked Eggs
Here are a few tips to enhance your baked egg experience:
- Use fresh eggs: Fresh eggs will have a thicker white, which helps to keep the egg whites together while baking. Fresh eggs also have a more vibrant yolk color.
- Don't overcrowd the baking sheet: Bake only one or two eggs at a time to avoid overcrowding the baking sheet and ensure even cooking. Overcrowding the baking sheet can cause the eggs to cook unevenly.
- Grease the baking sheet: Gently grease the baking sheet with a small amount of butter or oil to prevent the eggs from sticking. You can also use cooking spray for a quick and even coating.
- Add salt and pepper: Season the eggs with salt and pepper before baking for added flavor. Salt and pepper enhance the flavor of the eggs and create a more savory dish.
- Bake for a longer time for a firmer yolk: The cooking time will vary depending on the desired level of doneness. Start with a shorter cooking time and adjust as needed. It's better to undercook the eggs slightly than to overcook them.
Part 8: FAQs
Here are some frequently asked questions about cooking the perfect egg:
8.1. What's the best way to peel a hard-boiled egg?
The trick is to cool the eggs quickly in ice water. This will help the shell to contract and separate from the white. Then, gently tap the egg on a hard surface to crack the shell and peel it under cold running water. The cold water will help to prevent the shell from sticking to the white. You can also try rolling the egg on a countertop to crack the shell before peeling.
8.2. Why does my egg yolk turn green?
The green ring around the yolk of a hard-boiled egg is caused by the iron in the yolk reacting with sulfur in the white. This reaction is more likely to occur when eggs are overcooked or cooked at too high a temperature. To prevent this, make sure you cool the eggs quickly in ice water. Cooking eggs at a lower temperature can also help to prevent the green ring.
8.3. Can you cook eggs in the microwave?
Yes, you can cook eggs in the microwave. However, it's important to note that the results will vary depending on the wattage of your microwave. It's best to use a microwave-safe container with a lid and to cook the eggs for a shorter time than you would on the stovetop. microwave cooking tends to create a less even texture and can cause the eggs to explode if not cooked properly. It's best to use other methods like boiling or frying for a more predictable and reliable outcome.
8.4. How can I tell if an egg is spoiled?
If an egg has a strong, sulfurous odor, it's likely spoiled. You can also check the freshness of an egg by placing it in a bowl of cold water. If the egg sinks to the bottom and lies flat, it's very fresh. If it sits upright, it's a bit older, and if it floats, it's definitely past its prime. If you're unsure, it's best to err on the side of caution and discard the egg.
8.5. How long can I keep eggs in the refrigerator?
Fresh eggs can be stored in the refrigerator for up to 3-4 weeks. However, it's best to use them within a week or two for the best flavor and texture. Store eggs in the coldest part of the refrigerator, and always keep them in their original carton. The carton helps to protect the eggs from absorbing odors and flavors from other foods in the refrigerator.
I hope this comprehensive guide has empowered you to cook the perfect egg, regardless of your preferred doneness. Experiment with different methods, techniques, and timing to find what works best for you. And remember, cooking eggs is a journey of discovery, so have fun with it!
Everyone is watching

Corn on the Cob: The Ultimate Guide to Perfectly Cooked Ears
Healthy MealsAh, corn on the cob. Just the name evokes images of sunny days, barbecues, and that sweet, juicy flavour that ...

Perfect Pork Roast Oven Cooking Time: A Guide to Delicious Results
Healthy MealsThere's something truly satisfying about a perfectly roasted pork. The aroma alone is enough to make your mout...

Ham Cooking Time: How Long to Bake, Smoke, or Boil a Delicious Ham
Healthy MealsAh, ham. It's a classic, isn't it? A real crowd-pleaser, especially around holidays. And when done right, it'...

Scallops: The Ultimate Guide to Perfect Cooking
Healthy MealsAh, scallops. Those delicate, sweet, and utterly delicious morsels of the sea. They hold a special place in my...

Spaghetti Squash: The Ultimate Guide to Cooking and Serving
Healthy MealsRemember that time you saw spaghetti squash at the supermarket, looking all bumpy and strange, and thought, "W...