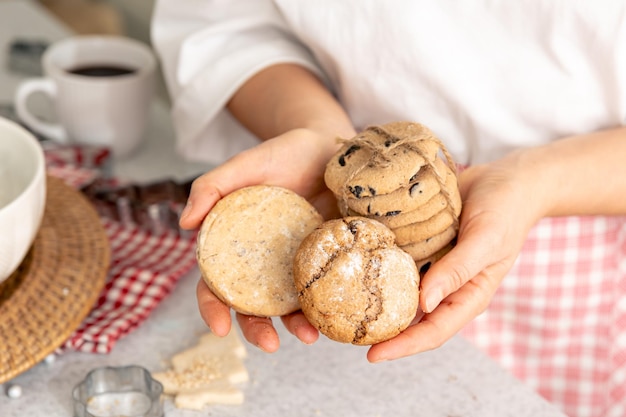
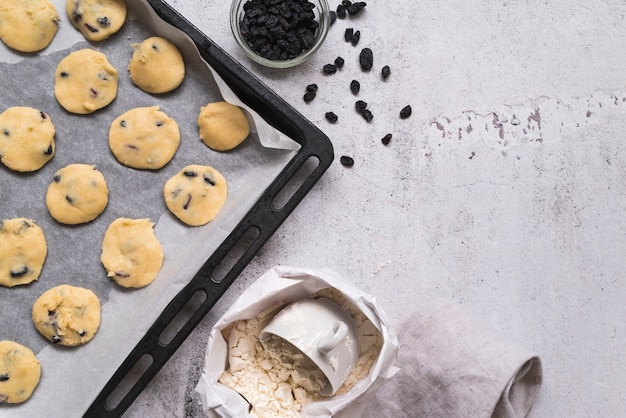
There's something magical about the scent of freshly baked cookies wafting through your home. It's a simple pleasure that brings back childhood memories and fills hearts with joy. But achieving that perfect cookie, with its golden-brown edges, soft centre, and delightful chewiness, can sometimes feel like a baking lottery. As a seasoned baker, I've had my share of cookie mishaps – burnt edges, raw centres, flat cookies that were more like crackers than treats. But over the years, I've learned a few tricks, and now I can confidently say I've cracked the code to baking the perfect cookie. So, let’s embark on this baking adventure together, and I'll share my secrets to achieving cookie perfection.
(Part 1) The Science Behind Cookie Baking

It's not just about throwing ingredients into a bowl and hoping for the best. Baking cookies is a delightful dance of science and art. We need to understand the ingredients, their interplay, and how they respond to heat. It's about knowing why things happen the way they do, so we can control the outcome and achieve those delicious results we crave.
The Importance of Temperature
Think of temperature as the conductor of your cookie orchestra. It's crucial to maintain the right temperature throughout the entire process. First, your oven needs to be preheated. Not just preheated, but preheated to the exact temperature specified in your recipe. Why? Imagine your cookie dough as a shy musician waiting to perform. A cold oven is like a chilly stage, making the dough hesitant to rise and bake evenly. This can lead to a burnt exterior with a gooey centre – a performance that falls short of perfection.
The temperature of your ingredients is also a key player. Cold butter, for instance, is like a tightrope walker – it spreads less, leading to thicker, chewier cookies. Warm butter, on the other hand, is more like a playful dancer, melting quickly and resulting in flatter, crispier cookies. So, always refer to your recipe for the specific temperatures recommended for each ingredient. It's like following the conductor's cues for a harmonious baking experience.
The Role of Ingredients
Each ingredient in your cookie dough plays a unique role in creating the final masterpiece. Sugar, for example, is not just a sweetener but also a texture influencer. Granulated sugar, the most common choice, creates a soft and chewy texture, like a gentle melody. Brown sugar, with its molasses content, adds a deeper flavour and a slightly softer texture, like a richer harmony.
Flour, another essential ingredient, provides the structure, like the backbone of your cookie symphony. But too much flour can make your cookies dry and crumbly, like a disjointed tune. The type of flour also matters. All-purpose flour is a versatile choice, while cake flour, being finer and lower in protein, results in a lighter and airier cookie, like a delicate solo.
Then there’s the humble egg, acting as a binder, like the glue that holds everything together, while also adding moisture, like a refreshing note. For a richer flavour, some recipes call for egg yolks, while others use whole eggs. It's about finding the perfect blend to create a delightful taste.
(Part 2) Getting Your Baking Equipment Ready

Having the right tools is like having a well-equipped orchestra. It allows you to play the symphony of baking with precision and finesse.
Choosing the Right Baking Sheet
Don't underestimate the power of a good baking sheet. It's like the stage where your cookies perform their culinary dance. I prefer using light-coloured baking sheets, as they distribute heat more evenly, like a spotlight that illuminates all parts of the stage equally. Darker sheets, on the other hand, tend to absorb more heat, which can result in burnt cookies – a scorched performance. Also, make sure to use a baking sheet that’s not too thin, as it will warp in the oven – a wobbly stage that could affect your cookies' performance.
The Importance of Measuring Cups and Spoons
Accurately measuring your ingredients is crucial, like ensuring each musician has the right sheet of music. While you can get away with eyeballing some ingredients, it’s crucial to be precise with flour and sugar.
Use a kitchen scale whenever possible. It's like having a metronome to ensure the perfect rhythm for your baking. If you don’t have one, use measuring cups and spoons specifically designed for dry ingredients. Avoid using measuring cups or spoons that are meant for liquids, as they will hold more flour or sugar than intended, like playing a note with the wrong instrument – leading to a denser and potentially dry cookie.
The Best Mixing Tools
When mixing your dough, a stand mixer with a paddle attachment is ideal, like having a conductor who helps blend the instruments together harmoniously. But if you’re a handheld mixer enthusiast, make sure to use a mixer with enough power to adequately combine the ingredients – a conductor who can keep the orchestra in sync. Avoid overmixing, as it can lead to tough cookies – a harsh and discordant melody.
(Part 3) Mastering the Cookie Dough

Creating the perfect cookie dough is like composing the score of your baking symphony. It’s about finding the right balance of ingredients and achieving a texture that bakes beautifully.
Chill It Out
Here comes my biggest baking tip: chill your dough! It's like giving your musicians a chance to rehearse before the big performance. This step is often overlooked, but it’s crucial for achieving perfectly shaped cookies. Chilling the dough for at least 30 minutes, ideally overnight, allows the butter to firm up. This prevents spreading and ensures that your cookies maintain their shape while baking, like performers who hold their positions with precision.
Chilling also helps to develop the flavour and makes the dough easier to work with. It prevents the cookies from becoming too soft and spread out, ensuring a nice, even bake, like a performance that flows smoothly from beginning to end.
Rolling It Out
If you’re rolling out your cookie dough, make sure to use a lightly floured surface. This will prevent sticking and ensure a smooth, even rolling process, like a stage that allows the dancers to move freely. Aim for a consistent thickness, using a rolling pin to achieve the desired thickness – a conductor who sets the pace and ensures harmony among the dancers.
Using Cookie Cutters
Cookie cutters are fun and easy to use, like the stagehands who create the set for the performance. Be sure to dip the cutter in flour before cutting out shapes to prevent sticking – a smooth transition between scenes. And don't forget to gently press the dough back together to ensure you don’t end up with thin, uneven edges – a seamless flow of the performance.
Spacing It Out
When you place your cookie dough on the baking sheet, leave ample space between each cookie. This is essential for proper airflow and even baking, like ensuring there is room for each musician to play their part without bumping into each other. The cookies need space to expand and develop their texture, like performers who need room to express themselves fully. If they are too close together, they will stick and bake unevenly – a performance where the instruments clash. Use a ruler to help you maintain a consistent space, if needed – a conductor who ensures the perfect spacing between the performers.
(Part 4) Baking Time: The Crucial Factor
Now we come to the crucial part: baking time. It's the final act of our baking symphony, where everything comes together. This is where a watchful eye is essential, like a conductor who closely observes the performance. It can be tricky to determine the exact time, as it varies depending on the size and thickness of your cookies, the type of oven you have, and the specific recipe you’re using. But there are a few things you can do to ensure your cookies bake perfectly.
The Baking Sheet Test
The best way to determine if your cookies are ready is to use the baking sheet test. Gently press the centre of a cookie. If it springs back, it’s done. If it leaves an indentation, it needs more time in the oven. This test is more accurate than simply relying on the stated time in the recipe, like a conductor who listens for the right notes and tempo.
Checking the Edges
Another sign that your cookies are done is the colour of the edges. The edges should be golden brown, but the centre should still be slightly soft – a performance that's not overdone but balanced and harmonious. Over-baked cookies will be dry and crumbly, like a performance that is too loud and harsh. So, keep a close eye on the edges to avoid over-baking.
Cooling Down
After removing your cookies from the oven, let them cool on the baking sheet for a few minutes before transferring them to a wire rack. This allows them to continue baking slightly, ensuring they don’t become soggy or mushy, like performers taking a brief pause to regain their composure.
(Part 5) The Types of Cookies and Their Baking Times
Here are some common types of cookies and their typical baking times. It's like having a repertoire of different musical pieces, each with its own tempo and duration:
| Type of Cookie | Baking Time (Minutes) |
|---|---|
| Chocolate Chip Cookies | 10-12 |
| Sugar Cookies | 8-10 |
| Oatmeal Cookies | 12-15 |
| peanut butter cookies | 10-12 |
| Shortbread Cookies | 15-20 |
Remember, these are just general guidelines. Always refer to your specific recipe and check your cookies regularly for doneness using the baking sheet test – a conductor who listens carefully to each instrument.
(Part 6) baking tips and Tricks
Here are some additional tips and tricks to help you bake perfect cookies every time. It's like having a secret backstage guide for a perfect performance:
Rotating the Baking Sheet
Halfway through the baking time, rotate the baking sheet to ensure even browning. This ensures that all cookies get the same amount of heat, like a conductor who ensures all musicians are playing at the same volume.
Using a Baking Stone
If you want to achieve a crispier texture, try baking your cookies on a baking stone. A baking stone absorbs heat more evenly, resulting in more consistent results, like a stage that provides a stable platform for the dancers.
Adding Extras
Get creative with your cookie dough by adding extra ingredients. Chocolate chips, nuts, sprinkles, and dried fruit are all delicious additions to cookies, like adding different instruments and melodies to a composition. Just be sure to use high-quality ingredients, as they will affect the taste and texture of your cookies, like choosing musicians who play their instruments with skill and passion.
(Part 7) Troubleshooting Common Cookie Baking Problems
Let's face it, sometimes even the best bakers encounter baking challenges. It's like when a performance doesn't go as planned. But don't despair. Here are some solutions to common cookie baking problems:
Cookies Spreading Too Much
If your cookies are spreading too much, it could be due to using too much butter, over-mixing the dough, or not chilling it long enough. Think of it like a performance where the dancers are moving too freely. Try reducing the butter slightly, mixing the dough less, and chilling it for longer – a conductor who adjusts the tempo and encourages controlled movements.
Cookies Not Spreading Enough
If your cookies are not spreading enough, it could be because the butter was too cold or you didn't mix the dough properly. It's like a performance where the dancers are too stiff. Make sure the butter is at room temperature and that the dough is well-mixed – a conductor who encourages fluidity and ease of movement.
Cookies Being Too Dry
If your cookies are too dry, it could be because you used too much flour, over-baked them, or the oven temperature was too high. Try using less flour, reducing the baking time, or adjusting the oven temperature – a conductor who balances the different elements of the performance.
Cookies Being Too Soft
If your cookies are too soft, it could be because you didn't chill the dough long enough or you didn't bake them long enough. It's like a performance that ends too abruptly. Make sure the dough is chilled for at least 30 minutes and that the cookies are baked until the edges are golden brown – a conductor who ensures the performance has a satisfying conclusion.
(Part 8) Storing Your Cookies
Once your cookies have cooled completely, store them in an airtight container at room temperature. They will stay fresh for up to 5 days – like a performance that continues to resonate even after the curtain closes.
If you want to store your cookies for longer, you can freeze them for up to 3 months. To freeze, place the cookies in a freezer-safe bag or container. When you’re ready to eat them, thaw them at room temperature for about 30 minutes before serving – like a recording that preserves the music for future enjoyment.
(Part 9) FAQs
Here are some frequently asked questions about baking cookies – questions that many bakers have encountered, like an audience asking for an encore:
1. What is the best way to measure flour?
The best way to measure flour is to use a kitchen scale. If you don't have a scale, scoop the flour into a measuring cup and level it off with a straight edge. Avoid scooping the flour directly from the bag, as this can result in a packed cup, which will give you too much flour, like a musician playing too many notes – leading to an overwhelming sound.
2. Why are my cookies flat?
There are several reasons why cookies might be flat. One possibility is that the butter was too warm or the dough was overmixed. Another possibility is that the cookies were not chilled long enough. Make sure to use cold butter, mix the dough until just combined, and chill it for at least 30 minutes – like a conductor who ensures the dancers maintain their form.
3. Why are my cookies burning on the edges?
Cookies might burn on the edges if the oven temperature is too high or the cookies are placed too close together. Check your oven temperature with a thermometer and make sure there is ample space between the cookies on the baking sheet – a conductor who adjusts the temperature and spacing for a harmonious performance.
4. How do I know when my cookies are done?
The best way to determine if your cookies are done is to use the baking sheet test. Gently press the centre of a cookie. If it springs back, it’s done. If it leaves an indentation, it needs more time in the oven – a conductor who listens carefully for the right sound.
5. What are some tips for storing cookies?
Store your cookies in an airtight container at room temperature. They will stay fresh for up to 5 days. To store them longer, freeze them for up to 3 months. To freeze, place the cookies in a freezer-safe bag or container. When you’re ready to eat them, thaw them at room temperature for about 30 minutes before serving – like storing a musical score for future use.
Now you have all the information you need to bake perfect cookies every time. So, grab your ingredients, fire up the oven, and enjoy the sweet reward of a perfectly baked treat. Happy baking!
Everyone is watching

Corn on the Cob: The Ultimate Guide to Perfectly Cooked Ears
Healthy MealsAh, corn on the cob. Just the name evokes images of sunny days, barbecues, and that sweet, juicy flavour that ...

Perfect Pork Roast Oven Cooking Time: A Guide to Delicious Results
Healthy MealsThere's something truly satisfying about a perfectly roasted pork. The aroma alone is enough to make your mout...

Ham Cooking Time: How Long to Bake, Smoke, or Boil a Delicious Ham
Healthy MealsAh, ham. It's a classic, isn't it? A real crowd-pleaser, especially around holidays. And when done right, it'...

Scallops: The Ultimate Guide to Perfect Cooking
Healthy MealsAh, scallops. Those delicate, sweet, and utterly delicious morsels of the sea. They hold a special place in my...

Spaghetti Squash: The Ultimate Guide to Cooking and Serving
Healthy MealsRemember that time you saw spaghetti squash at the supermarket, looking all bumpy and strange, and thought, "W...
