chicken breasts – a culinary staple in kitchens worldwide. Versatile, affordable, and a fantastic source of protein, they're a go-to ingredient for countless meals. But we've all experienced those dry, rubbery chicken breasts that leave us questioning our cooking skills. It's enough to make you crave takeout! But fear not, my fellow food enthusiasts! This guide is your roadmap to achieving perfectly cooked chicken breasts, juicy and flavorful, every single time.
My recent obsession with chicken breasts has transformed my kitchen into a culinary playground. I've learned a ton, and the most important lesson is mastering the art of temperature. It's the key to unlocking the secrets of delicious chicken breasts.
(Part 1) The Golden Rule: Temperature is King

Let's start with the basics: the USDA recommends an internal temperature of 165°F (74°C) for cooked chicken. This ensures food safety and eliminates the risk of foodborne illness. However, while this guideline is essential, it doesn't guarantee a juicy, flavorful chicken breast. That's where the art comes in.
The Temperature Dance
Imagine cooking chicken breast as a dance – a delicate dance where you aim for that sweet spot. You want the chicken to be cooked through but still retain its moisture. It's all about timing and understanding how temperature impacts the chicken's texture and flavor. We'll dive deep into this throughout the guide.
The Thermometer: Your Kitchen Companion
No matter your experience level in the kitchen, a meat thermometer is an essential tool. It eliminates guesswork and gives you complete control over your cooking. A quick check with the thermometer tells you if your chicken is ready or needs a bit more time in the oven, pan, or on the grill.
(Part 2) The chicken breast anatomy: Understanding the Grain

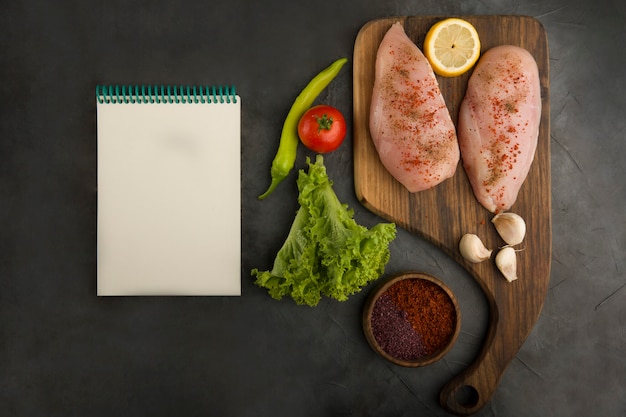
Before we dive into cooking techniques, let's delve into the anatomy of a chicken breast. Those muscle fibers, known as the grain, significantly impact how the chicken cooks. You can even see the grain clearly on the surface of the chicken breast. It's these fibers that give the chicken its texture.
Cutting Across the Grain: A Key to Tenderness
To achieve a tender and juicy chicken breast, it's crucial to cut across the grain when slicing. Think of it like slicing a loaf of bread – you want to cut perpendicular to the grain, not with it. Cutting across the grain shortens the muscle fibers, making the meat easier to chew and preventing it from becoming tough.
Why Cutting Matters: A Simple But Powerful Technique
Why is this so vital? Well, cooking a chicken breast with the grain intact causes the muscle fibers to contract during cooking, resulting in a tough and dry texture. Cutting across the grain breaks down these fibers, leading to a more tender and juicy outcome. It's a simple yet crucial tip for a flavorful chicken breast.
(Part 3) Cooking Methods: A Symphony of Flavor

Now, let's move on to the exciting part – the cooking methods! From traditional pan-frying to modern air frying, each method brings its own charm and nuances. Let's explore some of the most popular and effective ways to cook chicken breasts.
Pan-Frying: A Classic for a Reason
Pan-frying is a classic method for a reason – it's quick, easy, and produces a beautiful golden-brown crust. The key is to start with a hot pan and use a small amount of oil to prevent sticking.
- Temperature: Use medium-high heat for a sizzling pan.
- Oil: Opt for a neutral oil with a high smoke point, such as canola or vegetable oil.
- Chicken: Pat the chicken breasts dry with paper towels to prevent splattering and ensure even browning.
Baking: For a Tender and Juicy Breast
Baking is an excellent choice for a hands-off cooking method. The oven's gentle, even heat helps keep the chicken moist.
- Temperature: Preheat your oven to 375°F (190°C) for optimal heat.
- Chicken: Season the chicken breasts generously with salt, pepper, and any additional herbs or spices you love.
- Time: Bake for 20-25 minutes, or until the internal temperature reaches 165°F (74°C).
Grilling: Bringing Out the Smoky Flavor
Grilling is a fantastic way to infuse your chicken breast with a smoky flavor, while also adding beautiful grill marks.
- Temperature: Preheat your grill to medium heat for even cooking.
- Chicken: Season the chicken breasts with salt, pepper, and any other herbs or spices you desire.
- Time: Grill for 5-7 minutes per side, or until the internal temperature reaches 165°F (74°C).
Air-Frying: The Modern Kitchen Hero
Air-frying is a relatively new but highly popular cooking method. It uses hot air to cook food, resulting in a crispy exterior and a tender interior.
- Temperature: Preheat your air fryer to 400°F (200°C) for optimal air circulation.
- Chicken: Season the chicken breasts with salt, pepper, and any other herbs or spices you enjoy.
- Time: Cook for 8-10 minutes, or until the internal temperature reaches 165°F (74°C).
(Part 4) The Art of Brining: A Secret Weapon
Let's talk about a game-changer in the chicken breast cooking world: brining. Brining involves soaking chicken in a salt-water solution before cooking. This technique helps retain moisture, resulting in a tender and flavorful chicken breast.
How Brining Works: A Scientific Approach
Salt, the star ingredient in a brine, draws moisture out of the chicken. However, because the water is full of salt, it then draws the moisture back into the chicken but with extra salt added. This process helps tenderize the meat and infuse it with flavor.
Brine Recipe: A Simple Formula for Success
Here's a simple brine recipe: 1 cup of water 1/4 cup of salt 1 tablespoon of sugar
Combine all ingredients in a bowl and stir until the salt and sugar dissolve. Place the chicken breasts in a sealed container, pour the brine over them, ensuring the chicken is fully submerged. Refrigerate for at least 30 minutes, ideally for 2-4 hours.
The Benefits of Brining: A World of Deliciousness
Brining offers numerous advantages: More tender chicken: The salt helps to break down the proteins, resulting in a more tender texture. Juicier Chicken: The salt draws out moisture from the chicken, then the chicken reabsorbs the moisture, retaining the moisture. More Flavorful Chicken: The salt adds flavor to the chicken.
(Part 5) Don't Overcook It: The Timing is Crucial
Overcooking is a common mistake that can ruin a perfectly good chicken breast. Overcooked chicken becomes dry, tough, and frankly, not very enjoyable.
Signs of Overcooked Chicken: A Visual and Textural Guide
Here are some signs that your chicken might be overcooked: Color: The chicken becomes a dull, gray color, losing its vibrant hue. Texture: The chicken feels rubbery and dry to the touch, lacking the desired tenderness. Internal Temperature: The internal temperature is above 165°F (74°C), indicating it's been cooked too long.
The Importance of Time: Cooking Chicken with Precision
Timing is paramount when cooking chicken breasts. Always err on the side of caution and cook for a slightly shorter time than you think you need. It's easier to cook a chicken breast for a few more minutes than to try and salvage an overcooked one.
(Part 6) The Resting Period: The Secret to Juicy Chicken
Once your chicken is cooked through, resist the urge to slice into it immediately. Give it a few minutes to rest. This resting period allows the juices to redistribute throughout the meat, resulting in a juicier and more flavorful chicken breast.
Why Resting is Key: A Scientific Explanation
Think of it like this: when you cook chicken, the juices are pushed toward the center of the meat. As it cools, the juices are reabsorbed back into the fibers. This resting period is critical for creating a more flavorful and moist chicken breast.
How Long to Rest: A Simple Rule of Thumb
A good rule of thumb is to rest the chicken for 5-10 minutes before slicing. Cover it loosely with foil to keep it warm while it rests.
(Part 7) Serving Suggestions: Beyond the Basics
Now that you've mastered the art of cooking the perfect chicken breast, it's time to get creative with serving suggestions. Chicken breasts are incredibly versatile and can be incorporated into countless dishes. Let's explore some ideas that go beyond the usual.
Classic chicken salad: A Refreshing and Flavorful Option
A classic for a reason, chicken salad is a refreshing and flavorful option. Combine shredded chicken with mayonnaise, celery, onion, and your favorite herbs and spices. Serve on bread, crackers, or lettuce leaves for a light and satisfying meal.
Chicken Caesar Salad: A Delicious and Satisfying Classic
A delicious and satisfying salad, chicken Caesar is a favorite for good reason. Combine grilled chicken with romaine lettuce, Parmesan cheese, croutons, and a creamy Caesar dressing for a hearty and flavorful meal.
chicken tacos: A Fun and Flavorful Option
For a fun and flavorful meal, try chicken tacos. Season grilled or pan-fried chicken breasts with taco seasoning and serve in warm tortillas with your favorite toppings, such as shredded cheese, salsa, sour cream, and guacamole.
Chicken Stir-Fry: A Quick and Healthy Choice
For a quick and healthy meal, try a chicken stir-fry. Slice chicken breasts into thin strips and stir-fry them with your favorite vegetables, such as broccoli, carrots, and bell peppers. Serve over rice or noodles for a delicious and satisfying meal.
Chicken Pot Pie: A Hearty and Comforting Option
For a comforting and flavorful dish, try chicken pot pie. Combine cooked chicken breasts with vegetables, gravy, and a flaky pie crust for a satisfying and delicious meal.
(Part 8) Frequently Asked Questions: Your chicken breast faqs
I understand that questions often arise when it comes to cooking. Here are some common questions about cooking chicken breasts.
FAQs
| Question | Answer |
|---|---|
| What if my chicken breast is too thick? | If your chicken breast is too thick, you can flatten it out with a meat mallet. This will help it cook more evenly and reduce cooking time. |
| Can I cook frozen chicken breasts? | It's best to cook chicken breasts from thawed. However, if you must cook them frozen, increase the cooking time by about 50%. Be sure to check the internal temperature to ensure it reaches 165°F (74°C). |
| Can I use leftover cooked chicken? | Absolutely! Leftover cooked chicken is perfect for salads, sandwiches, or stir-fries. Just be sure to reheat it thoroughly before serving. |
| How can I tell if my chicken breast is done? | The best way to tell if your chicken breast is done is to use a meat thermometer. It should reach an internal temperature of 165°F (74°C). You can also check the chicken's color – it should be white throughout, not pink. |
| Can I use a marinade instead of a brine? | Yes, a marinade can also help to tenderize and flavor the chicken. However, it's not as effective as brining in terms of moisture retention. A marinade primarily adds flavor, while brining focuses on moisture retention and tenderization. |
(Part 9) The Chicken Breast Journey: From Beginner to Expert
As you embark on your chicken breast journey, remember that practice makes perfect. Don't be afraid to experiment with different cooking methods and flavor combinations. And always remember to check the temperature with a meat thermometer. With a little bit of practice and some knowledge, you'll be able to cook perfect, juicy chicken breasts every time. Happy cooking, everyone!
Everyone is watching

Corn on the Cob: The Ultimate Guide to Perfectly Cooked Ears
Healthy MealsAh, corn on the cob. Just the name evokes images of sunny days, barbecues, and that sweet, juicy flavour that ...

Perfect Pork Roast Oven Cooking Time: A Guide to Delicious Results
Healthy MealsThere's something truly satisfying about a perfectly roasted pork. The aroma alone is enough to make your mout...

Ham Cooking Time: How Long to Bake, Smoke, or Boil a Delicious Ham
Healthy MealsAh, ham. It's a classic, isn't it? A real crowd-pleaser, especially around holidays. And when done right, it'...

Scallops: The Ultimate Guide to Perfect Cooking
Healthy MealsAh, scallops. Those delicate, sweet, and utterly delicious morsels of the sea. They hold a special place in my...

Spaghetti Squash: The Ultimate Guide to Cooking and Serving
Healthy MealsRemember that time you saw spaghetti squash at the supermarket, looking all bumpy and strange, and thought, "W...
