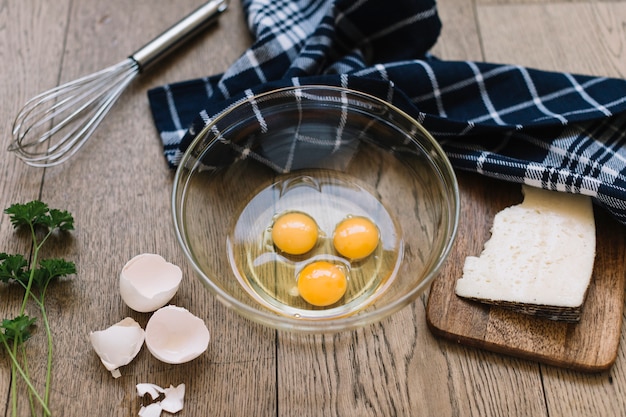
You know that feeling, right? You're craving a simple, satisfying breakfast or a light lunch, and a perfectly boiled egg is exactly what you need. But then the doubts creep in: "Will I overcook it? Will the yolk be too hard? How do I even peel it without making a mess?" I've been there! For years, I struggled with inconsistent results, frustrated by rubbery yolks and stubborn shells. But after countless trials and a bit of scientific exploration, I finally cracked the code (pun intended!).
This article is your guide to boiling the perfect egg, no matter what texture you desire. We'll explore the art and science behind this humble culinary feat, from choosing the right egg to mastering the peeling technique. Let's dive in!
Part 1: The Foundation of a perfect boiled egg

1.1. Egg Selection: The Starting Point
Choosing the right egg is like setting the stage for a successful performance. I personally gravitate towards free-range eggs; they often have a richer flavour and a vibrant yolk. But any fresh egg will do! A simple test: hold the egg up to a light. A small air sac at the top indicates freshness, while a large air sac suggests an older egg that might not boil as evenly.
1.2. Bringing the Water to a Gentle Boil
Imagine a symphony orchestra tuning up before the grand performance. That's what bringing the water to a boil is like. We need the right conditions for our eggs to cook evenly. Fill a pot with enough water to comfortably cover the eggs by at least an inch. This ensures a gentle, even heat that prevents cracking.
1.3. Adding the Eggs with Care
This is where gentle hands come in. Imagine lowering a delicate porcelain figurine into a warm bath. You don't want to drop it! Use a spoon or a slotted spoon to gently lower the eggs into the boiling water. Avoid dropping them, as this can lead to cracks.
1.4. The Timer: Your Culinary Compass
Now, the clock starts ticking. This is where the magic happens. The duration you cook the eggs for will dictate the texture you achieve, from the softest of soft boils to a firm hard-boiled masterpiece. We'll explore the timings in detail in the next section.
Part 2: Timing Guide: A Journey Through egg textures

2.1. Soft Boiled: A Delicate Delight
Imagine a creamy, runny yolk nestled within a tender, slightly set white. That's the magic of a soft boiled egg! This is perfect for a quick breakfast or a light lunch. For this texture, set your timer for 3-4 minutes.
2.2. Medium Boiled: The Versatile Choice
A medium boiled egg offers a happy medium: a slightly firmer yolk that still holds a touch of runniness, paired with a more set white. It's perfect for sandwiches, salads, or even a quick snack. Aim for 5-6 minutes on the timer.
2.3. Hard Boiled: The Classic
This is the hard-boiled egg you know and love: a firm yolk and a fully set white. It's ideal for egg salad, deviled eggs, or even as a protein boost in a salad. For this texture, cook your eggs for 8-10 minutes.
2.4. Beyond the Guide: Finding Your Perfect Timing
These times are simply starting points. Remember, the size of your eggs and the heat of your stove can influence the cooking time. Start with the shorter end of the range and adjust in 30-second increments until you find your perfect texture. It's better to undercook slightly than overcook, as you can always add a few seconds, but you can't undo overcooking.
Part 3: The Art of Peeling: A Gentle Touch

3.1. The ice bath: Cooling Down the Eggs
Imagine a chef meticulously cooling a delicate soufflé after it's been baked. The same principle applies to boiled eggs. Immediately after cooking, transfer them to a bowl of ice water. This shock-cooling stops the cooking process and makes the shells easier to peel. Let them soak for 5-10 minutes.
3.2. The Gentle Tap: Cracking the Shell
Now, for a gentle touch. Tap the bottom of the egg gently on a hard surface like a countertop. This creates a small crack, allowing you to access the shell. Be gentle; you don't want to crush the egg.
3.3. The Rolling Technique: Loosening the Shell
Think of a playful game of marbles. Roll the egg gently between your hands, applying a little pressure. As you roll, the shell will start to separate from the egg white, making peeling much easier.
3.4. The Peel: A Final Touch of Precision
Start peeling at the cracked end. Work your way around the egg, gently lifting the shell away. Use your fingers to guide the shell if it starts to stick. If you encounter stubborn spots, run the egg under cold water to loosen the shell.
Part 4: Tips and Tricks: Elevating Your Boiled Egg Game
4.1. Age Matters: Fresh vs. Older Eggs
Older eggs might need a bit more cooking time to achieve the same texture as fresh eggs. This is because the air sac inside expands with age, making the yolk runnier.
4.2. Altitude Adjustment: When Water Boils Differently
Living at a higher altitude means water boils at a lower temperature. You may need to add an extra minute or two to the cooking time to compensate for this difference.
4.3. Vinegar: The Great Debate
Some swear by adding vinegar to the boiling water to prevent cracking. While it might slightly help, I find it's not a crucial step and can sometimes make the eggs taste slightly acidic.
4.4. Using a Colander: Boiling Multiple Eggs with Ease
When boiling multiple eggs, a colander makes transferring them to the ice bath a breeze. Simply place the colander over the bowl of ice water and gently pour the eggs into it.
Part 5: The Science of Boiling: Understanding the Transformation
5.1. Heat and Protein: The Chemistry of Cooking
Boiling transforms an egg through a fascinating chemical process. The heat causes the proteins in the egg white and yolk to denature and coagulate, changing their structure and giving the egg its set texture.
5.2. Yolk and White: A Temperature Tango
The yolk coagulates at a higher temperature than the white. This explains why the yolk is runny in a soft boiled egg and firm in a hard boiled egg.
5.3. The Evolution of Texture: From Soft to Firm
As the egg cooks, the white becomes more firm, and the yolk becomes more viscous. The longer the cooking time, the more set the white and yolk become.
5.4. The Grey Ring: A Sign of Overcooking
The grey ring around the yolk of a hard-boiled egg is a result of iron in the yolk reacting with hydrogen sulphide in the egg white. Overcooking accelerates this reaction, resulting in the grey colour. To avoid it, cook for a shorter period of time.
Part 6: Beyond Breakfast: Creative Uses for Boiled Eggs
6.1. Salads: A Protein-Packed Boost
Boiled eggs are a classic addition to salads, adding protein, texture, and flavour. Try them in your favourite salad or experiment with your own unique combinations.
6.2. Sandwiches: A Creamy Delight
Boiled eggs are a delicious addition to sandwiches, adding a creamy, satisfying flavour and texture. Try a classic egg salad sandwich or get creative with your own combinations.
6.3. Deviled Eggs: A Party Favourite
Deviled eggs are a popular party snack. hard-boiled eggs are mashed, mixed with mayonnaise, mustard, and seasonings. They're easy to make and always a crowd-pleaser.
6.4. Egg Salad: A Versatile Dish
Egg salad is a simple and versatile dish that can be enjoyed as a sandwich filling, a salad topper, or a dip for crackers. Mashed hard-boiled eggs are mixed with mayonnaise, mustard, and seasonings. Add chopped vegetables, herbs, or spices for added flavour and interest.
6.5. Breakfast Bowls: A Protein Powerhouse
Boiled eggs add protein and texture to breakfast bowls. Try adding a sliced boiled egg to oatmeal, granola, or yogurt for a satisfying and nutritious start to your day.
Part 7: Troubleshooting: Fixing Common Boiled Egg Problems
7.1. Cracked Eggs: Salvaging the Situation
If an egg cracks during boiling, don't panic! Add a teaspoon of salt to the boiling water. The salt will thicken the water and reduce the likelihood of further cracking.
7.2. Rubber egg whites: Avoiding the Overcooked Texture
Overcooked egg whites become rubbery and unpleasant to eat. Cook for a shorter time, and consider adding a teaspoon of salt to the boiling water to prevent rubbery whites.
7.3. Greenish Yolk: A Sign of Overcooking
A greenish yolk indicates overcooking. The iron in the yolk reacts with hydrogen sulphide in the egg white, causing the green colour. Cook for a shorter period of time to avoid this.
7.4. Watery Yolk: Not Quite Cooked Through
A watery yolk means the egg hasn't been cooked long enough. Cook for a longer period of time to achieve your desired texture.
Part 8: FAQs: Answering Your Boiled Egg Questions
8.1. Can I Reuse the Boiling Water?
It's best to avoid reusing the water you boiled the eggs in, as it might contain bacteria from the shells. Use fresh water each time for optimal hygiene.
8.2. What if I Don't Have an Ice Bath?
If you don't have an ice bath, running cold water over the eggs until they're cool will do the trick. This will help stop the cooking process and make peeling easier.
8.3. Are There Any Tricks for Easier Peeling?
Adding a teaspoon of baking soda to the boiling water can help loosen the shell. Gently tapping the bottom of the egg and rolling it between your hands can also aid in peeling.
8.4. Can I boil eggs in the Microwave?
It's not recommended to boil eggs in the microwave. The heat is uneven, and the egg can explode.
8.5. How Long Can I Store Boiled Eggs in the Fridge?
Boiled eggs can be stored in the refrigerator for up to one week. Keep them in a sealed container or bag to prevent drying out.
Congratulations! You now have the knowledge and techniques to boil the perfect egg for any occasion. Go forth, experiment, and enjoy the deliciousness of a perfectly boiled egg!
Everyone is watching

Corn on the Cob: The Ultimate Guide to Perfectly Cooked Ears
Healthy MealsAh, corn on the cob. Just the name evokes images of sunny days, barbecues, and that sweet, juicy flavour that ...

Scallops: The Ultimate Guide to Perfect Cooking
Healthy MealsAh, scallops. Those delicate, sweet, and utterly delicious morsels of the sea. They hold a special place in my...

Spaghetti Squash: The Ultimate Guide to Cooking and Serving
Healthy MealsRemember that time you saw spaghetti squash at the supermarket, looking all bumpy and strange, and thought, "W...

Salmon Cooking Times: Perfect Guide for Every Recipe
Healthy MealsLet me tell you, cooking salmon is an art form. It's all about getting that perfect balance: juicy and tender,...

Ham Cooking Time: How Long to Bake, Smoke, or Boil a Delicious Ham
Healthy MealsAh, ham. It's a classic, isn't it? A real crowd-pleaser, especially around holidays. And when done right, it'...
