Ah, the T-bone steak. A culinary masterpiece, a symbol of indulgence, and a dish that can either make or break a dinner party. Let’s face it, there's nothing quite like biting into a perfectly cooked T-bone – the juicy, tender meat, the satisfying sizzle on the pan, the aroma that fills the kitchen… it’s a symphony of flavour that’s hard to resist. But let’s be real, achieving that perfect steak isn’t always a walk in the park. Overcooked, it’s dry and tough. Undercooked, it’s chewy and unpleasant. But fear not, my fellow steak enthusiasts, because I'm here to guide you on your journey to T-bone steak perfection.
Part 1: Selecting the Perfect Cut

The first step to a truly delicious T-bone steak is choosing the right cut. We're talking about a steak that's thick and marbled, with a good balance of fat and lean meat. You want that rich, buttery flavour of the fat to mingle with the juicy tenderness of the lean. Now, I’ve learned over the years that it's better to spend a little more for a higher quality cut. Trust me, it'll make a huge difference in the final result. It's like investing in a good pair of shoes – you'll appreciate the quality and comfort in the long run. So, here’s what to look for when selecting your T-bone:
1. Thickness
A thick cut of steak will cook more evenly and retain its moisture better. Think of it like a sponge – a thicker sponge absorbs more water. The same principle applies to your steak. You want a steak that’s at least an inch and a half thick, preferably closer to two inches. That way, you get a beautiful, even cook and a juicy, tender center. Anything less than that and you risk a dry, tough steak.
2. Marbling
Marbling, those streaks of fat running through the meat, is a steak’s secret weapon. It’s what adds flavour, juiciness, and tenderness. The more marbling, the better. Look for a steak with a good distribution of fat, where it looks almost interwoven with the lean meat. It's like the fat is holding hands with the lean, creating a harmonious symphony of flavour.
3. Colour
A good T-bone steak should have a deep red colour, like a rich ruby. If it’s a pale pink or has a greyish hue, it might not be as fresh. You want that deep red colour that tells you the steak is ready to be cooked to perfection.
Part 2: Preparing Your Steak

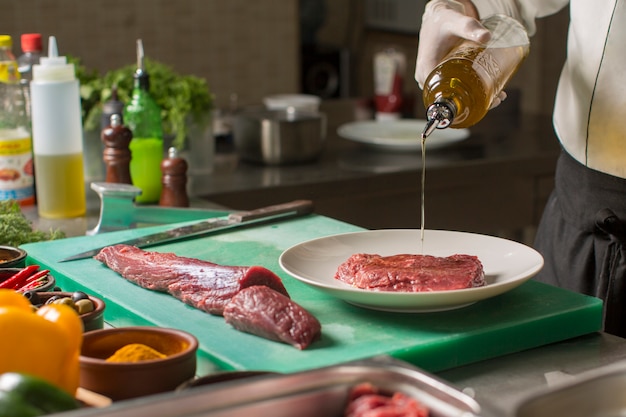
Now that you’ve got your perfect steak, it’s time to get it ready for cooking. This might seem simple, but it's a crucial step for achieving that perfect sear and flavour. So, pay attention!
1. Pat Dry
First things first, pat the steak dry with paper towels. This will help to ensure that the steak browns evenly and doesn’t steam instead of sear. Imagine trying to grill a wet burger – it just won’t get that crispy, delicious crust. The same principle applies here.
2. Salt and Pepper
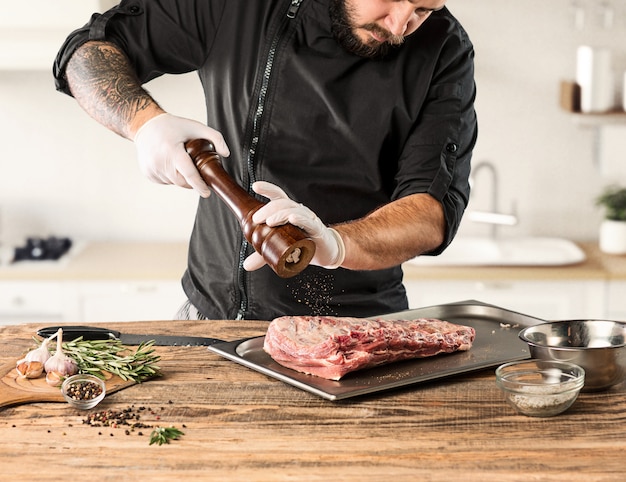
Seasoning is a matter of taste, but for a basic T-bone, I always start with a generous pinch of kosher salt and freshly ground black pepper. You can add additional seasoning like garlic powder, onion powder, or paprika, but I prefer to keep it simple. I believe the natural flavour of the steak should shine through. Think of it like a beautiful painting – sometimes, less is more.
3. Let it Rest
After seasoning, let your steak sit at room temperature for 30 minutes. This allows the meat to come up to temperature, which will result in more even cooking. Imagine cooking a frozen chicken breast – it takes much longer to cook evenly than a room temperature chicken breast. It's the same with your steak. Don't rush it! Let it rest, come up to room temperature, and then prepare for the star of the show.
Part 3: Cooking the Steak

Now for the fun part – cooking the steak! There are various methods to choose from, each with its unique charm and outcome. I’ll break down a few of the most popular methods, but remember, the key is to find what works best for you.
1. Pan-Searing
Pan-searing is a classic method that delivers a delicious crust and a juicy interior. It’s the ultimate way to highlight the steak’s natural flavours. Here’s how I do it:
- Heat a heavy-bottomed pan over high heat. You want the pan to be smoking hot. Think of it like a hot date – you want to make a bold, dramatic entrance.
- Add a tablespoon of oil to the pan, and swirl it around to coat the bottom. The oil will act as a heat conductor, ensuring that the steak cooks evenly and develops a beautiful crust.
- Carefully place the steak in the pan, and do not move it for 2-3 minutes. Resist the urge to poke or prod the steak, even if you're impatient. This allows the steak to develop a beautiful crust, like a golden shield.
- After 2-3 minutes, use tongs to flip the steak over and cook for another 2-3 minutes. The flip is like a dramatic twist in a movie – it’s exciting, unexpected, and elevates the steak’s flavour.
- Reduce the heat to medium, and cook for another 2-4 minutes per side, depending on your desired level of doneness. This is where you start to feel the magic – the steak begins to cook through, creating a juicy and flavorful interior.
For a perfectly cooked T-bone, you’ll want to aim for medium-rare, which is about 130 degrees Fahrenheit. A medium-rare steak has a juicy, pink center with a flavorful, browned crust. I prefer to use a meat thermometer to ensure accurate doneness. To test for doneness without a thermometer, press on the steak – if it feels firm but springy, it’s medium-rare.
2. Grilling
Grilling is a fantastic way to impart smoky flavour to your steak. It’s like a summer barbecue dream come true. Here’s what you need to do:
- Preheat your grill to medium-high heat. Make sure the coals are nice and hot. You want those coals to be roaring with excitement, ready to give your steak a smoky kiss.
- Place the steak on the grill and cook for 3-4 minutes per side, depending on your desired level of doneness. Flip the steak once. You’re aiming for those beautiful grill marks that tell everyone you’re a grilling pro.
- If you want a good sear, you can close the lid and let the steak cook for a few more minutes. This will help to create a nice, even crust and lock in the juices.
- Remove the steak from the grill and let it rest for 5-10 minutes before slicing and serving. This allows the juices to redistribute, ensuring a more tender and flavorful steak.
It’s important to keep an eye on your grill, as it can get quite hot. You don’t want to burn your steak. Make sure you use good quality charcoal or wood for the best smoky flavour.
3. Broiling
Broiling is a quick and easy method for cooking steak. You can do this in your oven, and it’s great for a small steak. Here’s how:
- Preheat your oven's broiler to high heat. The broiler will act like a mini sun, giving your steak a beautiful crust.
- Place the steak on a baking sheet and broil for 3-4 minutes per side, depending on your desired level of doneness.
- Remove the steak from the oven and let it rest for 5-10 minutes before slicing and serving. Remember, patience is key!
Be careful when broiling as the heat can be very intense. Use oven mitts to protect your hands. Also, make sure to keep a close eye on your steak, and don’t overcook it.
Part 4: Resting Your Steak
It's tempting to jump right into slicing and serving your steak straight off the grill or pan, but resist the urge! Resting your steak for 5-10 minutes after cooking is essential for several reasons:
- It allows the juices to redistribute throughout the meat, ensuring a more tender and flavorful steak. Think of it like a pool of water – when you disturb it, the water ripples and spreads out. The same principle applies to your steak.
- It lets the steak relax, making it easier to slice without tearing or shredding. A relaxed steak is a happy steak, a steak that slices beautifully.
- It gives the steak a chance to cool down slightly, making it more enjoyable to eat. No one wants to burn their mouth on a hot steak, right?
While you wait, prep your sides. I love serving my steak with roasted vegetables, creamy mashed potatoes, or a simple salad. These sides complement the steak beautifully, adding a symphony of textures and flavours to your meal.
Part 5: Slicing Your Steak
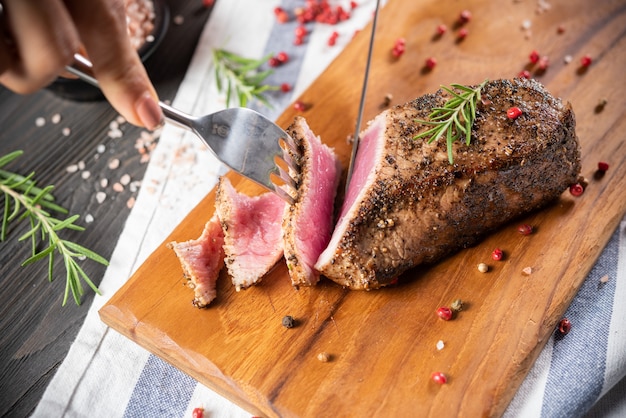
After your steak has rested, it’s time to slice it. This is a crucial step, as it can make a huge difference in how the steak looks and tastes. Here are a few tips for slicing your steak:
- Use a sharp knife. A dull knife will tear the meat and make it look messy. Imagine trying to cut a piece of cake with a butter knife – it’s just not going to work. You want a sharp knife that will slice through the steak like a hot knife through butter. I always use a good quality chef’s knife with a serrated edge for cutting my steaks.
- Slice against the grain. The grain refers to the direction of the muscle fibers. Slicing against the grain will make the steak more tender and easier to chew. You can identify the grain by looking for the lines running through the meat. Imagine trying to tear a piece of fabric – you’d tear it along the grain. But if you cut across the grain, it tears more easily. The same principle applies to steak.
- Slice thinly. I like my steak slices to be about ?? inch thick. This makes them easier to eat and allows the juices to be distributed throughout the meat. It’s like a delicate dance – thin slices create a beautiful interplay of flavour and texture.
Part 6: Serving Your Steak
Finally, it's time to serve your perfectly cooked T-bone steak! I love to arrange the slices on a platter, alongside your favorite sides. A little sprig of rosemary or thyme adds a nice touch of freshness and elegance to the presentation. It’s like a culinary masterpiece, ready to be admired and enjoyed.
1. Doneness
Remember, there’s no right or wrong answer when it comes to doneness. It's all about personal preference. Some people like their steak well-done, while others prefer it rare. If you're not sure, it's always better to err on the side of undercooked. A steak can always be cooked further, but it's harder to salvage an overcooked one.
2. Sauces
While a T-bone steak doesn’t necessarily need a sauce, it can be a great way to enhance the flavour. My favourite sauces are simple and let the natural flavour of the steak shine through. I love a classic béarnaise sauce, a simple pan sauce made with butter and garlic, or a splash of red wine sauce. These sauces add a touch of luxury and sophistication, elevating the steak to new heights.
Part 7: FAQs
Here are some frequently asked questions about T-bone steaks:
1. What is the difference between a T-bone and a porterhouse?
The main difference is in the size of the tenderloin. A T-bone has a smaller tenderloin section, while a porterhouse has a larger one. Both cuts feature the T-shaped bone with a strip of tenderloin on one side and a strip of sirloin on the other.
2. How long should I cook a T-bone steak?
The cooking time will vary depending on the thickness of the steak and your desired level of doneness. A 1-inch thick steak will take about 4-5 minutes per side for medium-rare, while a 2-inch thick steak will take about 6-8 minutes per side. It's always a good idea to use a meat thermometer to ensure accurate doneness. You want to make sure you get that perfect balance of crust and juicy center.
3. Can I freeze a T-bone steak?
Yes, you can freeze a T-bone steak. It's best to freeze it in a freezer-safe bag or wrap it tightly in plastic wrap to prevent freezer burn. When you're ready to cook it, thaw it in the refrigerator overnight.
4. What are some good sides to serve with T-bone steak?
T-bone steak is a versatile cut, so there are plenty of great sides you can serve with it. I love to pair it with roasted vegetables, creamy mashed potatoes, asparagus, green beans, or a simple salad. A baked potato or a side of pasta are also excellent choices. These sides add a touch of balance and complexity to the meal, complementing the steak beautifully.
5. Can I use a marinade for a T-bone steak?
Yes, you can use a marinade for a T-bone steak. It’s a great way to add flavour and moisture to the meat. I like to use a simple marinade with olive oil, lemon juice, garlic, and herbs. Just make sure to marinate the steak in the refrigerator for at least 2 hours, but no more than 24 hours. The marinade will infuse the steak with delicious flavour, making it even more tender and juicy.
Part 8: My T-bone Steak Journey
My journey with T-bone steak began years ago, when I was a young and eager cook. I remember trying to grill a steak for the first time, and I ended up burning it to a crisp! It was a disaster, but it also sparked my passion for cooking, and I was determined to learn how to make a perfect steak. I spent hours researching, experimenting, and practicing, constantly striving for that perfect sear and juicy center.
Over the years, I've experimented with different cooking methods, techniques, and recipes. I've learned from my mistakes, and I've discovered what works best for me. I’ve learned that a perfect steak isn’t about following a recipe to the letter. It's about understanding the principles of cooking and adapting them to your own taste. And now, I'm thrilled to share my knowledge with you, so you can experience the joy of a perfectly cooked T-bone steak.
Don't be afraid to experiment and find what you enjoy. There's no right or wrong way to cook a T-bone steak. The most important thing is to have fun and enjoy the process. It’s about creating a culinary experience that you’ll cherish.
Part 9: Conclusion
Mastering the art of cooking a T-bone steak is a rewarding experience. It’s a dish that’s simple yet elegant, and it always impresses guests. Whether you're a seasoned chef or a beginner, this guide provides you with the tools and knowledge you need to create a memorable culinary experience. So, gather your ingredients, put on your apron, and get ready to enjoy the flavourful journey of a perfectly cooked T-bone steak!
Remember, cooking a T-bone steak is a journey, not a race. Take your time, enjoy the process, and let your creativity flow. And most importantly, don’t be afraid to make mistakes – that’s how you learn and grow.
Everyone is watching

Corn on the Cob: The Ultimate Guide to Perfectly Cooked Ears
Healthy MealsAh, corn on the cob. Just the name evokes images of sunny days, barbecues, and that sweet, juicy flavour that ...

Perfect Pork Roast Oven Cooking Time: A Guide to Delicious Results
Healthy MealsThere's something truly satisfying about a perfectly roasted pork. The aroma alone is enough to make your mout...

Ham Cooking Time: How Long to Bake, Smoke, or Boil a Delicious Ham
Healthy MealsAh, ham. It's a classic, isn't it? A real crowd-pleaser, especially around holidays. And when done right, it'...

Scallops: The Ultimate Guide to Perfect Cooking
Healthy MealsAh, scallops. Those delicate, sweet, and utterly delicious morsels of the sea. They hold a special place in my...

Spaghetti Squash: The Ultimate Guide to Cooking and Serving
Healthy MealsRemember that time you saw spaghetti squash at the supermarket, looking all bumpy and strange, and thought, "W...
