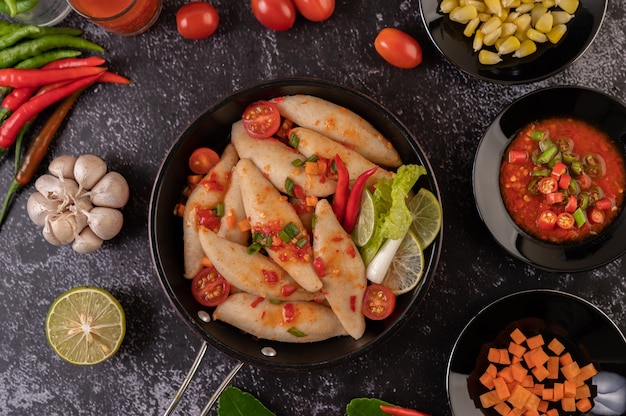
Sweet and sour chicken. Just the name conjures up memories, doesn't it? That iconic Chinese takeaway dish, a staple of childhood dinners and late-night cravings. But you know what? Making it at home isn't some mystical culinary feat. It's actually surprisingly simple, and once you've tasted your own version, you'll wonder why you ever bothered with takeout.
I'm talking about the real deal here, folks. The kind of sweet and sour chicken that bursts with flavour, with that perfect balance of tangy, sweet, and savoury, not the watery, gloopy stuff you sometimes get. Over the years, I've perfected my own recipe, and it's always a crowd-pleaser, even amongst the most discerning foodies. So, let me walk you through it, step by delicious step.
(Part 1) The Chicken: The Foundation of Flavor

First things first, the chicken. Now, this isn't just any chicken; we're going for that juicy, tender, and oh-so-flavorful experience. That's why I always opt for boneless, skinless chicken thighs. They just have a richer flavour than chicken breast, and they stay nice and moist during cooking. Of course, if you're a breast fan, feel free to use them, but make sure to cut them into small pieces so they don't dry out.
Preparing the Chicken: A Marination Masterclass
The chicken needs a little pampering before it takes center stage. We're talking about a marinade, which not only adds a burst of flavor but also helps to tenderise the meat. And trust me, it's a crucial step in achieving that authentic sweet and sour chicken taste.
Here's what you'll need for your marinade:
- 1 tablespoon of soy sauce: That salty, umami flavour that sets the stage for everything else.
- 1 tablespoon of Shaoxing wine: This Chinese rice wine adds a subtle sweetness and depth that you won't find anywhere else.
- 1 teaspoon of cornflour: It's not just about thickening; cornflour helps to create a smooth, velvety texture.
- 1/2 teaspoon of ground ginger: A touch of warmth and spice that complements the other flavours perfectly.
- 1/4 teaspoon of ground black pepper: Just a hint of heat to balance out the sweetness.
Now, simply whisk all those ingredients together in a bowl, then add your chicken pieces and give them a good toss. Make sure every piece is coated in that beautiful marinade. Then, cover the bowl and let the chicken chill in the fridge for at least 30 minutes, but an hour is even better. This gives the flavours time to penetrate and work their magic.
(Part 2) The Batter: Achieving that Crispy Perfection

Next up, the batter. This is where we get that iconic crispy exterior that makes sweet and sour chicken so irresistible. It's a delicate balance, though. Too thick, and the chicken ends up greasy. Too thin, and the batter won't hold its shape during frying. So, get those measuring spoons ready!
For your crispy masterpiece, you'll need:
- 1 cup of plain flour: The backbone of the batter, providing structure and a slight chewiness.
- 1 teaspoon of baking powder: It's the secret ingredient for that airy, light texture that prevents the batter from becoming dense.
- 1/2 teaspoon of salt: Just a pinch to enhance the overall flavour and balance out the sweetness.
- 1/4 cup of cold water: Use cold water, not warm, because it helps to create a crispier coating.
Sift the flour, baking powder, and salt into a bowl. This step is important! It prevents lumps from forming and ensures a smooth, consistent batter. Now, gradually whisk in the cold water, mixing until you have a batter that's about the consistency of single cream. Don't overmix it, though, as that can make the batter tough.
Breading the Chicken: Double the Crisp, Double the Delight
The key to achieving that truly unforgettable crispy coating is a technique called double-breading. It's a bit more involved, but the results are worth it.
First, you need to dust each piece of chicken with a thin layer of cornstarch. This acts as a barrier between the chicken and the batter, preventing it from becoming soggy. A quick shake in a bowl of cornstarch usually does the trick.
Now, for the main event! Dip each chicken piece into the batter, making sure to coat it completely. Then, use a fork to gently lift the chicken out of the bowl, letting any excess batter drip back in.
Finally, place the battered chicken pieces on a plate or baking sheet lined with parchment paper. Let them rest for 10-15 minutes before frying. This gives the batter time to set, ensuring it stays put during the frying process.
(Part 3) The Sauce: A Symphony of Sweet, Sour, and Savory

Alright, now for the star of the show: the sauce. This is where all the magic happens. A truly great sweet and sour sauce is a beautiful balance of flavours, that perfect interplay of sweet, sour, and savoury notes. And that's what I've achieved with this recipe. Get ready for a flavour explosion!
Here's what you'll need for your masterpiece:
- 1/2 cup of pineapple juice: This adds a natural sweetness and a touch of tropical flair.
- 1/4 cup of white wine vinegar: The tartness that cuts through the sweetness and adds that signature tang.
- 1/4 cup of soy sauce: For that savory base and umami depth.
- 1/4 cup of sugar: The sweetness that balances the other flavours and adds a touch of richness.
- 1 tablespoon of cornstarch: To thicken the sauce, creating a silky, glossy consistency.
- 1/2 teaspoon of ground ginger: A touch of warmth and spice.
- 1/4 teaspoon of ground black pepper: A tiny hint of heat to balance everything out.
- 1/4 cup of chopped red bell pepper: Adds a vibrant color and a slight sweetness.
- 1/4 cup of chopped green bell pepper: Contrasts with the red pepper, adding visual appeal and a fresh, crisp texture.
- 1/4 cup of chopped pineapple chunks: More tropical sweetness and a lovely texture.
Preparing the Sauce: A Quick and Easy Process
Now, grab a saucepan and let's get whisking! Combine the pineapple juice, white wine vinegar, soy sauce, sugar, cornstarch, ginger, and black pepper. Stir them all together until it's a smooth mixture.
Turn the heat to medium and start whisking constantly. Keep an eye on the sauce as it heats up – it will start to thicken. This should happen fairly quickly, within a minute or two.
Once the sauce has thickened, toss in the chopped bell peppers and pineapple chunks. Stir gently to combine everything. Then, lower the heat to low and let the sauce simmer for a few minutes. This allows the flavours to really meld together, creating a symphony of taste.
(Part 4) Frying the Chicken: The Path to Crispy Bliss
Ok, the moment of truth is here: frying the chicken. Deep frying is the way to go if you want that perfect golden-brown, ultra-crispy coating. But don't worry if you don't have a dedicated deep fryer; a large skillet or wok will do the trick as long as you have enough oil to submerge the chicken pieces.
Heat your oil to 350 degrees fahrenheit (175 degrees Celsius). To check if it's hot enough, drop a tiny piece of batter into the oil. If it sizzles and rises to the surface quickly, you're good to go.
Now, carefully add your chicken pieces to the hot oil, but don't crowd the pan. Fry them for about 3-4 minutes per side, or until they're golden brown and cooked through. Remove the chicken from the oil and place it on a paper towel-lined plate to drain.
(Part 5) Assembling the Dish: A Culinary Masterpiece
We're almost there! It's time to bring it all together for a beautiful, delicious finish. Start by pouring your sweet and sour sauce into a serving dish. Then, gently add the fried chicken pieces, making sure they're well-coated in the sauce.
To add that final touch of culinary magic, garnish with a few slices of pineapple, some chopped spring onions, and a sprinkle of sesame seeds. It's not just about the flavour; it's about creating a visual masterpiece that's as satisfying to the eye as it is to the taste buds.
(Part 6) Serving and Enjoying: A Feast for the Senses
There you have it! Your homemade sweet and sour chicken, ready to be devoured. Serve it with steamed rice, egg fried rice, or noodles. I like to add a side of stir-fried vegetables for a burst of freshness and nutrition.
Before you dive in, let the chicken rest for a few minutes. This allows the sauce to cool slightly and prevents that dreaded "mouth burn". Plus, it ensures the chicken is cooked through and perfectly tender.
Now, close your eyes, take a deep breath, and savor every bite. Let the tangy sauce, the crispy chicken, and the vibrant vegetables dance on your palate, a symphony of textures and flavours. This is the sweet and sour chicken you've been dreaming of!
(Part 7) Variations and Tips: Beyond the Basics
Don't be afraid to get creative with your sweet and sour chicken. It's a blank canvas for your culinary imagination. Want to add a kick? Try a pinch of chilli flakes in the sauce. Craving more vegetables? Experiment with mushrooms, broccoli, or carrots. Feeling adventurous? Swap the chicken for pork or tofu.
Here are a few more tips to ensure your sweet and sour chicken is a culinary triumph:
- Don't overcrowd the pan when frying the chicken. This ensures even cooking and a crispy exterior.
- Make sure the oil is hot enough before adding the chicken. This prevents it from absorbing too much oil.
- Let the chicken rest for a few minutes before serving to allow the sauce to cool and the chicken to retain its moisture.
- If you're using a deep fryer, follow the manufacturer's instructions carefully.
- Most importantly, have fun with it! There's no right or wrong way to make sweet and sour chicken. Experiment and find what you love best.
(Part 8) The Takeaway: A culinary journey
I hope this recipe inspires you to take a culinary adventure and create your own delicious sweet and sour chicken. It's a dish that's always a crowd-pleaser, and it's a great way to share your love of cooking with friends and family.
(Part 9) Why I Love Sweet and Sour Chicken: A Culinary Nostalgia
I've always had a soft spot for sweet and sour chicken. It evokes childhood memories of family dinners, the anticipation of opening that steaming takeaway box, and the joy of sharing a meal together. The tangy sauce, the crispy chicken, and the vibrant vegetables – it's a sensory experience that never fails to bring a smile to my face.
But it's more than just nostalgia. Sweet and sour chicken is simply delicious. The balance of flavours is perfect, the contrast of textures is captivating, and it's a dish that appeals to everyone. It's a culinary comfort food, a reminder of good times, and a testament to the power of simple, well-executed cooking.
(Part 10) Sweet and Sour Chicken – More than Just a Dish: A Celebration of Food and Family
Making sweet and sour chicken at home has become more than just a recipe for me. It's a way of connecting with loved ones, sharing a meal, and creating memories. It's about taking the time to cook something special, something that brings everyone together and fills the room with laughter and joy.
It's also a chance to express my creativity. I love experimenting with different ingredients and techniques, finding new and exciting flavor combinations. It's like a culinary adventure, and there's no greater reward than seeing the smiles on everyone's faces when they take that first bite.
(Part 11) FAQs: Answers to Your Burning Questions
1. Can I use chicken breast instead of chicken thighs?
Yes, you can. Just be sure to cut it into small pieces to prevent it from drying out. Chicken thighs are typically more tender and flavourful, but if you prefer chicken breast, go for it!
2. What kind of oil should I use for frying the chicken?
vegetable oil or peanut oil are excellent choices for frying. They have a high smoke point, meaning they can withstand high temperatures without burning.
3. How long can I store leftover sweet and sour chicken?
Leftover sweet and sour chicken can be stored in an airtight container in the refrigerator for up to 3 days. Reheat it in the microwave or on the stovetop until it's piping hot.
4. Can I make the sweet and sour sauce ahead of time?
Absolutely! Prepare the sauce in advance and store it in an airtight container in the refrigerator for up to 2 days. When you're ready to use it, just bring it to a simmer on the stovetop and add the chicken.
5. Can I add more vegetables to the sweet and sour sauce?
Feel free to add any vegetables you like! Mushrooms, broccoli, carrots, green beans – the possibilities are endless. Get creative and have fun with it!
Now, go forth and conquer the world of sweet and sour chicken! You've got this!
Everyone is watching

Corn on the Cob: The Ultimate Guide to Perfectly Cooked Ears
Healthy MealsAh, corn on the cob. Just the name evokes images of sunny days, barbecues, and that sweet, juicy flavour that ...

Perfect Pork Roast Oven Cooking Time: A Guide to Delicious Results
Healthy MealsThere's something truly satisfying about a perfectly roasted pork. The aroma alone is enough to make your mout...

Ham Cooking Time: How Long to Bake, Smoke, or Boil a Delicious Ham
Healthy MealsAh, ham. It's a classic, isn't it? A real crowd-pleaser, especially around holidays. And when done right, it'...

Scallops: The Ultimate Guide to Perfect Cooking
Healthy MealsAh, scallops. Those delicate, sweet, and utterly delicious morsels of the sea. They hold a special place in my...

Spaghetti Squash: The Ultimate Guide to Cooking and Serving
Healthy MealsRemember that time you saw spaghetti squash at the supermarket, looking all bumpy and strange, and thought, "W...
