Ah, spiral ham. It’s a true classic, isn’t it? There’s something so special about its aroma filling the kitchen, the irresistible scent of smoky sweetness beckoning everyone to the table. Whether it’s a holiday feast, a weekend gathering, or just a family dinner, a spiral ham always seems to bring a touch of magic to the occasion.
Over the years, I’ve cooked my fair share of spiral hams. From those first tentative attempts to the more confident creations now, I’ve learned a thing or two about getting that perfect result – a ham that practically melts in your mouth, its flavour lingering long after the last bite.
This guide is about sharing those hard-earned lessons. We'll delve into everything from selecting the right ham to creating the perfect glaze, ensuring you achieve a truly delicious and impressive centerpiece for your table. So, grab a cuppa, settle in, and let’s embark on this journey together.
(Part 1) Choosing the Right Ham
The first step to a successful spiral ham is choosing the right one. It’s like picking the perfect ingredient for a recipe – the foundation upon which the whole dish will rest. And with a multitude of spiral hams out there, it’s essential to know what to look for to make the right choice.
Types of Spiral Hams: Unraveling the Options
Spiral hams come in a variety of forms, each with its own characteristics and flavour profile. Knowing the differences will help you choose the ham that best suits your needs.
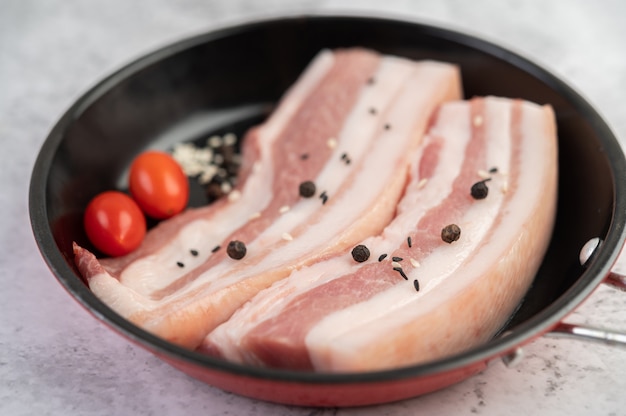
- bone-in spiral hams: These are the traditional spiral hams, boasting a large bone running down the center. This bone acts like a natural flavor conductor, resulting in a richer, juicier ham, often favored for its depth of taste. The downside? They take a bit longer to cook.
- Boneless Spiral Hams: These offer convenience and ease of carving, as the bone has been removed. They typically cook faster, making them a good choice if you’re on a time crunch. However, some folks find they lack the inherent flavor of their bone-in counterparts.
- Cured and Smoked Spiral Hams: This is the most readily available type in supermarkets. They’re already pre-cooked, meaning they only need to be heated through. Perfect for a quick and easy meal, they are also typically quite flavorful.
- Fresh Spiral Hams: These are less common and require a longer cooking time. They often need to be brined before cooking to develop optimal flavor and texture. If you’re looking for a more traditional approach, a fresh ham might be the way to go.
Size Matters: Finding the Right Fit
The size and weight of the ham will directly impact your cooking time. Consider how many people you’re feeding and how much leftover ham you'd like. A smaller ham is perfect for a smaller gathering, while a larger one can feed a crowd and offer generous leftovers.
Label Literacy: The Key to Informed Choices
Don’t forget to pay attention to the label! It's your guide to understanding what you're buying. Look for key details like the type of ham, ingredients, and cooking instructions. Words like "fully cooked" or "ready-to-eat" indicate a pre-cooked ham, ideal for quick meals.
(Part 2) Prepping Your Ham for Perfection

Once you’ve chosen your star ingredient, it’s time to give it a bit of pre-show prep. These simple steps can make a world of difference in achieving that succulent and flavourful end result.
Unveiling the Ham: Removing the Packaging
Gently remove the ham from its packaging, discarding any plastic wrapping. You’ll likely find a netting around the ham, which holds its shape during cooking. Whether you leave it on or remove it is a matter of personal preference. Some people find it easier to glaze the ham without the netting, while others prefer the traditional presentation it provides.
Scoring for Success: Unleashing Flavor
Scoring your ham is a crucial step for even cooking and optimal flavour absorption. It also creates a beautiful visual appeal.
Here's how to score your ham like a pro:
- Using a sharp knife, make diagonal cuts across the fat side of the ham, about 1/2 inch deep.
- Space the cuts about 1 inch apart, creating a diamond pattern.
- You can also score along the edges of the ham to enhance the flavor and create a crispy outer layer.
Preheating the Oven: A Crucial Step
While you’re prepping the ham, don’t forget to preheat your oven to the recommended temperature. This will ensure that the ham cooks evenly and avoids cold spots, leading to a more consistent texture. Most spiral ham recipes suggest a temperature of 325 degrees Fahrenheit (160 degrees Celsius).
(Part 3) Cooking Your Ham to Perfection
The oven is preheated, the ham is prepped, and you’re ready to create culinary magic. Let’s get this ham cooking!
The Golden Rule of Spiral Ham Cooking
The general rule of thumb is to bake your spiral ham at 325 degrees Fahrenheit (160 degrees Celsius) for about 15 minutes per pound. However, always check the label instructions, as cooking times can vary depending on the ham’s size and type.
Choosing the Right Cooking Vessel
For optimal heat circulation and even cooking, I highly recommend using a roasting pan with a rack. This allows the heat to surround the ham, preventing it from sitting in its own juices.
Adding a Splash of Flavor: Liquid Enhancements
To prevent your ham from drying out, add a cup of liquid to the bottom of your roasting pan. Water is a classic choice, but for a touch of added sweetness and depth of flavor, consider apple juice or pineapple juice. Feel free to get creative with aromatics like garlic cloves, onions, or herbs – they’ll infuse the ham with wonderful aromas.
Temperature Monitoring: Ensuring Thorough Cooking
Monitoring the ham’s internal temperature is crucial for ensuring it’s cooked through. This is where a meat thermometer comes in handy. Insert it into the thickest part of the ham. The internal temperature should reach at least 140 degrees Fahrenheit (60 degrees Celsius) for safe consumption.
(Part 4) Glazing Your Ham: A Symphony of Flavors
Glazing is where the magic truly happens. It's the final touch that transforms your ham from good to glorious, adding a glistening sheen and an explosion of flavor. There are endless glaze possibilities, but here are a few favorites from my culinary repertoire:
The Classic Glaze: A Simple Delight
This is a classic glaze that’s easy to make and delivers a beautifully balanced sweet and savory taste.
- Combine brown sugar, honey, mustard, and apple cider vinegar in a saucepan over medium heat.
- Stir continuously until the sugar dissolves and the glaze thickens slightly.
- Brush the glaze generously over the ham about 30 minutes before it’s finished cooking. Allow it to caramelize in the oven for that irresistible golden hue.
honey-mustard glaze: A Tangy Twist
This glaze is a sweet and tangy delight that pairs perfectly with the savory ham.
- In a small bowl, whisk together honey, mustard, and a touch of orange zest for a citrusy kick.
- Brush the glaze over the ham about 30 minutes before it’s done cooking, allowing it to caramelize beautifully.
pineapple glaze: A Tropical Escape
If you’re craving a tropical twist, this pineapple glaze is sure to delight.
- Combine pineapple juice, brown sugar, and a pinch of ginger in a saucepan over medium heat.
- Stir until the sugar dissolves and the glaze thickens slightly.
- Brush the glaze over the ham about 30 minutes before it’s done cooking, letting it caramelize to perfection.
(Part 5) Resting Your Ham: A Crucial Step
After the ham reaches the desired internal temperature, don’t rush to carve it. Let it rest for 15-20 minutes in a warm place, covered with foil. This allows the juices to redistribute throughout the ham, ensuring a wonderfully tender and juicy result.
(Part 6) Carving Your Ham: A Skillful Art
Carving a spiral ham can seem daunting, but it’s actually quite straightforward. With a little practice, you’ll be carving like a pro in no time.
- Sharpen Your Tools: Use a sharp carving knife for precise, clean slices.
- Spiral Your Way: Start at the top of the ham and carve thin slices down the center, working your way around the ham in a spiral pattern.
- bone-in ham Care: For bone-in hams, use a meat cleaver to cut through the bone.
(Part 7) Serving Your Ham: A Culinary Celebration
Your beautifully cooked, glazed, and rested spiral ham is ready to take center stage. Here are some ideas for showcasing this culinary masterpiece:
- Warm and Wonderful: Serve the ham warm with your favourite sides, such as mashed potatoes, green beans, or sweet potato casserole.
- Cold and Crisp: You can also serve the ham cold, sliced on a platter for a delightful appetizer or buffet option.
- flavor enhancers: Add a dollop of mustard or horseradish to your ham for a burst of flavor.
- Glaze Drizzle: Don't forget to save some of the glaze for drizzling over the ham, adding that final touch of sweetness and shine.
(Part 8) Leftover Ham: A Culinary Treasure
Leftover spiral ham is a culinary treasure waiting to be transformed into new delights. Here are some ideas to make the most of those delicious scraps:
Sandwich Sensations
Create classic ham and cheese sandwiches, or get creative with a ham and pineapple sandwich for a sweet and savory twist.
Soup and Stew Savvy
Add chunks of ham to your favorite soup or stew for extra flavor and protein.
Salad Symphony
Dice up some leftover ham and add it to a salad for a delicious and filling meal.
Breakfast Hash: A Hearty Treat
Fry up leftover ham with potatoes and onions for a hearty breakfast hash.
Pasta Perfection
Add some chopped ham to your pasta dish for a delicious and easy meal.
(Part 9) Troubleshooting: Tackling Common Challenges
Even the most seasoned cooks can run into a few hiccups in the kitchen. Here are some common challenges you might encounter and how to address them:
Dry Ham: Restoring Moisture
If your ham turns out dry, it may be due to overcooking. Use a meat thermometer to ensure it reaches the desired temperature without going overboard. You can also add more liquid to the roasting pan to help retain moisture.
Undercooked Ham: Ensuring Safety
If your ham is undercooked, return it to the oven and cook it until it reaches the desired internal temperature. Undercooked ham can be unsafe, so it’s crucial to ensure it’s thoroughly cooked.
Unevenly Cooked Ham: Achieving Uniformity
If your ham is unevenly cooked, try rotating it halfway through the cooking process to ensure all sides cook evenly.
Too Sweet Glaze: Finding Balance
If your glaze is too sweet, add a bit of vinegar or lemon juice to balance out the sweetness.
(Part 10) FAQs: Your Spiral Ham Q&A
Let’s tackle some common questions about spiral ham cooking.
How Long Does a Cooked Spiral Ham Last in the Refrigerator?
A cooked spiral ham can last for 3-5 days in the refrigerator.
Can I Freeze a Spiral Ham?
Yes, you can freeze a cooked spiral ham for up to 2 months.
What's the Best Way to Reheat a Spiral Ham?
Reheating a spiral ham in the oven at 325 degrees Fahrenheit (160 degrees Celsius) for about 30 minutes, or until heated through, is a good option. You can also reheat it in the microwave, but it may become a bit dry.
What Other Sides Go Well With Spiral Ham?
Spiral ham pairs beautifully with a variety of sides, such as mashed potatoes, green beans, sweet potato casserole, macaroni and cheese, cornbread, and fruit salad.
What Can I Do with Leftover Ham?
Leftover spiral ham is a culinary treasure! Use it in sandwiches, salads, soups, stews, breakfast hash, and pasta dishes.
So there you have it! You’re now armed with all the knowledge you need to cook a truly delicious and impressive spiral ham. Gather your ingredients, fire up the oven, and get ready to enjoy a culinary triumph. Happy cooking!
Everyone is watching

Corn on the Cob: The Ultimate Guide to Perfectly Cooked Ears
Healthy MealsAh, corn on the cob. Just the name evokes images of sunny days, barbecues, and that sweet, juicy flavour that ...

Perfect Pork Roast Oven Cooking Time: A Guide to Delicious Results
Healthy MealsThere's something truly satisfying about a perfectly roasted pork. The aroma alone is enough to make your mout...

Ham Cooking Time: How Long to Bake, Smoke, or Boil a Delicious Ham
Healthy MealsAh, ham. It's a classic, isn't it? A real crowd-pleaser, especially around holidays. And when done right, it'...

Scallops: The Ultimate Guide to Perfect Cooking
Healthy MealsAh, scallops. Those delicate, sweet, and utterly delicious morsels of the sea. They hold a special place in my...

Spaghetti Squash: The Ultimate Guide to Cooking and Serving
Healthy MealsRemember that time you saw spaghetti squash at the supermarket, looking all bumpy and strange, and thought, "W...