The first time I baked a sourdough loaf, it felt like a monumental achievement. It was a messy, anxiety-ridden adventure, with flour sprinkled liberally across my kitchen and a hefty dose of anticipation. But when I finally tasted that first slice – the crusty exterior, the tangy aroma, the soft, chewy crumb – all that effort suddenly felt worthwhile. It was a taste of pure joy, and it ignited a passion for sourdough that hasn't faded since.
sourdough baking isn't just about throwing some ingredients together and hoping for the best. It's a journey, a dance with nature, a slow burn of patience and reward. You need to understand the science, nurture your starter, and master the art of creating something truly beautiful.
This guide is for you, the sourdough newbie, the bread-baking enthusiast looking to deepen their knowledge, the curious soul who wants to unlock the magic of this ancient craft. We'll be taking it step by step, from the very basics to perfecting your technique. So, grab your apron, gather your ingredients, and let's get kneading!
(Part 1) The Magic of Sourdough
Understanding the Basics: The Science Behind the Tang
At its core, sourdough is simply flour and water. But the magic lies in the alchemy of those simple ingredients, transformed by the power of wild yeast. Unlike the cultivated yeasts used in commercial bread, these tiny creatures are found everywhere in the air, ready to ferment your flour with a touch of wild magic.
This microscopic cast of characters, known as “wild yeasts” and lactic acid bacteria, are the true stars of sourdough. They feast on the flour's carbohydrates, transforming them into carbon dioxide gas (which makes the bread rise) and lactic acid (which gives sourdough its distinctive tangy flavour). It's a natural, fascinating process, a living tradition passed down through generations.
Why Choose Sourdough? Beyond the Taste
You might wonder, "Why go through all this trouble when there's perfectly good bread at the supermarket?" That's a valid question, but sourdough offers a unique experience. It's about connecting with something primal, a centuries-old craft. It's about taking control of your food, experiencing the joy of creating something delicious and unique from scratch.
Beyond the romance of tradition, sourdough boasts some surprising health benefits. The naturally occurring lactobacilli contribute to better digestion and nutrient absorption, and the higher fibre content helps you feel fuller for longer. But let's be honest, sometimes the best reason is simply the pleasure of sinking your teeth into that crispy crust and soft, chewy crumb. It's a sensory delight!
(Part 2) The Heart of Sourdough: Your Starter
The very soul of sourdough is its starter, a living ecosystem of wild yeast and bacteria that you'll nurture and care for. It's like a tiny, demanding pet, requiring attention, feeding, and a healthy dose of patience. But don't worry, it's not as daunting as it sounds. Once you get the hang of it, it's a surprisingly easy and rewarding experience.
Getting Started: Bringing Your Starter to Life
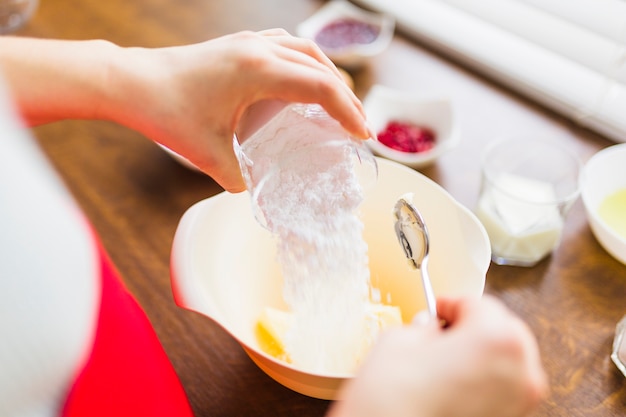
Creating your starter is the first step on your sourdough journey. It's a simple mix of flour and water, left to ferment and develop its own unique personality. Here's what you need:
- 100 grams of all-purpose flour (you can use a combination of bread flour and whole wheat for a more complex flavour)
- 100 grams of lukewarm water (about 80 degrees Fahrenheit)
- A clean glass jar with a lid (at least 500ml capacity)
1. In your jar, combine the flour and water and mix well with a wooden spoon until it forms a smooth batter.
2. Cover the jar with a loose-fitting lid (don't seal it tightly, as the starter needs to breathe) and leave it at room temperature (ideally around 70-75 degrees Fahrenheit).
3. Now comes the waiting game. Your starter will begin to bubble and ferment, but this can take anywhere from 3-7 days. During this time, the mixture will transform, becoming frothy and bubbly, with a light and airy texture. This is the moment you know your starter is coming alive.
4. Every 12 hours, discard half of the starter and feed it with 50 grams of flour and 50 grams of water. Continue this feeding process for a few days.
Monitoring Your Starter: Signs of Life
Observing your starter closely is key. You're looking for signs of life, the telltale clues that the wild yeast and bacteria are hard at work. Here are some key indicators:
- Bubbling Activity: Your starter should be visibly active, with bubbles forming on the surface. This is the yeast and bacteria releasing carbon dioxide gas, a sign of their happy fermentation.
- Sour Aroma: The starter will develop a pleasant, slightly sour smell, similar to unripe fruit or yogurt. This is the lactic acid bacteria doing their thing, adding that signature tang.
- Double in Size: After feeding, your starter should double in size within 4-8 hours. This is a good indicator that it’s healthy and active, thriving on its floury diet.
Troubleshooting Your Starter: When Things Go Awry
Sometimes, your starter might not cooperate. Don't fret, it happens to the best of us. Here are some common issues and their solutions:
- No Activity: If your starter shows no signs of life after a few days, try feeding it with a small amount of active sourdough starter (from a friend or local bakery). This can jumpstart the fermentation process. You can also try changing the type of flour you’re using, as some flours are more hospitable to wild yeast.
- Too Active: If your starter is too active (doubles in size within 2 hours), try keeping it in the fridge to slow down its activity. Cold temperatures can tame its enthusiasm.
- Mold Growth: If you see mold on your starter, sadly, it's time to start again. Mold indicates contamination, and it's best to discard the entire starter and begin anew. Always store your starter in a clean jar with a loose-fitting lid to prevent unwanted visitors.
Maintaining Your Starter: A Lifetime Companion
Once your starter is alive and kicking, it needs regular care and attention. It's a commitment, but a rewarding one. Here’s the basic routine:
- Feed Regularly: Feed your starter every 12 hours with equal parts flour and water. This keeps it active and healthy, ensuring it's ready for your baking adventures.
- Refrigerate When Not in Use: If you’re not using your starter frequently, store it in the refrigerator. This slows down its activity, and you'll only need to feed it once a week. It's like putting your starter on a mini-vacation.
- Bring to Room Temperature Before Baking: When you’re ready to bake, take your starter out of the fridge and let it sit at room temperature for a few hours before using it. This gives it a chance to wake up and get back to work.
(Part 3) Mastering the Art of Sourdough Baking
Congratulations! You've successfully nurtured your starter. Now it's time to dive into the world of sourdough baking. This is where the real fun begins!
Choosing the Right Flour: The Foundation of Your Loaf
The type of flour you use will have a significant impact on the texture and flavour of your sourdough bread. It's like choosing the right canvas for your masterpiece.
Here’s a breakdown of popular flour options:
- Bread Flour: High in protein (around 12-14%), which gives the bread a strong gluten structure. Ideal for loaves with a chewy texture and good oven spring (the ability to rise beautifully in the oven).
- All-Purpose Flour: A versatile flour with a moderate protein content (around 10-12%), suitable for most sourdough recipes.
- Whole Wheat Flour: Made from the entire wheat kernel, it provides a nutty flavour and a denser texture. It adds a rustic touch to your bread.
- Rye Flour: Has a distinctive earthy flavour and a sticky texture. Often used in combination with other flours for a unique taste. It's a great addition if you're looking for a bolder flavour profile.
The Importance of Hydration: The Water to Flour Ratio
Hydration refers to the ratio of water to flour in your dough. Think of it as the balance between the dry ingredients and the liquid. A higher hydration level (meaning more water) will result in a wetter, more open crumb, while a lower hydration level will give you a denser, tighter crumb.
Here are some guidelines for different hydration levels:
| Hydration Level | Dough Texture | Crumb | Ideal for |
|---|---|---|---|
| 60-65% | Firm and manageable | Tight and compact | Sandwich loaves, rolls |
| 65-75% | Slightly sticky and elastic | Open and airy | Artisan loaves, baguettes |
| 75-80% | Very sticky and wet | Very open and airy | Sourdough pizza crusts |
Remember, these are just guidelines. Experiment with different hydration levels to find your preferences and the perfect texture for your taste.
The Art of Kneading: Building the Gluten Structure
Kneading is crucial for developing the gluten in your dough, which gives the bread its structure and rise. Think of gluten as the framework that supports your loaf. But don't worry, you don't need to be a professional baker to achieve a good knead.
Here's a simple kneading method:
- Form a Dough Ball: After combining your flour, water, and starter, mix the dough together with your hands until it forms a cohesive ball.
- Stretch and Fold: Place the dough on a lightly floured surface. Use your fingertips to gently stretch the dough out into a rectangle. Fold the dough in thirds, like folding a letter. Rotate the dough 90 degrees and repeat the stretch and fold process 3-4 times. This helps develop the gluten without overworking the dough.
- Autolyse: Allow the dough to rest for 30 minutes. This will help the gluten relax and become more elastic. It's like giving your dough a mini-break to stretch and unwind.
- Knead for 10-15 minutes: Continue to knead the dough for 10-15 minutes, until it is smooth and elastic. You should be able to stretch the dough without tearing it. It should feel soft and supple.
Bulk Fermentation: The Slow Rise of Flavor
Bulk fermentation is the first stage of rising, where the dough is allowed to rise at room temperature. This is where the magic truly happens, where the wild yeast and bacteria transform the dough, producing the flavour and texture that make sourdough so special. It's a slow, patient process, typically lasting 4-8 hours.
The goal is to let the dough rise to about double its original size. You'll notice the dough becoming airy and bubbly, a sign of the ongoing fermentation.
Shaping Your Loaf: From Dough to Form
Shaping the dough is a crucial step in sourdough baking. It not only gives your loaf a beautiful form, but also helps it rise evenly. It's like sculpting a piece of edible art.
Here are a few popular shaping techniques:
- Boule: A round loaf, shaped by gently stretching and tucking the dough into a ball. It's a classic sourdough shape, simple yet elegant.
- Batard: A long, oval-shaped loaf, formed by folding and shaping the dough into a rectangle. This shape allows for a good surface area to develop a beautiful crust.
- Pain de Campagne: A rustic, freeform loaf, often baked in a dutch oven. This shape is perfect for those who prefer a more rustic and irregular look.
Proofing: The Final Rise to Perfection
Proofing is the final rise of the dough, after it has been shaped. This allows the yeast and bacteria to produce more carbon dioxide gas, resulting in a light and airy crumb. It's the finishing touch, the final flourish before the bake.
Proof your dough in a lightly floured bowl, covered with a damp tea towel or plastic wrap. The ideal temperature for proofing is around 70-75 degrees Fahrenheit. The damp towel creates a humid environment that helps the dough rise evenly.
The proofing time will vary depending on the temperature and hydration of your dough. It typically takes 2-4 hours for the dough to double in size. You'll know it's ready when the dough feels soft and springy, and it has risen to about double its size.
(Part 4) Baking Your Sourdough Loaf: The Moment of Truth
The moment has arrived. It's time to bake your beautiful sourdough loaf. Get ready to witness the transformation of your dough into a golden-brown masterpiece.
Preheating the Oven: The Key to a Perfect Crust
Preheating your oven to the correct temperature is essential for a successful sourdough bake. A hot oven will give the loaf a crispy crust and a well-risen crumb. It's the secret to that satisfying crunch.
Preheating your oven to 450 degrees Fahrenheit is recommended. For an even better result, use a Dutch oven or a baking stone. These provide a more consistent heat distribution, resulting in a beautiful, even bake.
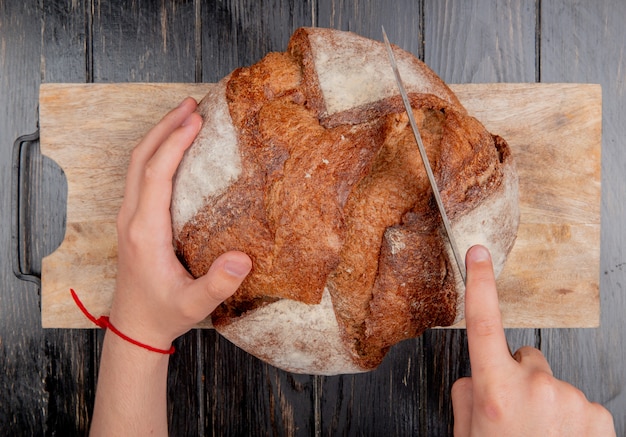
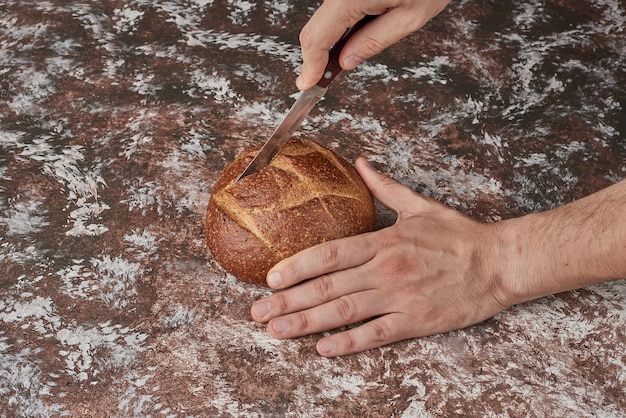
Scoring the Loaf: Creating a Beautiful Crust and Allowing Steam to Escape
Scoring your loaf before baking helps it rise evenly and allows steam to escape. This prevents the loaf from splitting uncontrollably and creates those beautiful, rustic cuts on the crust.
You can use a sharp knife or a scoring tool to make cuts across the top of the loaf. A simple “X” shape is a classic scoring pattern, but feel free to get creative with your designs. Let your artistic side shine through.
Baking Time: The Countdown to Deliciousness
The baking time will vary depending on the size and shape of your loaf. A typical sourdough loaf will take around 40-50 minutes to bake.
You’ll know your loaf is done when it’s golden brown and sounds hollow when you tap it on the bottom. You can also use a bread thermometer to check the internal temperature. It should be around 200-210 degrees Fahrenheit.
Cooling the Loaf: Patience is Key
Once your sourdough loaf is out of the oven, let it cool on a wire rack for at least 30 minutes before slicing. This will allow the bread to firm up and prevent it from becoming soggy. It's a crucial step to ensure a perfect crust and a moist crumb.
(Part 5) The Art of Storing Your Sourdough Bread: Keeping Your Loaf Fresh
Once your beautiful sourdough loaf is cool, you’ll want to store it properly to keep it fresh and delicious. After all, you want to enjoy your hard work for as long as possible.
Storing at Room Temperature: For Immediate Enjoyment
If you plan to eat your loaf within a day or two, you can store it at room temperature in a bread bag or a sealed container. This keeps it fresh and prevents it from drying out too quickly.
Freezing for Later: Saving Your Loaf for Another Day
For longer storage, freeze your sourdough loaf. To freeze, wrap the loaf tightly in plastic wrap and then place it in a freezer bag. It will keep in the freezer for up to 3 months.
To thaw, remove the loaf from the freezer and let it thaw at room temperature overnight. You can also thaw it in the refrigerator for a few hours. Once thawed, enjoy it like you would a freshly baked loaf.
(Part 6) Delicious Ways to Enjoy Your Sourdough Bread: From Simple to Spectacular
One of the best parts of baking your own sourdough bread is all the delicious ways you can enjoy it. It's a versatile bread, perfect for both sweet and savory creations.
Simple and Classic: The Timeless Appeal of Sourdough
- Toasted with Butter: The classic and most satisfying way to enjoy sourdough. The buttery richness complements the tangy flavour perfectly. It's a simple pleasure that never gets old.
- Grilled Cheese: The perfect way to use up leftover sourdough. The bread's crust gets crispy and the inside is perfectly toasted, creating a delightful contrast in textures. It's a comfort food classic with a sourdough twist.
Savoury Delights: Sourdough Takes On the World of Flavor
- Sourdough Croutons: Add a touch of rustic charm to your salads. Simply cube some sourdough and toast it until golden brown. They'll add a satisfying crunch and a hint of sourdough tang.
- Sourdough Bread Bowls: A fun and impressive way to serve soups and stews. Hollow out a loaf of sourdough and bake it until crispy. The bread becomes a delightful vessel for your favorite soup or stew, adding a unique flavor dimension.
- Sourdough Pizza Crust: The perfect base for a homemade pizza. The sourdough gives the crust a unique flavour and texture, making it a delicious alternative to traditional pizza dough.
Sweet Temptations: Sourdough Meets Dessert
- French Toast: The tangy flavour of sourdough adds a whole new dimension to classic French toast. It creates a more complex flavor profile, making it a truly special treat.
- Sourdough Bread Pudding: A comforting and decadent dessert. The bread soaks up the custard and becomes incredibly soft and flavorful. It's a perfect way to use up leftover sourdough and create a warm and comforting dessert.
(Part 7) FAQs: Common Sourdough Baking Questions Answered
As a seasoned sourdough baker, I’ve heard my fair share of questions. Here are some of the most common ones, along with my answers.
1. What if my starter doesn't rise?
If your starter doesn’t show any signs of life after a few days, try feeding it with a small amount of active sourdough starter (from a friend or local bakery). This can jumpstart the fermentation process. You can also try changing the type of flour you’re using. Some flours are more hospitable to wild yeast than others.
2. My starter is too active. What can I do?
If your starter is doubling in size within 2 hours, try keeping it in the fridge to slow down its activity. Cold temperatures can help tame its enthusiastic fermentation.
3. How do I know if my loaf is done?
Your loaf is done when it's golden brown and sounds hollow when you tap it on the bottom. You can also use a bread thermometer to check the internal temperature. It should be around 200-210 degrees Fahrenheit.
4. Why is my sourdough bread dense?
There are a few reasons why your sourdough bread might be dense. You might not have kneaded the dough long enough, or you might not have proofed the dough long enough. Check your kneading and proofing times and make adjustments as needed. Sometimes, a denser crumb is simply a matter of preference.
5. Can I use sourdough starter in other recipes?
Absolutely! Sourdough starter can be used in a variety of recipes, from pancakes and waffles to cookies and cakes. Just remember to adjust the amount of starter and yeast in your recipe accordingly. Experiment and discover the unique flavors sourdough can bring to your other baking projects.
(Part 8) Embrace the Journey: The Rewards of Sourdough Baking
Sourdough bread baking is a journey of discovery, a rewarding experience that will fill your kitchen with the aroma of freshly baked bread and your heart with a sense of accomplishment.
Don’t be discouraged if your first few loaves don’t turn out perfect. Embrace the imperfections, learn from your mistakes, and enjoy the process. With patience and practice, you’ll become a sourdough master in no time.
So, what are you waiting for? Grab your flour, water, and a bit of patience, and embark on your own sourdough adventure! The rewards will be well worth the effort.
Everyone is watching

Corn on the Cob: The Ultimate Guide to Perfectly Cooked Ears
Healthy MealsAh, corn on the cob. Just the name evokes images of sunny days, barbecues, and that sweet, juicy flavour that ...

Perfect Pork Roast Oven Cooking Time: A Guide to Delicious Results
Healthy MealsThere's something truly satisfying about a perfectly roasted pork. The aroma alone is enough to make your mout...

Ham Cooking Time: How Long to Bake, Smoke, or Boil a Delicious Ham
Healthy MealsAh, ham. It's a classic, isn't it? A real crowd-pleaser, especially around holidays. And when done right, it'...

Scallops: The Ultimate Guide to Perfect Cooking
Healthy MealsAh, scallops. Those delicate, sweet, and utterly delicious morsels of the sea. They hold a special place in my...

Spaghetti Squash: The Ultimate Guide to Cooking and Serving
Healthy MealsRemember that time you saw spaghetti squash at the supermarket, looking all bumpy and strange, and thought, "W...