Snow crab legs, those glistening, red beauties, are a real treat, aren't they? The moment you crack open those shells and unveil that succulent, sweet meat, it's a culinary celebration. But let's be honest, facing a mountain of icy legs can be a bit intimidating. You're wondering, "Where do I even begin?" Fear not, my friends! I'm here to guide you through the whole shebang, from picking the perfect snow crab legs to mastering the art of cooking them, and everything in between.
Over the years, I've tried countless methods, experimented with different seasonings, and even had a few "oh dear" moments along the way. But trust me, I've learned a thing or two, and I'm ready to share my knowledge and wisdom with you. So, grab your apron, put on your favourite tunes, and let's get cracking!
Part 1: Choosing Your Snow Crab Legs
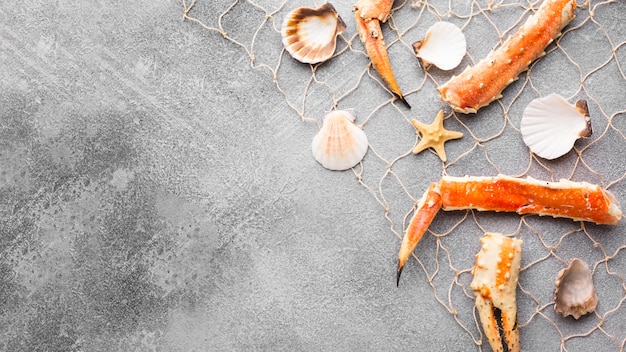
The journey to delicious snow crab starts with selecting the right legs. This might seem like a simple step, but it makes a world of difference in the final taste and texture. Here's my advice:
1. Fresh is Best
If you're lucky enough to get fresh snow crab legs, grab them! The flavour is simply unbeatable. Look for legs that are firm to the touch, with a shiny, moist shell. Imagine the ocean breeze as you hold them – that's the freshness you want! Steer clear of any that have a fishy smell or feel slimy, as this indicates they might not be at their best.
2. Frozen – A Decent Alternative
Don't worry if fresh isn't an option. frozen crab legs are a perfectly good alternative. Choose legs that are individually frozen – this helps prevent freezer burn and keeps them in peak condition. Make sure the packaging is intact, and the legs look plump and well-frozen.
3. Size Matters
Snow crab legs come in various sizes. Jumbo legs, the biggest and meatiest, are perfect for a grand feast. Smaller ones, ideal for a more intimate gathering, offer a delicate flavour. The size affects cooking time, so remember to adjust accordingly.
4. The Legs Tell the Tale
When examining your potential crab legs, take a good look at their colour. A bright reddish-orange hue is a sign of quality. Avoid any with a dull or faded colour, as this might indicate poor quality or improper handling.
5. Checking the Weight
Always check the weight of frozen crab legs. Look for packages that clearly state the weight of the crab meat inside, this helps you choose the best value for your money.
Part 2: Prepping the Snow Crab Legs
Now that you have your perfect snow crab legs, let's get them ready for cooking. This might seem straightforward, but a few crucial steps ensure you get the most out of your crab.
1. Thaw with Care
If you're using frozen crab legs, thawing them correctly is essential. Don't rush it! The best way is to thaw them slowly in the fridge overnight. This gentler approach preserves the flavour and texture of the meat. You can also thaw them in cold water, but make sure to change the water every 30 minutes to ensure it remains cold and the crab legs don't become overheated.
2. Rinse and Clean
Once thawed, rinse the crab legs under cold running water and give them a good scrub with a brush. This removes any debris or impurities and prepares them for cooking.
3. The Power of Steaming
Some folks swear by steaming their snow crab legs. It's a gentle method that preserves the delicate flavour of the crab meat. To steam, place the legs in a steamer basket above boiling water, cover, and cook for about 10-15 minutes. The legs are ready when the shell turns red and the meat is opaque.
Part 3: Mastering the Art of Boiling
Now, let’s talk about boiling, my favourite method! It’s simple, reliable, and delivers consistently delicious results.
1. The Boiling Pot
Fill a large pot with enough water to cover the crab legs. Add salt, about 1 tablespoon per litre of water. This adds flavour and helps maintain the natural flavour of the crab meat. You can also add flavour enhancers like lemon juice, bay leaves, or peppercorns to your boiling water, to enhance the flavour of the crab meat.
2. Bring It to a Boil
Bring the water to a rolling boil over high heat. Then, gently lower the crab legs into the boiling water, ensuring they're completely submerged.
3. Cooking Time
The cooking time for snow crab legs varies depending on their size. Generally, smaller legs cook faster than larger ones. A good rule of thumb is to cook them for about 10-15 minutes for medium-sized legs, and 15-20 minutes for larger legs.
4. Checking for Doneness
To check if the crab legs are cooked, insert a skewer or toothpick into the thickest part of the leg. If the meat comes away easily from the shell and it's opaque, then it’s cooked.
Part 4: Grilling - A Bold Option
This might seem unconventional, but hear me out. grilling snow crab legs adds a smoky flavour that's truly delicious. It's a bit more involved, but the reward is worth the effort!
1. Preheat Your Grill
Preheat your grill to medium-high heat.
2. Prepare the Legs
Brush the crab legs with melted butter or olive oil and season with your favourite spices. Paprika, garlic powder, black pepper, or even a Cajun spice blend all work beautifully.
3. Grilling Time
Place the crab legs on the grill and cook for about 5-7 minutes per side. Ensure you’re grilling them over direct heat. The legs are ready when the shell turns red and the meat is opaque.
4. Keep an Eye on It
It's crucial to keep an eye on the grill to prevent the crab legs from burning. If the grill is too hot, move them to a less intense part.
Part 5: Beyond Boiling and Grilling
Did you know you can bake snow crab legs in the oven? This method is perfect for a larger batch of crab legs and requires minimal effort.
1. Preheating is Key
Preheat your oven to 350°F (175°C).
2. Preparing the Legs
Place the crab legs in a roasting pan or a large baking dish. Add a cup of water to the bottom of the pan to create steam and prevent the legs from drying out.
3. Seasoning Up
Season the crab legs with your favourite spices, herbs, and butter.
4. Oven Time
Cover the roasting pan with foil and bake for about 20-25 minutes. Remove the foil for the last 5 minutes of cooking to allow the legs to crisp up.
Part 6: Essential Tools for Cracking the Code
Now, let's talk about the tools of the trade! You’ll need a few essentials to crack those legs open and get to that delicious meat.
1. crab crackers
Crab crackers are a must-have for cracking the toughest parts of the leg. They come in various shapes and sizes, but choose ones that are sturdy and have a good grip.
2. Crab Picks
Crab picks are used to extract the meat from the shell once it’s cracked open. They’re usually made of stainless steel and have a pointed end.
3. Shelling Tools
Shelling tools are handy for removing the meat from the thin parts of the leg. They have a small, curved blade that helps to separate the meat from the shell.
Part 7: Making the Most of Your Snow Crab Legs
You’ve cooked your crab legs, now it’s time to enjoy them. But there’s more to it than just digging in. Here are some ideas to make your crab feast extra special.
1. The Melting Butter
Let’s be honest, melted butter is the ultimate companion for snow crab legs. It adds a rich, creamy flavour that enhances the taste of the crab meat. You can melt butter in a small saucepan or a ramekin over low heat, and keep it warm while you’re eating.
2. Spicy Dipping Sauces
If you’re looking for something more adventurous, try making your own dipping sauces. A simple mix of mayonnaise, mustard, and hot sauce is a classic. Or, get creative and experiment with different flavours, like a garlic aioli or a spicy sriracha sauce.
3. Lemon Wedges
A squeeze of fresh lemon juice is a wonderful way to brighten up the flavour of snow crab legs. Serve your crab legs with a few lemon wedges for everyone to enjoy.
Part 8: Leftover Love
You’ve indulged in your snow crab feast, but you might have some leftover crab meat. Don’t worry, there are tons of ways to put it to good use.
1. Crab Cakes
Leftover crab meat is perfect for making crab cakes. Mix the meat with breadcrumbs, mayonnaise, and seasonings, then shape them into patties and fry them until golden brown.
2. Crab Salad
Mix the crab meat with chopped celery, onions, and mayonnaise for a refreshing crab salad. Serve it on bread or crackers.
3. Crab Pasta
Add leftover crab meat to your favourite pasta dish. It adds a burst of flavour and a touch of luxury.
Part 9: FAQs
You’ve got all the information you need to cook snow crab legs like a pro, but let's answer some common questions.
1. How long can you store snow crab legs in the freezer?
You can store snow crab legs in the freezer for up to 3 months. Make sure they are tightly wrapped in freezer-safe plastic wrap or aluminum foil.
2. Can you reheat snow crab legs?
Yes, you can reheat snow crab legs, but it's best to do it gently. You can reheat them in the oven at a low temperature, or in a microwave. Be careful not to overcook them, as this can dry out the meat.
3. What's the difference between snow crab and king crab legs?
Snow crab legs and king crab legs are both delicious, but they have some key differences. King crab legs are typically larger and have a richer, more intense flavour. Snow crab legs are smaller and have a milder, sweeter flavour.
4. What are some good side dishes to serve with snow crab legs?
Snow crab legs go well with a variety of side dishes. Some popular choices include corn on the cob, potatoes, asparagus, or a simple green salad.
5. Where can I buy snow crab legs?
Snow crab legs are widely available at grocery stores, seafood markets, and online retailers. Make sure to check the quality and freshness of the legs before you buy them.
There you have it, folks! Now, go forth and conquer the world of snow crab legs. Trust me, with a bit of practice and these tips, you’ll be a snow crab cooking champion in no time. Just remember, the most important thing is to have fun and enjoy the experience.
Everyone is watching

Corn on the Cob: The Ultimate Guide to Perfectly Cooked Ears
Healthy MealsAh, corn on the cob. Just the name evokes images of sunny days, barbecues, and that sweet, juicy flavour that ...

Perfect Pork Roast Oven Cooking Time: A Guide to Delicious Results
Healthy MealsThere's something truly satisfying about a perfectly roasted pork. The aroma alone is enough to make your mout...

Ham Cooking Time: How Long to Bake, Smoke, or Boil a Delicious Ham
Healthy MealsAh, ham. It's a classic, isn't it? A real crowd-pleaser, especially around holidays. And when done right, it'...

Scallops: The Ultimate Guide to Perfect Cooking
Healthy MealsAh, scallops. Those delicate, sweet, and utterly delicious morsels of the sea. They hold a special place in my...

Spaghetti Squash: The Ultimate Guide to Cooking and Serving
Healthy MealsRemember that time you saw spaghetti squash at the supermarket, looking all bumpy and strange, and thought, "W...