As a seasoned home cook, I've always been a bit of a stickler for food safety. I've seen my fair share of dodgy-looking chicken in the supermarket, and I've certainly experienced the unfortunate consequences of undercooked poultry. Let's just say that a trip to the doctor wasn't the highlight of my summer. But, honestly, who wants to risk getting food poisoning when you can enjoy a delicious roast chicken without the fear of salmonella lurking around the corner?
So, I thought it was high time to delve into the world of safe cooking temperatures, especially when it comes to chicken. This article is your guide to ensuring that your poultry is cooked to perfection – and, more importantly, safe to eat. I'll share my personal experiences, some insider tips, and even a few funny anecdotes that I've picked up along the way. Grab your trusty meat thermometer, and let's get cooking!
(Part 1) The Golden Rule: 165°F (74°C)
Alright, let's get this straight: the magic number for safe chicken is 165°F (74°C). This is the internal temperature that needs to be reached throughout the entire bird. Think of it as the "done" signal from the chicken – a sign that it's safe to devour. And trust me, you don't want to settle for anything less.
Why 165°F (74°C) is the Holy Grail
The reason why 165°F (74°C) is the gold standard is because it's hot enough to kill off those pesky salmonella bacteria that can cause food poisoning. These little critters can lurk in raw chicken, and only a good, hot blast of heat can take them down.
Salmonella is a type of bacteria that can cause food poisoning, leading to symptoms like diarrhea, fever, and abdominal cramps. It's crucial to reach the safe temperature of 165°F (74°C) to ensure that any potential salmonella bacteria are eliminated.
The Trouble with undercooked chicken
I've learned the hard way that undercooked chicken is a recipe for disaster. I vividly remember that time I tried to whip up a quick chicken stir-fry. I thought I had cooked it through, but apparently not. A couple of days later, I was struck down with food poisoning. Let's just say that I didn't exactly enjoy that weekend.
So, always err on the side of caution and ensure that your chicken reaches the required temperature. It's better to be safe than sorry, wouldn't you agree?
(Part 2) The Meat Thermometer: Your Culinary Hero
Now, I know what you're thinking. "A meat thermometer? That's a bit of a fuss, isn't it?" But trust me, this handy little gadget is your best friend in the kitchen when it comes to chicken.
Why a Meat Thermometer is Essential
A meat thermometer is your secret weapon against undercooked chicken. It allows you to check the internal temperature of your bird without having to cut into it. Think of it as a culinary detective, revealing the truth about the inner workings of your chicken.
Let's be honest, sometimes it's hard to tell by just looking if the chicken is cooked through. A lot of us have been there – staring at the chicken in the oven, wondering if it's ready. This is where the meat thermometer comes in. It eliminates the guesswork and ensures that your chicken is cooked to perfection.
Finding the Right Spot to Insert
The key is to insert the thermometer into the thickest part of the chicken, making sure that it's not touching any bones. You want a true reading of the internal temperature, not a skewed one that's influenced by the heat of the bone.
For a whole chicken, insert the thermometer into the thickest part of the thigh, making sure to avoid touching the bone. For chicken breasts, insert the thermometer into the thickest part of the breast, avoiding the bone. For chicken thighs, insert the thermometer into the thickest part of the thigh, avoiding the bone.
It's important to be patient and let the thermometer sit for a few seconds to give it time to accurately register the internal temperature. Don't just glance at it quickly; take a few moments to ensure you get a reliable reading.
The Importance of Calibration
Before you embark on your chicken-cooking journey, remember to calibrate your meat thermometer. This ensures that you're getting accurate readings. You can calibrate it by placing the thermometer into a cup of boiling water – the temperature should be 212°F (100°C).
Calibration is important because over time, thermometers can become inaccurate. By checking their accuracy with boiling water, you can ensure that they are providing reliable readings and that your chicken is cooked to the proper temperature.
(Part 3) cooking chicken: The Different Methods
Chicken is incredibly versatile and can be cooked in a variety of ways. But, no matter which method you choose, remember that the golden rule of 165°F (74°C) applies.
Roasting: A Classic Choice
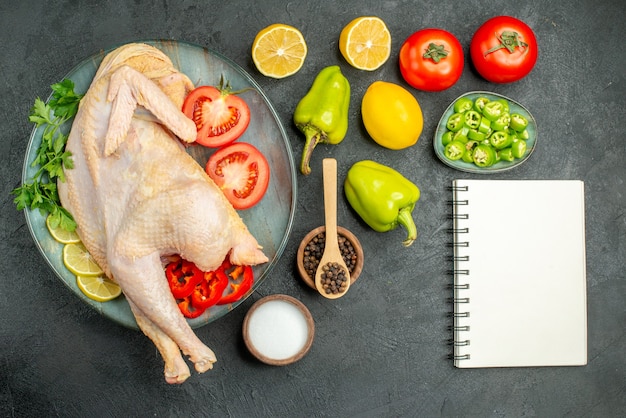
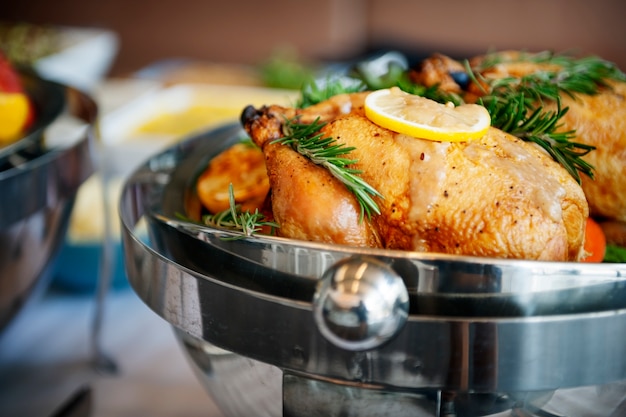
Roasting is a classic way to cook chicken, and it's a great option for a whole bird. To ensure that your chicken is cooked evenly, I like to pat it dry with paper towels, season it generously with salt and pepper, and place it in a roasting pan. I also add some herbs and aromatics, like rosemary and garlic, for extra flavour.
For a juicy and flavorful roast chicken, I recommend roasting it at a lower temperature (around 325°F or 160°C). This allows the chicken to cook slowly and evenly, without drying out. I also like to tent the chicken with aluminum foil for the first part of the cooking time to prevent it from drying out.
When roasting a whole chicken, it's important to ensure that the heat is distributed evenly throughout the oven. You can use a baking stone or a roasting rack to elevate the chicken, allowing hot air to circulate around it.
Pan-frying: A Quick and Easy Method
Pan-frying is a quick and easy way to cook chicken, perfect for a weeknight dinner. To ensure that your chicken is cooked through, I recommend using a heavy-bottomed skillet and cooking it over medium heat. I also like to sear the chicken first to give it a nice crust, and then reduce the heat and finish cooking it until it reaches the desired temperature.
For pan-frying, it's crucial to have a well-seasoned skillet to prevent sticking. You can also use a bit of oil, like olive oil or vegetable oil, to help lubricate the pan.
If you're pan-frying chicken breasts, you can gently press down on them with a spatula to ensure that they cook evenly. This helps to prevent them from puffing up and becoming unevenly cooked.
Baking: A Simple and Reliable Option
Baking is another reliable method for cooking chicken, and it's perfect for boneless, skinless chicken breasts. To ensure that your chicken is cooked evenly, I recommend placing it on a baking sheet lined with parchment paper. I also like to toss the chicken with some olive oil, salt, and pepper before baking.
When baking chicken, it's important to ensure that the baking sheet is not overcrowded. This allows the chicken to cook evenly and prevents it from steaming.
For a crispy skin, you can bake the chicken at a higher temperature, like 400°F (200°C) for the first 10-15 minutes. This helps to create a nice crust.
Grilling: A Summertime Favorite
Grilling is a great way to cook chicken in the summertime, and it imparts a lovely smoky flavour. To ensure that your chicken is cooked through, I recommend using a medium-heat grill and flipping it halfway through the cooking time. I also like to brush the chicken with a marinade or sauce to add some extra flavour.
When grilling chicken, it's important to keep the grill clean. This helps to prevent the chicken from sticking and allows it to cook evenly.
You can use a meat thermometer to check the internal temperature of the chicken while it's on the grill. This allows you to know when it's done without having to cut into it.
(Part 4) Cooking Time: A Guide to Different Cuts
The cooking time for chicken varies depending on the size and cut of the bird. But, remember that the most important factor is the internal temperature reaching 165°F (74°C).
Whole Chicken
For a whole chicken, expect cooking times of about 1 hour and 30 minutes to 2 hours at 325°F (160°C). But remember, the best way to know when your chicken is done is to check the internal temperature with a meat thermometer. Don't rely solely on the estimated cooking time.
When roasting a whole chicken, it's helpful to check the temperature of the thickest part of the thigh. This is the slowest part to cook, so if it reaches 165°F (74°C), you can be sure the rest of the bird is also cooked through.
Chicken Breasts
For boneless, skinless chicken breasts, expect cooking times of about 20 to 30 minutes at 375°F (190°C). However, you can adjust the temperature and cooking time depending on the thickness of the chicken breasts. Thicker breasts will take longer to cook than thinner breasts.
To prevent overcooking chicken breasts, it's important to use a meat thermometer to check the internal temperature. This ensures that they are cooked through but still juicy.
Chicken Thighs
For chicken thighs, expect cooking times of about 30 to 40 minutes at 375°F (190°C). Remember, chicken thighs are generally more forgiving than chicken breasts because they have more fat. This means that they're less likely to dry out during cooking.
Chicken thighs are often preferred for their flavor and juiciness. They can be cooked with the skin on or off, but it's important to cook them thoroughly to ensure safety.
(Part 5) Resting: The Final Step to juicy chicken
Once your chicken is cooked to perfection, let it rest for a few minutes before carving and serving. This allows the juices to redistribute throughout the meat, resulting in a more tender and juicy chicken.
Resting the chicken is especially important when you're cooking a whole bird. This allows the juices to redistribute throughout the breast meat, which is often the leanest and most prone to drying out.
To rest a whole chicken, I like to transfer it from the oven to a cutting board and cover it with aluminum foil for 10 to 15 minutes. This allows the chicken to stay warm while the juices redistribute.
For boneless, skinless chicken breasts, I recommend resting them on a plate for 5 to 10 minutes before carving and serving.
(Part 6) Reheating: Ensuring Safety
Sometimes, we end up with leftover chicken. But, even if you've cooked it perfectly, there's a right way to reheat it to ensure it stays safe.
Reheating Leftovers in the Oven
This is probably the safest way to reheat chicken, as it ensures that the entire piece reaches a safe temperature. Simply place the chicken in a baking dish, cover it with foil, and bake it in a preheated oven at 325°F (160°C) until it reaches 165°F (74°C).
For added moisture, I like to add a bit of broth or water to the bottom of the baking dish. This helps prevent the chicken from drying out.
Reheating Leftovers in the Microwave
The microwave is a quick and easy way to reheat chicken, but it's not the most foolproof method. The uneven heating can cause some parts of the chicken to reach a safe temperature, while other parts remain undercooked.
If you're using the microwave, make sure to cover the chicken with a microwave-safe lid or plastic wrap to help retain moisture and ensure even heating. Be sure to check the internal temperature with a meat thermometer to make sure that the chicken reaches 165°F (74°C).
Reheating Leftovers on the Stovetop
You can also reheat chicken on the stovetop, but you need to make sure that it reaches a safe temperature. Heat a skillet over medium heat and add the chicken. Cook, stirring occasionally, until the chicken is heated through and reaches 165°F (74°C).
Be sure to check the internal temperature with a meat thermometer to ensure that the chicken is cooked through.
(Part 7) Cross-Contamination: Preventing It in the Kitchen
Even if you cook your chicken to the right temperature, you can still get food poisoning if you're not careful about cross-contamination. This happens when raw chicken comes into contact with other foods, surfaces, or utensils.
Keeping It Separate
It's important to keep raw chicken separate from other foods in your fridge. I always store it on a lower shelf, in a container or bag, to prevent it from dripping onto other foods.
I also make sure to use separate cutting boards for raw chicken and other foods. This helps to prevent the spread of bacteria. And, if you're using a knife to cut raw chicken, I always wash it thoroughly with hot soapy water before using it on other foods.
Washing Your Hands
Wash your hands thoroughly with soap and water for at least 20 seconds after handling raw chicken. And, always wash your hands before you begin cooking. This helps to prevent the spread of bacteria.
It's important to wash your hands thoroughly, including your fingertips, nails, and wrists, to ensure that you're removing any potential bacteria.
Cleaning Your Surfaces
Make sure to clean all surfaces that have come into contact with raw chicken, including your cutting board, countertop, and sink. Use hot soapy water or a diluted bleach solution to sanitize these surfaces.
Don't forget to clean any utensils that have been in contact with raw chicken, such as knives, forks, and spoons. It's important to thoroughly wash them with hot soapy water to prevent cross-contamination.
(Part 8) Storage: How Long is Too Long?
Okay, you cooked the chicken perfectly, rested it, and stored it properly. Now, how long can you keep it?
Cooked Chicken: A Safe Storage Guide
The USDA recommends that cooked chicken be stored in the refrigerator for up to 3 to 4 days. But, to be on the safe side, I try to eat leftover chicken within 2 days.
Always store cooked chicken in a sealed container in the refrigerator. This helps to prevent it from drying out and becoming unsafe to eat.
When storing cooked chicken, it's important to ensure that the container is airtight. This prevents the chicken from absorbing other odors in the refrigerator and helps to maintain its quality.
Freezing Cooked Chicken
You can also freeze cooked chicken for up to 2 months. To freeze chicken, I recommend wrapping it tightly in plastic wrap or aluminum foil. This helps to prevent freezer burn and preserve the quality of the chicken.
When you're ready to thaw frozen cooked chicken, you can do so in the refrigerator for a day or two, or in the microwave. Just make sure that the chicken is thawed completely before you reheat it.
As a quick reminder, never freeze cooked chicken more than once, as this can affect its texture and taste.
(Part 9) Signs of Spoiled Chicken
You've done everything right, but it's always best to be cautious. Here are a few signs that your chicken might have gone bad:
Firstly, a sour or unpleasant smell. Fresh chicken should have a mild odor. If you notice a strong, unpleasant smell, it's time to throw it away.
Secondly, a slimy or sticky texture. Fresh chicken should have a firm texture. If you notice a slimy or sticky texture, it's a sign that the chicken has gone bad.
Lastly, a change in color. Fresh chicken should be a light pink color. If you notice a grayish or greenish color, it's a sign that the chicken has gone bad.
If you see any of these signs, don't even think about taking a chance. It's best to throw the chicken away to avoid getting sick.
Trust your senses, and don't hesitate to toss out any chicken that seems off. It's better to be safe than sorry.
FAQs
Now, let's tackle those common questions that pop up when we talk about cooking and storing chicken.
1. Can I use a meat thermometer for other types of meat?
Absolutely! Meat thermometers are a valuable tool for ensuring the safety of all kinds of meat, not just chicken. The USDA provides recommended safe internal temperatures for various types of meat, including pork, beef, and fish.
Using a meat thermometer ensures that all types of meat are cooked to a safe internal temperature, helping to prevent foodborne illnesses.
2. What about chicken nuggets and breaded chicken?
While these might not look like whole pieces of chicken, they still need to be cooked to 165°F (74°C) to be safe. You can use a meat thermometer to check the internal temperature of these items as well.
Even though chicken nuggets and breaded chicken are processed, they still contain raw chicken. It's important to ensure that they are cooked to the safe temperature of 165°F (74°C) to kill any potential bacteria.
3. How long can I keep raw chicken in the refrigerator?
Raw chicken should be stored in the refrigerator for no more than 1 to 2 days. It's always best to use it as soon as possible to ensure freshness and safety.
It's important to store raw chicken properly in the refrigerator to prevent bacteria from multiplying. The cold temperature slows down bacterial growth, but it doesn't stop it entirely.
4. Can I wash raw chicken before cooking it?
The USDA actually advises against washing raw chicken before cooking. This is because splashing water can spread bacteria to other surfaces and foods. Instead, focus on cleaning your hands and surfaces thoroughly after handling raw chicken.
Washing raw chicken can actually spread bacteria to other areas in your kitchen. The water can splash and carry bacteria to other surfaces, utensils, and foods. It's safer to focus on cleaning after handling raw chicken.
5. What if I'm unsure if my chicken is cooked?
When in doubt, throw it out! Don't even think about taking a chance with undercooked chicken. It's better to be safe than sorry. If you're unsure, it's always better to err on the side of caution and cook the chicken for a bit longer. You can always check the internal temperature with a meat thermometer to be absolutely sure.
If you're unsure about the safety of your chicken, it's always better to err on the side of caution. Don't hesitate to discard any chicken that seems questionable.
There you have it! With this comprehensive guide, you're all set to cook delicious and safe chicken dishes. Remember, a little effort in the kitchen goes a long way in ensuring that you and your loved ones can enjoy a meal without any worries. Stay safe, and happy cooking!
Everyone is watching

Corn on the Cob: The Ultimate Guide to Perfectly Cooked Ears
Healthy MealsAh, corn on the cob. Just the name evokes images of sunny days, barbecues, and that sweet, juicy flavour that ...

Perfect Pork Roast Oven Cooking Time: A Guide to Delicious Results
Healthy MealsThere's something truly satisfying about a perfectly roasted pork. The aroma alone is enough to make your mout...

Ham Cooking Time: How Long to Bake, Smoke, or Boil a Delicious Ham
Healthy MealsAh, ham. It's a classic, isn't it? A real crowd-pleaser, especially around holidays. And when done right, it'...

Scallops: The Ultimate Guide to Perfect Cooking
Healthy MealsAh, scallops. Those delicate, sweet, and utterly delicious morsels of the sea. They hold a special place in my...

Spaghetti Squash: The Ultimate Guide to Cooking and Serving
Healthy MealsRemember that time you saw spaghetti squash at the supermarket, looking all bumpy and strange, and thought, "W...