Part 1: The Rib-Picking Primer

The first step to any rib masterpiece is choosing the right cut. You’ve got two main contenders, each with its own unique charm:
Baby back ribs
These are the ribs you’re probably most familiar with. They come from the upper part of the pig’s rib cage, and they’re known for being more tender and having a higher meat-to-bone ratio. They’re also a bit smaller, which means they’ll cook faster. But, be warned, they’re also a bit pricier than their bigger brother, the spare rib.
spare ribs
Spare ribs come from the lower part of the rib cage. They’re chunkier, with a wider rib bone, and they have a bit more fat. This means they’ll take a bit longer to cook, but they’ll also be more flavorful and provide a nice, juicy bite. Spare ribs are the king of “fall-off-the-bone” tenderness, so if that’s your goal, they’re your best bet.
Picking the Perfect Rack
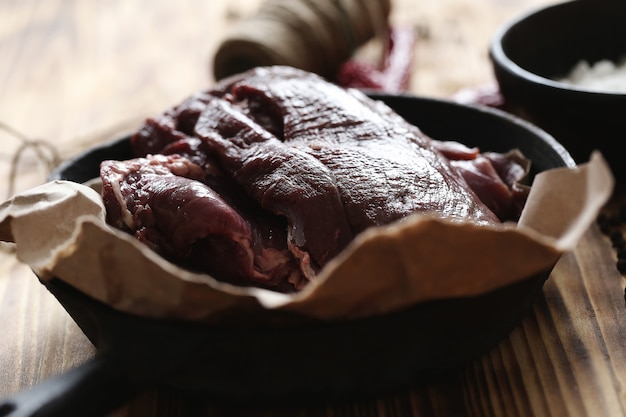
Now that you've decided on your rib type, it’s time to pick the perfect rack. You want to look for a rack with a nice, even layer of fat. This fat is crucial for keeping the ribs juicy and tender. Also, check for any signs of damage or discoloration. Give them a good sniff, too - they should smell fresh and not have a sour or funky odour.
Part 2: Prepping the Ribs

Alright, you’ve got your perfect rack of ribs. Now it’s time to get them ready for their transformation into rib nirvana. This part is all about making sure the ribs are as flavorful and tender as possible. Here’s the rundown:
Removing the Membrane
This thin, white membrane on the back of the ribs is tough and chewy. It’ll prevent the rub from getting into the meat, making the ribs less flavorful. To remove it, you can use a sharp knife or a small, thin spatula. Slide your tool under the membrane and gently lift it off. You might have to use a bit of force, but don’t be afraid to dig in. Another method is the paper towel trick. Fold a paper towel over the membrane and grip it with a pair of tongs. Then, give it a firm pull, and the membrane should come off in one clean piece.
Applying the Rub
Now comes the fun part: adding flavor. A good rib rub is essential for bringing out the best in your ribs. You can buy pre-made rubs, but I prefer to make my own. You can really go wild with your rub combinations, but here’s a basic recipe that always does the trick:
- 1/2 cup brown sugar
- 1/4 cup smoked paprika
- 1 tablespoon onion powder
- 1 tablespoon garlic powder
- 1 tablespoon black pepper
- 1 tablespoon salt
- 1 teaspoon cayenne pepper (optional)
- 1 teaspoon dried oregano
Simply combine all the ingredients in a bowl and then rub the mixture all over your ribs. Be sure to get it into all the cracks and crevices.
Once you’ve rubbed your ribs, wrap them tightly in plastic wrap and refrigerate them for at least four hours, preferably overnight. This will give the rub time to penetrate the meat and develop even more flavour.
Part 3: The Smoking Ritual

Here we are, at the heart of the matter: the smoking process. This is where the magic really happens, where you create a truly memorable rib experience. There are different methods of smoking, from using a dedicated smoker to improvising with a grill.
Choosing the Right Wood
The wood you use will have a big impact on the flavour of your ribs. The best wood for ribs is typically a hardwood like hickory, mesquite, pecan, or oak. You can also use fruit woods like apple, cherry, or peach for a slightly sweeter flavour.
Controlling the Temperature
The key to perfect ribs is low and slow cooking. Aim for a temperature of around 225-250°F (107-121°C). This will allow the ribs to cook evenly and develop a nice, crispy bark on the outside while remaining incredibly tender on the inside.
The Long and Slow Dance
Now for the big wait. Ribs take a long time to cook, and that's okay. It's all part of the process. You're looking at around 4-6 hours for baby back ribs and 5-7 hours for spare ribs. The exact time will depend on the size of the rack, the temperature of your smoker, and your preferred level of tenderness. Don't rush it! Patience is key here.
The Importance of Wrapping
After the first couple of hours, you’ll want to wrap the ribs in foil to help them steam and become even more tender. Add a little bit of apple juice or beer to the foil for extra moisture. Wrap the ribs tightly and cook them for another 1-2 hours.
Part 4: Checking for Doneness
The best way to tell if your ribs are done is to use the “bend test.” Gently pick up the rib rack and try to bend it in the middle. If the bones bend easily without snapping, your ribs are ready to go.
You can also use a meat thermometer to check for doneness. The internal temperature should reach 190-200°F (88-93°C).
Part 5: Glazing and Serving
Now that your ribs are perfectly cooked, you want to give them that final touch of flavour: a glaze. There are all sorts of delicious glaze recipes out there, but here’s a simple one that’s always a crowd-pleaser:
- 1/2 cup ketchup
- 1/4 cup brown sugar
- 2 tablespoons apple cider vinegar
- 1 tablespoon Worcestershire sauce
- 1 teaspoon smoked paprika
- 1 teaspoon black pepper
Combine all the ingredients in a saucepan and bring to a simmer. Let the glaze simmer for about 5 minutes, until it thickens slightly. Then, brush the glaze over the ribs and return them to the smoker for another 15-20 minutes. This will give the glaze time to caramelize and develop that delicious, sticky finish.
Part 6: Sides for Rib Nirvana
Of course, no rib feast is complete without some delicious side dishes. Here are some of my favourites:
- Mac and Cheese: A classic combo for a reason.
- Baked Beans: Sweet and smoky, they complement the ribs perfectly.
- potato salad: Creamy and refreshing, it provides a nice contrast to the richness of the ribs.
- Coleslaw: A crunchy and tangy side that helps to cut through the richness of the meat.
- Cornbread: A classic Southern side dish that pairs well with the smoky flavor of ribs.
- grilled corn on the Cob: A sweet and smoky side dish that adds a touch of freshness to your meal.
- Roasted Vegetables: A healthy and flavorful option that complements the richness of the ribs.
Part 7: Variations on a Theme
Once you’ve mastered the basics, you can start experimenting with different flavour profiles and cooking techniques. Here are a few ideas to get you started:
dry rub Variations
Try using different spices and herbs in your rub. Experiment with things like cumin, coriander, chili powder, or even some finely chopped fresh rosemary or thyme.
For a spicy kick, add a teaspoon of cayenne pepper or chili powder to your rub. If you prefer a sweeter flavor, you can add a tablespoon of brown sugar or maple syrup.
Glaze Alternatives
Get creative with your glazes. Try using a honey mustard glaze, a barbecue sauce-based glaze, or even a sweet and spicy glaze with chili powder and brown sugar.
For a more tangy flavor, add a tablespoon of apple cider vinegar or lemon juice to your glaze. For a smoky flavor, add a tablespoon of smoked paprika.
Cooking Methods
If you don’t have a smoker, you can still cook delicious ribs in the oven. Just make sure to wrap the ribs in foil and cook them on a low temperature for a long time. You can also cook ribs on a grill, but be careful to keep the temperature low and to avoid direct heat.
Other Cooking Techniques
If you're feeling adventurous, you can try cooking your ribs using a reverse sear method. This involves cooking the ribs low and slow in the oven for a long period of time, then searing them over high heat on the grill to create a crispy bark.
You can also try braising your ribs in a slow cooker. This method involves browning the ribs in a pan, then transferring them to a slow cooker with a flavorful liquid, such as beef broth or tomato sauce. Braising your ribs in a slow cooker results in incredibly tender ribs, full of flavor.
Part 8: My rib cooking Journey
I’ve been cooking ribs for years, and I’ve learned a lot along the way. I’ve had my fair share of dry, tough ribs, but I’ve also had some truly unforgettable experiences. One time, I cooked ribs for a family gathering, and they were such a hit, everyone was asking for my recipe. It was a real proud moment, and it solidified my love for this humble but delicious dish.
Cooking ribs is a journey, not a destination. It’s about taking your time, experimenting with different flavours, and finding what works best for you. So, go on, embrace the adventure, and get those ribs cooking!
FAQs
Here are some common questions about rib cooking, along with my answers:
1. How do I know if my ribs are done?
The best way to tell if your ribs are done is by using the “bend test.” Gently pick up the rib rack and try to bend it in the middle. If the bones bend easily without snapping, your ribs are ready to go.
You can also use a meat thermometer to check for doneness. The internal temperature should reach 190-200°F (88-93°C).
2. How long do I cook ribs in the oven?
If you’re cooking ribs in the oven, it will take about 4-6 hours for baby back ribs and 5-7 hours for spare ribs. Be sure to wrap the ribs in foil and cook them at a low temperature (225-250°F).
3. Can I make ribs ahead of time?
Absolutely! You can prep the ribs ahead of time by applying the rub and refrigerating them for up to 24 hours. This will give the rub time to penetrate the meat and develop even more flavour.
4. What happens if I overcook my ribs?
If you overcook your ribs, they will become dry and tough. You want to cook them low and slow, and make sure to wrap them in foil for a portion of the cooking time to keep them moist.
5. What’s the best way to reheat ribs?
The best way to reheat ribs is in a low oven or on a smoker. You can also reheat them in the microwave, but they might become a little bit dry.
I hope this guide has inspired you to get those ribs cooking. Don't be afraid to experiment, and remember, the key to perfect ribs is patience, love, and a little bit of smoke.
Everyone is watching

Corn on the Cob: The Ultimate Guide to Perfectly Cooked Ears
Healthy MealsAh, corn on the cob. Just the name evokes images of sunny days, barbecues, and that sweet, juicy flavour that ...

Perfect Pork Roast Oven Cooking Time: A Guide to Delicious Results
Healthy MealsThere's something truly satisfying about a perfectly roasted pork. The aroma alone is enough to make your mout...

Ham Cooking Time: How Long to Bake, Smoke, or Boil a Delicious Ham
Healthy MealsAh, ham. It's a classic, isn't it? A real crowd-pleaser, especially around holidays. And when done right, it'...

Scallops: The Ultimate Guide to Perfect Cooking
Healthy MealsAh, scallops. Those delicate, sweet, and utterly delicious morsels of the sea. They hold a special place in my...

Spaghetti Squash: The Ultimate Guide to Cooking and Serving
Healthy MealsRemember that time you saw spaghetti squash at the supermarket, looking all bumpy and strange, and thought, "W...
