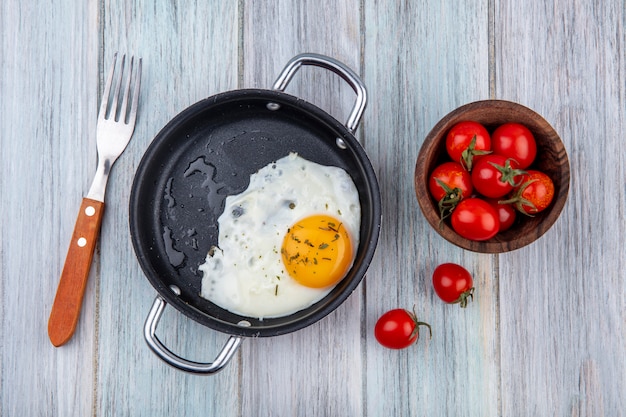
There's something undeniably magical about a perfectly cooked sunny-side up egg. The sight of that glistening yolk, nestled within a delicate, whisper-thin white, is pure culinary artistry. It's a promise of a flavourful explosion with every bite, a symphony of creamy, runny goodness. But achieving that sunny-side up perfection can be tricky. Cook it too long, and the yolk firms up, losing its luscious, runny magic. Cook it too little, and the white remains wobbly, making for an unsatisfying experience. So, how do you achieve sunny-side up egg nirvana?
I've been on a quest for the perfect sunny-side up egg for years, and let me tell you, it's a journey worth taking. Over the years, I've learned a few tricks and experimented with different methods, and today I'm sharing my secrets with you, my fellow egg enthusiasts. Let's embark on this culinary adventure together, and discover the joy of the perfectly cooked sunny-side up egg.
Part 1: The Essentials: What You Need
Before we delve into the cooking process, let's gather our essential tools and ingredients. You might be surprised, but there's more to it than just eggs and a pan!
1. The Right Pan
The foundation of a perfect sunny-side up egg is a good pan. I find a cast iron skillet to be the ideal choice. Its even heat distribution and exceptional heat retention create the perfect environment for achieving a crispy edge while ensuring the yolk remains perfectly runny. But fret not if you lack a cast iron skillet! A high-quality nonstick pan will do the trick, just make sure it's properly seasoned for optimal performance.
2. The perfect eggs
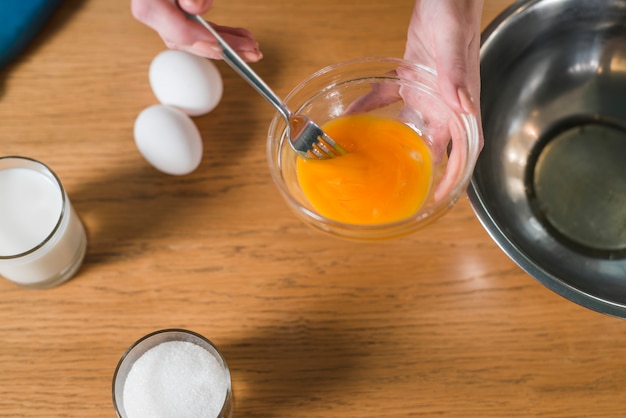
Now, let's talk about the stars of the show – the eggs! Freshness is key. The fresher the egg, the better it holds its shape and the more vibrant the yolk. I always try to source eggs from local farms whenever possible, but any good quality, fresh egg will do the job.
3. Butter, Oil, or Both?
This is a matter of personal preference, but I find that a combination of butter and oil yields the best results. The butter adds a rich, buttery flavour, while the oil helps prevent sticking and ensures even cooking. If you're vegan or dairy-free, you can substitute with a neutral oil like vegetable oil or grapeseed oil.
4. A Spatula
A spatula is essential for maneuvering those delicate eggs around the pan and for flipping them (if you're opting for the traditional flip method, which we'll discuss later). Choose a thin, flexible spatula, the kind that won't damage the fragile egg whites, ensuring a smooth and controlled cooking process.
5. A Lid (Optional)
A lid can be a valuable tool if you prefer a slightly softer white. It allows the steam to gently cook the whites more evenly, resulting in a beautifully cooked egg.
Part 2: The Cooking Methods
Now that we've gathered our essential ingredients and tools, let's explore the different methods for cooking those perfect sunny-side up eggs.
1. The Traditional Method
This is the classic approach, the method most of us grew up with.
- Heat your chosen pan over medium heat. Add a tablespoon of butter and a teaspoon of oil. Let the butter melt completely, and the oil should shimmer slightly.
- Carefully crack the eggs into the pan, being mindful to keep the yolks intact.
- Let the eggs cook for a few minutes, until the whites have set but the yolks remain runny. This usually takes about 3-4 minutes.
- For an extra crispy edge, you can gently slide the spatula under the eggs and lift them slightly, allowing the heat to reach the bottom of the whites.
- The moment of truth – flipping! Carefully flip the eggs over using your spatula. Flip them quickly and decisively, minimizing the risk of breaking those precious yolks.
- Cook for another minute or two, until the yolks reach your desired level of doneness.
This method can be a bit of a challenge, especially for beginners. Mastering the timing and flipping technique takes practice, but the satisfaction of achieving a perfectly cooked sunny-side up egg is worth the effort.
2. The Lid Method
This method is a bit more forgiving and results in eggs with slightly softer whites. It's a great option for those who are new to cooking sunny-side up eggs or prefer a softer texture.
- Heat your pan over medium heat. Add a tablespoon of butter and a teaspoon of oil. Let the butter melt and the oil shimmer.
- Carefully crack the eggs into the pan, making sure to keep the yolks intact.
- Place a lid on the pan and let the eggs cook for about 3-4 minutes, or until the whites have set. The steam from the lid gently cooks the whites more evenly.
- Carefully remove the lid and check the yolks. If you want them more cooked, let them cook for another minute or two.
The steam from the lid creates a gentle cooking environment, resulting in a beautifully cooked egg with a soft, tender white.
3. The No-Flip Method
This method is my personal favourite! It's quick, easy, and produces perfect sunny-side up eggs every time. It's the ultimate solution for those who are apprehensive about flipping.
- Heat your pan over medium-low heat. Add a tablespoon of butter and a teaspoon of oil. Let the butter melt and the oil shimmer.
- Carefully crack the eggs into the pan, ensuring the yolks remain intact.
- Let the eggs cook for about 4-5 minutes, or until the whites have set but the yolks remain runny. Gently nudge the eggs with your spatula to encourage the whites to cook evenly.
The low heat allows the whites to cook slowly and evenly, creating a perfectly cooked egg without the need for flipping. It's a great option for those who want to avoid the risk of breaking the yolks.
Part 3: Timing is Key
The key to a perfect sunny-side up egg lies in understanding the timing. It's about knowing how long it takes for the whites to set and the yolks to reach your desired level of doneness.
1. The Whites
The whites should be cooked through, offering a slight jiggle when gently nudged with a spatula. They should not be rubbery or tough. If you're unsure if the whites are cooked through, gently poke them with a spatula. They should spring back slightly, indicating they are cooked.
2. The Yolks
The yolks should be runny, but not watery. They should be firm enough to hold their shape but still soft and creamy. You can control the level of doneness by adjusting the cooking time. For a runny yolk, cook the eggs for a shorter amount of time. For a more firm yolk, cook them for a bit longer.
Part 4: The Temperature Factor
The temperature of your pan is crucial for achieving perfect sunny-side up eggs.
1. Medium Heat
Medium heat is the sweet spot for most sunny-side up eggs. It allows the whites to set without burning the yolks, ensuring a balanced and delicious result.
2. Medium-Low Heat
Medium-low heat is ideal for the no-flip method. The slow, even heat allows the whites to cook gently and evenly, resulting in a perfectly cooked egg with a soft, tender texture.
3. High Heat
High heat is not recommended for sunny-side up eggs. It causes the whites to cook too quickly, and the yolks risk burning, ruining the delicate balance of the egg.
Part 5: The Importance of Patience
Cooking sunny-side up eggs is a delicate process that requires patience. It's easy to get impatient and rush the process, but this can lead to overcooked eggs, a culinary tragedy. Remember, it's better to err on the side of undercooking than overcooking.
If your eggs are not cooked enough, you can always cook them for a bit longer. But overcooked eggs are a lost cause!
Part 6: The Art of Flipping (Optional)
If you're opting for the traditional flip method, there are a few techniques to make it easier and less likely to break the yolks.
- Use a thin, flexible spatula. A thick spatula can damage the egg whites and make flipping difficult.
- Slide the spatula under the eggs gently, avoid forcing it, to prevent breakage.
- Lift the eggs slightly, allowing the heat to reach the bottom of the whites for even cooking.
- Flip the eggs quickly and decisively. Don't hesitate.
If you're still feeling apprehensive about flipping, embrace the lid method or the no-flip method, they offer foolproof alternatives.
Part 7: The Finishing Touches
Once your sunny-side up eggs are cooked to perfection, it's time to add those final, flavourful touches.
A sprinkle of salt and pepper is a classic addition, but you can get creative with other seasonings like paprika, garlic powder, or onion powder.
For an extra touch of flavour, add a dollop of sour cream, cottage cheese, or avocado.
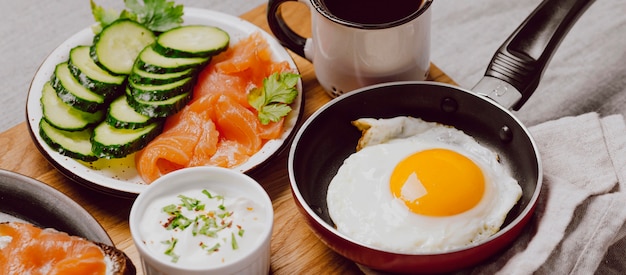
And don't forget the perfect accompaniment – a slice of buttered toast, the ideal partner for your sunny-side up egg.
Part 8: The Joy of Sunny-Side Up Eggs
There's something undeniably satisfying about a perfectly cooked sunny-side up egg. It's a testament to your culinary skills, a delicious and healthy way to start your day.
Whether you enjoy them with toast, bacon, or simply on their own, sunny-side up eggs are a culinary delight. So, next time you're in the kitchen, give them a try. I promise, you won't be disappointed.
Part 9: The Dos and Don'ts of Sunny-Side Up Eggs
Let's summarise all the advice I've shared with you, a quick rundown of the dos and don'ts of sunny-side up eggs.
Dos
- Use fresh eggs. The fresher the egg, the better the texture and flavour.
- Use a cast iron skillet or a good quality nonstick pan. The right pan makes all the difference.
- Heat the pan over medium heat or medium-low heat, depending on your cooking method.
- Cook the eggs for 3-4 minutes, or until the whites are set but the yolks are still runny. Timing is crucial.
- Be patient! Rushing the process can lead to overcooked eggs.
- Experiment with different seasonings and toppings to discover your own perfect combination.
Don'ts
- Don't overheat the pan. High heat can cause the whites to burn and the yolks to become dry.
- Don't overcook the eggs! Overcooked eggs have rubbery whites and a firm yolk, losing their luscious texture.
- Don't use a thick spatula. A thin, flexible spatula is essential for delicate handling.
- Don't be afraid to experiment. There are no strict rules in the culinary world.
Part 10: FAQs
1. Can I cook sunny-side up eggs in the oven?
Yes, you can cook sunny-side up eggs in the oven. Preheat your oven to 350°F (175°C). Crack the eggs into a baking dish and bake for 5-7 minutes, or until the whites are set and the yolks are still runny.
2. What if my eggs are sticking to the pan?
If your eggs are sticking to the pan, it's likely because the pan is not hot enough, or you're not using enough butter or oil. Ensure you heat the pan over medium heat and add a tablespoon of butter and a teaspoon of oil. If the eggs are still sticking, try greasing the pan with a bit of butter or oil before cracking the eggs.
3. How can I tell if my eggs are overcooked?
Overcooked eggs will have rubbery whites and a firm yolk. The yolk will be pale in colour and may have a slightly dry texture.
4. What should I do if my yolks break?
Don't panic! broken yolks are not the end of the world. You can still enjoy your sunny-side up eggs. If you're using the traditional flip method, carefully flip the eggs without breaking the yolks. If the yolks break, you can still enjoy them as scrambled eggs.
5. What are some other ways to cook eggs?
There are many other delicious ways to cook eggs, including scrambled, poached, fried, boiled, and omelettes. Experiment with different cooking methods to find your favourites.
As you can see, creating the perfect sunny-side up egg is an adventure, not a destination. But with a little patience, practice, and the right approach, you can achieve sunny-side up egg perfection. So, go forth, my fellow egg enthusiasts, and unleash your inner chef!
Everyone is watching

Corn on the Cob: The Ultimate Guide to Perfectly Cooked Ears
Healthy MealsAh, corn on the cob. Just the name evokes images of sunny days, barbecues, and that sweet, juicy flavour that ...

Perfect Pork Roast Oven Cooking Time: A Guide to Delicious Results
Healthy MealsThere's something truly satisfying about a perfectly roasted pork. The aroma alone is enough to make your mout...

Ham Cooking Time: How Long to Bake, Smoke, or Boil a Delicious Ham
Healthy MealsAh, ham. It's a classic, isn't it? A real crowd-pleaser, especially around holidays. And when done right, it'...

Scallops: The Ultimate Guide to Perfect Cooking
Healthy MealsAh, scallops. Those delicate, sweet, and utterly delicious morsels of the sea. They hold a special place in my...

Spaghetti Squash: The Ultimate Guide to Cooking and Serving
Healthy MealsRemember that time you saw spaghetti squash at the supermarket, looking all bumpy and strange, and thought, "W...