There's a certain magic to a perfectly cooked steak. The sizzle of the meat hitting a hot pan, the intoxicating aroma that fills the kitchen, and the undeniable satisfaction of sinking your teeth into a juicy, tender piece – it's a sensory experience that elevates a simple meal into something truly special. However, getting the doneness just right can be a bit of a culinary puzzle, even for experienced cooks. One moment you're aiming for a blushing medium-rare, the next you're staring at a well-done, dry, and slightly chewy piece of meat.
Don't worry, I've been there. Through years of experimenting, learning from my mistakes (and the occasional overcooked steak!), I've discovered that the key to achieving a perfect stovetop steak lies in understanding the science of cooking and, of course, mastering the art of timing. That's why I've created this comprehensive guide, packed with tips, tricks, and a handy timing chart to help you cook steak to your exact preference, whether you prefer a melt-in-your-mouth rare or a well-done, robust bite.
Let's embark on this delicious journey together, exploring everything from choosing the right cut to mastering the art of resting your steak. Get ready to elevate your steak game to new heights!
(Part 1) Choosing the Right Cut: The Foundation of Flavor
Why Cut Matters: A Steak's Tale
Before we even think about searing or timing, the journey to a perfect steak starts with choosing the right cut. Just like you wouldn't try to bake a cake without the right flour, selecting the perfect cut is crucial to achieving your desired texture and flavour.
Imagine a ribeye, marbled with luscious fat, ready to be cooked to a tender medium-rare. The fat melts during cooking, creating an incredibly juicy and flavorful experience. Now, picture a lean sirloin, perfect for a well-done steak with a more robust flavour. The choice of cut dictates the potential for tenderness, flavour, and the way the steak responds to heat.
So, how do you choose the right cut? Well, it depends on your preferences and the occasion. If you're craving a melt-in-your-mouth experience, a ribeye or new york strip are excellent choices. For a leaner steak with a more robust flavour, consider a sirloin or flank steak.
My Go-To steak cuts: A Personal Preference
Over the years, I've developed a personal fondness for a few specific cuts that consistently deliver:
- Ribeye: The undisputed king of steak, with its rich marbling and buttery texture. It's perfect for medium-rare or medium doneness, allowing the flavour and tenderness to shine through. Think of it as the luxury option, perfect for special occasions.
- New York Strip: A close contender to ribeye, offering a slightly leaner profile but still packed with flavour. It's versatile and can be cooked to any level of doneness, making it a great all-rounder.
- Sirloin: A classic choice for its leanness and affordability. It's best for medium or medium-well, as it can become dry if cooked too long. This is a great option for weeknight meals or when you want a lighter steak.
- Flank Steak: A more challenging but rewarding cut, known for its robust flavour and tender, chewy texture. It's perfect for marinating and grilling, resulting in a juicy and flavourful steak. Think of this as the adventurous choice, perfect for experimenting with different marinades and flavours.
But remember, these are just my personal preferences. Experiment, discover your own favourites, and let your taste buds be your guide!
(Part 2) Preparing the Steak: Setting the Stage
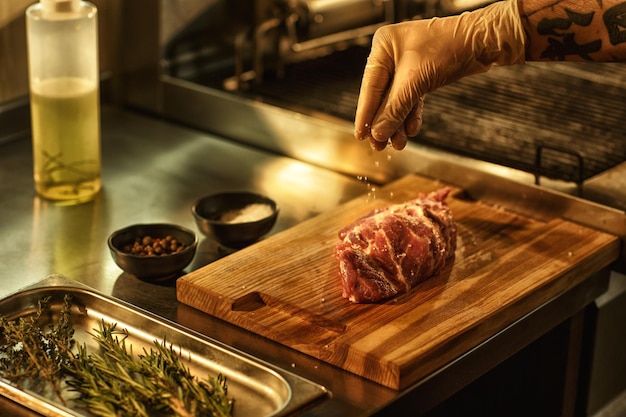
Patting Dry and Seasoning: Enhancing the Flavour
Once you've chosen your cut, it's time to prepare the steak for its star turn on the stovetop. Start by patting it dry with paper towels. This step might seem simple, but it's essential for achieving a beautiful sear and a crispy crust. Excess moisture prevents the pan from reaching the desired temperature and creates steam, hindering the browning process.
Now, the seasoning. Salt is the absolute MVP. It seasons the meat, draws out moisture, and helps to create that coveted crispy crust. I usually season liberally with kosher salt, giving it a good rub all over the steak. For added depth of flavour, I sprinkle on freshly ground black pepper, a pinch of garlic powder, or even a touch of smoked paprika.
Remember, less is more when it comes to seasoning. You want to enhance the natural flavour of the steak, not mask it.
Letting the Steak Rest: Bringing It to Room Temperature
After seasoning, I like to let the steak rest at room temperature for about 30 minutes. This allows the meat to come up to room temperature, ensuring even cooking. Think of it like preheating your oven for a cake; bringing the steak to room temperature helps it cook more evenly, avoiding cold spots that could lead to uneven doneness. However, if you're pressed for time, you can skip this step. Just make sure to bring the steak to room temperature before cooking.
(Part 3) The Stovetop Setup: A Culinary Symphony
Choosing the Right Pan: A Foundation for Success
The pan you choose plays a crucial role in achieving that perfect sear. My go-to choice is a cast iron skillet. Its excellent heat retention and ability to distribute heat evenly create a beautifully crispy crust and a consistently cooked steak. However, a heavy-bottomed stainless steel pan or a non-stick pan will also work well.
Avoid using a pan that's too small for your steak. You want to give it enough space to sear properly without overcrowding the pan, which can lead to uneven cooking and steam build-up.
Heating the Pan: The Power of Heat
Next, heat your pan over medium-high heat. This is crucial for creating that delicious sear. You want the pan to be hot enough to create a crispy crust without burning the steak. A good test is to sprinkle a few drops of water into the pan. If the water sizzles and evaporates immediately, your pan is ready.
Adding Fat: Lubrication and Flavor
Once the pan is hot, add a tablespoon or two of oil or butter. I prefer to use a combination of olive oil and butter for added flavour and richness. Let the fat heat up before adding the steak. This ensures that the steak sears properly and doesn't stick to the pan.
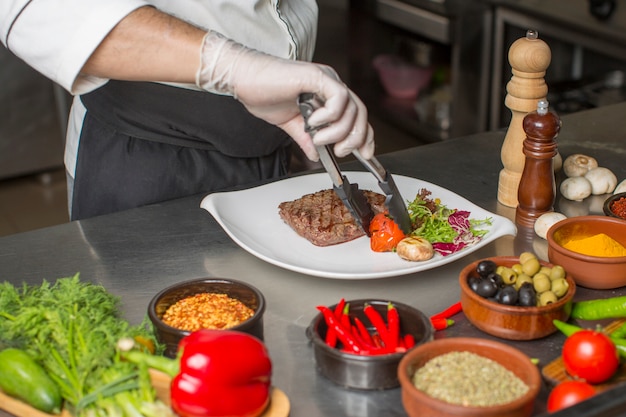
(Part 4) Cooking the Steak: A Culinary Choreography
Searing the Steak: The Art of the Golden Crust
Now comes the fun part: searing the steak. This is where we create that beautiful golden-brown crust, sealing in the juices and enhancing the flavour. It's a crucial step that transforms a simple piece of meat into a culinary masterpiece.
Carefully place the steak in the hot pan, making sure not to overcrowd it. Let it cook undisturbed for about 3-4 minutes per side. You'll know it's ready to flip when the edges start to brown and the bottom has a nice crust.
Resist the urge to move the steak around too much or poke it with a fork. This disrupts the cooking process and prevents a good sear. Patience is key here!
Flipping the Steak: The Turning Point
Once the first side is beautifully seared, carefully flip the steak over using tongs. Continue cooking for another 3-4 minutes per side, or until the steak reaches your desired doneness.
Remember, these are just starting points. The cooking time will vary depending on the thickness of your steak and the desired doneness.
Checking for Doneness: Mastering the Touch Test and Thermometer
As the steak cooks, you can use a meat thermometer to check for doneness. Insert the thermometer into the thickest part of the steak, avoiding the bone. Here's a guide to internal temperatures for various levels of doneness:
| Doneness | Internal Temperature (°F) |
|---|---|
| Rare | 125-130°F |
| Medium-Rare | 130-135°F |
| Medium | 135-140°F |
| Medium-Well | 140-145°F |
| Well-Done | 145°F and above |
If you're not using a meat thermometer, you can use the touch test to gauge the doneness. Press the centre of the steak gently with your finger. It should feel firm but springy for rare, slightly firmer for medium-rare, firmer for medium, and very firm for well-done.
While the touch test can be a good starting point, I always rely on a thermometer for an accurate reading, especially when cooking steaks to rare or medium-rare.
Resting the Steak: The Art of Patience
Once your steak is cooked to perfection, it's essential to let it rest for 5-10 minutes before slicing and serving. This allows the juices to redistribute throughout the steak, resulting in a more tender and flavorful meal.
Cover the steak loosely with aluminium foil to keep it warm while it rests. Think of this as giving the steak a chance to breathe and relax after its intense journey on the stovetop.
(Part 5) Mastering the Art of Timing: A Culinary Clock
Timing Chart for Every Doneness: A Steak-Cooking Compass
Now, let's talk about timing. This is where things can get a bit tricky, but with a little practice and this handy chart, you'll be a steak-cooking maestro in no time.
The chart below provides a general guideline for cooking times based on the thickness of your steak and desired level of doneness.
Remember, these are just estimates, and the actual cooking time may vary slightly depending on the type of pan you use, the heat of your stovetop, and the thickness of your steak.
Always use a meat thermometer to confirm doneness, especially when cooking steaks to rare or medium-rare.
| Steak Thickness (inches) | Rare (125-130°F) | Medium-Rare (130-135°F) | Medium (135-140°F) | Medium-Well (140-145°F) | Well-Done (145°F and above) |
|---|---|---|---|---|---|
| 1 inch | 2-3 minutes per side | 3-4 minutes per side | 4-5 minutes per side | 5-6 minutes per side | 6-7 minutes per side |
| 1.5 inches | 3-4 minutes per side | 4-5 minutes per side | 5-6 minutes per side | 6-7 minutes per side | 7-8 minutes per side |
| 2 inches | 4-5 minutes per side | 5-6 minutes per side | 6-7 minutes per side | 7-8 minutes per side | 8-9 minutes per side |
Tips for Perfect Timing: A Culinary Clock
Here are some additional tips for nailing the timing:
- Use a timer: Set a timer for each side of the steak to avoid overcooking. Think of it as your personal steak chef, keeping you on track.
- Check for doneness frequently: Use the touch test or a meat thermometer to check for doneness every couple of minutes. It's better to be safe than sorry!
- Don't overcrowd the pan: Give the steak enough space to sear properly. If you need to cook multiple steaks, do them in batches. This ensures that each steak gets the perfect sear and cooks evenly.
- Adjust the heat: If the steak is cooking too quickly, reduce the heat slightly. If it's taking too long to cook, increase the heat. Your stovetop is your canvas, and you are the artist, controlling the temperature to create the perfect steak.
- Practice makes perfect: The more you cook steaks, the better you'll become at gauging the timing and achieving your desired level of doneness. Cooking is a journey of learning, and each steak is a new lesson!
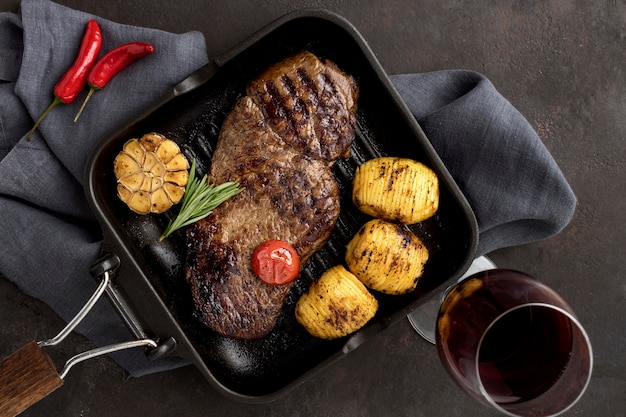
(Part 6) Sauces and Sides: The Culinary Symphony Continues
No steak is complete without the perfect accompaniments. I'm talking about sauces and sides that complement the flavours of the steak and elevate the dining experience to new heights.
steak sauces: The Finishing Touches
A good steak sauce can transform a simple steak into a culinary masterpiece. My personal favourites are:
- Béarnaise Sauce: Rich, creamy, and tangy, this classic sauce is a perfect match for ribeye or New York strip. Imagine the creamy richness of Béarnaise cutting through the juicy tenderness of a perfectly cooked ribeye, a symphony of flavours that dance on your palate.
- Red Wine Reduction: A simple but elegant sauce, made with red wine, shallots, and herbs. It's perfect for any cut of steak. The deep, earthy notes of the red wine reduction complement the richness of the steak, creating a flavourful harmony.
- Peppercorn Sauce: A spicy and bold sauce, perfect for those who love a bit of heat. It pairs well with sirloin or flank steak. The peppery kick of the sauce adds a contrasting element to the robust flavour of the steak, creating a thrilling flavour profile.
- Garlic Herb Butter: A simple and flavourful sauce made with butter, garlic, and herbs. It's a great way to add a touch of freshness and flavour to any steak. The fragrant garlic and herbs add a bright and aromatic touch, complementing the savoury notes of the steak.
Of course, there are countless other steak sauces out there, so experiment and find your favourites. Let your culinary creativity guide you, and don't be afraid to try something new!
Sides to Complement Your Steak: The Supporting Cast
When it comes to sides, I like to keep it simple and focus on flavours that complement the steak. Here are a few of my go-to options:
- Roasted Vegetables: Broccoli, asparagus, Brussels sprouts, or carrots, roasted to perfection, add a delicious and healthy element to your meal. The roasted vegetables provide a burst of colour and freshness, complementing the richness of the steak.
- mashed potatoes: Creamy and comforting, mashed potatoes are a classic side for steak. The creamy texture of the mashed potatoes provides a comforting counterpoint to the juicy steak.
- Garlic Bread: This simple side is a must-have for any steak dinner. The garlicky aroma and buttery flavour of the bread provide a delicious contrast to the savoury steak.
- Salad: A fresh salad adds a light and refreshing element to your meal. The crispness of the salad provides a welcome contrast to the rich steak.
Remember, the possibilities are endless. Choose sides that suit your taste and create a harmonious flavour profile. Let your culinary imagination guide you, and enjoy the process of creating a satisfying and delicious meal!
(Part 7) A Note on Resting: The Importance of Patience
Why Resting Matters: Unlocking the Juicy Secret
I cannot overemphasise the importance of resting your steak before slicing and serving. It seems like a small detail, but it makes a big difference in the overall taste and texture.
When you cook a steak, the muscle fibres contract, squeezing out the juices. During the resting period, the muscle fibres relax, allowing the juices to redistribute throughout the steak. This results in a juicier, more tender, and flavourful steak.
The minimum resting time for a steak is 5 minutes. However, for thicker steaks, I recommend resting for 10 minutes or even longer.
Tips for Resting Your Steak: The Art of Patience
Here are a few tips for resting your steak:
- Cover the steak: Cover the steak loosely with aluminium foil to keep it warm while it rests. This prevents the steak from drying out and ensures that it stays juicy and flavorful.
- Let it rest on a cutting board: Place the steak on a cutting board and allow it to rest undisturbed. This provides a stable platform for the steak to rest and redistribute its juices.
- Avoid slicing too early: Resist the temptation to slice the steak before it has rested. This will only result in a dry and disappointing meal. Patience is key, and the delicious reward is worth the wait!
(Part 8) FAQs: Demystifying the Steak-Cooking Process
Here are some frequently asked questions about cooking steak:
1. What are the best cuts of steak for pan-frying?
For pan-frying, cuts like ribeye, New York strip, sirloin, and flank steak are excellent choices. These cuts are thick enough to hold their shape during cooking and have a good balance of marbling and leanness.
2. How do I know when my steak is done?
The best way to determine doneness is by using a meat thermometer. Insert the thermometer into the thickest part of the steak, avoiding the bone. Check the temperature against the chart above.
You can also use the touch test, but this is less reliable than using a meat thermometer, especially when cooking steaks to rare or medium-rare.
3. What should I do if my steak is overcooked?
Unfortunately, there's not much you can do to salvage an overcooked steak. However, you can try to prevent it from drying out further by covering it loosely with foil and letting it rest for a few minutes.
4. Can I cook steak in a non-stick pan?
Yes, you can cook steak in a non-stick pan. Just make sure the pan is heated over medium-high heat before adding the steak.
5. What are some tips for making a delicious steak sauce?
There are countless ways to make a delicious steak sauce. Here are a few tips:
- Start with a good base: Use a base of red wine, stock, or even beer. The base provides a foundation for flavour and richness.
- Add aromatics: Shallots, garlic, and herbs add a lot of flavour. These ingredients infuse the sauce with complex and aromatic notes.
- Don't be afraid to experiment: Try adding different spices, such as peppercorns, mustard seeds, or paprika. Let your culinary creativity guide you, and explore different flavour combinations.
- Reduce the sauce: Reduce the sauce over medium heat to thicken it and intensify the flavours. The reduction process concentrates the flavours, creating a more intense and delicious sauce.
- Finish with a touch of butter: Adding a knob of butter at the end will add richness and shine to your sauce. The butter adds a luxurious touch and creates a silky texture.
I hope this guide has equipped you with the knowledge and confidence to conquer the art of cooking the perfect stovetop steak. Now, go forth and impress your friends and family with your culinary prowess. Happy cooking!
Everyone is watching

Corn on the Cob: The Ultimate Guide to Perfectly Cooked Ears
Healthy MealsAh, corn on the cob. Just the name evokes images of sunny days, barbecues, and that sweet, juicy flavour that ...

Scallops: The Ultimate Guide to Perfect Cooking
Healthy MealsAh, scallops. Those delicate, sweet, and utterly delicious morsels of the sea. They hold a special place in my...

Spaghetti Squash: The Ultimate Guide to Cooking and Serving
Healthy MealsRemember that time you saw spaghetti squash at the supermarket, looking all bumpy and strange, and thought, "W...

Salmon Cooking Times: Perfect Guide for Every Recipe
Healthy MealsLet me tell you, cooking salmon is an art form. It's all about getting that perfect balance: juicy and tender,...

Ham Cooking Time: How Long to Bake, Smoke, or Boil a Delicious Ham
Healthy MealsAh, ham. It's a classic, isn't it? A real crowd-pleaser, especially around holidays. And when done right, it'...