I'll confess, green beans have always been a bit of a culinary enigma for me. More often than not, they end up overcooked and mushy, or just plain bland. I've experimented with steaming, roasting, you name it, but nothing seemed to hit the mark. Then one day, a friend shared her secret weapon for perfectly cooked green beans – all done on the stovetop. And let me tell you, it was a revelation! Since then, I’ve been making them this way, and they’re consistently a hit. They’re crisp-tender, beautifully seasoned, and bursting with flavour. Today, I’m going to share all my tips and tricks, so you can nail this simple yet delicious side dish.
Part 1: The Foundation of Flavor - Choosing the Right Beans

The Bean Whisperer: Choosing the perfect green beans
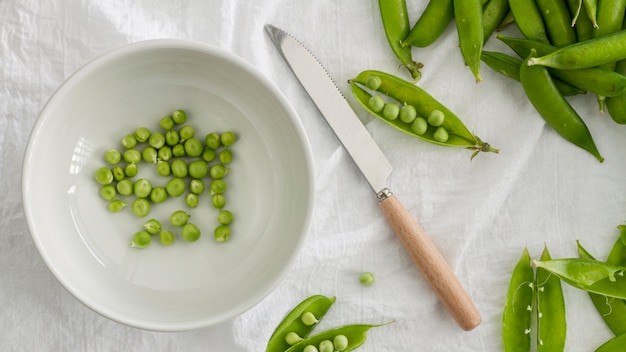
The journey to perfect green beans starts with selecting the right ingredients. You want to choose fresh, firm beans. Avoid any that are limp, wilted, or have yellowed ends. Now, I'm a big fan of French beans, they have a delightful snap and a bright flavour. But honestly, any kind of green bean will work for this recipe – just make sure they’re fresh!
Think of it like this, you wouldn’t build a sturdy house on a weak foundation, right? The same goes for cooking. By choosing the right beans, you’re setting yourself up for success.
Trimming for Success
Once you’ve got your green bean stars, it’s time to give them a trim. Snip off the ends of the beans – the tiny bits that are often stringy and tough. If you’re feeling fancy, you can also trim the edges of the beans to make them all uniform. But let's be honest, I usually just trim the ends and call it a day.
Trimming the beans doesn’t just make them look neater, it helps to ensure that every bite is a delightful one, free from any unpleasant surprises. It’s all about setting the stage for a delicious experience.
Part 2: The Magic of Blanching

The Blanching Breakdown
Now, brace yourselves, because here comes the secret ingredient: blanching! This simple step is the key to unlocking perfectly cooked green beans. Blanching essentially “shocks” the beans, which helps lock in their vibrant green colour and fresh flavour. It also ensures even cooking, so you don't end up with some soft and others still crunchy.
Blanching might sound fancy, but it’s really just a quick dip in boiling water followed by an ice bath. It’s a small step that yields huge flavour benefits, trust me!
A Blanching Primer: How to do It Like a Pro
Start by filling a large pot with plenty of salted water. Bring it to a rolling boil over high heat. Add the trimmed green beans and cook for about 3-5 minutes, or until they’re just tender. Remember, you want them to still have a bit of a bite. This is where taste testing comes in handy!
Next, immediately plunge the beans into a bowl of ice water. This stops the cooking process and ensures those vibrant green colours stay put. Let them chill in the ice bath for a few minutes, then drain them thoroughly.
Blanching might seem like an extra step, but it’s worth it for those perfect, crisp-tender beans. Plus, you can always make a big batch and store the blanched beans in the fridge for a quick and easy side dish throughout the week.
Part 3: The Stovetop Transformation

The Pan's the Thing
Now, grab a large skillet or frying pan. You'll need something big enough to hold all those beans. Add a generous splash of olive oil to the pan and set it over medium-high heat.
The pan is your canvas, and the olive oil is your paint. You’re getting ready to create something delicious!
Spice Up Your Life
This is where you get to unleash your inner chef and add your own personal touch. I love to use a combination of garlic, red pepper flakes, and fresh herbs like thyme or rosemary. You can also add other spices like cumin, coriander, or even a pinch of sugar for extra depth of flavour.
Think of spices as the secret ingredients that make a dish sing. They bring out the best in the green beans and create a symphony of flavours. Don’t be afraid to experiment!
Once the oil is shimmering, add your chosen spices to the pan and stir for a minute or two, letting the aromas fill your kitchen. It’s like aromatherapy for your taste buds!
This is when your kitchen will start to smell absolutely divine. The aromas of garlic, herbs, and spices are a sure sign that something delicious is about to happen.
Part 4: Bringing It All Together
Cooking to Perfection
Add the blanched green beans to the pan, tossing them to coat them evenly with the spices and oil. Let them cook for another 3-5 minutes, until they're heated through and lightly browned in spots. This is where those delicious caramelized notes come in!
The gentle browning process adds a whole new layer of flavor, making the green beans even more irresistible. It’s like adding a touch of magic to a simple dish.
The Finishing Touches
Finally, squeeze a little lemon juice over the green beans for a burst of brightness. Season with salt and pepper to taste. Some folks like a pinch of sugar to balance the flavours. You can also add chopped nuts, toasted almonds or pecans, for extra crunch.
Think of the lemon juice as a final touch of sparkle. It adds a touch of acidity that makes the flavors really pop. And don't forget the salt and pepper, they are essential for seasoning and enhancing the overall flavour profile.
Part 5: Sharing the Deliciousness
Serving Suggestions: Green Beans Go With Everything
Now it's time to enjoy those perfect green beans! Serve them as a simple side dish alongside grilled meats, fish, or chicken. They also pair beautifully with roasted vegetables or a hearty salad.
Green beans are like the perfect culinary chameleon, they fit right in with any dish. And they add a delightful pop of color and flavour to your plate.
Beyond the Side Dish: Get Creative!
Feel free to get creative! I’ve been known to toss them with a little pasta, or add them to a frittata for a protein-packed breakfast.
Don't be afraid to think outside the box. Experiment with different combinations to find your favorite ways to enjoy these flavorful green beans.
Part 6: Storage and Leftovers: Keeping the Goodness Alive
Storing Your Culinary Treasures
If you have leftovers, store them in an airtight container in the refrigerator for up to 3-4 days. They’ll still taste great the next day, especially if you give them a quick reheat in a pan with a little more olive oil.
Leftovers are a gift from the kitchen gods! You can enjoy those delicious green beans even longer, and they'll make a great quick meal when you’re short on time.
Reheating Like a Pro
To reheat your green beans, simply add them to a pan over medium heat with a little olive oil. Cook for a few minutes, tossing occasionally, until they're heated through. They won’t be as crispy as fresh, but still delicious! You can even add a splash of water to create a bit of steam and help to rehydrate them.
Don’t worry, reheating green beans is easy and doesn't require any special skills. A quick reheat in a pan and you’re good to go!
Part 7: Mastering the Art of Perfect Green Beans
Keep it Simple, Keep it Delicious
Remember, the beauty of this recipe lies in its simplicity. Don’t overthink it! Just focus on using fresh, high-quality ingredients and letting those natural flavours shine.
The most delicious recipes are often the simplest ones. Let the natural flavours of the green beans shine, and don’t be afraid to trust your instincts.
The Power of Salt
Don't be afraid to season generously! The salt enhances the flavour of the beans and helps them cook more evenly. And remember to salt the water you’re blanching them in, too.
Salt is a chef's best friend. It brings out the flavour of every ingredient, so don’t be shy about using it.
Don't Overdo It
It's easy to overcook green beans, so keep a close eye on them. They should be crisp-tender, not mushy. You can always cook them a little longer if they need it, but it’s much harder to fix overcooked beans!
Overcooked green beans are a culinary tragedy, so it's crucial to pay attention to the cooking time. You want them to have a delightful snap, not turn into mush.
Experimentation is Key
This is your chance to get creative! Add your favourite herbs, spices, and other ingredients. Try different combinations to see what you like best.
The world of culinary creativity is your oyster. Feel free to experiment and find your perfect green bean recipe.
Part 8: Beyond the Basics: Variations and Ideas
The Green bean salad: Light and Fresh
For a lighter, summery twist, toss the cooked green beans with a vinaigrette, chopped red onion, and toasted almonds. Or, try a lemon-herb dressing with a bit of grated parmesan cheese. A little bit of crumbled feta cheese also adds a nice salty flavour.
green bean salad is a refreshing and delicious way to enjoy this versatile vegetable. It’s perfect for warm weather and outdoor gatherings.
Green Bean and Sausage Stir-Fry: A Hearty Delight
For a hearty meal, stir-fry the green beans with diced sausage, onions, and garlic. Serve over rice or noodles. You can also add other vegetables like bell peppers, mushrooms, or snow peas for a colourful and flavourful dish.
green bean stir-fry is a quick and easy weeknight dinner solution. It’s packed with flavour and nutrients, and it's a great way to use up leftover green beans.
The green bean casserole: A Classic with a Twist
While not traditionally stovetop, a creamy green bean casserole can be a great option for a special meal or a family gathering. You can always tweak the classic recipe to suit your preferences. Try adding a bit of Dijon mustard or a splash of white wine for a more complex flavour.
Green bean casserole is a beloved classic, and there are so many delicious variations to try. Don’t be afraid to add your own personal touch and make it your own.
Part 9: FAQs: Your Green Bean Questions Answered
The Mystery of the Yellow Beans: Why Do They Turn Yellow?
Yellowing green beans are often a sign of overcooking or age. To prevent yellowing, blanch them briefly and cool them quickly in ice water. Additionally, use fresh beans for the best results.
It’s a common problem, but there’s an easy solution! Blanching and using fresh beans will help you avoid those dreaded yellow beans.
The Blanching Dilemma: Can I Skip It?
You can skip the blanching step, but your beans might not be as bright green or crisp-tender. Just cook them in a pan with oil and spices for a little longer. Keep in mind they might be slightly softer.
Blanching is definitely a best practice, but if you’re in a pinch, you can skip it. Just be aware that your green beans might not be as vibrant.
Reheating Secrets: How to Bring Back the Flavour
The best way to reheat leftover green beans is in a pan with a little olive oil. Cook them over medium heat for a few minutes, tossing occasionally, until they're heated through. Adding a splash of water can help to rehydrate them, too.
Don’t worry about leftover green beans, a quick reheat is all they need. A little bit of olive oil will bring back their flavor and make them taste like they’re fresh out of the pan.
Flavor Boosters: Make Your Green Beans Sing
There are many ways to add flavor to your green beans. Try using different spices, herbs, and other ingredients like garlic, lemon zest, red pepper flakes, and toasted nuts. You can also add a pinch of sugar to balance the flavours or a little bit of balsamic vinegar for a tangy twist.
Let your creativity soar! Experiment with different flavors and create your perfect green bean symphony.
Frozen vs. Fresh: Can I Use frozen beans?
Absolutely! You can use frozen green beans. Simply defrost them first, then cook them in the same way as fresh green beans. Keep in mind that they might be slightly softer, as they've already been cooked. You might need to adjust the cooking time slightly.
Frozen green beans are a great pantry staple, and they’re just as delicious as fresh. Just make sure to defrost them before cooking.
I hope you’ve enjoyed this little peek into my world of green beans! Now it’s your turn to give it a go. Trust me, once you try this simple yet flavorful recipe, you’ll never go back to boring, mushy green beans again. Happy cooking!
Everyone is watching

Corn on the Cob: The Ultimate Guide to Perfectly Cooked Ears
Healthy MealsAh, corn on the cob. Just the name evokes images of sunny days, barbecues, and that sweet, juicy flavour that ...

Perfect Pork Roast Oven Cooking Time: A Guide to Delicious Results
Healthy MealsThere's something truly satisfying about a perfectly roasted pork. The aroma alone is enough to make your mout...

Ham Cooking Time: How Long to Bake, Smoke, or Boil a Delicious Ham
Healthy MealsAh, ham. It's a classic, isn't it? A real crowd-pleaser, especially around holidays. And when done right, it'...

Scallops: The Ultimate Guide to Perfect Cooking
Healthy MealsAh, scallops. Those delicate, sweet, and utterly delicious morsels of the sea. They hold a special place in my...

Spaghetti Squash: The Ultimate Guide to Cooking and Serving
Healthy MealsRemember that time you saw spaghetti squash at the supermarket, looking all bumpy and strange, and thought, "W...
