I've always been a grill fanatic. There's something about those smoky char lines and the satisfying sizzle that makes me feel like a master chef. But let's be honest, sometimes the weather doesn't cooperate, or you simply don't have a grill. Does that mean you're destined to a life of bland, overcooked steak? Absolutely not! You can achieve that perfect sear and juicy pink centre right on your stovetop or in your oven. Today, I'm going to share my tried and true methods, which have turned even the most skeptical grill-averse friends into steak lovers.
(Part 1) Setting the Stage: Steak Essentials

Think of this as your culinary playbook, the foundation for crafting a delicious steak experience.
The Right Cut:
Let's start with the heart of the matter: the cut. While I have a soft spot for ribeye, there's a whole world of options to explore. new york strip, sirloin, and even a tender filet mignon are fantastic choices. If you're feeling adventurous, flank or skirt steak are great for a quick and easy sear. They might be thinner, but their rich flavour and tenderness make them perfect for a simple, satisfying meal.
choosing the right steak:
Don't just grab the first steak you see. Here's what to look for at the butcher counter:
- Marbling: Those delicate white streaks of fat running through the muscle are your secret weapon. More marbling equals more flavour and tenderness. Don't be shy about asking for a steak with good marbling; it's worth the extra cost.
- Colour: A vibrant, bright red hue signals freshness. Avoid any steaks that appear dull or discoloured. This is a good indicator of quality and freshness.
- Thickness: Aim for a steak that's at least 1 inch thick. This ensures even cooking and helps the steak retain moisture. Think of it as a heat shield, preventing the inside from becoming dry.
Don't be afraid to ask your butcher for advice. They're the experts and can guide you towards the perfect cut based on your preferences and cooking method.
(Part 2) Mastering the Stovetop: Sizzling Success

The stovetop is your canvas, and we're going to paint a masterpiece of flavour and texture.
Getting the Pan Hot:
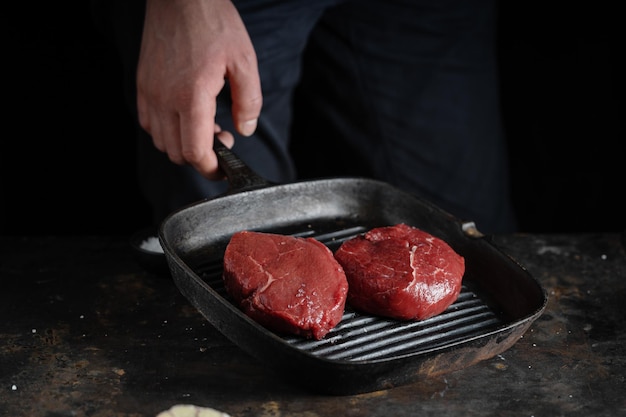
This is where patience pays off. A scorching hot pan is the key to a beautiful, crispy crust. Let that cast iron skillet (or any heavy-bottomed pan) heat over medium-high heat for at least 5 minutes. You'll know it's ready when a drop of water sizzles immediately and evaporates. It's a bit of a culinary test, but it ensures your steak gets the perfect sear.
Seasoning with Savvy:
Before you even think about adding the steak, season it generously with salt and pepper. Let the flavours penetrate the surface, creating a delicious crust. Feel free to add other spices, like garlic powder, paprika, or a touch of chili powder. But remember, simplicity is often the best way to let the natural flavour of the steak shine through.
The Art of Searing:
Now for the fun part! Place your seasoned steak in the hot pan and resist the urge to touch it. Let it cook undisturbed for 3-4 minutes. This allows the steak to develop a beautiful, crispy crust on the outside while keeping the inside juicy and tender. After those initial 3-4 minutes, flip the steak and cook for another 3-4 minutes, or until you achieve the desired level of doneness.
Controlling the Heat:
Every pan and every steak is unique. You may need to adjust the heat slightly. If the pan gets too hot and starts smoking excessively, turn the heat down a notch. The goal is a consistent sear, not a raging inferno.
(Part 3) The Oven Finish: Taking it to the Next Level

While the stovetop handles the initial sear, the oven provides a consistent, even heat, ensuring a perfect cook.
The Oven's Role:
After you've achieved that gorgeous sear on both sides, transfer the steak to a preheated oven to finish cooking. This is where the magic happens. The oven provides a steady, controlled heat, ensuring the steak cooks evenly without over-browning.
Oven Temperature Matters:
For a medium-rare steak, preheat your oven to 350 degrees fahrenheit (175 degrees Celsius). For a more well-done steak, increase the temperature to 400 degrees Fahrenheit (200 degrees Celsius). This ensures that the internal temperature of the steak reaches your desired level.
Timing is Key:
The time your steak needs in the oven depends on its thickness and your desired level of doneness. A general rule of thumb is 5-8 minutes per side for a medium-rare steak, or 10-12 minutes for a well-done steak. But remember, ovens can vary, so keep a close eye on your steak. It’s a good idea to check the temperature with a meat thermometer for ultimate accuracy.
(Part 4) steak doneness: The Temperature Test
The key to achieving the perfect steak is understanding how to gauge doneness.
The Finger Test:
The classic method is to use your finger to feel the firmness of the steak. Press the fleshy part of your palm to mimic the feel of a rare steak, then press your thumb into the palm to mimic a medium-rare steak. But for a more accurate and consistent result, use a meat thermometer.
The Meat Thermometer:
Here's a guide to steak doneness based on internal temperature:
| Doneness | Internal Temperature (°F) |
|---|---|
| Rare | 125-130°F |
| Medium-rare | 130-135°F |
| Medium | 135-140°F |
| Medium-well | 140-145°F |
| Well-done | 145°F and above |
Remember, these are just guidelines. Your perfect steak is a matter of personal preference. I'm a fan of medium-rare, with a juicy pink centre and that crispy crust.
(Part 5) Resting is Key: Releasing the Flavour
After all that hard work, patience is your next ingredient for a truly delicious steak.
Why Resting Matters:
When you cook a steak, the juices get pushed to the surface. By letting it rest for 5-10 minutes before slicing, you allow those juices to be reabsorbed into the steak. This results in a more evenly cooked and juicy steak, as well as a more tender texture.
How to Rest a Steak:
Transfer the cooked steak to a cutting board and loosely cover it with aluminum foil. This creates a little steam, allowing the juices to redistribute. Avoid slicing into the steak immediately; the juices will run out, leaving a dry and less flavourful steak.
(Part 6) Slicing and Serving: Presenting Your Masterpiece
Now that your steak has had its well-deserved rest, it's time to reveal its culinary magic.
Slicing Techniques:
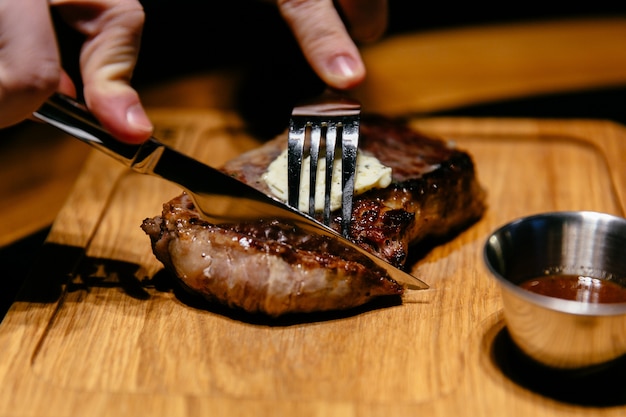
Slice your steak against the grain, meaning cut across the muscle fibres. This is a key technique for maximizing tenderness. It breaks up the muscle structure, making it easier to chew and enhancing the overall texture.
Serving Suggestions:
The possibilities are endless! Serve your steak with a side of mashed potatoes, roasted vegetables, or a classic salad. A drizzle of your favorite sauce can elevate the flavour to another level. Personally, I love adding a bit of butter and fresh herbs to my steak while it's resting. It adds a rich, aromatic touch that complements the steak beautifully.
(Part 7) Going Beyond the Basics: Elevating Your Steak Game
Mastering the fundamentals is essential, but don't be afraid to explore new flavours and techniques. Here are some ideas to enhance your steak game:
Marinade Magic:
Marinade your steak for a few hours or overnight to infuse it with even more flavour. My go-to marinade is a simple mixture of olive oil, soy sauce, garlic, and herbs. But you can experiment with citrus juice, spices like cumin or paprika, or even a bit of honey. Let your creativity run wild!
Creative Sauces:
While a simple butter sauce is always delicious, consider trying more adventurous sauces to complement your steak. A mushroom sauce with a touch of thyme, a creamy blue cheese sauce with a hint of garlic, or even a spicy chimichurri sauce can add a whole new dimension of flavour.
Grilled Cheese Steak:
This is a personal favourite! After searing your steak, place it between two slices of bread with melted cheese and caramelized onions. It's a heavenly combination that will have you craving more.
(Part 8) FAQs
1. Can I use a cast iron pan for the entire cooking process?
Absolutely! Cast iron pans are fantastic heat conductors and retain heat exceptionally well. You can sear the steak on both sides and then transfer the entire pan to the oven to finish cooking. Just be sure to preheat the oven with the pan inside. This prevents thermal shock and ensures a smooth cooking transition.
2. How do I prevent my steak from sticking to the pan?
The key is a hot enough pan and a high-heat oil, like avocado or grapeseed oil. Ensure your pan is screaming hot before adding the steak. If it starts to stick, try gently lifting it with tongs. It's better to let it cook a bit longer than to risk tearing the steak by trying to pry it off the pan.
3. What happens if I overcook my steak?
Unfortunately, overcooked steak is dry and tough. But don't despair! If you accidentally overcook your steak, try slicing it thinly and using it in a stir-fry or a sandwich. It's still edible and can be incorporated into other dishes.
4. How do I store leftover steak?
Store leftover steak in an airtight container in the refrigerator for up to 3 days. Avoid freezing it, as this can affect the texture.
5. What is the best way to reheat leftover steak?
Reheat leftover steak in a skillet over medium heat with a tablespoon of butter or oil. Cook until heated through. You can also reheat steak in the oven at 350 degrees Fahrenheit (175 degrees Celsius) for about 10 minutes.
I hope these tips have inspired you to step away from the grill and embrace the world of stovetop and oven steak cooking. It's easier than you think, and you'll be amazed at the results! Happy cooking!
Everyone is watching

Corn on the Cob: The Ultimate Guide to Perfectly Cooked Ears
Healthy MealsAh, corn on the cob. Just the name evokes images of sunny days, barbecues, and that sweet, juicy flavour that ...

Perfect Pork Roast Oven Cooking Time: A Guide to Delicious Results
Healthy MealsThere's something truly satisfying about a perfectly roasted pork. The aroma alone is enough to make your mout...

Ham Cooking Time: How Long to Bake, Smoke, or Boil a Delicious Ham
Healthy MealsAh, ham. It's a classic, isn't it? A real crowd-pleaser, especially around holidays. And when done right, it'...

Scallops: The Ultimate Guide to Perfect Cooking
Healthy MealsAh, scallops. Those delicate, sweet, and utterly delicious morsels of the sea. They hold a special place in my...

Spaghetti Squash: The Ultimate Guide to Cooking and Serving
Healthy MealsRemember that time you saw spaghetti squash at the supermarket, looking all bumpy and strange, and thought, "W...
