There's a certain magic to a standing rib roast, isn't there? The sheer size of it, the beautiful presentation with those gleaming bones, and the promise of incredibly juicy, flavorful meat - it all adds up to a meal that feels truly special. I've always loved the way it brings people together, making even the most ordinary occasion feel celebratory.
Of course, like any good cook, I've had my fair share of roast disasters. I've learned the hard way that a standing rib roast isn't just about throwing a big chunk of meat in the oven and hoping for the best. There's a whole art to it, from choosing the right cut to mastering the perfect cooking technique.
But don't worry, my friend. I'm here to guide you through the process, sharing all the tips and tricks I've picked up over the years. We'll cover everything from selecting the ideal cut to the best seasoning methods and even how to carve the roast like a pro. By the end of this guide, you'll be ready to impress your family and friends with a truly unforgettable standing rib roast. So grab a cuppa, settle in, and let's dive into the world of this culinary masterpiece!
(Part 1) Choosing the Right Cut: The Foundation of Flavor
Let's face it, you can't expect a perfect standing rib roast if you don't start with the right cut. It's like building a house – you need a strong foundation to support everything else. In this case, the foundation is the meat itself.
prime rib vs. Standing Rib Roast: Decoding the Terminology
You've probably heard both terms "prime rib" and "standing rib roast" used, and sometimes they seem interchangeable. But there's a subtle difference:
- Prime rib usually refers to a bone-in cut that includes the rib bones and the "eye" of the roast. It's a luxurious cut, often found at restaurants, and it's typically cooked with the bones intact, adding a unique richness to the flavor.
- Standing rib roast is a broader term that can encompass both bone-in and boneless cuts. It's a more general term, so if you're buying from a butcher, make sure to specify whether you want it bone-in or boneless.
For this guide, we'll be using the term "standing rib roast" to cover both types, keeping things simple.
Choosing the Right Size: How Many Guests are You Feeding?
The size of your standing rib roast will depend on the number of people you're feeding. Don't underestimate the appetites of your guests, especially if you're serving the roast with delicious sides! Here's a handy guide to help you choose the right size:
| Size (lbs) | Serves |
|---|---|
| 3-4 lbs | 4-6 people |
| 5-6 lbs | 6-8 people |
| 7-8 lbs | 8-10 people |
Remember, this is just a guideline. If you have a group of big eaters, you might want to bump up the size a bit. And if you're planning on leftovers (which I always recommend!), go for a slightly larger roast.
Bone-in vs. Boneless: Choosing What Suits Your Style
This is where personal preference comes in. I'm a big fan of bone-in rib roasts, especially for the added flavor the bones impart. They help to keep the meat moist and tender, and they look absolutely stunning on the table. But if you're looking for a roast that's easier to carve and less intimidating for beginners, boneless might be a better choice. Ultimately, it's up to you.
Getting the Best Cut: Your Butcher is Your Ally
Don't be shy about asking your butcher for advice! They're experts in meat and know what they're talking about. Tell them how many people you're feeding, how you plan to cook the roast, and how rare or well-done you like your meat. They'll be happy to guide you towards the perfect cut for your needs. Remember, a good butcher is a valuable resource – take advantage of their expertise!
(Part 2) Preparing the Standing Rib Roast: Setting the Stage for Flavor
You've got the perfect cut; now it's time to get it ready for the oven. This preparation stage is crucial for ensuring a tender, juicy, and flavorful roast. It's all about creating the perfect environment for those delicious flavors to develop.
Seasoning and Flavoring: A Simple, Powerful Approach
When it comes to seasoning, I believe in keeping things simple and letting the natural flavor of the beef shine through. Here's my go-to seasoning combination:
- Salt: Kosher salt is my go-to. It's a flavor powerhouse, drawing moisture out of the meat and creating a beautiful, crispy crust. Don't be afraid to be generous with the salt!
- Black Pepper: Freshly ground black pepper adds a touch of spice and depth. The aroma of freshly ground pepper is irresistible, and the flavor adds a beautiful counterpoint to the richness of the beef.
- Garlic: A few cloves of minced garlic provide a subtle aroma and flavor boost. Garlic is a classic companion to beef, adding a warmth and complexity that you can't find anywhere else.
- Rosemary: A sprig or two of fresh rosemary adds a lovely herbaceous aroma. The earthy notes of rosemary complement the beef beautifully, adding a layer of freshness and complexity.
I rub this seasoning mixture all over the roast, making sure every surface is well coated. You can also get creative and add other herbs and spices like thyme, onion powder, or paprika. But remember, the goal is to enhance the natural flavor of the beef, not to overwhelm it.
Patting Dry and Leaving It Uncovered: Giving the Roast a Head Start
After seasoning, pat the roast dry with paper towels. This removes any excess moisture that could steam the roast instead of browning it. Then, leave the roast uncovered in the refrigerator for at least 4 hours, ideally overnight. This crucial step allows the salt to penetrate the meat, drawing out moisture and creating a flavorful crust. This is a little magic trick that makes a world of difference in the final product.
(Part 3) Roasting the Standing Rib Roast: The Art of Low and Slow
Now we're getting to the heart of the matter – roasting! The key to a tender, succulent standing rib roast is low and slow cooking. This gentle approach allows the heat to break down the connective tissue in the meat, resulting in a juicy and melt-in-your-mouth texture that will have your guests begging for more.
Preheat the Oven: Setting the Stage for Success
Start by preheating your oven to 450°F (232°C). This high initial heat is crucial for creating a crispy, flavorful crust. Think of it as a quick burst of energy to get the roast going.
Searing the Roast: Adding a Layer of Depth
Before you pop the roast into the oven, give it a good sear. This adds a beautiful caramelization and extra flavor. I usually sear it in a large cast iron skillet over high heat, ensuring to brown all sides evenly. The result is a crispy, flavorful exterior that contrasts beautifully with the tender interior. If you don't have a cast iron skillet, a heavy-bottomed oven-safe skillet will do just fine. Just make sure it can handle the high heat.
roasting time and Temperature: Finding the Perfect Balance
Now, it's time for the slow and steady cooking process. Here's a general guideline for roasting times and temperatures, but remember that every oven is different, so adjust accordingly:
- Rare: 125-130°F (52-54°C) for 15-20 minutes per pound.
- Medium-rare: 130-135°F (54-57°C) for 18-22 minutes per pound.
- Medium: 135-140°F (57-60°C) for 20-25 minutes per pound.
- Medium-well: 140-145°F (60-63°C) for 22-27 minutes per pound.
- Well-done: 145-150°F (63-66°C) for 25-30 minutes per pound.
After searing, place the roast in the preheated oven and immediately reduce the temperature to 325°F (163°C). This is where the magic happens – the low and slow cooking that transforms the roast into a masterpiece.
Monitoring the Temperature: Staying in Control
It's crucial to monitor the internal temperature of the roast throughout the cooking process. I use a meat thermometer to ensure it reaches the desired doneness. Insert the thermometer into the thickest part of the roast, avoiding the bone. The thermometer will give you a clear picture of how the roast is progressing and help you avoid overcooking.
Resting the Roast: Letting the Juices Redistribute
Once the roast has reached the desired temperature, it's time for a crucial step – resting. This allows the juices to redistribute throughout the meat, ensuring that it stays moist and tender when you carve it. I usually let the roast rest for at least 15-20 minutes, covered with foil, before carving. This is a simple step, but it makes a huge difference in the final result.
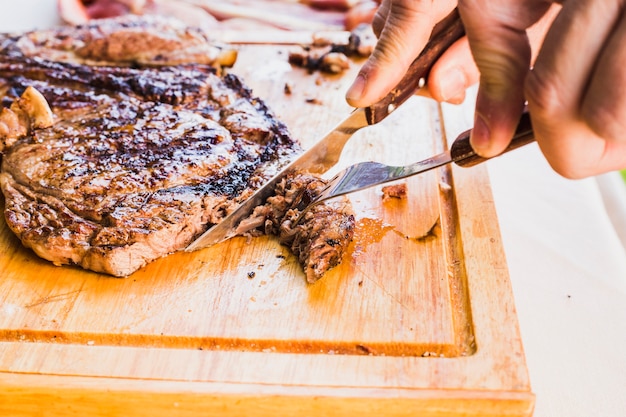
(Part 4) The Art of Carving a Standing Rib Roast: A Guide for Beginners
Carving a standing rib roast can seem daunting, but it's really not that complicated. With a little practice and a sharp knife, you'll be slicing like a pro in no time. Here's how I approach it:
1. Slice Against the Grain: Unveiling Tenderness
The most important thing is to slice against the grain. This ensures that the meat is tender and easy to chew. To find the grain, look at the muscle fibres in the meat. The grain runs lengthwise, so you'll want to slice perpendicular to it. It's like slicing through a stack of logs – you want to cut across the grain, not with it.
2. Start at the End: A Strategic Approach
If you're carving a bone-in roast, start by slicing off the end piece of meat. This will expose the bone and make it easier to remove. It's like taking a bite out of a sandwich – you start at the end to get to the good stuff.
3. Follow the Bone: Guided by Nature
Once the end piece is removed, follow the bone with your knife, slicing against the grain. You can use a carving fork to hold the meat steady while you slice. Just think of the bone as a guide, helping you to create beautiful, even slices.
4. Separate the Ribs: Presenting a Showstopper
If you're carving a bone-in roast, you'll need to separate the ribs. This can be done by carefully cutting between the ribs with a chef's knife. Once the ribs are separated, you can remove them from the roast or leave them in place for presentation. If you're feeling fancy, you can even arrange the ribs in a fan shape for a stunning visual impact.
(Part 5) side dishes: Complementing the Feast
No standing rib roast is complete without a selection of delicious side dishes to round out the meal. Here are some of my favorites that perfectly complement the richness of the roast:
- Roasted Vegetables: Classic roasted potatoes, Brussels sprouts, carrots, and asparagus are always a crowd-pleaser. The roasting process brings out the natural sweetness of the vegetables, and they add a lovely contrast of textures and flavors.
- Creamy mashed potatoes: A creamy and comforting side that perfectly complements the richness of the roast. Mashed potatoes are a classic pairing for roast beef, adding a touch of indulgence and elegance to the meal.
- green bean casserole: A classic Thanksgiving favourite that's always a hit. This creamy, cheesy casserole adds a touch of nostalgia and comfort to any table.
- Cranberry Sauce: A sweet and tangy sauce that adds a lovely contrast to the savory roast. Cranberry sauce adds a burst of bright acidity, balancing the richness of the roast and providing a refreshing contrast.
- Yorkshire Pudding: A light and fluffy pudding that's often served alongside roast beef. Yorkshire pudding adds a delightful element of lightness and texture, making the meal even more satisfying.
You can also get creative and try different side dishes that reflect your personal tastes and the season. Just remember to choose sides that complement the flavor of the roast and don't overpower it.
(Part 6) Leftover Magic: Repurposing the Roast
Let's face it – one of the best parts about a roast is the leftovers! Don't let those delicious leftovers go to waste. There are endless possibilities for repurposing your roast and transforming it into new culinary adventures.
roast beef sandwiches: A Simple Yet Satisfying Delight
Slice the leftover roast thinly and create delicious sandwiches with your favourite toppings. I love a classic combination of horseradish, mustard, and a slice of cheese on toasted bread. It's a simple yet satisfying meal that will remind you of the deliciousness of the roast.
Roast Beef Salad: A Light and Flavorful Meal
Dice the leftover roast and toss it with your favourite salad greens, vegetables, and dressing. You can even add some cooked potatoes or pasta for a more substantial meal. It's a lighter option that's perfect for lunch or a casual dinner.
Roast Beef Soup: A Hearty and Comforting Option
Use the leftover roast to create a hearty and flavorful soup. You can simmer it with vegetables, broth, and herbs to create a delicious and comforting meal. Roast beef soup is a perfect way to warm up on a chilly day and use up those delicious leftovers.
Roast Beef Hash: A Crispy and Satisfying Feast
Combine leftover roast with diced potatoes, onions, and other vegetables for a hearty and satisfying hash. You can cook it in a skillet on the stovetop or in the oven for a crispy texture. Roast beef hash is a classic comfort food that's perfect for breakfast, brunch, or even dinner.
(Part 7) FAQs: Addressing Your Burning Questions
You've got questions, I've got answers! Here are some frequently asked questions about standing rib roast:
1. How long does it take to cook a standing rib roast?
The cooking time depends on the size and desired doneness of the roast. In general, a 3-4 pound roast will take about 2-3 hours, while a 6-7 pound roast will take 3-4 hours. Remember, you're aiming for a slow and steady cooking process, allowing the heat to penetrate the meat evenly and break down the connective tissue.
2. How do I know when my standing rib roast is cooked?
You can use a meat thermometer to check the internal temperature. The roast is considered done when it reaches the desired temperature, according to the chart in Part 3. A meat thermometer is an essential tool for any serious cook, ensuring that your roast is cooked to perfection.
3. What happens if I overcook my standing rib roast?
If you overcook the roast, it will become dry and tough. Overcooking is the enemy of a tender, juicy roast! To avoid overcooking, monitor the temperature closely and remove the roast from the oven as soon as it reaches the desired doneness.
4. Can I cook a standing rib roast in a slow cooker?
While you can cook a standing rib roast in a slow cooker, it's not the ideal method for achieving a crispy crust. The slow cooker is best for creating a tender and juicy roast, but the crust will be softer. If you're looking for that crispy exterior, stick to the oven method.
5. What are some good wine pairings for standing rib roast?
A full-bodied red wine like Cabernet Sauvignon, Merlot, or Zinfandel complements the rich flavor of the roast. These wines have enough structure and complexity to stand up to the bold flavors of the roast beef, creating a harmonious and satisfying pairing.
(Part 8) Final Thoughts: A Culinary Triumph
There you have it – my complete guide to achieving a perfect standing rib roast. Remember, it's about finding the right cut, prepping it with care, and roasting it with patience. Don't be afraid to experiment with different seasonings and side dishes to create your own signature dish.
A standing rib roast is more than just a meal; it's an experience. It's about gathering loved ones around the table, sharing laughter and conversation, and savouring a truly special meal. So, go forth, embrace the challenge, and create a culinary masterpiece that will be remembered for years to come.
Everyone is watching

Corn on the Cob: The Ultimate Guide to Perfectly Cooked Ears
Healthy MealsAh, corn on the cob. Just the name evokes images of sunny days, barbecues, and that sweet, juicy flavour that ...

Perfect Pork Roast Oven Cooking Time: A Guide to Delicious Results
Healthy MealsThere's something truly satisfying about a perfectly roasted pork. The aroma alone is enough to make your mout...

Ham Cooking Time: How Long to Bake, Smoke, or Boil a Delicious Ham
Healthy MealsAh, ham. It's a classic, isn't it? A real crowd-pleaser, especially around holidays. And when done right, it'...

Scallops: The Ultimate Guide to Perfect Cooking
Healthy MealsAh, scallops. Those delicate, sweet, and utterly delicious morsels of the sea. They hold a special place in my...

Spaghetti Squash: The Ultimate Guide to Cooking and Serving
Healthy MealsRemember that time you saw spaghetti squash at the supermarket, looking all bumpy and strange, and thought, "W...