Ah, roast beef. The very word conjures up images of Sunday dinners, family gatherings, and the comforting aroma of slow-cooked meat filling the air. For many, it’s the ultimate British comfort food, a dish that speaks to tradition and good times. But let’s be honest, getting that roast beef just right can feel like a culinary tightrope walk. There’s a lot of pressure to deliver a perfect, succulent, melt-in-your-mouth masterpiece, the kind that leaves everyone saying, “This is the best I’ve ever had!”
Over the years, I’ve tried countless recipes, experimented with different cuts of meat, and learned a thing or two about mastering the art of roast beef. It’s not rocket science, but there are a few key tips and tricks that can transform your roast beef from good to absolutely brilliant. We’re talking about that beautiful, deep brown colour, that perfectly crisp exterior, and that juicy, tender inside. The kind of roast beef that’ll have you reminiscing about grandma’s Sunday dinners for years to come.
So, grab your apron, put on some good tunes, and let’s embark on this culinary journey together. I’m going to take you through every step of the process, from selecting the perfect cut of meat to nailing the perfect resting time. By the end of this, you’ll be a roast beef champion, ready to impress your friends and family with your newfound culinary skills.
(Part 1) choosing the right cut

The first step, and arguably the most important, is choosing the right cut of beef. Now, I know what you’re thinking, "There are so many different cuts!" And you're right, there are! But fear not, I’m going to break down the most common cuts and help you pick the one that best suits your needs. Let’s get started!
1. Rib of Beef
This is the Rolls Royce of roast beef cuts. Rib of beef is a true showstopper, boasting beautiful marbling that translates to incredible tenderness and flavor. It’s my personal favorite, and you’ll understand why once you taste it. Just be prepared to pay a bit more for this luxurious cut.
2. Sirloin
Sirloin is a classic for a reason. It’s a leaner cut than rib, but still offers a lovely amount of flavour. It’s also a great option if you’re looking for a more affordable cut. Sirloin is versatile enough to work for smaller gatherings or even a weeknight dinner.
3. Topside
Topside is a lean and economical cut, but it can be a little bit tougher than the other cuts. To ensure tenderness, I recommend using a slow cooking method for topside. It works beautifully for slow roasting or braising, resulting in a melt-in-your-mouth experience.
4. Rump
Rump is a versatile cut that can be cooked whole or in steaks. It’s a good option for a larger group, as it’s a fairly substantial cut. Rump also works well for grilling, if you’re looking for a slightly different approach.
(Part 2) Preparing the Beef

You’ve got your chosen cut of beef, and now it’s time to get it prepped for roasting! Here’s how I like to do it:
1. Pat It Dry
Before you even think about seasoning, give your beef a good pat dry with some kitchen paper. This helps to create a lovely crisp exterior when it’s roasted. Trust me, nobody wants a soggy roast!
2. Seasoning Like a Pro
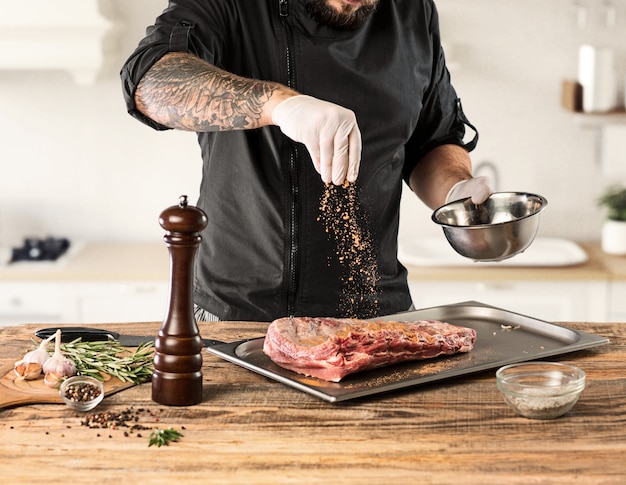
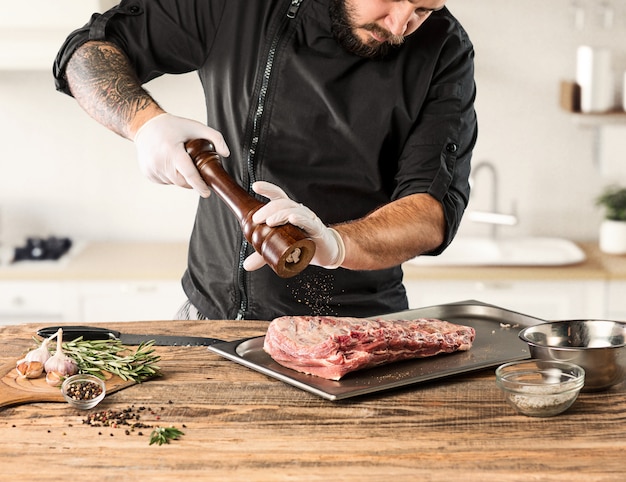
Here’s where it gets interesting! Don't just go for the usual salt and pepper. Get creative. I like to use a mix of coarse sea salt, freshly ground black pepper, and a sprinkle of paprika. You could even add some herbs like rosemary, thyme, or oregano. Experiment and find what flavours you love!
Remember, the key to good seasoning is balance. You want to be able to taste the natural flavour of the beef, but also add a touch of complexity with your spices and herbs. Don’t be afraid to adjust the seasoning as you go, adding a pinch more of this or that as you see fit.
3. Don’t Be Afraid of Fat
If your chosen cut of beef has a nice layer of fat, leave it on! Fat equals flavour, my friends. It helps to keep the meat juicy and tender during cooking. Plus, it renders down and adds amazing flavour to your gravy. If you’re worried about the fat being too much, you can trim it slightly, but don’t go overboard.
(Part 3) Roasting Perfection

This is the heart of the roast beef process! You’ve prepped your beef, now it’s time to roast it to glorious perfection. Remember, everyone has their own little tricks and secrets, and I’m about to share mine with you.
1. Preheat the Oven
Before you even think about putting the beef in the oven, preheat it to a high temperature, around 220°C (425°F). This creates a nice sear on the outside of the beef, locking in the juices and adding that gorgeous browning.
2. The First Sear
Now, for the sear! Place your beef on a roasting rack in a roasting tin and pop it into the preheated oven for about 15-20 minutes. You’re aiming for a beautiful, deep brown colour on the outside. Don’t forget to rotate the beef halfway through, to ensure even browning.
The sear is crucial for developing flavour and creating a crispy crust. If you’re not using a roasting rack, ensure the beef is placed in the tin so it’s not sitting in its own juices. You want airflow around the meat to achieve the perfect sear.
3. Lower the Heat
Once the beef has a lovely sear, reduce the oven temperature to about 180°C (350°F). This allows the beef to cook through gently, without drying out. You’ll be able to achieve that perfect balance of juicy interior and crispy exterior.
4. cooking time
Here’s where things get a little tricky. The cooking time will vary depending on the size and thickness of your beef. You’ll want to cook it until it reaches your desired level of doneness.
Here’s a general guide, but always remember to use a meat thermometer for accuracy:
| Doneness | internal temperature (°F) | Internal Temperature (°C) | Cooking Time (per pound) |
|---|---|---|---|
| Rare | 125-130 | 52-54 | 15-20 minutes |
| Medium-Rare | 130-135 | 54-57 | 20-25 minutes |
| Medium | 140-145 | 57-63 | 25-30 minutes |
| Medium-Well | 150-155 | 66-68 | 30-35 minutes |
| Well-Done | 160-165 | 71-74 | 35-40 minutes |
Remember, these are just estimates. You might need to adjust the cooking time depending on your oven and the specific cut of beef you’re using. Don’t be afraid to peek at the roast periodically and make adjustments as needed.
5. Resting Time
This is a crucial step! After your beef is cooked, let it rest for about 15-20 minutes before carving. This allows the juices to redistribute throughout the meat, resulting in a super juicy and tender roast. It might seem like a waste of time, but it’s absolutely vital for a truly delicious roast.
While the beef rests, you can prepare your sides and gravy, and let the aroma of your culinary masterpiece fill your home. A good roast beef deserves the wait, so resist the temptation to carve immediately.
6. The Ultimate Test
So, you’ve cooked your beef, you’ve rested it, now it’s time for the ultimate test - the trusty meat thermometer. I recommend aiming for an internal temperature of 145°F (63°C) for medium-rare, 160°F (71°C) for medium, and 170°F (77°C) for medium-well.
Using a meat thermometer is the most reliable way to ensure your roast beef is cooked to your liking. It takes the guesswork out of the process and ensures you avoid overcooking.
(Part 4) Sides for the Perfect Roast
No roast beef is complete without some delicious sides! Here are a few of my favourites:
1. roast potatoes
What’s a roast dinner without crispy, golden roast potatoes? It’s a crime, I tell you! I like to parboil them first, then toss them in some olive oil, salt, pepper, and rosemary. Then, I roast them in the oven with the beef for the last hour of cooking, ensuring they get nice and crispy on the outside while remaining fluffy on the inside.
2. Yorkshire Pudding
yorkshire puddings are an absolute must-have with roast beef. They’re light, fluffy, and soak up all the delicious gravy. I like to make mine in a muffin tin for easy serving, but you can use a traditional Yorkshire pudding tin as well.
3. Roasted Vegetables
Roasted vegetables add a touch of sweetness and freshness to the meal. I love to roast carrots, parsnips, and Brussels sprouts with a drizzle of olive oil, salt, pepper, and a pinch of sugar. You can also add other seasonal vegetables, like butternut squash or sweet potatoes, for a more vibrant flavour profile.
4. Gravy
No roast beef is complete without a rich and flavorful gravy. I like to make mine from the beef drippings and pan juices. Just be sure to deglaze the pan with some red wine or beef stock for extra flavour. You can also add a tablespoon of flour to the pan juices to thicken the gravy, but be careful not to burn it.
(Part 5) Making the Most of Leftovers
Leftover roast beef? Don’t even think about throwing it away! There are so many delicious things you can do with it.
1. roast beef sandwiches
Who doesn’t love a good roast beef sandwich? Just pile some leftover beef onto some crusty bread with some horseradish sauce, mustard, and a few pickles. You can also add a layer of cheese for extra indulgence.
2. Beef and Ale Pie
If you’re looking for something a little more substantial, try making a beef and ale pie. Simply combine the leftover beef with some chopped vegetables, gravy, and a dollop of ale. Then, top it with a flaky pastry crust and bake until golden brown.
3. Beef and Potato Hash
Beef and potato hash is a simple and satisfying way to use up leftover roast beef. Just combine the leftover beef with some diced potatoes, onions, and any other vegetables you have on hand. Then, sauté it all together in a pan until crispy. You can also add some herbs, spices, and a touch of Worcestershire sauce for extra flavor.
(Part 6) Tips and Tricks for Roast Beef Mastery
Okay, you’ve got all the basics down, but I’m about to share some of my favourite tips and tricks to take your roast beef game to the next level.
1. Don’t Overcook It!
The biggest mistake people make when roasting beef is overcooking it. Overcooked beef can be dry and tough, so be sure to use a meat thermometer to check the internal temperature.
Don’t be afraid to err on the side of undercooked rather than overcooked. Beef can always be cooked a bit more, but you can’t reverse the process of overcooking.
2. Rest, Rest, Rest!
Resting the beef is absolutely essential for a juicy and tender roast. Don’t rush the process. Let the beef rest for at least 15-20 minutes before carving. This allows the juices to redistribute throughout the meat, resulting in a super juicy and tender roast.
While the beef rests, cover it loosely with aluminum foil to trap in the heat and moisture. This will help ensure a beautifully tender and juicy roast.
3. Basting is Key
Basting the beef during cooking helps to keep it moist and tender. You can baste it with beef stock, red wine, or even butter.
Basting helps to distribute the juices and flavour throughout the roast, ensuring it cooks evenly. You can baste it every 30 minutes or so, or more frequently if you like.
4. Don’t Forget the Fat
Don’t trim off all the fat from the beef before cooking. Fat equals flavour, remember? Leave a nice layer of fat on the beef to keep it juicy and tender.
The fat renders down during cooking, adding flavour and moisture to the meat. If you’re worried about the fat being too much, you can trim it slightly, but don’t go overboard.
5. Use a Roasting Rack
A roasting rack is a lifesaver when it comes to roasting beef. It allows air to circulate around the beef, ensuring that it cooks evenly and develops a crispy exterior.
A roasting rack ensures the beef is not sitting in its own juices, allowing for even cooking and a beautiful, crispy crust. If you don’t have a roasting rack, you can place the beef on a bed of vegetables in the roasting tin, which will help to elevate it and allow for airflow.
(Part 7) FAQs
Now, I know you might have some burning questions about roast beef. Here are some of the most common questions and my answers to them:
1. What if my beef isn’t cooked all the way through?
If your beef is still a little bit pink in the middle, that’s okay! It’s actually a sign that it’s perfectly cooked medium-rare. Just make sure that the internal temperature has reached at least 145°F (63°C).
Remember, the internal temperature is the most accurate way to determine doneness. If you’re not sure, always err on the side of caution and cook it a little longer.
2. What if my beef is too dry?
If your beef is dry, you can try to revive it by slicing it thin and topping it with some gravy or pan juices. You can also try reheating it in a skillet with a little bit of butter or oil.
Reheating can help to reintroduce moisture to the beef and give it a fresh burst of flavour. You can also add a splash of red wine or beef stock to the skillet for extra richness.
3. What’s the best way to store leftover roast beef?
Store leftover roast beef in the refrigerator for up to 3 days. You can store it in an airtight container or wrap it tightly in plastic wrap.
Proper storage is essential for keeping leftover roast beef fresh and delicious. It’s also a good idea to let the beef cool completely before storing it in the fridge.
4. Can I freeze leftover roast beef?
Yes, you can freeze leftover roast beef for up to 3 months. Just wrap it tightly in plastic wrap or aluminum foil, then place it in a freezer-safe bag. To thaw, place the frozen beef in the refrigerator overnight.
Freezing leftover roast beef is a great way to save it for later. Just make sure it’s tightly wrapped to prevent freezer burn.
5. What if I don’t have a meat thermometer?
If you don’t have a meat thermometer, you can use a few other methods to check the doneness of your beef. You can use the finger test, press the beef and if it feels firm and springy, it’s medium-rare. If it feels soft and squishy, it’s well-done. You can also make a small cut into the beef to check the colour. If it’s pink in the middle, it’s medium-rare. If it’s brown throughout, it’s well-done.
These methods are less accurate than a meat thermometer, but they can be helpful if you’re in a pinch. However, I strongly recommend investing in a meat thermometer for the most reliable results.
(Part 8) Final Thoughts
There you have it, my complete guide to roast beef perfection! I hope this has inspired you to try making your own roast beef at home. Remember, practice makes perfect. So, don’t be afraid to experiment, try different cuts of beef, and find what works best for you. And most importantly, enjoy the process!
Happy roasting!
Everyone is watching

Corn on the Cob: The Ultimate Guide to Perfectly Cooked Ears
Healthy MealsAh, corn on the cob. Just the name evokes images of sunny days, barbecues, and that sweet, juicy flavour that ...

Scallops: The Ultimate Guide to Perfect Cooking
Healthy MealsAh, scallops. Those delicate, sweet, and utterly delicious morsels of the sea. They hold a special place in my...

Spaghetti Squash: The Ultimate Guide to Cooking and Serving
Healthy MealsRemember that time you saw spaghetti squash at the supermarket, looking all bumpy and strange, and thought, "W...

Salmon Cooking Times: Perfect Guide for Every Recipe
Healthy MealsLet me tell you, cooking salmon is an art form. It's all about getting that perfect balance: juicy and tender,...

Ham Cooking Time: How Long to Bake, Smoke, or Boil a Delicious Ham
Healthy MealsAh, ham. It's a classic, isn't it? A real crowd-pleaser, especially around holidays. And when done right, it'...
