Ah, ribeye. Just the name conjures up images of juicy, flavorful steak, perfectly seared and cooked to your exact liking. For many, grilling is the go-to method for this king of cuts, but let me tell you, a sizzling ribeye on the stovetop can be just as delicious – and a lot more convenient! Believe me, this is something even a beginner can master. It's about understanding the simple steps, not about being a seasoned chef.
This guide is all about demystifying the process, taking you from choosing the right ribeye to that glorious moment when you sink your teeth into a perfectly cooked, juicy, and tender piece of heaven. I'll share my personal tips, tricks, and even a few hilarious mishaps (let's just say, I've had a few "well-done" moments). Grab your apron, pour a glass of something delightful, and let's get cooking!
(Part 1) Choosing Your Ribeye: The Foundation of a Delicious Steak

The first step is choosing the right ribeye. This isn't a random grab-and-go situation at the butcher's. It's about picking a piece of meat that will give you the best possible taste and texture.
1. Marbling Matters: A Key to Juicy Tenderness
Ever wondered why some steaks are so much more flavorful than others? The answer lies in marbling. Imagine little streaks of fat running through the meat – those are the marbling. These fat streaks melt during cooking, adding moisture and flavor to your steak. You want to look for a ribeye with good, even marbling, not just concentrated in one area. Think of it like a beautiful tapestry of fat and meat – the more the merrier!
2. Thickness Is King: A Perfect Bite Every Time
Imagine your ribeye as a canvas for your cooking skills. The thicker the steak, the more room you have to create a delicious sear and a juicy, tender interior. Aim for a ribeye that’s at least 1.5 inches thick. If you can find a thick-cut one, even better! You'll be rewarded with that perfect combination of crispness on the outside and juicy tenderness inside.
3. Bone-In vs. Boneless: A Matter of Personal Preference
You'll find ribeyes both bone-in and boneless. bone-in ribeyes, with their bone still attached, tend to be more flavorful because the bone helps to retain moisture during cooking. They also add a bit of rustic charm. Boneless ribeyes, on the other hand, offer a clean, fuss-free option, especially if you're concerned about bones getting in the way when you're carving your steak. Ultimately, the choice is yours. Pick the one that speaks to you and your culinary desires!
(Part 2) Prepping the Ribeye: Setting the Stage for Success

Now that you’ve got your perfect ribeye, let’s get it prepped for its stovetop debut. Don’t worry, this isn’t as complicated as it sounds! These few simple steps will make a world of difference in the final flavor and texture of your steak.
1. Pat it Dry: Getting Rid of Excess Moisture
Before you start cooking, grab a paper towel and gently pat the ribeye dry. This is crucial! Think of it like prepping a canvas – you want a smooth surface for your masterpiece. A dry steak will ensure a nice, even sear and prevent it from steaming instead of browning. Be gentle though, you don’t want to tear up the delicate meat.
2. Salt and Pepper: A Simple Seasoning for Maximum Flavor
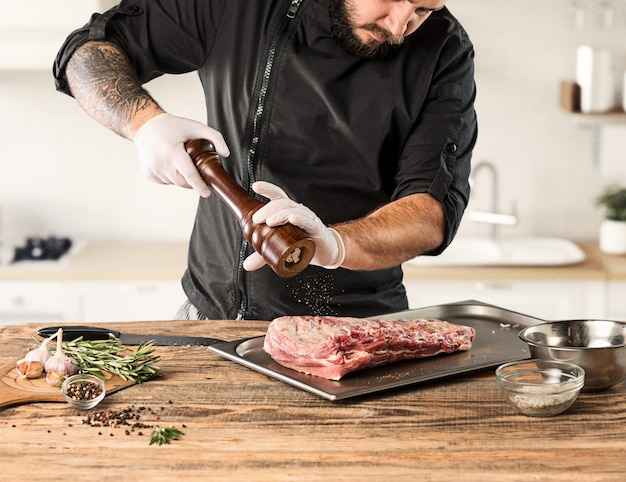
Now, let's talk seasoning. Keep it simple! A good quality kosher salt and freshly ground black pepper are all you need. Think of them as the perfect complements to your ribeye's natural flavor. Don't go overboard with the salt – you want to enhance the flavor, not drown it out. Just sprinkle a generous amount on both sides of the steak and let it sit for about 30 minutes at room temperature. This will allow the salt to penetrate the meat, seasoning it from the inside out.
3. Oil Up Your Pan: A Slick Trick for Perfect Browning
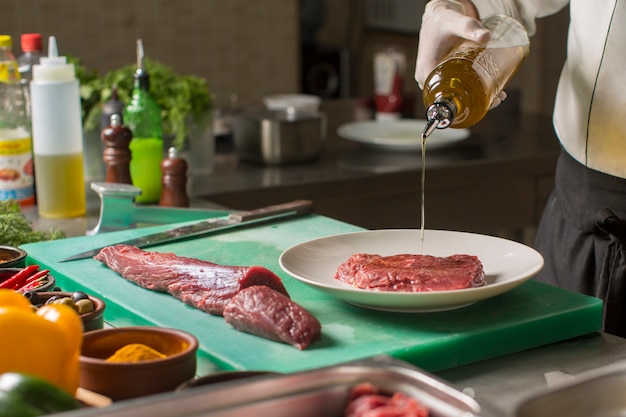
Get yourself a good quality heavy-bottomed pan. Cast iron is ideal, but a heavy stainless steel pan will do just fine. Heat the pan over medium-high heat and add a generous amount of oil. I like to use a neutral oil like canola or grapeseed – they have a high smoke point and won’t impart any unwanted flavors. Let the oil get nice and hot before adding your steak. You want that pan super sizzling so you get a beautiful crust on your ribeye!
(Part 3) Searing the Ribeye: The Key to That Perfect Crust

This is where the real magic happens! The sear is the secret to that delicious, crispy crust that gives your ribeye its signature flavor. It's a bit of a dance between heat and time, but don't worry, it's not as intimidating as it sounds.
1. Listen to the Sizzle: The Sound of Success
As soon as that ribeye hits the hot pan, you'll hear a symphony of sizzles and pops, like a happy little dance of flavors. That sound is a sure sign that you're on the right track. The steak will instantly begin to brown, and you'll know that you're creating a delicious crust.
2. Don’t Overcrowd the Pan: Let the Steak Breathe
Don't overcrowd the pan. Think of it like a crowded dance floor – the steaks need space to move and cook evenly. If you're cooking multiple steaks, sear them in batches. You want each steak to sizzle and brown, not steam and get soggy.
3. Flip It Like a Pro: The Art of the Turn
Once the first side has a nice, dark crust, it's time to flip the steak. Use tongs to carefully turn the steak. Resist the urge to press down – you want to keep those precious juices inside! Flip it gracefully, so you don't disturb that beautiful sear. Sizzle the other side for the same amount of time as the first side, until it’s nicely browned.
(Part 4) Cooking to Your Desired Doneness: The Quest for Perfect Texture
Here comes the tricky part: figuring out how long to cook your ribeye to get your desired level of doneness. Everyone has their own preference, and there are a bunch of different ways to check for doneness. I'll walk you through the methods I use, and you can choose what works best for you.
1. The Touch Test: A Hands-On Approach
This is the classic method, and it's pretty accurate, once you get the hang of it. It's all about using your fingertips to gauge the firmness of the steak.
Here's a breakdown:
Rare: The steak will feel very soft, almost jiggly. Think of a soft jelly.
Medium Rare: The steak will be slightly firmer, but still very springy to the touch. Like a soft sponge.
Medium: The steak will feel firmer, and you'll start to feel some resistance when you press on it. Like a slightly firmer sponge.
Medium Well: The steak will be firm and have a lot of resistance. Like a firm piece of bread.
Well Done: The steak will be very hard and firm. Like a very hard piece of bread.
Remember, you’re going for a feel, not a precise measurement! It takes practice, but it’s a fun way to get a feel for your steak as it cooks.
2. The Thermometer: Precision at Your Fingertips
For those who prefer a more precise approach, a meat thermometer is your best friend. Insert it into the thickest part of the steak, making sure it doesn't touch the bone. Aim for the following temperatures:
| Doneness | internal temperature (°F) | Internal Temperature (°C) |
|---|---|---|
| Rare | 125-130 | 52-54 |
| Medium Rare | 130-135 | 54-57 |
| Medium | 140-145 | 60-63 |
| Medium Well | 150-155 | 65-68 |
| Well Done | 160 | 71 |
It's a good idea to start checking the temperature early on in the cooking process, so you can adjust the heat if needed and prevent the steak from overcooking.
3. The Visual Cue: A Peek at the Inner Workings
If you’re feeling adventurous, you can also check for doneness by looking at the color of the steak’s juices.
Here's a breakdown:
Rare: Juices will be clear to slightly pink. Like clear water with a hint of pink.
Medium Rare: Juices will be pink and clear. Like a light pink lemonade.
Medium: Juices will be light brown. Like a pale tea.
Medium Well: Juices will be dark brown. Like a strong coffee.
Well Done: Juices will be gray. Like a dull, lifeless color.
This method takes a bit more practice, but once you're comfortable with it, it's a good visual cue to help you gauge the doneness of your steak. It's a bit of a culinary detective game!
(Part 5) Resting the Ribeye: A Moment for the Steak to Relax
You've seared, you've cooked, now it's time to let the steak take a well-deserved break. Resting your ribeye is crucial for unlocking its full potential. It allows the juices to redistribute evenly throughout the meat, resulting in a tender, juicy, and flavorful steak. It's a mini spa treatment for your ribeye!
1. Cover and Wait: Let the Steak Catch Its Breath
Take the steak off the heat and place it on a cutting board. Cover it loosely with foil and let it rest for at least 5-10 minutes before slicing. You'll be tempted to dig in right away, but trust me, this is where patience pays off. It's like letting a good wine breathe – it makes all the difference in the final taste.
2. Don’t Be Tempted: Resist the Urge to Cut In Early
The moment you cut into a steak that hasn’t rested, all those beautiful juices will run out, leaving you with a dry, disappointing piece of meat. It's like ruining a perfect piece of art by cutting into it before it's finished! It's hard to wait, I know, but your taste buds will thank you for the extra few minutes.
(Part 6) Slicing the Ribeye: A Final Touch of Elegance
You've come a long way, and now you're finally ready to slice your ribeye. This last step is all about showcasing that beautiful, juicy interior. It's the final act of appreciation for your culinary journey.
1. Sharp Knife Is Key: Slicing with Precision
A sharp knife is essential for slicing your ribeye. You want to cut through the meat cleanly and evenly, without tearing or crushing the fibers. Use a good quality chef’s knife, and make sure it’s nice and sharp. A dull knife will lead to uneven cuts and a less enjoyable eating experience.
2. Across the Grain: Unlocking Tenderness
Slicing across the grain is the secret to a tender, juicy steak. The grain refers to the direction of the muscle fibers in the meat. Slice the steak perpendicular to the grain to break down the fibers, making it easier to chew and releasing more of those delicious juices. Think of it like slicing a loaf of bread – you want to cut across the slices, not with them, for the best texture.
(Part 7) Serving and Enjoying: The Moment of Truth
You've put in the work, and now it's time to enjoy the fruits of your labor! Serving your ribeye is a chance to showcase your culinary prowess. It's about creating a visual and culinary experience that will tantalize your taste buds.
1. Presentation Matters: A Visual Feast
Arrange your sliced ribeye on a platter, and consider adding a few simple garnishes like fresh herbs, a sprig of rosemary, or a few slices of lemon. It’s all about creating a visually appealing presentation that will tempt your taste buds. Let the steak be the star, but don't be afraid to add a little flair to your masterpiece.
2. The Perfect Sides: Complementary Companions
Choose sides that will complement your steak. Think of them as the supporting cast, adding depth and richness to the main act.
Here are a few ideas:
- grilled asparagus: The smoky char of grilled asparagus pairs beautifully with the rich flavor of ribeye.
- Creamy mashed potatoes: A classic side that adds a comforting element to your meal.
- Garlic roasted broccoli: The roasted flavor and garlic aroma create a delightful contrast to the steak.
- Roasted root vegetables: Sweet and earthy flavors, like carrots and parsnips, create a delicious harmony with the ribeye.
- A simple salad: A light and refreshing side to balance out the richness of the steak.
And don’t forget the sauce! A classic béarnaise, a rich red wine sauce, or even a simple herb butter can elevate your steak to new heights.
3. Taste and Appreciate: A Moment of Satisfaction
Take a moment to savor every bite of your perfectly cooked ribeye. Notice the juicy, tender texture, the crispy sear, and the burst of flavor. It's like a symphony of tastes dancing on your tongue. Enjoy the fruits of your hard work, and appreciate the deliciousness that comes from preparing a meal from scratch.
(Part 8) FAQs: Answering Your Burning Questions
Here are a few questions you might have about cooking the perfect ribeye on the stovetop:
1. What if I don’t have a cast iron pan?
A good quality stainless steel pan will work just fine. Just make sure it’s heavy-bottomed, so it heats evenly. If you don’t have a heavy-bottomed pan, you can use a nonstick pan, but you’ll have to be a bit more careful to avoid sticking. The key is to choose a pan that can handle high heat and distribute the heat evenly.
2. Can I use a different cut of meat instead of ribeye?
Yes, you can! A new york strip steak, a filet mignon, or even a sirloin steak can all be cooked on the stovetop. Just adjust the cooking times according to the thickness of the cut. The principles of searing and cooking to your desired doneness remain the same.
3. How do I know if my steak is done?
The most reliable method is to use a meat thermometer. The internal temperature will depend on how you like your steak cooked. You can also use the touch test, or visually inspect the color of the juices. But remember, practice makes perfect! The more you cook steaks, the better you'll become at judging their doneness.
4. What if my steak is overcooked?
Don’t worry, it happens! It's a part of the learning process. You can always slice the steak a bit thicker, so the outside is less cooked, and the inside is more tender. You can also add a rich sauce to help disguise any dryness. It’s not ideal, but it’s still edible. And hey, you've gained valuable experience for your next steak-cooking adventure!
5. How can I make my steak even more flavorful?
A marinade can elevate your steak to new heights of deliciousness. There are endless marinade options, but I like to keep it simple with olive oil, lemon juice, and fresh herbs. You can also add a few cloves of garlic, or a pinch of red pepper flakes for a kick. Let the steak marinate for at least 30 minutes before cooking, and make sure to pat it dry before searing. A well-marinated steak will be incredibly flavorful and tender.
There you have it, my friends! My guide to cooking the perfect ribeye on the stovetop. Remember, it’s all about practice and having fun in the kitchen. So grab your ingredients, put on some music, and get ready for a delicious culinary adventure. You’ve got this!
Everyone is watching

Corn on the Cob: The Ultimate Guide to Perfectly Cooked Ears
Healthy MealsAh, corn on the cob. Just the name evokes images of sunny days, barbecues, and that sweet, juicy flavour that ...

Perfect Pork Roast Oven Cooking Time: A Guide to Delicious Results
Healthy MealsThere's something truly satisfying about a perfectly roasted pork. The aroma alone is enough to make your mout...

Ham Cooking Time: How Long to Bake, Smoke, or Boil a Delicious Ham
Healthy MealsAh, ham. It's a classic, isn't it? A real crowd-pleaser, especially around holidays. And when done right, it'...

Scallops: The Ultimate Guide to Perfect Cooking
Healthy MealsAh, scallops. Those delicate, sweet, and utterly delicious morsels of the sea. They hold a special place in my...

Spaghetti Squash: The Ultimate Guide to Cooking and Serving
Healthy MealsRemember that time you saw spaghetti squash at the supermarket, looking all bumpy and strange, and thought, "W...
