I've always considered myself a bit of a foodie, and there's nothing quite like a perfectly cooked prime rib. It's the ultimate centerpiece for a special meal, a dish that practically screams "celebration!" But let me tell you, achieving that perfect, melt-in-your-mouth tenderness can be a bit of a culinary challenge. Over the years, I've spent countless hours experimenting, learning from both my successes and those not-so-successful attempts. That's why I'm excited to share my hard-earned knowledge and guide you through the process of creating a prime rib that will leave everyone at your table saying "Wow!"
This isn't just about throwing a roast in the oven and hoping for the best. We're diving deep into the secrets of choosing the perfect cut, mastering the art of seasoning, and understanding the science behind achieving that ideal level of doneness. I'll be sharing my tried and true techniques, including my favorite seasoning blend and the perfect resting method. By the end of this journey, you'll be confident enough to tackle even the most challenging roast with ease, leaving your guests absolutely delighted.
Part 1: Choosing the Perfect Cut

Understanding the Difference: Bone-in vs. Boneless
The first step to a perfect prime rib is choosing the right cut, a decision not to be taken lightly. This is the difference between a delightful experience and a dry, chewy disappointment. Prime rib comes from the rib section of the beef, specifically the rib roast, which can be either bone-in or boneless. While both are delicious, they have their own unique characteristics.
Why Boneless is My Go-To
Now, I personally prefer boneless prime rib. It's more manageable to cook, easier to carve, and cooks more evenly. While bone-in prime rib is certainly delicious, I find that the boneless version tends to be more tender and juicy. The bone helps to impart flavor, but it can also create hot spots during cooking. Ultimately, the choice is yours, but I've found that boneless offers more versatility and less potential for dry patches.
The Importance of Grade: Prime is King
The grade of the beef will also significantly impact the final result. Prime is the highest grade, boasting the most marbling, which translates to a more tender and flavorful roast. The marbling acts like little pockets of fat that melt during cooking, keeping the meat moist and flavorful. If you can't find Prime, you can always opt for Choice, which will still deliver a good quality roast. However, steer clear of Select grade, as it will have less marbling and tend to be leaner, which can result in a drier roast.
Size Matters: Matching Your Roast to Your Crowd
Of course, size matters too. Consider how many people you're feeding. A 3-rib roast is a good size for 6-8 people, providing about 1.5 pounds of meat per person. If you have a larger crowd, you can always go for a 4-rib roast or even a 7-rib roast for a truly impressive feast. But remember, a larger roast will need more time to cook, so factor that into your planning.
Part 2: Preparing Your Prime Rib for Culinary Glory

Trimming and Cleaning: A Crucial First Step
Once you have your prime rib, it's time to get your hands dirty. The first step is to trim off any excess fat and silver skin. This is the thin, tough membrane that sits on top of the fat. I like to use a sharp knife to carefully remove it, taking care not to cut into the meat itself. This step is crucial for ensuring even cooking and preventing a tough, chewy texture. Think of it as a beauty treatment for your roast, ensuring a smooth and even surface for your seasonings to adhere to.
Patting it Dry: A Simple Step with Big Impact
After you've trimmed the roast, pat it dry with paper towels. This helps create a crispy, golden-brown crust. Trust me, a crispy crust adds another layer of flavour that you won't want to miss. It's that beautiful contrast of textures and flavors that elevates your prime rib from good to truly memorable.
The Art of Seasoning: Crafting a Flavor Profile
Now comes the fun part: seasoning. This is where you can really let your creativity shine. A simple salt and pepper rub is always a winner, but I like to go a little more adventurous. My go-to prime rib seasoning blend includes:
- Kosher salt
- Freshly ground black pepper
- Garlic powder
- Onion powder
- Paprika
- Dried thyme
- Dried rosemary
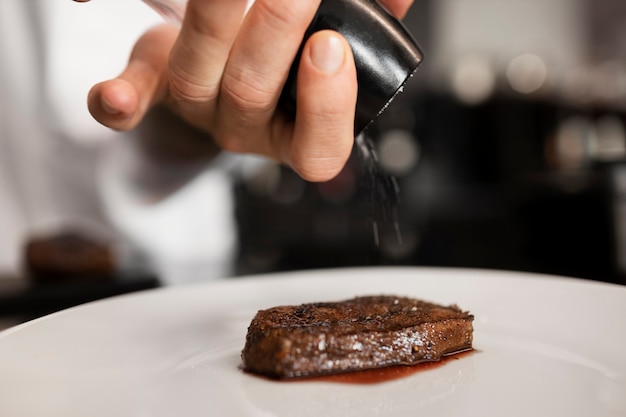
You can adjust the proportions to your liking, or even add your own personal touches, like a sprinkle of cayenne pepper for a bit of heat. The important thing is to apply the seasoning liberally, making sure to cover all sides of the roast evenly. Be generous with the seasonings, allowing them to penetrate the meat and create a delicious, flavorful crust.
Part 3: The Art of Roasting: Achieving Tenderness and Flavor

The Pre-Heating Process: Setting the Stage for Success
Preheat your oven to 450°F (232°C). This high temperature is essential for searing the roast and achieving that beautiful crust. This initial high heat is like a quick burst of energy, helping to seal in the juices and develop a flavorful exterior.
The Searing Technique: The Foundation for a Perfect Crust
Once your oven is preheated, place the prime rib on a roasting rack set over a baking sheet. This helps create air circulation around the roast, ensuring even cooking. Let it sear for 15-20 minutes, until the outside develops a nice golden-brown crust. I like to turn the roast every few minutes to ensure that all sides are evenly seared. The crust not only adds flavour but also helps to seal in the juices. It's like a delicious little hug for the meat!
The Mid-Roast Adjustment: Maintaining Tenderness and Moisture
After the searing phase, reduce the oven temperature to 325°F (163°C). This lower temperature helps the roast cook through without drying out. Now, here's the important part: you need to check the internal temperature of the roast regularly using a meat thermometer. Aim for an internal temperature of 135°F (57°C) for medium-rare, 140°F (60°C) for medium, and 145°F (63°C) for medium-well. This slower, gentler cooking process ensures that the meat cooks evenly and maintains its moisture, resulting in a tender and juicy roast.
The Importance of Resting: Allowing the Meat to Relax and Redistribute Juices
Once your roast has reached your desired internal temperature, take it out of the oven and let it rest for at least 15 minutes. This resting time is crucial for allowing the juices to redistribute throughout the roast. Think of it as a time for the meat to relax and regain its composure after its culinary journey. When you carve the roast after resting, you'll discover juicy and flavorful slices, a testament to the importance of this crucial step.
Part 4: The Carving Ceremony: Transforming Your Roast into a Feast
The Equipment: Essential Tools for the Task
The moment of truth has arrived! It's time to carve your perfectly cooked prime rib. You'll need a sharp carving knife, a carving fork, and a cutting board. You can even use a meat cleaver if you're feeling adventurous, but a good carving knife is all you really need. The key is to have tools that are sharp and comfortable to use, making the carving process easier and more enjoyable.
The Technique: Slicing Against the Grain for Ultimate Tenderness
First, slice the prime rib against the grain. This means slicing across the muscle fibers, which helps make the meat more tender and easier to chew. Don't worry if your slices aren't perfectly uniform; it's the taste that matters most. The key is to pay attention to the direction of the muscle fibers, cutting across them to ensure that the meat is tender and easily digestible.
The Presentation: A Feast for the Eyes
Once you've carved the roast, arrange the slices on a platter, and sprinkle with any leftover seasoning or add some fresh herbs for an extra touch of beauty. Serve it with your favourite sides, like mashed potatoes, roasted vegetables, or a simple salad. Remember, presentation matters! It's the finishing touch that adds a sense of artistry to your culinary masterpiece. A beautifully arranged platter of prime rib will make a lasting impression on your guests, adding to the overall enjoyment of the meal.
Part 5: side dishes to Compliment Your prime rib masterpiece
The Classic Combination: A Taste of Tradition
While the prime rib itself is a star, it always benefits from a supporting cast of side dishes. A classic pairing is mashed potatoes, a comforting and creamy companion. roast vegetables, such as carrots, potatoes, and onions, add a touch of sweetness and earthiness. A crisp salad adds a refreshing contrast. You can never go wrong with these traditional choices. They offer a balanced and satisfying combination of flavors and textures that complement the rich flavor of the prime rib.
Exploring New Options: Breaking Free from the Conventional
But don't be afraid to think outside the box! Try serving your prime rib with creamy polenta, Brussels sprouts with bacon, or a flavorful risotto. The key is to find a balance between flavours and textures, creating a symphony of tastes on your plate. Experimentation is key! There's a whole world of flavors and textures to explore, and you can create side dishes that perfectly complement your prime rib and add a unique touch to your meal.
Part 6: The Perfect Prime Rib for a Crowd: Hosting a Feast with Confidence
Planning for Success: Creating a Seamless Dining Experience
Hosting a gathering with a prime rib as the star of the show? It can be a little daunting, but with the right planning, it can be a stress-free experience. The key is to have everything organised beforehand. Prepare your side dishes the day before, or at least pre-chop your vegetables. This will save you valuable time and reduce stress on the day of the party.
Tips for a Seamless Experience: Making Your Hosting Easier
Also, consider using a slow cooker to keep your side dishes warm. This will allow you to focus on carving and serving the prime rib without worrying about cold dishes. And don't forget to have plenty of drinks on hand! A well-stocked bar or cooler will keep your guests happy and hydrated throughout the evening. With a little planning and organisation, hosting a prime rib dinner can be an enjoyable and stress-free experience.
Part 7: Wine Pairings for Your Prime Rib Masterpiece: Elevating Your Feast
The Perfect Complement: Finding the Right Wine to Match Your Roast
No prime rib feast is complete without a delicious wine pairing. For a rich and flavorful roast, a robust red wine is ideal. Consider Cabernet Sauvignon, Merlot, or Zinfandel. These wines complement the richness of the meat with their complex fruit flavors and tannins. The tannins in these wines help to cut through the richness of the fat, creating a balanced and harmonious experience.
Exploring Alternatives: Expanding Your Wine Horizons
If you prefer a lighter red wine, Pinot Noir or Beaujolais are good options. They offer a more subtle fruitiness and a refreshing acidity that cuts through the richness of the meat. And if you're feeling adventurous, try a bold Syrah or a full-bodied Shiraz. These wines have intense aromas and flavors that can stand up to the bold flavour of prime rib. Don't be afraid to experiment! Wine pairing is a personal journey, and finding the perfect complement to your prime rib is part of the fun.
Part 8: FAQs: Your Prime Rib Questions Answered
Q1: What is the best way to ensure a tender and juicy prime rib?
A1: The secret lies in both cooking time and temperature. Make sure to sear the roast at a high temperature for a crispy crust, then lower the temperature and cook slowly to allow the meat to become tender and juicy. Don't forget to rest the roast for at least 15 minutes after cooking to allow the juices to redistribute. This combination of techniques ensures that the meat is cooked evenly, resulting in a tender and juicy roast that will melt in your mouth.
Q2: Can I cook prime rib in the slow cooker?
A2: You certainly can! Slow cookers are great for tenderising tough cuts of meat. However, for prime rib, a traditional roasting method is recommended to achieve that perfect crust and juicy interior. The slow cooker is more effective for breaking down tougher cuts of meat, but it doesn't provide the same browning and crispness as a traditional oven roasting method. For the best results with prime rib, stick to the traditional oven method.
Q3: How can I tell if my prime rib is done?
A3: The best way to determine doneness is by using a meat thermometer. Aim for an internal temperature of 135°F (57°C) for medium-rare, 140°F (60°C) for medium, and 145°F (63°C) for medium-well. However, if you don't have a thermometer, you can test for doneness by pressing on the roast. If it feels firm, it's done. If it feels soft, it needs more cooking time. Using a thermometer provides a precise measurement of the internal temperature, ensuring that your roast is cooked to your desired level of doneness. If you don't have a thermometer, the pressure test is a good alternative, but it's not as precise.
Q4: How long can I store cooked prime rib in the refrigerator?
A4: Cooked prime rib can be stored in the refrigerator for up to 3-4 days. Make sure to wrap it tightly in plastic wrap or aluminum foil to prevent drying. Proper storage is essential for maintaining the quality and freshness of your cooked prime rib. Refrigeration will slow down the growth of bacteria, keeping your roast safe to eat for up to a few days.
Q5: Can I freeze cooked prime rib?
A5: Yes, you can freeze cooked prime rib for up to 2-3 months. To freeze it, wrap it tightly in plastic wrap and then aluminum foil. Thaw it in the refrigerator for 1-2 days before reheating. Freezing is a great way to preserve cooked prime rib for longer periods. Make sure to thaw it properly in the refrigerator to avoid any potential safety risks.
Part 9: Beyond the Basics: Prime Rib Variations: Expanding Your Culinary Horizons
A Flavorful Adventure: Adding Personal Touches to Your Prime Rib
If you're looking to add a touch of adventure to your prime rib game, there are countless variations to explore. Try a Dijon mustard and herb rub for a tangy kick. Or, for a more savory flavour, add a sprinkle of smoked paprika or a touch of chili powder. These flavor combinations will add a unique twist to your prime rib, catering to your personal preferences.
The Art of Glazing: Creating a Showstopping Finish
For a truly showstopping finish, consider glazing your roast with a mixture of honey, soy sauce, and garlic. The glaze will create a beautiful, sticky, and caramelized crust. The glaze adds a layer of sweetness and richness, enhancing the flavor and appearance of your roast. It's a simple yet effective technique that elevates your prime rib to another level.
Adding a Touch of Luxury: Encasing Your Roast in Puff Pastry
And if you want to go all out, try wrapping your prime rib in puff pastry. This creates a delicious, flaky crust that adds a touch of luxury to any meal. The puff pastry adds a surprising element of texture and a touch of elegance to your roast, making it a truly unforgettable dining experience. It's a great option for a special occasion or when you want to impress your guests with a unique culinary twist.
Part 10: Embracing the Culinary Journey: The Rewards of Mastering Prime Rib
Mastering the art of cooking prime rib is a journey of discovery. It's about understanding the science behind the meat, learning the art of seasoning, and experimenting with different techniques. It's also about embracing the joy of cooking a meal that brings people together. So, go forth, embrace your inner chef, and create a prime rib masterpiece that will leave your guests wanting more.
Everyone is watching

Corn on the Cob: The Ultimate Guide to Perfectly Cooked Ears
Healthy MealsAh, corn on the cob. Just the name evokes images of sunny days, barbecues, and that sweet, juicy flavour that ...

Perfect Pork Roast Oven Cooking Time: A Guide to Delicious Results
Healthy MealsThere's something truly satisfying about a perfectly roasted pork. The aroma alone is enough to make your mout...

Scallops: The Ultimate Guide to Perfect Cooking
Healthy MealsAh, scallops. Those delicate, sweet, and utterly delicious morsels of the sea. They hold a special place in my...

Ham Cooking Time: How Long to Bake, Smoke, or Boil a Delicious Ham
Healthy MealsAh, ham. It's a classic, isn't it? A real crowd-pleaser, especially around holidays. And when done right, it'...

Spaghetti Squash: The Ultimate Guide to Cooking and Serving
Healthy MealsRemember that time you saw spaghetti squash at the supermarket, looking all bumpy and strange, and thought, "W...
