There's a certain magic to a perfectly cooked T-bone steak, isn't there? The sizzle as it hits the hot pan, the enticing aroma that fills the air, the juicy tenderness of the meat... it's a culinary experience that evokes pure satisfaction. But let's be honest, achieving that "perfect" steak isn't always a guarantee. I've had my fair share of dry, tough, and frankly, disappointing attempts.
However, through a mix of trial and error, a dash of research, and a few (admittedly embarrassing) culinary mishaps, I've finally cracked the code. This isn't just about grilling a steak, it's about mastering a technique, a dance of sorts, where each step plays a vital role in achieving the perfect final product. So, grab your apron, gather your ingredients, and let's embark on this culinary adventure together.
(Part 1) The Steak: Choosing Your Canvas

You wouldn't try to paint a masterpiece on a cracked canvas, would you? The same goes for cooking a steak. choosing the right steak is the foundation, the cornerstone of a delicious pan-seared T-bone.
The Bone: A Key Player
Let's talk about the bone, the star of the show. It's not just for aesthetics, it's a functional element. The bone helps transfer heat to the centre of the steak more evenly, leading to more consistent cooking. That's why I always look for a T-bone with a good-sized bone – it's a guarantee of a juicy, flavorful centre.
Marbling: The Secret to Juiciness
Now, let's get to the heart of the matter - marbling. This is where the magic happens. The more marbling a steak has, the juicier and more flavourful it will be. Think of those beautiful white streaks of fat – those are the key to a truly delicious steak. They're like tiny little flavor bombs, contributing to the overall richness of the meat. Look for a steak with a good amount of marbling, evenly distributed throughout. It should be like a beautiful, marbled artwork.
choosing the right cut: A Guide for the Uninitiated
I'm a big believer in buying meat from a good butcher. They can be a wealth of information, offering advice and insights. But if you're shopping at the supermarket, look for steaks that are properly labelled with a USDA grade. A "Choice" or "Prime" grade will ensure you're getting high-quality meat with good marbling.
(Part 2) Preparing Your Canvas: Getting Ready for the Sizzle
You've got your perfect steak – your canvas, so to speak. Now it's time to prep it, get it ready for its starring role.
Room Temperature: The Steak's Essential Warm-Up
Don't throw that steak straight from the fridge into the pan. It's crucial to let it come to room temperature before cooking. This allows the steak to cook more evenly and avoids the dreaded "cold centre." I usually take my steak out of the fridge about 30 minutes before I start cooking. It's a simple step, but it makes a world of difference in the final outcome.
Patting it Dry: The Crucial Step to a Beautiful Crust
Once the steak has reached room temperature, pat it dry with paper towels. This removes excess moisture, which can lead to steam rather than a nice sear. Think of it as prepping your canvas for the paint – you want a smooth surface for a beautiful, even crust.
Seasoning: The Art of Enhancing Natural Flavors
Now, the fun part – seasoning! This is where you can let your personal preferences shine. I'm a simple man when it comes to seasoning. Salt and pepper are my go-to ingredients. I like to use coarse sea salt and freshly ground black pepper. This combination adds a depth of flavour that I love.
A Touch of Garlic: Adding a Hint of Umami
For those who like a bit of extra flavour, a touch of garlic can elevate the dish. I like to mince a clove or two of garlic and rub it onto the steak. It adds a wonderful fragrance and a subtle garlic taste. You could also try a sprinkle of dried herbs for a more complex flavour profile.
(Part 3) The Pan-Searing Ritual: Creating a Culinary Masterpiece
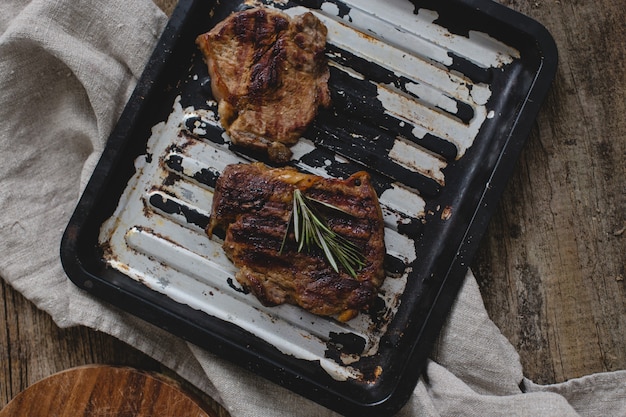
We've reached the moment of truth – the pan-searing. This is where the magic happens. A hot pan and a good sear are the keys to a juicy, flavourful steak. This is your chance to transform your canvas into a culinary masterpiece.
The Right Pan: Choosing the Right Tool for the Job
For pan-searing, I prefer a cast-iron skillet. It retains heat incredibly well and provides that even browning we're after. It's like a skilled artist using the right brush for their masterpiece. A good quality stainless steel pan will also work well, but the cast iron is my go-to for achieving that perfect crust.
Heating the Pan: The Foundation of a perfect sear
Don't be shy about the heat. A really hot pan is essential for creating a beautiful sear. I heat my pan over high heat for 5-7 minutes before I add the steak. You want the pan to be smoking hot – that's the sign of a properly prepped surface for your steak.
Adding the Fat: The Secret Ingredient to a Delicious Crust
You can't have a good sear without a little fat. I prefer to use a high-heat oil like grapeseed or avocado oil. It has a high smoke point, so it won't burn easily. You don't need a lot, just enough to lightly coat the bottom of the pan. Think of it as the base coat of your painting – it's essential for a smooth and even finish.
Searing the Steak: The Art of Patience and Precision
Once the pan is smoking hot and the fat is shimmering, it's time to add the steak. Place it in the pan and let it cook undisturbed for 3-4 minutes per side. Resist the urge to move it around; this will help the steak develop a beautiful crust. It's a bit like letting the paint dry – you need to give it time to set and create a beautiful finish.
The Flip: A Moment of Anticipation
After 3-4 minutes, flip the steak over and sear the other side for another 3-4 minutes. You'll notice that beautiful brown crust forming – that's a sign of a perfectly seared steak.
Searing the Sides: Achieving a Consistent Finish
To achieve an even sear, I like to sear the sides of the steak for a minute or two each. This adds a bit more depth of flavour and makes the steak look even more impressive. It's like adding those final touches to your artwork, ensuring a consistent and captivating visual appeal.
(Part 4) The Resting Ritual: Allowing the Steak to Breathe
Okay, you've seared your steak to perfection. But hold your horses! The resting ritual is just as important. It allows the juices to redistribute throughout the steak, ensuring a tender, succulent final product. It's like letting the paint dry and settle before framing your masterpiece.
Patience is Key: The Final Step Before Serving
After removing the steak from the pan, let it rest for 5-7 minutes. Cover it loosely with aluminium foil, this allows the steak to stay warm while it rests. Resist the urge to cut into it right away!
The Secret to juicy steak: Understanding the Science
While the steak is resting, the juices will redistribute throughout the meat. If you cut into it right away, those delicious juices will run out, leaving you with a dry steak. Trust me, this is a crucial step! It's like letting a piece of artwork breathe before displaying it – it allows the colours to settle and the piece to come to life.
(Part 5) Doneness: Finding Your Perfect Level of Cook
The most common question I get is "how do I know when my steak is cooked to the right level of doneness?" It's a fair question, and there's a simple answer: use a meat thermometer.
The Meat Thermometer: Your Culinary Guide
A meat thermometer is your best friend when it comes to achieving the perfect doneness. I swear by a digital meat thermometer; they're quick and accurate. It's like having a guidebook for your culinary journey, ensuring you arrive at the desired destination.
Temperature Guide: The Perfect Level for Every Palette
Here's a handy guide to internal steak temperatures:
| Doneness | internal temperature (°F) |
|---|---|
| Rare | 125-130°F |
| Medium-Rare | 130-135°F |
| Medium | 140-145°F |
| Medium-Well | 150-155°F |
| Well-Done | 160°F |
Don't Overcook: The Art of Balance
I tend to prefer my steak medium-rare. It's still juicy and tender, but it has a hint of pink in the centre. But ultimately, the level of doneness is a personal preference. Don't be afraid to experiment until you find your perfect doneness. It's like finding the perfect shade of colour for your painting – it's all about personal taste and style.
(Part 6) The Perfect Finishing Touches: Adding Those Final Flourishes
Your steak is resting, the juices are redistributing, and you're almost ready to enjoy your culinary masterpiece. But before you dive in, there are a few finishing touches that will elevate your steak to the next level. It's like adding the finishing touches to your painting – those final details that bring the artwork to life.
The Herb Butter: A Symphony of Flavors
A dollop of herb butter is the perfect finishing touch for a pan-seared T-bone. I like to use a mixture of fresh parsley, thyme, and garlic. You can also add a bit of lemon zest for a citrusy kick. It's like adding a splash of vibrant colour to your artwork, creating a complex and alluring flavor profile.
A Touch of Salt: Enhancing the Natural Beauty
Once the steak has rested, sprinkle a pinch of flaky sea salt over the top. This adds a bit of extra saltiness and a beautiful crunch. It's like adding a final layer of varnish to your painting – it enhances the overall effect and brings out the subtle nuances of the flavors.
(Part 7) Serving and Enjoying Your Culinary Creation: A Moment of Appreciation
The moment of truth has arrived. Your steak is cooked to perfection, it's rested, and it's adorned with those finishing touches. Now it's time to serve and enjoy your culinary creation. It's like finally unveiling your artwork to the world – a moment of pride and accomplishment.
Sides Galore: Completing the Culinary Masterpiece
I like to serve my pan-seared T-bone with a simple side of roasted vegetables. Asparagus, broccoli, or Brussels sprouts all pair beautifully with a steak. It's like framing your artwork – choosing the perfect background to showcase the beauty of the main subject.
A Glass of Red Wine: The Perfect Complement
A glass of red wine is the perfect accompaniment to a good steak. A Cabernet Sauvignon or a Merlot will complement the richness of the steak perfectly. It's like choosing the perfect music for your artwork – it enhances the sensory experience and creates a harmonious blend of flavors.
Enjoy Every Bite: Savor the Moment
Take a moment to appreciate your work. You've created a delicious, satisfying meal, and you deserve to enjoy every bite! It's like admiring your completed artwork – a moment of pride, satisfaction, and pure enjoyment.
(Part 8) FAQs: Addressing Your Culinary Concerns
You've made it this far, and you're ready to cook the perfect pan-seared T-bone. But before you get started, let's tackle a few frequently asked questions.
1. Can I use a different type of oil for pan-searing?
Absolutely! While I prefer grapeseed or avocado oil, you can also use olive oil, canola oil, or even butter. Just make sure it has a high smoke point so it doesn't burn. It's like choosing the right brush for your painting – you want to use the right tool for the job.
2. How long should I rest the steak?
I recommend resting the steak for 5-7 minutes. This allows the juices to redistribute throughout the meat, resulting in a more tender and juicy steak. It's like letting the paint dry and settle before framing your artwork – it allows the flavors to mellow and the steak to reach its full potential.
3. Can I cook the steak to a different level of doneness?
Of course! It's all about personal preference. Use a meat thermometer to ensure you're cooking the steak to your desired level of doneness. It's like choosing the perfect shade of color for your painting – it's all about personal taste and style.
4. Can I add more seasoning to the steak?
You can definitely add more seasoning if you prefer. Some people like to use a rub with paprika, garlic powder, and onion powder. The sky's the limit! It's like adding layers of paint to your artwork – you can experiment and create a unique flavor profile that reflects your own style.
5. What can I do if my steak is overcooked?
It happens to the best of us. If your steak is overcooked, it's still edible, but it might be a bit dry. You can try adding a sauce to add some moisture and flavour. It's like adding a touch of varnish to a dry painting – it can help revive and enhance the final product.
There you have it! My step-by-step guide to perfect pan-seared T-bone steak. I hope you give it a try. And remember, practice makes perfect! With a little time and effort, you'll be able to impress your friends and family with a delicious, juicy steak that will have them begging for more.
Everyone is watching

Corn on the Cob: The Ultimate Guide to Perfectly Cooked Ears
Healthy MealsAh, corn on the cob. Just the name evokes images of sunny days, barbecues, and that sweet, juicy flavour that ...

Scallops: The Ultimate Guide to Perfect Cooking
Healthy MealsAh, scallops. Those delicate, sweet, and utterly delicious morsels of the sea. They hold a special place in my...

Spaghetti Squash: The Ultimate Guide to Cooking and Serving
Healthy MealsRemember that time you saw spaghetti squash at the supermarket, looking all bumpy and strange, and thought, "W...

Salmon Cooking Times: Perfect Guide for Every Recipe
Healthy MealsLet me tell you, cooking salmon is an art form. It's all about getting that perfect balance: juicy and tender,...

Ham Cooking Time: How Long to Bake, Smoke, or Boil a Delicious Ham
Healthy MealsAh, ham. It's a classic, isn't it? A real crowd-pleaser, especially around holidays. And when done right, it'...