There’s a certain magic to a perfectly cooked tri tip, a cut of meat that's both challenging and rewarding to prepare. You know the feeling, right? That beautiful sear on the outside, the glistening pink center, and the burst of flavour that explodes in your mouth? It’s truly a culinary masterpiece. But finding the right oven temperature to achieve that perfect balance of juiciness and tenderness can be a real head-scratcher. It’s a journey, my friend, one I’ve been on for years, learning and perfecting my techniques along the way. And I’m excited to share those nuggets of wisdom with you.
(Part 1) The Tri Tip: A Culinary Enigma

Let's start with the star of the show - the tri tip. This cut, often called the "bottom sirloin," comes from the bottom sirloin muscle of the cow. It’s lean, yet marbled, giving it that fantastic flavour and juiciness when cooked correctly. But it can be a bit of a culinary enigma. The key is to find that perfect balance between heat and time, creating a beautiful sear on the outside while keeping the inside juicy and tender. And that’s where understanding oven temperature comes into play.
Understanding the Tri Tip's Uniqueness
Tri tip is a bit of a paradox in the world of cooking. It’s a cut that can be tricky to master, but when you do, it’s truly a culinary triumph. The reason? It's a versatile cut, capable of holding up to a variety of cooking methods, but demanding a specific approach to achieve optimal results. We're going to delve into how to unlock that potential using your oven.
(Part 2) The Oven's Role in Tri Tip Perfection
While many swear by the grill for their tri tip, the oven offers a unique set of advantages. It provides a more consistent cooking temperature, allowing you to control the cooking time more precisely. This control is especially important when you want that perfect balance of sear and tenderness. But how do you know what temperature to use?
The Temperature Spectrum: A Balancing Act
The perfect oven temperature for your tri tip is a bit of an art form. It depends on several factors, such as the thickness of the cut, your desired level of doneness, and even the type of oven you have. It's about finding the right combination, and that's where a bit of experience and experimentation comes in handy.
(Part 3) Exploring the Temperature Ranges
Let’s explore some common temperature ranges and the results you can expect. Remember, these are just guidelines, so feel free to adjust them to your preferences and the specific cut of tri tip you’re working with.
Low and Slow: 250°F - 300°F (121°C - 149°C)
This low and slow approach is perfect for a well-done tri tip, creating a melt-in-your-mouth tenderness. It’s a bit like letting the meat simmer in its own juices, allowing the flavours to develop and the texture to become unbelievably soft. This method is perfect for those who prefer their meat cooked through. It's all about patience, but trust me, the results are worth it. You could even throw in some vegetables for a full meal, as the low and slow heat will perfectly roast them too.
Medium Heat: 325°F - 350°F (163°C - 177°C)
For those who prefer a good balance between cooking time and desired doneness, this temperature range is a happy medium. It’s ideal for achieving a well-cooked tri tip, with a nice sear on the outside and a tender, juicy interior. This is a good option if you're looking for a more conventional tri tip preparation, with a slight preference for a more well-cooked center.
High Heat: 400°F - 450°F (204°C - 232°C)
This is for the adventurous souls who love their tri tip with a crispy sear and a juicy, pink center. It's a fast cook, requiring careful monitoring to ensure the outside doesn't burn while the inside reaches the perfect level of doneness. This method is my go-to for a juicy, medium-rare tri tip. But be warned: it takes practice and a bit of daring!
(Part 4) The Tri Tip Thickness Factor
The thickness of your tri tip is a significant factor in determining the perfect oven temperature. Think of it like this: the thicker the cut, the longer it takes to cook through. So, if you're working with a thick tri tip, you'll need a lower temperature and more time to ensure it cooks evenly and doesn't become dry on the outside before the inside is cooked.
Adapting to Different Thicknesses
For a thinner tri tip, around 1 inch thick, a higher temperature of 400°F - 450°F might be the way to go. But if you're tackling a thicker cut, 2 inches or more, you'll want to drop the temperature to 325°F - 350°F to prevent overcooking the outside while the inside still needs more time to reach the desired doneness. This careful adjustment allows for a more consistent and satisfying cooking experience.
(Part 5) The Doneness Decision
Now that you've got a general idea of temperature ranges, it's time to consider the ultimate question: how well done do you want your tri tip? It's a matter of personal preference, and there's no right or wrong answer, as long as you enjoy your meal.
internal temperature Guide: A Culinary Compass
I always recommend using a meat thermometer to ensure your tri tip reaches the desired level of doneness. It's a culinary compass, guiding you towards that sweet spot of perfection. Here's a helpful guide to internal temperatures for tri tip, based on common levels of doneness:
| Doneness | Internal Temperature (°F) | Internal Temperature (°C) |
|---|---|---|
| Rare | 125 - 130 | 52 - 54 |
| Medium Rare | 130 - 135 | 54 - 57 |
| Medium | 140 - 145 | 60 - 63 |
| Medium Well | 150 - 155 | 66 - 68 |
| Well Done | 160 | 71 |
My Personal Preference: Medium Rare
Personally, I'm a big fan of medium-rare tri tip. It’s the perfect balance for me: a juicy, pink center with a delicious sear on the outside. It’s that sweet spot where the flavour and texture are both perfectly balanced. But, again, there’s no right or wrong answer. If you prefer well-done, go for it! It's your culinary adventure, and you should enjoy it your way.
(Part 6) The Oven Type Factor
You’d be surprised how much the type of oven you have can affect the cooking process. Some ovens run hotter or cooler than others, even if they’re set to the same temperature. It’s all about getting to know your oven and figuring out its quirks.
Calibration and Adjustment
I always recommend calibrating your oven with a thermometer to ensure it’s running at the correct temperature. If you find your oven consistently runs hot or cold, adjust your cooking times and temperatures accordingly. Don’t be afraid to experiment and find what works best for you. Remember, cooking is a journey of discovery, and your oven is your partner in that journey.
(Part 7) The Tri Tip Prep: Setting the Stage for Success
Before we get to the actual oven cooking, let’s talk about preparing your tri tip for success. A little pre-oven love can make all the difference in creating that perfect culinary experience.
Seasoning with Savour: A Culinary Symphony
Seasoning is key! It's the foundation of a delicious tri tip. Don’t be afraid to experiment with different combinations of herbs, spices, and rubs. Personally, I love a simple salt and pepper blend, but there are countless possibilities. You could try a classic garlic and herb mix, or go bold with a chili powder and cumin blend. Whatever you choose, make sure to season generously, but not excessively, so the flavour shines through without overpowering the natural flavour of the meat. It's all about creating a harmonious symphony of flavour.
Resting for Relaxation: A Necessary Pause
Once your tri tip is seasoned, give it a rest in the fridge for at least 30 minutes. This allows the flavours to infuse and the meat to relax, which helps it cook more evenly. Think of it as giving the meat a chance to unwind before the heat of the oven. This simple step can make a big difference in the final result.
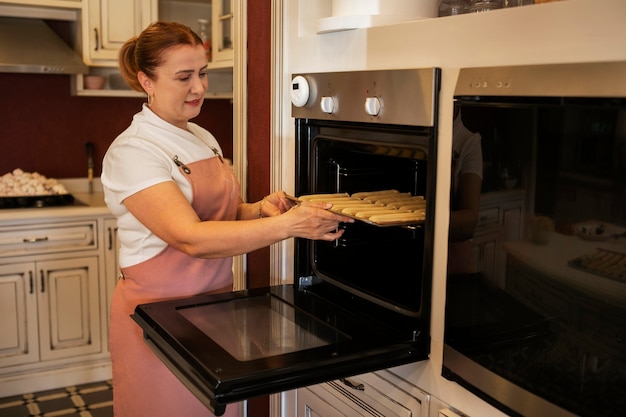
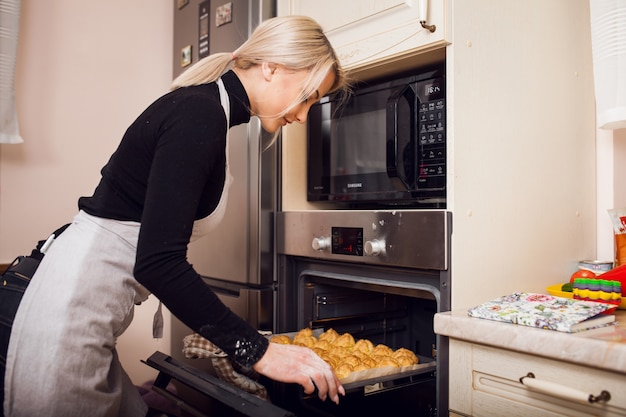
(Part 8) Oven Cooking: The Culinary Transformation
Alright, it's showtime! We’ve reached the moment of truth, the oven cooking process. Ready to witness the magic unfold?
Sealing the Deal: Creating a Flavorful Crust
First, we need to seal in those juicy flavours and create that glorious crust. Preheat your oven to your chosen temperature, and then place your tri tip on a roasting rack set over a baking sheet. Get a good sear on all sides in a hot pan, about 2 minutes per side. This step is crucial, as it locks in those delicious juices and gives your tri tip that irresistible browned exterior. It’s the first step towards that perfect balance of flavour and texture.
Oven-Baked Bliss: The Culinary Transformation
Now, it's time for the oven to work its magic. Transfer your seared tri tip to the prepared roasting rack. Remember, the cooking time will vary depending on the thickness of your cut and the temperature you've chosen. Check the internal temperature with your thermometer to ensure it's reached your desired level of doneness. For a thinner tri tip, 30 - 45 minutes might be enough, while a thicker cut might require an hour or even more. Let the oven do its work, transforming your tri tip into a culinary masterpiece. It's a process that requires patience and observation, but the results are well worth the wait.
(Part 9) Resting and Slicing: The Grand Finale
The final act! You've endured the wait, the anticipation, and the tantalizing aromas wafting through your kitchen. Now, you're ready to savour the fruits of your labour. It's time to give your tri tip a little TLC and rest. Let it rest for 10-15 minutes, covered loosely with foil. This allows the juices to redistribute throughout the meat, resulting in a juicier, more tender tri tip. Think of it as a final act of kindness for your culinary creation. Then, slice it against the grain, and watch those beautiful, juicy slices unveil, a testament to your culinary prowess.
(Part 10) Serving Up Deliciousness
So, there you have it! You’ve just mastered the art of cooking the perfect tri tip in the oven. Now, it’s time to savour your hard work. Serve your tri tip with your favourite sides, like roasted vegetables, mashed potatoes, or a simple salad. This is a dish that deserves to be celebrated, and it’s guaranteed to impress your guests. It’s the culmination of your culinary journey, a dish that’s both delicious and impressive.
FAQs
-
What if I overcook my tri tip?
It happens! We've all been there. If you find your tri tip is a bit overdone, don't despair. It might not be as juicy as you'd like, but it’s still edible. You can slice it thinly and serve it with a sauce, like gravy or a tangy chimichurri. Just try to prevent it from happening next time! Remember, cooking is about learning from our mistakes and always striving to improve. It’s a continuous process of growth and refinement.
-
How can I tell if my tri tip is done without a thermometer?
This is a bit of a gamble, as visual cues can be deceiving. If you're unsure, err on the side of caution and cook it a bit longer. Remember, you can always cut it open and check the inside to be sure. It’s better to be safe than sorry, especially when it comes to food safety. Trust your instincts and don’t be afraid to check.
-
Can I use the oven to finish off a grilled tri tip?
Absolutely! This is a great way to ensure even cooking and achieve the perfect level of doneness. Just grill your tri tip to your desired level of sear, and then transfer it to the oven to finish cooking. It's a win-win situation, my friend. You get the delicious char of the grill and the consistent heat of the oven to ensure even cooking. It's a combination that’s sure to impress.
-
What are some other great cuts of meat to cook in the oven?
The oven is your friend for all sorts of meaty goodness. Try a roast chicken, a leg of lamb, or even a pork loin. The possibilities are endless! The oven offers a versatile and reliable cooking method for a variety of meats, allowing you to explore different flavours and textures. So, get creative and experiment with different cuts and recipes. You never know what delicious discovery awaits you.
-
What's your favourite way to serve tri tip?
I'm a simple man at heart. I love a good slice of medium-rare tri tip, drizzled with a little bit of olive oil and sprinkled with some flaky sea salt. It's a classic combination that never disappoints. Sometimes, the simplest things in life are the best. It’s about letting the flavour of the meat shine through, enhanced by a touch of simplicity.
There you have it! Now, you're armed with the knowledge and confidence to tackle any tri tip challenge that comes your way. Happy cooking, and enjoy that juicy, flavourful perfection!
Everyone is watching

Corn on the Cob: The Ultimate Guide to Perfectly Cooked Ears
Healthy MealsAh, corn on the cob. Just the name evokes images of sunny days, barbecues, and that sweet, juicy flavour that ...

Scallops: The Ultimate Guide to Perfect Cooking
Healthy MealsAh, scallops. Those delicate, sweet, and utterly delicious morsels of the sea. They hold a special place in my...

Spaghetti Squash: The Ultimate Guide to Cooking and Serving
Healthy MealsRemember that time you saw spaghetti squash at the supermarket, looking all bumpy and strange, and thought, "W...

Salmon Cooking Times: Perfect Guide for Every Recipe
Healthy MealsLet me tell you, cooking salmon is an art form. It's all about getting that perfect balance: juicy and tender,...

Ham Cooking Time: How Long to Bake, Smoke, or Boil a Delicious Ham
Healthy MealsAh, ham. It's a classic, isn't it? A real crowd-pleaser, especially around holidays. And when done right, it'...