Ah, the NY Strip. A classic cut for a reason, right? It’s got that rich, beefy flavour, beautiful marbling, and a satisfying chew that just makes you feel like you’re treating yourself. But cooking it to perfection, that’s the real challenge. Too much time on the grill, and it’s dry as a bone. Not enough, and you’ve got a lukewarm, chewy disaster. I've been there, folks, staring at a sizzling steak, sweating bullets, wondering if I’ve ruined the whole dinner.
But you know what? It doesn't have to be that way. You can master this magnificent cut of meat and consistently create steaks that are juicy, tender, and full of flavour. I’m here to walk you through the entire process, from prep to plating, sharing my personal tips and tricks along the way. Ready to get grilling? Let’s do it!
(Part 1) The ny strip steak: A Close-up Look
Understanding the Cut
The NY Strip, also known as the new york strip, is a cut from the short loin of the cow. It's got a beautiful, rectangular shape and a good amount of fat running through it, which makes for a rich, flavourful bite. This marbling is what gives it that melt-in-your-mouth tenderness, but it can also make it a bit tricky to cook evenly. It's a bit like a delicate dance between heat and timing to get that perfect sear on the outside while keeping the inside juicy and pink.
The Importance of Thickness
Thickness is key when it comes to cooking times. A thin steak cooks quickly, while a thick one needs a bit more time to reach the right internal temperature. Imagine trying to cook a thin piece of paper versus a thick steak – it’s the same principle. You can’t treat them the same! That’s why understanding your steak’s thickness is crucial for getting the perfect level of doneness.
Temperature is Key
Let’s get scientific for a moment. Heat affects proteins, and those proteins are what make up your steak. As the steak heats up, the proteins contract and squeeze out the moisture. This is why it’s so important to cook your steak to the right internal temperature. It’s the only way to ensure you get that perfect balance of texture and flavour. Think of it as a temperature puzzle, and your meat thermometer is the key to solving it.
(Part 2) Your Essential Steak Toolkit
Alright, before we get into the actual cooking, let's talk gear. A well-equipped kitchen is your secret weapon for achieving steak greatness. Here’s what you’ll need:
- A cast iron skillet: This is my go-to for searing. Cast iron is like a heat hug for your steak, ensuring a beautiful, crispy crust. Just be careful, it gets incredibly hot!
- A Grill: Gas or charcoal, it’s up to you. A grill allows for even heat distribution and that irresistible smoky flavour.
- Meat Thermometer: This is your trusty sidekick, taking the guesswork out of cooking. You'll thank me for this one later.
- Tongs: You need these to flip your steak without messing up that perfect sear.
- A Cutting Board: For slicing and serving your masterpiece.
(Part 3) Steak Prep: Setting the Stage for Success
It’s All About the Preparation
Think of prep as the foundation of a good steak. The effort you put in here will pay off in spades later.
- Room Temperature is the Way to Go: Take your steak out of the fridge about 30 minutes before you start cooking. This allows the steak to cook more evenly. Think of it as giving it a chance to warm up and relax before it goes into the heat.
- Season Like a Pro: Salt and pepper are the basics, but don’t be afraid to get creative with herbs and spices. Try a mix of paprika, garlic powder, and onion powder for a kick, or rosemary and thyme for an earthy touch.
- Pat It Dry: This is a crucial step that many people miss. Use paper towels to gently pat the steak dry. A dry surface means a better sear, which is what we're aiming for.
The Importance of Resting
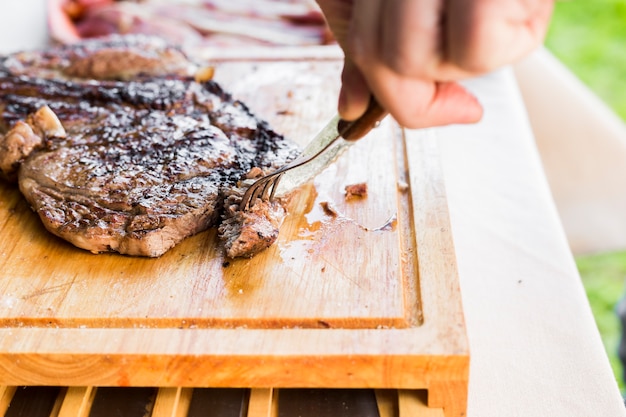
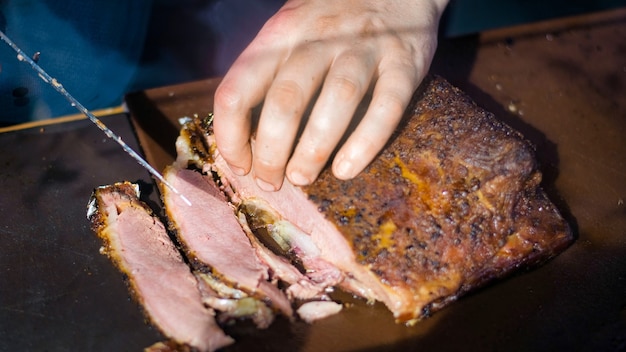
This is one of my biggest tips, and it’s often overlooked. After cooking, give your steak a 5-10 minute rest before slicing. This allows the juices to redistribute, making for a more tender and flavorful steak. Think of it like a little bit of culinary magic, happening right on your cutting board!
(Part 4) cooking techniques: Unlocking Steak Potential
Alright, now we’re getting to the heart of the matter. We’re going to explore the techniques that will transform your steak from ordinary to extraordinary. The key is to create a beautiful, crispy crust on the outside while keeping the inside juicy and tender.
reverse searing: My Favourite for Thick Steaks
For those thick, beautiful NY Strips, reverse searing is the way to go.
- Low and Slow: Start by cooking the steak in the oven at a low temperature (around 225°F). Cook it until it reaches an internal temperature of about 110°F for medium-rare. This low-and-slow approach ensures even cooking throughout the steak.
- High Heat Finish: Once it’s cooked to your desired internal temperature, crank up the heat on your grill or cast iron skillet. Sear the steak on each side for about 2-3 minutes to get that beautiful, crispy crust.
The result? A perfectly cooked steak with a delicious crust and a juicy, tender center. It’s like a symphony of textures and flavours.
The Classic Pan-Searing Method: Simple and Effective
This is a tried and true method for a reason. It’s straightforward and produces excellent results.
- Hot Pan: Heat a cast iron skillet over high heat. You want that skillet to be smoking hot!
- Sear and Flip: Place the steak in the pan and sear it for about 2-3 minutes per side. Resist the urge to flip it multiple times. One flip is all you need!
- Reduce Heat: Reduce the heat to medium and continue cooking the steak for another 3-5 minutes per side, depending on the thickness and your desired doneness.
The key here is to watch the internal temperature and make sure your steak reaches the desired level of doneness. Don’t just rely on time alone!
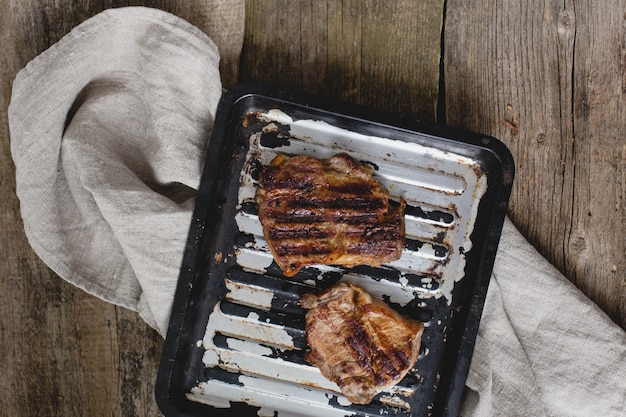
Grilling: The Smoky Flavour Route
Nothing beats that smoky, chargrilled flavour you get from grilling! Here’s how to grill a perfect NY Strip:
- Pre-Heat: Heat your grill to high heat. You want those beautiful grill marks!
- Place the Steak: Place the steak directly over the heat and sear for about 2-3 minutes per side. This creates that irresistible crust and those classic grill marks.
- Indirect Heat: Move the steak to the cooler part of the grill and continue cooking, depending on the thickness and your desired doneness.
Remember, your trusty meat thermometer is your best friend here. And don’t overcook it! Let those juicy, flavourful juices flow!
(Part 5) Cooking Times: A Detailed Guide
This is where we get into the nitty-gritty. The cooking times for your NY Strip will vary depending on thickness and desired doneness. Here’s a general guide to give you a starting point, but remember, the most accurate way to ensure perfect doneness is to use a meat thermometer.
NY Strip Steak Cooking Times (Approximate)
Remember, these are just estimates. Always use a meat thermometer to check the internal temperature for the most accurate results.
| Level of Doneness | Internal Temperature (°F) | 1-inch Thick Steak (Minutes) | 1.5-inch Thick Steak (Minutes) | 2-inch Thick Steak (Minutes) |
|---|---|---|---|---|
| Rare | 125°F-130°F | 4-5 | 6-7 | 8-9 |
| Medium-Rare | 130°F-135°F | 5-6 | 7-8 | 9-10 |
| Medium | 135°F-140°F | 6-7 | 8-9 | 10-11 |
| Medium-Well | 140°F-145°F | 7-8 | 9-10 | 11-12 |
| Well-Done | 150°F-155°F | 8-9 | 10-11 | 12-13 |
Tips for Accurate Cooking Times
- Don’t Crowd the Pan: Give your steak plenty of space to cook evenly. It’s like giving it a chance to breathe and not get steamy and sweaty in there!
- Use a Meat Thermometer: It's the best way to ensure your steak is cooked to your liking. It’s your secret weapon for avoiding overcooked disasters.
- Don’t Overcook: Overcooking a steak will make it tough and dry. It's better to err on the side of undercooking.
- Rest Your Steak: Allowing the steak to rest after cooking will help it redistribute its juices. This is the magic trick that turns a good steak into an amazing one.
(Part 6) From the Grill to the Plate: Elevate Your Meal
The steak is cooked, it's rested, now what? Let's turn this meal into a culinary experience!
Sides that Shine with Steak
I love pairing my NY Strip with sides that complement its rich flavour and juicy texture. Here are some of my go-to options:
- Roasted Vegetables: Asparagus, broccoli, Brussels sprouts, and even root vegetables like carrots and potatoes all work beautifully with steak. Roast them with herbs and spices for a flavour explosion.
- Creamy mashed potatoes: A classic for a reason. The creamy texture of mashed potatoes provides a luxurious contrast to the meat.
- grilled corn on the Cob: Grilled corn with a touch of butter and salt is a perfect summer side dish for steak.
- Garlic Butter Sauce: Simple, yet delicious. Melted butter infused with garlic is a perfect complement to any steak.
- Mushroom Sauce: A rich and earthy sauce that elevates the flavour of your steak to another level.
Don’t Forget the Wine!
A good steak deserves a good wine! Here are some pairings that I find work really well:
- Cabernet Sauvignon: This full-bodied red wine has bold tannins and rich fruit flavors that stand up to the hearty flavour of a NY Strip.
- Merlot: A softer red wine with plum and cherry notes, perfect for medium-rare steaks.
- Zinfandel: A fruit-forward red wine with a bit of spice, perfect for a well-done steak.
If you’re not a red wine fan, a crisp Chardonnay or Sauvignon Blanc can also work well with steak. It’s really about finding a wine that complements the flavours of your meal.
(Part 7) Steak Cooking Variations: Beyond the NY Strip
While the NY Strip is a classic, it's not the only game in town! There are other cuts of beef that can also be cooked to perfection. Here are a couple of my favourites:
The ribeye steak: A Marbled Masterpiece
This cut is known for its rich marbling and incredible flavour. It's also a great option for those who prefer a more tender steak. The ribeye is thicker than the NY Strip, so it needs a longer cooking time. I recommend reverse searing this cut for the best results.
The filet mignon: Delicate and Delicious
This cut is known for its buttery tenderness and delicate flavour. It's a great choice for those who prefer a less-intense steak flavour. The filet mignon is quite lean, so it's important to cook it quickly and not overcook it. A pan-sear method works really well for this cut.
(Part 8) FAQs: Your Steak Questions Answered
Got questions? I've compiled some of the most common questions about cooking a perfect NY Strip steak. Let's get those answers sorted!
1. What is the Best Way to Cook a NY Strip Steak?
The best way to cook a NY Strip steak depends on your personal preference. Reverse searing is my favorite for achieving a perfectly cooked steak, but the classic pan-sear method and grilling are also great options. Experiment and find the method that works best for you.
2. How Long Should I Cook a NY Strip Steak for Medium-Rare?
The cooking time for a medium-rare NY Strip steak will vary depending on the thickness of the steak. For a 1-inch steak, aim for 5-6 minutes per side, for a 1.5-inch steak, aim for 7-8 minutes per side, and for a 2-inch steak, aim for 9-10 minutes per side. However, the best way to ensure perfect doneness is to use a meat thermometer to check the internal temperature, which should be around 130°F-135°F for medium-rare.
3. What is the Best Internal Temperature for a Well-Done Steak?
A well-done steak should have an internal temperature of 150°F-155°F. This might seem like a high temperature, but it's important to remember that the steak will continue to cook slightly even after it's removed from the heat.
4. How Do I Prevent My Steak from Drying Out?
There are a couple of key things you can do to prevent your steak from drying out:
- Don’t Overcook: It's important to cook the steak to your desired level of doneness, but overcooking will make it tough and dry. Use a meat thermometer to ensure accurate cooking.
- Rest Your Steak: Allow the steak to rest for 5-10 minutes after cooking. This allows the juices to redistribute, giving you a more tender and flavorful steak.
5. What are Some Tips for Getting a Good Sear on My Steak?
To achieve a beautiful, crispy sear on your NY Strip steak, follow these tips:
- Use a Hot Pan or Grill: The heat needs to be high enough to create a good sear without burning the steak.
- Pat the Steak Dry: A dry surface will help the steak sear better.
- Don’t Move the Steak: Let the steak sit in the pan or on the grill for the entire sear time before flipping it. This will help create a beautiful crust.
That’s it! I hope you feel confident enough to tackle a delicious NY Strip steak next time you’re in the mood for a juicy, flavorful meal. Remember, practice makes perfect. So, get grilling, and enjoy!
Everyone is watching

Corn on the Cob: The Ultimate Guide to Perfectly Cooked Ears
Healthy MealsAh, corn on the cob. Just the name evokes images of sunny days, barbecues, and that sweet, juicy flavour that ...

Perfect Pork Roast Oven Cooking Time: A Guide to Delicious Results
Healthy MealsThere's something truly satisfying about a perfectly roasted pork. The aroma alone is enough to make your mout...

Ham Cooking Time: How Long to Bake, Smoke, or Boil a Delicious Ham
Healthy MealsAh, ham. It's a classic, isn't it? A real crowd-pleaser, especially around holidays. And when done right, it'...

Scallops: The Ultimate Guide to Perfect Cooking
Healthy MealsAh, scallops. Those delicate, sweet, and utterly delicious morsels of the sea. They hold a special place in my...

Spaghetti Squash: The Ultimate Guide to Cooking and Serving
Healthy MealsRemember that time you saw spaghetti squash at the supermarket, looking all bumpy and strange, and thought, "W...