I've always loved hard-boiled eggs. There's a satisfying simplicity to them, a perfect balance of creamy yolk and firm white. But, I've also been guilty of creating those rubbery, overcooked yolks that make you question your entire culinary existence. Over the years, I've become obsessed with mastering the art of the perfect hard-boiled egg, and I'm here to share all my tips and tricks. Buckle up, my fellow egg-lovers, because this is going to be a wild ride!
(Part 1) The Science of Perfect hard boiled eggs: It's All About the Chemistry
Let's start with the science, shall we? The magic of a hard-boiled egg lies in the fascinating chemistry of the egg white and yolk. The egg white is a symphony of protein molecules, held together by delicate bonds. As heat creeps in, these bonds weaken, causing the proteins to unfold and then re-form in a new, more rigid structure. That's why the white becomes firm and opaque - it's like a tiny little protein party with a dramatic transformation.
Now, the yolk is a whole other story. It's a complex blend of fat, protein, and water. The fat molecules are responsible for that luscious creaminess we all crave. When heat kisses the yolk, those fat molecules melt, creating the liquid centre. But, the proteins in the yolk also begin their own transformation, unfolding and re-bonding into a more solid structure. So, the art of the perfect hard-boiled egg is all about finding the sweet spot - cooking it long enough for the white to set, but not so long that the yolk becomes rubbery.
The Impact of Freshness: Older Eggs and Their Secrets
Now, let's talk freshness. fresh eggs are the key to a truly perfect hard-boiled egg. Why? Because as eggs age, the air pocket inside them grows larger. This means there's more space for the egg white to move around while cooking, potentially leading to uneven cooking and a less-than-perfect result. If you're using older eggs, be prepared for a potentially runnier yolk after cooking, which can be a little frustrating when you're aiming for that perfect, solid centre.
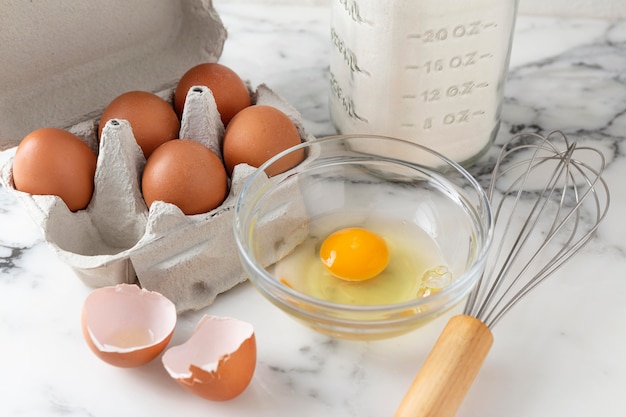
(Part 2) Essential Equipment: The Tools of the Egg-Boiling Trade
You need a few essential tools to conquer the art of the hard-boiled egg. Firstly, you'll need a medium-sized pot, big enough to comfortably accommodate your eggs without overcrowding them. Think of it as a spacious egg spa where they can relax and enjoy the cooking process. A strainer is your best friend for draining the hot water, and a bowl for the ice bath is a must-have. And if you're really serious about your hard-boiled eggs, consider investing in a trusty egg timer. It might sound fancy, but it's a game-changer for perfect timing.
(Part 3) Adding Eggs with Care: A Gentle Touch is Key
Now, you've got your equipment, your eggs, and you're ready to get started. Here's where it gets interesting - the art of adding the eggs to the pot. Gently lower each egg into the pot, making sure they're completely submerged in the water. No crowding! This gentle approach helps prevent cracks. Imagine you're giving them a little spa treatment. They deserve it after all.
(Part 4) Temperature Control: The Secret to Perfect Texture
We've talked about equipment, and the gentle art of egg placement. Now, let's talk about the most important factor - temperature. Start with cold water! Yes, cold water! It might sound counterintuitive, but trust me on this. The cold water allows the eggs to warm up slowly and evenly, resulting in a more tender texture and reducing the risk of cracking. Adding your eggs to boiling water can shock them, leading to those dreaded cracks. Remember, gradual heat is the key to success.
(Part 5) Timing is Everything: Mastering the Cooking Time
We've discussed the equipment, the gentle approach to egg placement, and the importance of cold water. Now, it's time for the grand finale - the timing. This is where you really need to pay attention. Here's the general guide I follow, but remember, every egg is unique, so adjust as needed:
Cooking Time Chart: Your Guide to Perfect Egg Results
| Cooking Time (Minutes) | Egg Result |
|---|---|
| 3-4 | Soft Boiled |
| 5-7 | Medium Boiled |
| 8-10 | Hard Boiled |
I usually aim for around 9 minutes for a perfectly hard-boiled egg. But, like I said, it's all about experimenting and finding what works best for you. It's like a culinary adventure, and you're the explorer!
(Part 6) The Ice Bath: A Quick Plunge for Perfect Texture
The cooking time is up, and now it's time for a dramatic plunge! Immediately drain the hot water and transfer your eggs to a bowl filled with ice water. This is called an ice bath, and it's a crucial step for achieving that perfect texture. The ice bath stops the cooking process, prevents that dreaded green ring around the yolk, and ensures a smooth, even texture. Let them sit in the ice bath for about 10 minutes. Then, you're ready for the grand finale - peeling!
(Part 7) The Art of Peeling: Becoming a Master Peeler
peeling hard-boiled eggs can be a bit of an art form, especially if they've been overcooked. But don't worry, with a little practice, you can become a peeling master! I'm a big fan of using a spoon. Gently tap the egg all over, especially around the larger end, where the air pocket is. This helps loosen the shell. You can then start peeling. Peeling under cold water can also make the shell come off easier. Think of it as a little egg spa treatment, round two.
If you're dealing with a stubborn egg, try rolling it on the counter to crack the shell. Just be careful not to crush it! This technique can sometimes do the trick.
(Part 8) Storage and Shelf Life: Keeping Your Eggs Fresh
Once your eggs are peeled, you can store them in the refrigerator for up to a week. I like to keep them in a container filled with cold water, as it helps maintain their moisture and prevents them from drying out. Remember to change the water every day to keep them fresh and delicious.
(Part 9) The Perfect Hard Boiled Egg: A Culinary Triumph
What makes a perfectly hard-boiled egg so satisfying? It's the perfect balance of textures - the creamy, smooth yolk and the firm, slightly chewy white. For me, the yolk is the star of the show. It's like a little bite of sunshine, and it's perfect for deviled eggs, egg salad, or simply enjoyed on its own with a sprinkle of salt and pepper.
(Part 10) Variations and Creativity: Beyond the Basics
Once you've mastered the art of the basic hard-boiled egg, it's time to get creative! You can add a touch of flavour to your eggs by simmering them in flavoured water, like a bay leaf, peppercorns, or even a sprig of rosemary. And if you're feeling adventurous, try dyeing your eggs with natural ingredients like beetroot juice or turmeric. The possibilities are endless, and your taste buds will thank you!
FAQs: Your Hard Boiled Egg Questions Answered
1. Why do my hard-boiled eggs have a green ring around the yolk?
The green ring is a result of a chemical reaction between the iron in the yolk and the sulfur in the egg white. This happens when the egg is overcooked, especially when it's been exposed to high heat for a prolonged time. To prevent this, try cooking your eggs at a lower temperature and avoid overcooking them. Gentle heat is the key to avoiding that green ring.
2. Can I freeze hard-boiled eggs?
While technically you can freeze hard-boiled eggs, it's not ideal. The texture will change, becoming rubbery and less appealing. It's best to enjoy your hard-boiled eggs fresh, within a week of cooking.
3. How do I make deviled eggs?
Deviled eggs are a classic appetizer, and they're surprisingly easy to make. First, peel your hard-boiled eggs and slice them in half lengthwise. Remove the yolks and mash them with mayonnaise, mustard, chopped onion, and your favourite seasonings. Then, fill the egg whites with the yolk mixture and sprinkle with paprika. Enjoy the deliciousness!
4. Can I use older eggs to make hard-boiled eggs?
You can use older eggs, but they might result in a runnier yolk. Fresh eggs are generally better for hard-boiling because they have a smaller air pocket. Older eggs, with larger air pockets, can lead to the white spreading out more during cooking, potentially affecting the final texture.
5. What if I don’t have an ice bath?
If you don't have an ice bath, you can run cold water over the eggs until they're cool to the touch. This will help stop the cooking process and prevent the yolk from turning green. It's a simple workaround that works in a pinch.
And there you have it - my complete guide to the perfect hard-boiled egg. Remember, it's all about experimenting and finding what works best for you. Happy boiling, and enjoy the deliciousness!
Everyone is watching

Corn on the Cob: The Ultimate Guide to Perfectly Cooked Ears
Healthy MealsAh, corn on the cob. Just the name evokes images of sunny days, barbecues, and that sweet, juicy flavour that ...

Perfect Pork Roast Oven Cooking Time: A Guide to Delicious Results
Healthy MealsThere's something truly satisfying about a perfectly roasted pork. The aroma alone is enough to make your mout...

Ham Cooking Time: How Long to Bake, Smoke, or Boil a Delicious Ham
Healthy MealsAh, ham. It's a classic, isn't it? A real crowd-pleaser, especially around holidays. And when done right, it'...

Scallops: The Ultimate Guide to Perfect Cooking
Healthy MealsAh, scallops. Those delicate, sweet, and utterly delicious morsels of the sea. They hold a special place in my...

Spaghetti Squash: The Ultimate Guide to Cooking and Serving
Healthy MealsRemember that time you saw spaghetti squash at the supermarket, looking all bumpy and strange, and thought, "W...