Let's talk steak, folks! You know the scene, right? The sun's out, the grill's roaring, and you've got a beautiful piece of meat ready to go. But then, the dreaded moment hits - you flip the steak, and instead of that glorious sear, you're left with a sad, grey mess. Or maybe you've overcooked it into a shoe leather texture? We've all been there, trust me. But don't worry, there's hope! With the right techniques and a bit of know-how, you can grill the perfect steak every single time, and that's exactly what we're going to uncover today.
This is my ultimate guide to grilling the best steak, bursting with tips, tricks, and personal experiences. We'll cover everything from choosing the right cut to mastering the art of searing, and even how to nail that perfect medium-rare finish. So, grab a cool drink, get comfy, and let's get grilling!
(Part 1) The Foundation: Choosing the Right Cut

First things first, you need to pick the right cut for the job. Not all steaks are created equal, and some are better suited for grilling than others. It's not just about thickness, you want to look for a cut with good marbling – that's the amount of fat interspersed throughout the meat. This fat renders during cooking, adding incredible flavour and tenderness.
Top Picks for the Grill:
- Rib-Eye: A classic for a reason, the rib-eye is known for its rich flavour and excellent marbling. It's a perfect choice for those who appreciate a bit of fat on their steak. I find it's incredibly forgiving on the grill, allowing for a little more wiggle room with cooking times.
- new york strip: Another popular option, the New York strip boasts a leaner profile compared to the rib-eye. It has a fantastic flavour and a beautiful balance between tenderness and chewiness. I love the distinct "strip" shape of this cut, making it visually appealing on the plate.
- filet mignon: If you're looking for ultimate tenderness, then the filet mignon is the way to go. However, it lacks the intense flavour of other cuts due to its lower fat content. It's a great option for a special occasion or when you want a truly luxurious steak experience.
- T-Bone: The T-bone is a favourite for its interesting mix of textures. One side features the tender filet mignon, while the other boasts the more flavorful strip steak. It's perfect for sharing, offering a variety of flavours in one single cut.
- Porterhouse: Similar to the T-bone, the porterhouse is a larger cut with a wider strip steak portion. It's perfect for a crowd or when you want a truly impressive meal. I love making a big Porterhouse for holidays or family gatherings, it's always a crowd-pleaser.
Remember, these are just a few suggestions. There are many other cuts that work well on the grill, so don't be afraid to experiment and find your favourites. For example, I recently discovered a love for flank steak. It's a bit tougher, but when grilled properly, it packs a punch of flavour. It's great for slicing thin and serving in tacos or stir-fries.
When choosing a steak, I always recommend going for a thickness of at least 1.5 inches. This gives the steak time to cook evenly without overcooking the outside. Plus, it helps to create a juicy, flavorful centre. Imagine a thick, juicy steak that's cooked to perfection – that's what you're aiming for!
(Part 2) Preparation: Getting Ready for Grilling Glory
You've chosen your cut, but now it's time to get it prepped for grilling. Proper preparation is key to achieving the perfect steak, so don't skip this step! It’s like preparing for a marathon – you wouldn’t just jump into the race without warming up, would you?
1. Bringing it to Room Temperature
This is a step that many people overlook, but it makes a big difference. You want to avoid shocking the meat with extreme temperature changes, which can lead to uneven cooking. I always take my steak out of the refrigerator about 30-45 minutes before grilling. This allows the meat to gradually warm up to room temperature, ensuring that it cooks more evenly.
Imagine your steak as a delicate flower. You wouldn't want to shock it with a sudden burst of heat, right? That's why letting it come to room temperature is essential for a beautiful bloom of flavour.
2. Seasoning: The Art of Flavor
The beauty of steak is its simplicity. There’s no need for complex sauces or marinades – just a good, simple seasoning is all you need. Salt and freshly ground black pepper are the staples, but I also love to add a sprinkle of garlic powder, onion powder, and paprika for a bit more depth.
Don't be afraid to season generously! Salt is your friend. It draws moisture out of the meat, which then gets reabsorbed, creating a more flavorful and tender steak. When seasoning, I like to use a good quality coarse salt, which dissolves slowly and adds a great texture to the crust. As for pepper, freshly ground black pepper offers a bolder flavour compared to pre-ground pepper.
While salt and pepper are staples, you can experiment with other spices and herbs. For a more adventurous touch, try adding smoked paprika, chili flakes, or even a touch of cayenne pepper.
Apply the seasoning evenly on all sides of the steak, making sure to cover every surface.
3. The "Pat-Down": Removing Excess Moisture
This might seem insignificant, but it's crucial. Excess moisture on the surface of the steak will hinder browning, resulting in a less appealing crust. To achieve that beautiful, crispy sear, make sure to pat the steak dry with paper towels. This ensures that the heat from the grill directly hits the meat, resulting in a delicious caramelization.
Imagine a hot skillet – water would sizzle and steam, preventing the food from browning. It's the same principle with your steak – patting it dry allows for that perfect sear.
(Part 3) The Grill: Your Steak's Playground
Now, we’re ready for the star of the show: the grill! The type of grill you use can have a huge impact on the final result, so choose wisely.
Gas Grill vs. charcoal grill
Both have their pros and cons, so it comes down to personal preference.
A gas grill offers consistent and controllable heat, making it great for beginners. You can easily adjust the temperature and ensure even cooking. I love gas grills for their convenience and speed, especially when I'm short on time.
A charcoal grill, on the other hand, provides a more intense, smoky flavour. It takes a little more effort to get the coals burning at the right temperature, but the flavour it adds is unparalleled. I tend to use my charcoal grill for special occasions, when I want that smoky depth.
Setting Up for Success:
Whether you're using a gas or charcoal grill, the key is to achieve a hot grilling surface. You want the grill to be screaming hot, which is about 450-500°F (232-260°C) for a gas grill or a bed of white-hot coals for a charcoal grill. You can test the temperature with a grill thermometer. The ideal temperature allows for a beautiful sear on the outside while keeping the inside juicy and tender.
It's also essential to clean the grill grate before grilling. A clean grill grate promotes even heat transfer and prevents sticking. Use a grill brush to scrub away any debris and then give the grate a good wipe down with a damp cloth.
Grilling Time: Let the Show Begin
Finally, it’s time to get grilling!
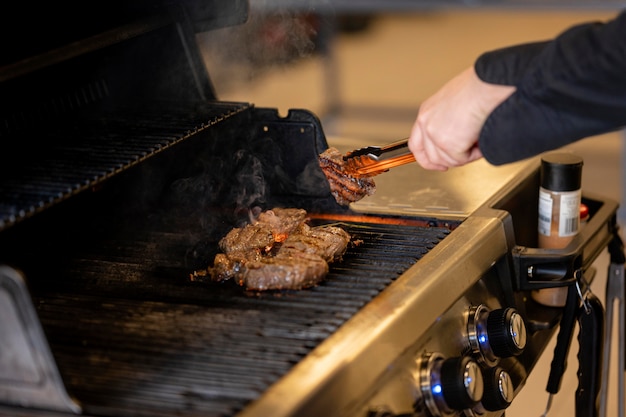
1. The First Sear: Building that Crust
Place the steak on the hot grill and let it sit undisturbed for about 3-4 minutes. This first sear is crucial for creating a flavorful, crispy crust. Resist the urge to flip it too early. Let the steak develop a nice brown crust before you touch it.
The steak will stick slightly at first, but it will release naturally as it cooks. You'll see telltale grill marks forming, which are a sign that the crust is developing nicely. If the steak isn’t releasing easily, it’s not yet ready to flip.
2. Flipping: One and Done
Once the first side is seared, carefully flip the steak over. You only need to flip the steak once. Flipping it multiple times can result in a dry, tough steak.
Again, let the steak sit undisturbed for another 3-4 minutes, allowing the other side to develop a similar crust.
(Part 4) The internal temperature: Finding Your Perfect Doneness
Here’s where things get interesting. You need to be able to tell when your steak is cooked to your liking. This is about more than just guessing. It’s about understanding the relationship between cooking time and internal temperature, and using tools to ensure accuracy.
Most importantly, learn the difference between rare, medium-rare, medium, medium-well, and well-done. Each has its own unique texture and level of doneness.
The Doneness Guide:
Here’s a handy table to guide you:
| Doneness | Internal Temperature (°F) | Internal Temperature (°C) | Description |
|---|---|---|---|
| Rare | 125-130°F | 52-54°C | Very red center, cool to the touch, very juicy |
| Medium-Rare | 130-135°F | 54-57°C | Red center, slightly warm to the touch, juicy |
| Medium | 140-145°F | 60-63°C | Pink center, warm to the touch, less juicy |
| Medium-Well | 150-155°F | 65-68°C | Very little pink, hot to the touch, drier |
| Well-Done | 160°F and above | 71°C and above | Completely brown, very hot to the touch, dry |
The ideal doneness for steak is a matter of personal preference. Some people prefer their steak rare, while others like it well-done. My personal preference is for medium-rare. It offers the best balance of flavour and tenderness.
Checking the Temperature:
There are several ways to ensure your steak is cooked to your liking. You can use a meat thermometer to check the internal temperature. This is the most accurate method. Insert the thermometer into the thickest part of the steak, making sure it doesn’t touch any bone. The thermometer will give you a precise reading of the internal temperature, ensuring you achieve your desired doneness.
Another option is the “finger test”. This method involves pressing the steak to gauge its firmness. A rare steak will feel soft and jiggly, while a well-done steak will be firm and springy. But this is a less reliable method, and I tend to rely on my trusty meat thermometer.
(Part 5) Resting: Patience is a Virtue
Once your steak reaches the desired doneness, don't rush to cut into it immediately. Give it a chance to rest!
Resting is essential for allowing the juices to redistribute throughout the steak. This ensures that the meat stays juicy and tender. The best way to rest a steak is to remove it from the grill and place it on a cutting board. Cover it loosely with aluminum foil for about 5-10 minutes. This will allow the internal temperature to stabilize and the juices to redistribute.
Resist the temptation to cut into the steak right away. I know it can be hard to wait, but trust me, the extra few minutes will make a huge difference!
(Part 6) Slicing and Serving: The Final Touches
The steak is rested, so it's time to slice and serve!
Slicing the Steak:
For a beautiful presentation, slice the steak against the grain. This means slicing the meat perpendicular to the muscle fibers, resulting in more tender and flavorful pieces.
If you’re slicing a T-bone or Porterhouse steak, you can slice each side separately. This way, you’ll have filet mignon slices and strip steak slices.
Serving the Steak:
Now, it’s time to plate your masterpiece. I like to serve my steak with a simple side of roasted vegetables or a salad. I also love to add a dollop of butter or a drizzle of sauce.
When it comes to sauces, a classic Béarnaise sauce or a rich peppercorn sauce are always a good choice. For a lighter touch, you can also use a simple vinaigrette or a herb-infused olive oil.
And don’t forget a side of creamy mashed potatoes or a crisp green salad for a complete meal.
(Part 7) Beyond the Basic: Enhancing Your Steak
The basic steak grilling techniques are essential, but there's always room for creative experimentation! Here are a few ideas to add a unique touch to your steak:
1. Smoky Flavour: Wood Chips and Grilling
For a smoky kick, add wood chips to your grill. Soak the chips in water for about 30 minutes, then place them on the coals or in a smoker box. The wood chips will release smoke as they burn, infusing your steak with a delicious, smoky flavour. Hickory, pecan, and apple wood are popular choices.
Imagine that smoky aroma filling your backyard, mingling with the scent of grilling steak. It's a symphony of flavour!
2. reverse searing: Tenderness and Flavor
Reverse searing is a technique that involves slowly cooking the steak at a lower temperature before searing it at a higher temperature. This method helps to ensure that the steak cooks evenly and stays juicy. First, cook the steak over indirect heat at around 250°F (121°C) until it reaches an internal temperature of about 10 degrees below your desired doneness. Then, sear the steak over direct, high heat for a minute or two per side to achieve a crispy crust.
Think of it like a gentle warm-up for your steak, followed by a quick burst of intense heat. It's a great way to achieve both tenderness and a beautiful crust.
3. Marinade Magic: A Flavor Booster
Marinades can add extra flavour to your steak. There are countless recipes available, but a simple marinade of olive oil, lemon juice, garlic, and herbs will work wonders. Remember, marinades shouldn't be used to tenderize meat, as they typically don't have enough time to do so. Marinate your steak for 30 minutes to a few hours, but no longer.
Marinades are like a secret ingredient, infusing your steak with an extra layer of flavour. Experiment with different combinations and find your perfect marinade.
(Part 8) FAQs: Answering Your Questions
So, you’ve read through all my tips and tricks, but you still have a few questions. No problem. Let’s address some common queries:
1. Can I Marinate Steak in Acidic Marinades?
While acidic marinades (like those with lemon juice or vinegar) can add flavor, they can also make the meat tougher if used for too long. For best results, keep marinating time to a minimum (30 minutes to a few hours).
2. What is the Best Temperature for Grilling Steak?
Aim for a high temperature, around 450-500°F (232-260°C) for a gas grill or a bed of white-hot coals for a charcoal grill. This creates a beautiful sear and cooks the steak quickly without overcooking it.
3. How Long Should I Grill a Steak?
Grilling time depends on the thickness of the steak and your desired doneness. Use a meat thermometer to check the internal temperature, as this is the most accurate way to determine when the steak is cooked to your liking.
4. Can I Grill a Steak in the Rain?
It's not ideal, but you can grill a steak in the rain. Just be sure to use a grill cover to protect the grill from water damage. You might also want to consider using a gas grill, as it's easier to control the temperature in rainy conditions.
5. What Should I Do if My Steak is Overcooked?
Don't worry, it happens to the best of us! If your steak is overcooked, try slicing it thin and using it in a dish like steak salad or tacos.
(Part 9) Wrapping Up: The Journey of a Steak
And there you have it, my ultimate guide to grilling the perfect steak. From choosing the right cut to mastering the art of searing, there are plenty of steps to achieving that juicy, flavorful steak you’ve always dreamt of. Remember, it’s a journey, not a race. Take your time, enjoy the process, and most importantly, have fun! I hope these tips help you become a grilling pro in no time.
Now go forth, fire up the grill, and conquer those sizzling steaks! You’ve got this.
Everyone is watching

Corn on the Cob: The Ultimate Guide to Perfectly Cooked Ears
Healthy MealsAh, corn on the cob. Just the name evokes images of sunny days, barbecues, and that sweet, juicy flavour that ...

Perfect Pork Roast Oven Cooking Time: A Guide to Delicious Results
Healthy MealsThere's something truly satisfying about a perfectly roasted pork. The aroma alone is enough to make your mout...

Scallops: The Ultimate Guide to Perfect Cooking
Healthy MealsAh, scallops. Those delicate, sweet, and utterly delicious morsels of the sea. They hold a special place in my...

Spaghetti Squash: The Ultimate Guide to Cooking and Serving
Healthy MealsRemember that time you saw spaghetti squash at the supermarket, looking all bumpy and strange, and thought, "W...

Salmon Cooking Times: Perfect Guide for Every Recipe
Healthy MealsLet me tell you, cooking salmon is an art form. It's all about getting that perfect balance: juicy and tender,...