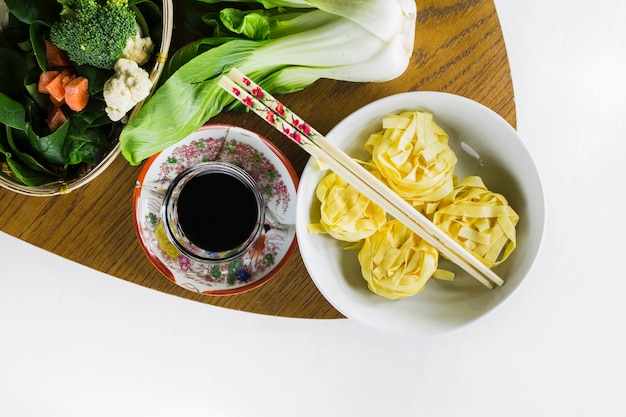
Let's face it, there's nothing quite like a plate of perfectly cooked egg noodles. That golden, silky texture, the subtle egg flavour, the way they soak up every bit of sauce... it's pure comfort food heaven. But getting those noodles just right takes a bit more than just throwing some flour and eggs in a bowl. It's about understanding the science behind the dough, mastering the rolling and cutting techniques, and knowing exactly when to stop the cooking process. Today, I'm going to take you on a journey to noodle perfection, sharing my secrets and insights along the way. Buckle up, it's going to be a delicious ride!
(Part 1) The Ingredients: A Symphony of Flavour

Just like a great orchestra, every ingredient in our egg noodle symphony plays a crucial role. From the backbone of the flour to the secret weapon of the eggs, each element contributes to the final masterpiece. So, let's break down the ingredients and understand why they're so important.
The Flour: The Backbone of the Noodle
Think of the flour as the foundation of your noodle structure. You want a good quality, all-purpose flour, but not just any kind. I prefer a high-protein variety because it gives the noodles a lovely bite, preventing them from becoming limp and soggy. Remember, you want your noodles to hold their shape, not turn into mush in the pot. Imagine that protein content as the muscle that keeps those noodles strong and resilient.
The Eggs: The Secret Weapon
Now, let's talk eggs. They are the secret ingredient that elevates egg noodles to a whole new level. Forget those bland, store-bought versions – fresh, free-range eggs are where it's at. They have a richer flavour and a beautiful, deep golden yolk that adds a vibrant hue to your noodles. But it's not just about the colour; it's about the texture. fresh eggs create a silky smooth dough that translates to noodles that are tender yet pleasantly chewy, a perfect balance of textures.
The Salt: The Unsung Hero
Don't underestimate the power of salt! A pinch goes a long way, enhancing the flavour of both the flour and eggs, and subtly influencing the texture of the dough. The salt helps to create a more elastic dough, making it easier to roll out and preventing it from becoming too sticky. You might not taste it directly, but the salt plays a vital role in bringing everything together.
The Water: The Glue that Binds It All Together
Water is often overlooked, but it's the crucial ingredient that binds everything together. The key is to use cold water. This helps to keep the dough cool, preventing the gluten from developing too quickly. Overdeveloped gluten can lead to tough, rubbery noodles, which is definitely not what we want. We want those noodles to be tender and springy, not like chewing on a rubber band.
(Part 2) The Dough: A Culinary Ballet

Now we're getting into the heart of the matter, the creation of the dough. This is where you transform your ingredients into a smooth, elastic ball of noodle potential. It's a delicate dance between flour, eggs, and water, a balancing act that requires a bit of finesse.
The Mixing Method: A Balancing Act
You can use a stand mixer with a dough hook, but I prefer the hands-on approach. It gives me a better feel for the dough, allowing me to adjust the texture as needed. Start by combining the flour, salt, and eggs in a large bowl. Gradually add the cold water, mixing constantly with a wooden spoon or spatula. The goal is to bring the dough together without overworking it. You'll know it's ready when it forms a smooth ball that doesn't stick to the bowl. Don't be afraid to get your hands dirty; it's all part of the process.
The Kneading Technique: A Workout for Your Dough
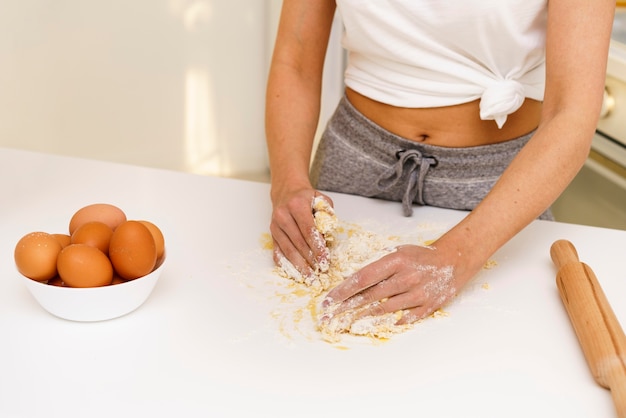
Kneading is like giving your dough a good workout. Transfer the dough to a lightly floured surface and start kneading, pushing, folding, and turning it for about 10 minutes. The goal is to develop the gluten, making the dough elastic and smooth. You'll know it's kneaded enough when it's smooth and bounces back when you poke it. Remember, patience is key here. Don't rush the process; the dough needs time to develop its strength.
The Resting Period: A Time for Relaxation
Once the dough has been kneaded, give it a chance to relax. Cover it with plastic wrap and let it rest for at least 30 minutes. This allows the gluten to relax, making the dough more pliable and easier to roll out. It's like giving the dough a mini-vacation, allowing it to recover and become more manageable.
(Part 3) The Rolling: From Dough to Sheet

Now it's time for the transformation. We're going to take that dough ball and turn it into a beautiful, thin sheet, ready to be cut into noodles. There are two main methods: the classic rolling pin approach and the modern pasta machine technique.
The Rolling Pin Technique: An Old-School Charm
For the purist, there's nothing quite like the traditional rolling pin. Dust your surface with flour, place the dough in the center, and start rolling. Work slowly and evenly, flipping the dough over frequently to ensure it's rolled out to a consistent thickness of about 1/8 inch. It takes a bit of muscle and patience, but it's a satisfying process. If the dough starts to feel too tough, let it rest for a few minutes before continuing.
The Pasta Machine Method: A Modern Twist
If you're looking for a more automated approach, a pasta machine can be a godsend. Follow the manufacturer's instructions, starting with the widest setting and gradually decreasing the thickness until you reach your desired level. It's a little less hands-on but still requires some finesse to ensure the dough is evenly rolled.
(Part 4) The Cutting: A Culinary Dance of Precision
Now comes the crucial step: cutting those beautiful sheets of dough into perfectly even noodles. There are a few ways to achieve this, depending on your preference and equipment.
The Knife Method: A Classic Approach
For the traditional approach, use a sharp knife to cut the rolled-out dough into strips of your desired width. I typically go for about 1/4 inch wide noodles, providing a nice balance of texture and flavour. Use a steady hand and cut evenly to ensure all the noodles are roughly the same size.
The Pasta Cutter Method: Efficiency and Accuracy
A pasta cutter is a great tool for achieving perfectly even noodles. Feed the dough sheet through the cutter, and it will automatically cut the noodles to your chosen width. It's quick and efficient, ensuring consistency throughout.
(Part 5) The Shaping: A Noodle Transformation
Depending on the type of egg noodle you want to make, you might need to add some extra shaping to your noodles. Let's explore some popular variations.
The Fettuccine Method: Long and Ribbon-Like
For fettuccine, you'll need to roll the noodles flat and cut them into long, ribbon-like strips. You can use a fettuccine cutter or simply roll the noodles flat and cut them with a knife. The key is to ensure that all the strips are the same width, ensuring even cooking and a beautiful appearance.
The Tagliatelle Method: Wide and Flat
Tagliatelle is similar to fettuccine, but it's wider and flat. You can use a tagliatelle cutter or simply roll the noodles flat and cut them into wide strips. Again, the key is to maintain consistency in width for even cooking.
The Pappardelle Method: Long and Wide
Pappardelle, another wide and flat noodle, is even thicker and wider than tagliatelle. You can use a pappardelle cutter or roll the noodles flat and cut them into thick, wide strips. The goal remains the same: maintain consistency for a beautiful and delicious result.
(Part 6) The Drying: A Noodle Transformation
Once you've cut your noodles, it's time to let them dry slightly. This prevents them from sticking together when you cook them. It's also a good time to add extra flour to the noodles if they're sticking together.
The Air-Drying Method: A Classic Approach
Lay the noodles out on a floured surface or hang them on a drying rack. Let them air dry for about 30 minutes to an hour, or until they are slightly dry to the touch. This allows the surface to dry, preventing them from sticking together in the pot.
The oven method: A Quick and Efficient Solution
For a faster drying process, use your oven. Set it to the lowest setting, leave the door slightly ajar, and place the noodles on a baking sheet lined with parchment paper. Let them dry for about 15 minutes. You don't want to cook them; you just want to remove excess moisture.
(Part 7) The Cooking: A Noodle Symphony
Now comes the moment of truth: cooking your noodles to perfection. The key is to achieve that perfect al dente texture, meaning firm to the bite. You don't want them mushy or overcooked. It's about finding that delicate balance between firmness and tenderness.
The Boiling Method: A Classic Approach
Bring a large pot of salted water to a rolling boil. Add the noodles to the boiling water and cook for about 2-3 minutes, or until al dente. Don't overcook them! It's crucial to check their doneness by biting into one. If it's firm to the bite, it's ready.
The Stirring Technique: A Crucial Step
While the noodles are cooking, stir them occasionally to prevent them from sticking together. You want them to cook evenly and remain separate, not clumped together at the bottom of the pot.
The Drain: A Clean and Dry Finish
Once the noodles are cooked, drain them in a colander and rinse them with cold water. This stops the cooking process and prevents the noodles from sticking together. It also helps to remove excess starch, ensuring a cleaner, more appealing presentation.
(Part 8) The Serving: A Noodle Feast
Congratulations! You've made it to the final stage: serving your delicious, homemade egg noodles. The possibilities are endless; you can toss them with your favourite sauce, add them to a soup, or even use them in a casserole.
The Sauce: A Symphony of Flavour
My personal favourite is a simple butter and Parmesan cheese sauce. It's rich, creamy, and cheesy, the perfect complement to the delicate flavour of egg noodles. Feel free to experiment with other ingredients, like garlic, herbs, or a splash of white wine.
The Soup: A Hearty and Comforting Dish
Egg noodles are a classic addition to soups. I love adding them to chicken noodle soup or vegetable soup. They add a hearty and comforting element, making every bowl a satisfying experience.
The Casserole: A Baked Delight
Egg noodles are perfect for a casserole. I love a creamy chicken noodle casserole with a mushroom sauce and a crispy topping. It's a delicious and satisfying dish that's perfect for a family meal or a potluck.
(Part 9) The Variations: A Noodle Universe
While we've covered the classic egg noodle recipes, there's a whole world of variations waiting to be explored. Let's get creative and add some exciting twists to our noodle repertoire.
The Spinach Noodles: A Green Delight
For a vibrant green colour and a slightly earthy flavour, try adding spinach to your dough. Simply blend a handful of spinach into your eggs and water before adding them to the flour. The spinach adds a nutritional boost and a beautiful visual appeal.
The Herb Noodles: A Fresh and Aromatic Twist
For a fresh and aromatic flavour, add some herbs to your dough. I love to use basil, rosemary, or thyme, but feel free to experiment with your favourites. Finely chop the herbs and add them to the flour and eggs. They'll infuse the noodles with their unique fragrance and flavour.
The Chilli Noodles: A Spicy Kick
If you like a little heat, add some chilli flakes to your dough. It'll give your noodles a satisfying kick. Just be careful not to overdo it! You don't want your noodles to be too spicy.
(Part 10) Tips and Tricks: The Noodle Wisdom
Now let's dive into the insider tips that can elevate your egg noodle game. These are the little secrets that make all the difference, turning you from a noodle novice to a seasoned pro.
The Flouring Technique: A Key to Success
When rolling out your dough, flour the surface generously. This prevents the dough from sticking and makes rolling easier. It also ensures that your noodles don't stick together as they dry.
The Resting Time: A Crucial Step
Never skip the resting time for the dough. It allows the gluten to relax, resulting in a more tender and pliable dough. This makes rolling and cutting much easier and ensures your noodles have the perfect texture.
The Boiling Time: A Matter of Precision
Don't overcook your noodles! They should be cooked al dente, meaning firm to the bite. Use the bite test: if it's firm to the bite, it's ready.
The Cooling Technique: A Noodle Saver
Once the noodles are cooked, rinse them with cold water. This stops the cooking process and prevents them from sticking together. It also helps to remove excess starch, resulting in a cleaner, more appealing presentation.
(Part 11) FAQs: Unlocking the Noodle Secrets
Let's address some common questions about egg noodles. These are the ones I get asked all the time, so let's clear up any confusion.
Q1: Can I use store-bought noodles instead of making my own?
You can certainly use store-bought noodles if you're short on time or don't feel like making your own. However, I highly recommend making your own. The flavour and texture are simply unbeatable, and the satisfaction of making your own noodles is truly rewarding.
Q2: How long can I store homemade egg noodles?
You can store homemade egg noodles in the refrigerator for up to 3 days. Store them in an airtight container to preserve their freshness. To freeze them, lay them out on a baking sheet lined with parchment paper and freeze for about 30 minutes. Then, transfer them to a freezer-safe bag. Frozen noodles can last for up to 3 months.
Q3: What can I do with leftover egg noodles?
Leftover egg noodles are a blank canvas for culinary creativity! You can toss them with a sauce, add them to a soup, use them in a casserole, or even fry them up with butter and garlic. The possibilities are endless.
Q4: What's the best way to cook egg noodles?
The best way to cook egg noodles is to boil them in a large pot of salted water until they are al dente. Don't overcook them! Use the bite test to ensure they are firm to the bite. Once they're cooked, drain them in a colander and rinse them with cold water.
Q5: What are some creative ways to use egg noodles?
Egg noodles are incredibly versatile! You can use them in sweet dishes, like a noodle pudding with cinnamon and sugar. They are also excellent in Asian dishes, such as a stir-fry with vegetables and tofu. The only limit is your imagination.
(Part 12) The Final Word: A Noodle Masterpiece
And there you have it, my comprehensive guide to creating perfect egg noodles. I've shared my knowledge, my passion, and my secrets to making those golden strands a culinary masterpiece. Now it's your turn to step into the kitchen and unleash your noodle-making prowess. Remember, it's all about the journey, the process, and the satisfaction of crafting something delicious with your own two hands. You've got this, and I can't wait to hear about your noodle adventures. Happy cooking!
Everyone is watching

Corn on the Cob: The Ultimate Guide to Perfectly Cooked Ears
Healthy MealsAh, corn on the cob. Just the name evokes images of sunny days, barbecues, and that sweet, juicy flavour that ...

Perfect Pork Roast Oven Cooking Time: A Guide to Delicious Results
Healthy MealsThere's something truly satisfying about a perfectly roasted pork. The aroma alone is enough to make your mout...

Ham Cooking Time: How Long to Bake, Smoke, or Boil a Delicious Ham
Healthy MealsAh, ham. It's a classic, isn't it? A real crowd-pleaser, especially around holidays. And when done right, it'...

Scallops: The Ultimate Guide to Perfect Cooking
Healthy MealsAh, scallops. Those delicate, sweet, and utterly delicious morsels of the sea. They hold a special place in my...

Spaghetti Squash: The Ultimate Guide to Cooking and Serving
Healthy MealsRemember that time you saw spaghetti squash at the supermarket, looking all bumpy and strange, and thought, "W...
