Oh, the joy of a perfectly cooked steak! Juicy, tender, with a beautiful sear and just the right amount of pink inside. For me, there's no better way to achieve that culinary masterpiece than with a trusty cast iron skillet. It's been my go-to for years, and through countless experiments, both successful and, let's be honest, disastrous, I've learned a thing or two about getting it right. So, grab a glass of your favourite beverage, settle in, and let's dive into this sizzling adventure together.
(Part 1) Choosing Your Cast Iron Companion

First things first, we need the right tool for the job. It's all about finding that perfect cast iron skillet, the one that feels right in your hands, a kitchen companion you can rely on. Think of it as finding the perfect pair of jeans – it needs to fit just right.
The Art of Cast Iron Selection
When choosing your skillet, consider the size and weight. You want something large enough to comfortably accommodate your steak (no overcrowding!) and sturdy enough to handle the heat. I typically go for a 10-inch skillet; it’s a versatile size that works well for everything from solo steaks to pan-searing vegetables.
And here’s a little secret – don’t be afraid of those well-seasoned vintage beauties. Cast iron is like fine wine; it gets better with age. Just make sure to give it a good scrub, a thorough seasoning, and a little love before you start cooking.
Seasoning Your Cast Iron: A Protective Layer of Love
Seasoning your cast iron is like giving it a protective layer of armor, creating a non-stick surface and preventing rust. It's a simple process, but it's essential. Start by washing your skillet with warm, soapy water, then dry it completely. Next, apply a thin layer of cooking oil, like canola or flaxseed oil, all over the surface, including the sides and handle. Pop it into a preheated oven at 350°F (175°C) for an hour, then let it cool completely in the oven before storing. Voila! You’ve got a cast iron skillet ready to rock!
(Part 2) Choosing Your Steak: A culinary adventure

Now, onto the star of the show – the steak! This is your chance to get a little fancy and choose the cut that speaks to your taste and budget. While a classic ribeye, with its marbled richness and buttery tenderness, is always a winner, don't be afraid to explore other cuts.
steak cuts for Cast Iron Cooking: A Culinary Guide
Here's a quick rundown of some popular steak cuts that shine in a cast iron skillet:
- Ribeye: The king of steaks, known for its marbling and buttery tenderness.
- new york strip: A leaner option with a great flavour and beautiful grill marks.
- Sirloin: A versatile cut with a good flavour and a satisfying chew.
- filet mignon: The most tender and delicate cut, perfect for those who prefer a melt-in-your-mouth experience.
- flank steak: A flavorful, lean cut that's perfect for slicing after cooking.
Thickness Matters: The Key to Juicy Perfection
For perfectly cooked steak, aim for a cut that's about 1.5 to 2 inches thick. This allows for a beautiful sear on the outside while keeping the inside juicy and tender. Think of it like a perfect balance – the outside gets a crispy crust, while the inside stays beautifully soft and moist.
(Part 3) Prepping Your Steak: Setting the Stage for Success

Alright, you've got your cast iron skillet and your chosen steak. Now, it's time to prepare for the main event. We're not just tossing a raw steak into the pan, folks! A little pre-game prep will make all the difference.
Seasoning Your Steak: Simple Yet Effective
I'm a firm believer in simplicity. Salt and pepper are all you need to bring out the steak's natural flavour. But if you're feeling fancy, go for a sprinkle of garlic powder, onion powder, or a pinch of paprika. Just be mindful not to overdo it. You want the seasoning to enhance, not overpower, the steak's natural goodness.
The Art of Resting: Patience Is a Virtue
Once you've seasoned your steak, let it rest. This allows the salt to penetrate the meat, drawing out moisture and creating a more flavorful, tender steak. I usually let it rest for at least 30 minutes, but an hour is even better. Think of it as giving the steak a chance to relax and unwind before its big moment.
(Part 4) mastering the sear: The Heart of Cast Iron Cooking
This is where the magic happens. The sear is what creates that beautiful, crispy crust and locks in those delicious juices. It's the cornerstone of perfect steak, transforming a simple cut of meat into a culinary masterpiece.
Preheating the Pan: Getting Things Blazing Hot
First things first, preheat your cast iron skillet over high heat. We're talking blazing hot! I usually let it heat up for about 5-10 minutes. You want the skillet to be so hot that when you drop a drop of water on it, it sizzles immediately. This is the key to achieving that perfect sear.
Oil Up: The Right Lubricant for the Job
Once your skillet is scorching hot, add a generous amount of oil. I like to use a high-heat oil like avocado oil or grapeseed oil. Let it heat up for a minute or two before adding your steak.
Time to Sear: A Moment of Focused Intensity
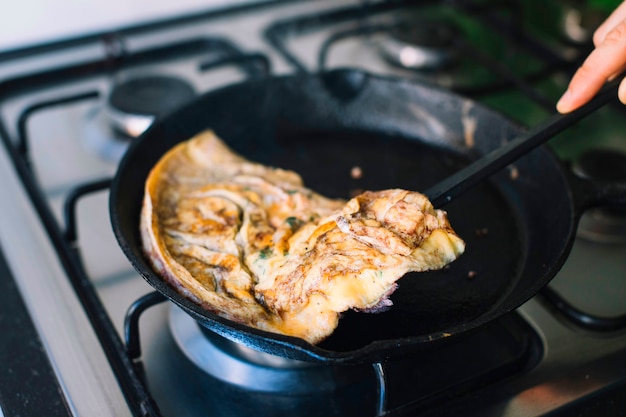
Now, channel your inner chef. Place your steak in the pan and leave it alone! Resist the urge to move it around. Let it sear undisturbed for about 2-3 minutes per side. This creates a beautiful crust and locks in all the juices. Don't worry about it sticking – with a properly seasoned cast iron and hot enough pan, it should release easily. If it seems like it's sticking, give it a little nudge with your spatula. Once it's beautifully seared on all sides, it's time for the next step.
(Part 5) Cooking to Your Preference: Finding the Perfect Level of Doneness
Now we're getting to the heart of the matter – cooking your steak to your preferred level of doneness. It's all about finding that sweet spot where the outside is perfectly seared and the inside is cooked just right. This is where personal preference comes into play, but here's a guide to get you started.
Understanding Doneness: A Culinary Guide
Here's a breakdown of different levels of doneness, along with the internal temperatures to aim for:
| Doneness | Internal Temperature (°F) | Internal Temperature (°C) |
|---|---|---|
| Rare | 125-130 | 52-54 |
| Medium Rare | 130-135 | 54-57 |
| Medium | 140-145 | 60-63 |
| Medium Well | 150-155 | 66-68 |
| Well Done | 160 | 71 |
Remember, these are just guidelines. Doneness is a personal preference, and there's no right or wrong answer. You might like your steak juicy and rare, while someone else prefers it well done. The key is to cook it to your liking.
Adjusting cooking time: Finding the Perfect Balance
Once you've seared your steak, adjust the cooking time to achieve your desired level of doneness. If you want your steak rare, you'll cook it for a shorter time. If you prefer it well done, you'll cook it for longer. Here's a general guide for cooking times based on thickness:
- 1-inch steak: 3-4 minutes per side for medium rare.
- 1.5-inch steak: 4-5 minutes per side for medium rare.
- 2-inch steak: 5-6 minutes per side for medium rare.
Remember, these are just estimations. It's always best to use a meat thermometer to check the internal temperature to ensure your steak is cooked to your liking.
(Part 6) Resting Your Steak: A Crucial Step for Tenderness
Your steak is cooked to perfection, but we're not quite ready to dig in yet! Resting your steak is a crucial step for allowing the juices to redistribute evenly throughout the meat, resulting in a more tender, flavorful steak.
The Importance of Rest: A Moment of Relaxation
Think of it like a marathon runner needing a break after crossing the finish line. When you cook a steak, the muscle fibers contract, trapping the juices inside. Resting allows those fibers to relax, allowing the juices to flow back into the meat. This makes the steak incredibly tender and juicy.
How to Rest: A Simple Yet Effective Technique
Simply transfer your steak to a cutting board and cover it loosely with aluminium foil. Let it rest for 5-10 minutes before slicing and serving. This will give the juices time to redistribute and your steak will be beautifully tender and flavorful.
(Part 7) Slicing and Serving: Presenting Your Culinary Masterpiece
The anticipation is building, and you're ready to dig into that delicious steak. Now, we're down to the final act, slicing and serving. Don't just hack at it like a barbarian! This is about creating beautiful slices that showcase the texture and marbling of your steak.
Slicing Techniques: A Guide to Perfect Cuts
There are a few different ways to slice your steak, depending on the cut and your preference. For ribeye and New York strip steaks, I like to slice them against the grain, which means slicing perpendicular to the muscle fibers. This creates tender, bite-sized pieces. For other cuts, like flank steak, you might want to slice them across the grain.
Serving Up: A Feast for the Senses
Now, it's time to present your masterpiece. Don't be afraid to get creative with your presentation. I love to serve my steak with a simple side of roasted vegetables, mashed potatoes, or a green salad. A drizzle of pan sauce or a dollop of butter adds an extra touch of flavour.
(Part 8) FAQs: Clearing Up Common Questions
You've got your cast iron skillet ready, your steak prepped and cooked to perfection, but maybe you still have some questions. Don't worry, I've got you covered!
1. Can I use a cast iron skillet on an induction cooktop?
That's a great question! While cast iron skillets are fantastic on gas and electric stovetops, they don't work with induction cooktops. Induction cooktops use magnetic fields to generate heat, and cast iron is not magnetic. However, there are cast iron skillets specifically designed for induction cooktops, so keep an eye out for those.
2. How do I clean a cast iron skillet?
You want to treat your cast iron skillet with care. Don't use soap, as it can strip away the seasoning. Instead, use hot water and a stiff brush to remove any food particles. If there are stubborn bits, you can use a little salt as an abrasive. Dry your cast iron skillet thoroughly with a kitchen towel and apply a thin layer of oil to maintain the seasoning.
3. Can I use a cast iron skillet in the oven?
Absolutely! Cast iron skillets are oven-safe, so you can use them to sear your steak on the stovetop and then finish cooking it in the oven. This is particularly helpful for thicker cuts of meat that require a longer cooking time.
4. How often should I season my cast iron skillet?
You should season your cast iron skillet after each use. This helps maintain the protective layer of seasoning and prevents rust. Simply wash and dry your skillet, then apply a thin layer of oil and heat it in the oven for an hour.
5. What if my steak is not releasing from the pan?
Don't panic! Sometimes, a steak can stick to the pan, even with a properly seasoned skillet. If this happens, use a spatula to gently pry the steak loose. If it's still stuck, add a little water or oil to the pan, and let it simmer for a minute or two. This should help release the steak from the pan.
There you have it, my friends! The ultimate guide to perfect cast iron steak. Now, go forth and conquer the world of sizzling perfection. And remember, every steak is a journey, so embrace the process, enjoy the adventure, and most importantly, have fun with it!
Everyone is watching

Corn on the Cob: The Ultimate Guide to Perfectly Cooked Ears
Healthy MealsAh, corn on the cob. Just the name evokes images of sunny days, barbecues, and that sweet, juicy flavour that ...

Scallops: The Ultimate Guide to Perfect Cooking
Healthy MealsAh, scallops. Those delicate, sweet, and utterly delicious morsels of the sea. They hold a special place in my...

Spaghetti Squash: The Ultimate Guide to Cooking and Serving
Healthy MealsRemember that time you saw spaghetti squash at the supermarket, looking all bumpy and strange, and thought, "W...

Salmon Cooking Times: Perfect Guide for Every Recipe
Healthy MealsLet me tell you, cooking salmon is an art form. It's all about getting that perfect balance: juicy and tender,...

Ham Cooking Time: How Long to Bake, Smoke, or Boil a Delicious Ham
Healthy MealsAh, ham. It's a classic, isn't it? A real crowd-pleaser, especially around holidays. And when done right, it'...
