I've always been a huge fan of brown rice. That nutty, slightly chewy texture is just so satisfying, and I love knowing it’s packed with fiber and nutrients. But for ages, I struggled to get it right. Sometimes it was mushy, other times it was rock-hard, leaving me with a dish that was far from enjoyable. I tried every method imaginable - stovetop, microwave, you name it - but nothing seemed to deliver consistent results. It was truly a hit-and-miss affair.
Then, one day, a friend suggested I try using a pressure cooker. Now, I admit, I was a little hesitant at first. A pressure cooker? Wouldn't that just lead to a kitchen explosion? My friend assured me it was safe and incredibly efficient, and I'm so glad I took her advice.
Turns out, pressure cooking is the absolute game-changer when it comes to brown rice. It's incredibly fast, super easy, and produces perfectly cooked rice every single time. Gone are the days of mushy or undercooked rice! Just fluffy, delicious, perfectly cooked brown rice in a fraction of the time.
If you're looking for a foolproof method to cook brown rice, this is it. In this article, I'll guide you through the process step by step, sharing some tips and tricks I've picked up along the way. You'll be a brown rice master in no time!
(Part 1) Why Pressure Cookers are Kitchen Heroes

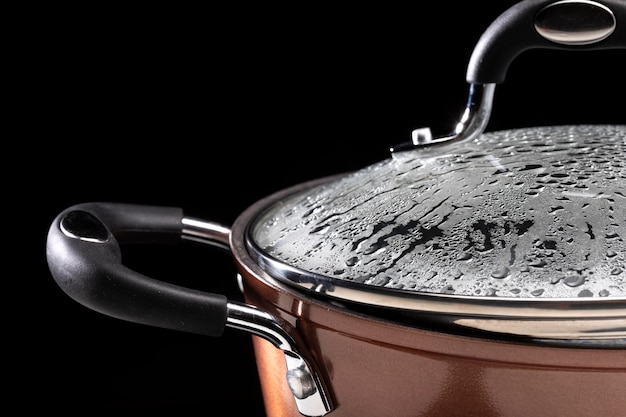
Before we dive into the specifics of how to pressure cook rice, let's take a moment to celebrate the brilliance of pressure cookers. They're truly the superheroes of the kitchen.
Speed Demon:
The main reason I love pressure cookers is their incredible speed. They work by trapping steam, creating pressure that raises the boiling point of water. This means food cooks much faster than on the stovetop. Imagine perfectly cooked brown rice in about 15 minutes, compared to the 30 minutes or more it takes on the stovetop! That's a game-changer for busy weeknights.
Tastebud Tickler:
But it's not just about speed. Pressure cookers can also enhance the flavor of your food. The high pressure forces flavors from the ingredients to mingle and meld, creating a richer, more intense taste. This is especially true for rice, where the pressure helps the grains cook evenly and absorb more water, resulting in a more flavorful and satisfying dish.
Hands-Off Hero:
Another thing I love about pressure cookers is their hands-off nature. Once you've got everything in the pot, you can set the timer and go about your day. No need to constantly check on the rice or stir it. This is a huge bonus, especially if you're busy juggling other tasks or simply want to relax while dinner is cooking.
Budget Buddy:
Finally, let's not forget about the budget-friendly aspect. Pressure cookers are a relatively inexpensive kitchen appliance, and they can save you money in the long run. Why? Because they can cook a variety of dishes, reducing your reliance on takeout or frozen dinners.
(Part 2) Choosing the Right Pressure Cooker for Your Needs

With so many pressure cookers available these days, choosing the right one can feel overwhelming. But don't worry, I'm here to help! Here are a few things to consider when picking out your perfect pressure cooker:
Size:
Think about your cooking habits and the number of people you typically feed. If you live alone or with one other person, a smaller pressure cooker (around 3-4 quarts) will be more than enough. But if you're cooking for a family or often have guests, you might want to go for a larger size (around 6-8 quarts).
Features:
Some pressure cookers come with additional features, like a slow cooker function, a yogurt maker, or a steamer basket. Consider which features you'd find useful. If you're just looking for a pressure cooker for rice, a basic model will do the trick.
Ease of Use:
Look for a pressure cooker that's easy to use and understand. Some models have multiple buttons and settings, which can be intimidating for beginners. Others are simple and straightforward. Choose one that suits your comfort level.
Safety Features:
Safety is always paramount! Make sure the pressure cooker you choose has all the necessary safety features, like an automatic pressure release valve and a safety lock that prevents the lid from opening while the pressure is still inside.
(Part 3) The Golden Ratio: Finding the perfect rice-to-Water Balance

Now, onto the fun part: the recipe! The key to perfectly cooked brown rice is getting the right ratio of rice to water. It's all about balance, my friends! I find a 1:1.5 ratio works best for pressure cooking brown rice. This means for every cup of rice, you'll use 1.5 cups of water. Let's break it down with a handy table:
| Rice (cups) | Water (cups) |
|---|---|
| 1 | 1.5 |
| 2 | 3 |
| 3 | 4.5 |
| 4 | 6 |
You can always adjust the ratio slightly based on your personal preferences. Some people prefer a slightly wetter rice, while others like it drier. Don't be afraid to experiment until you find the perfect consistency for you.
(Part 4) Prepping Your Rice for Pressure Cooker Perfection
Now that you've got your pressure cooker and your measurements sorted, it's time to prepare your rice. Here's what I do:
Step 1: Rinse the Rice:
Rinse the rice thoroughly under cold water until the water runs clear. This removes excess starch, which can make the rice sticky. I find using a fine-mesh sieve is the best way to do this. It allows the water to flow through while keeping the rice contained.
Step 2: Soak the Rice:
Soaking the rice for about 30 minutes before cooking helps the grains absorb water evenly and cook more quickly. I find that soaking in cold water brings out the best flavour, but you can use warm water if you're short on time.
(Part 5) Cooking the Rice: Unveiling the Pressure Cooker Magic
Okay, here's where the magic happens. Follow these steps, and your brown rice will be cooked to perfection!
Step 1: Get Your Pressure Cooker Ready:
Place the rinsed and soaked rice into your pressure cooker. Add the water according to your chosen ratio.
Step 2: Close the Lid and Set the Pressure:
Securely close the lid of your pressure cooker and set it to the high-pressure setting. Most pressure cookers have a manual setting and an automatic setting. I find that the automatic setting is easier and more convenient. It handles the pressure release automatically, saving you a step and reducing the risk of forgetting.
Step 3: Set the Timer:
Set the timer for 12 minutes for brown rice. This time may vary slightly depending on the type of rice you use and your pressure cooker.
Step 4: Natural Pressure Release:
Once the timer goes off, let the pressure release naturally for 10 minutes before manually releasing the remaining pressure. This allows the rice to steam and fluff up, resulting in a lighter, airier texture.
(Part 6) Serving Your Perfectly Cooked Rice: Time to Enjoy!
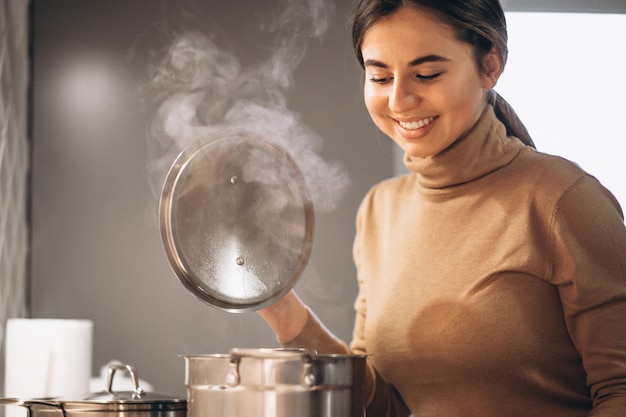
After the pressure has been released, open the lid of your pressure cooker, and voila! You'll be greeted with beautifully cooked brown rice.
Fluff it Up:
Use a fork to gently fluff the rice. This separates the grains and makes them even lighter and airier. It's a simple step, but it makes a big difference in the texture and presentation.
Taste it:
Before serving, taste a grain or two to ensure the rice is cooked to your liking. If it seems slightly undercooked, you can add a little more water and cook for an extra minute or two.
Get Creative with Toppings:
Brown rice is so versatile! It can be enjoyed on its own, as a side dish, or as the base for a delicious bowl. Here are some of my favorite toppings that add a burst of flavor and texture:
- Avocado: Creamy and healthy, avocado complements the nutty flavor of brown rice.
- black beans: A hearty addition, black beans provide protein and fiber, making the dish more substantial.
- Roasted vegetables: Roasted vegetables like bell peppers, zucchini, and onions add vibrant color and savory flavors.
- Sesame seeds: These tiny seeds offer a nutty crunch and a touch of earthy flavor.
- Fresh herbs: Chopped cilantro, parsley, or basil brighten the dish with fresh, vibrant flavors.
- Sliced almonds: A crunchy topping that adds a touch of nutty flavor and healthy fats.
- A dollop of yoghurt: Greek yoghurt provides a tangy and creamy contrast to the brown rice.
(Part 7) Tips and Tricks: Mastering the Art of Pressure Cooker Rice
Here are a few tips and tricks I've learned over the years that can help you make even better brown rice:
Salt for Flavor:
Add a pinch of salt to the water before cooking. This helps season the rice and brings out its natural flavor.
Experiment with Herbs:
Add a sprig of fresh herbs, like rosemary or thyme, to the rice while it's cooking. This adds a subtle, fragrant flavor to the rice.
leftover rice is a Blessing:
Don't throw away leftover rice! It's perfect for making rice salad, rice pudding, or even fried rice.
Store it Properly:
Once the rice has cooled completely, store it in an airtight container in the fridge for up to 3 days.
(Part 8) FAQs:
1. Can I use different types of rice?
You can use different types of rice in a pressure cooker, but the cooking time will vary. For white rice, you'll need to cook for around 5 minutes. For wild rice, it might take around 30 minutes. Check the package instructions for specific cooking times.
2. What if my rice is mushy?
If your rice is mushy, it might be because you used too much water or cooked it for too long. Next time, try using a little less water or reducing the cooking time by a minute or two.
3. What if my rice is undercooked?
If your rice is undercooked, you can try adding a little more water and cooking it for a few more minutes.
4. Can I cook other things in my pressure cooker besides rice?
Absolutely! Pressure cookers are incredibly versatile. You can use them to cook all sorts of things, from soups and stews to beans and meat.
5. How do I clean my pressure cooker?
Most pressure cookers are dishwasher safe, but it's always best to check the manufacturer's instructions. If you're washing it by hand, make sure to clean the lid thoroughly, paying particular attention to the pressure release valve.
I hope you've found this guide helpful. Now go forth and pressure cook some delicious brown rice!
Everyone is watching

Corn on the Cob: The Ultimate Guide to Perfectly Cooked Ears
Healthy MealsAh, corn on the cob. Just the name evokes images of sunny days, barbecues, and that sweet, juicy flavour that ...

Perfect Pork Roast Oven Cooking Time: A Guide to Delicious Results
Healthy MealsThere's something truly satisfying about a perfectly roasted pork. The aroma alone is enough to make your mout...

Ham Cooking Time: How Long to Bake, Smoke, or Boil a Delicious Ham
Healthy MealsAh, ham. It's a classic, isn't it? A real crowd-pleaser, especially around holidays. And when done right, it'...

Scallops: The Ultimate Guide to Perfect Cooking
Healthy MealsAh, scallops. Those delicate, sweet, and utterly delicious morsels of the sea. They hold a special place in my...

Spaghetti Squash: The Ultimate Guide to Cooking and Serving
Healthy MealsRemember that time you saw spaghetti squash at the supermarket, looking all bumpy and strange, and thought, "W...
