Let’s face it: there's nothing quite as satisfying as a perfectly cooked chicken breast. It's juicy, tender, and bursting with flavour. But getting it right can be a bit of a culinary dance, especially when it comes to oven-baking. I've definitely had my fair share of dry, overcooked disasters, and trust me, nobody wants that. So, buckle up, because I'm about to spill all my secrets for achieving oven-baked chicken breast nirvana.
We'll be diving deep into the science of temperature, exploring different cooking methods, and even tackling the tricky art of seasoning. Whether you're a seasoned chef or a kitchen newbie, this guide will have you whipping up delicious chicken breasts in no time. So grab your apron, your favourite spice rub, and let's get cooking!
Part 1: Choosing the Right Chicken Breast

You know, the journey to a perfect chicken breast starts even before you turn on the oven. It begins with selecting the right piece of poultry. So let’s break down the key factors to consider.
1.1 Boneless vs. Bone-In: A Matter of Preference
First up, we’ve got the bone-in vs. boneless dilemma. I'm a huge fan of boneless, skinless chicken breasts. They're a breeze to work with and cook a bit faster. But if you're a fan of the more traditional bone-in variety, go for it! Just remember they take a little longer to cook through. The flavour is also said to be richer, so it really comes down to your personal preference.
1.2 Size Matters: From Petite to Plump
Now, let’s talk size. You've got your tiny, petite chicken breasts, perfect for a quick lunch or snack, and then there are the plump, hefty ones that are more suited for a hearty dinner. It's important to remember that smaller breasts will cook up quicker than their larger counterparts. If you're working with a mix of sizes, it's best to separate them and cook them individually. Otherwise, you might end up with some overcooked poultry while others are still raw, which is a definite no-no.
1.3 Fresh vs. Frozen: A Matter of Timing
Ideally, you want to use fresh chicken breast, but we all know life can get hectic. If you're working with frozen breasts, make sure they're completely thawed before you start cooking. Otherwise, you risk uneven cooking, and that's a recipe for disaster. Think of it like this: frozen chicken is like a lump of ice; you need to give it time to melt before you can cook it properly.
1.4 Quality Control: Inspecting Your Poultry
Now, let's talk about choosing the right chicken. You want breasts that are plump, firm, and have a nice, even colour. Avoid any breasts that are discoloured, bruised, or have a strong odour. This is especially important in the UK, where we're known for our high poultry standards. Always look for the Red Tractor logo to ensure your chicken has been raised responsibly and is of the highest quality.
Part 2: Prepping Your Chicken Breast

Now that you've got your perfect chicken breasts, it's time to get them ready for the oven. The secret here is all about prepping them just right to ensure even cooking and maximum flavour.
2.1 Pat it Dry: The Importance of Moisture Control
First things first, grab some paper towels and pat those chicken breasts dry. This is essential for achieving even browning and preventing the chicken from steaming instead of roasting. Think of it as getting rid of any excess moisture that could hinder the browning process.
2.2 Seasoning Magic: Enhancing Flavour
Now for the fun part: seasoning! You can really go wild here, but I'm a big fan of keeping it simple with salt and pepper. Just be generous with your seasonings, as they'll penetrate the meat as it cooks. You can also add other herbs and spices like garlic powder, onion powder, paprika, oregano, or thyme. Don’t be afraid to experiment and find your own signature blend.
2.3 Butter Up: Adding Richness and Moisture
For extra moisture and a touch of richness, I always recommend rubbing a little butter or olive oil on the chicken breasts before baking. I find that a tablespoon or two of butter does wonders, both for taste and for keeping the chicken moist. Plus, it gives the chicken that beautiful golden brown colour that makes your mouth water.
Part 3: Oven Chicken Breast Temperature: Cracking the Code

Now, let’s dive into the heart of the matter: the oven temperature. This is where the magic happens. Get this wrong, and you could end up with dry, tough chicken. So, pay attention!
3.1 The Magic Number: Finding the Sweet Spot
The general rule of thumb for oven-baked chicken breasts is to cook them at 375°F (190°C). This temperature allows for even cooking and ensures the chicken is cooked through without becoming dry. But remember, every oven is unique, so you might need to tweak the temperature slightly based on your own kitchen.
3.2 Time is of the Essence: cooking times to Remember
The cooking time depends on the size of your chicken breasts. A smaller breast (about 4-6 ounces) will take around 20-25 minutes, while a larger breast (about 8-10 ounces) will need about 30-35 minutes. But the best way to know for sure is to use a meat thermometer. I can't stress this enough – it's your best friend in the kitchen.
3.3 The Importance of a Meat Thermometer: A Tool for Precision
A meat thermometer is a must-have for any kitchen. It takes the guesswork out of cooking, ensuring that your chicken is cooked to the proper internal temperature and safe to eat. The magic number here is 165°F (74°C). Insert the thermometer into the thickest part of the breast, avoiding the bone. If the temperature hits 165°F (74°C), you're golden!
Part 4: Oven chicken breast cooking Methods: Your Options Explored
Now that we've covered the basics of temperature, let's explore different cooking methods for your chicken breast. Each method brings its unique charm and flavour to the table.
4.1 Roasting Perfection: The Classic Approach
Roasting is the classic method for cooking chicken breast, and for good reason. It's simple, foolproof, and delivers a juicy, tender result. Just place your seasoned chicken breasts on a baking sheet lined with parchment paper (to prevent sticking and make cleanup a breeze). Pop the pan into your preheated oven and let it roast for the recommended time, keeping a close eye on the temperature with your trusty meat thermometer.
4.2 Baking with a Twist: Adding Vegetables for a Complete Meal
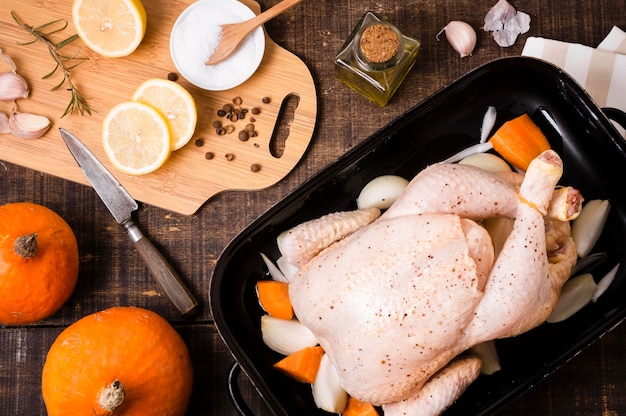
If you're looking for a little extra flavour and a complete meal, try baking your chicken breast with vegetables. It's a delicious and efficient way to cook. Toss your favourite vegetables (like carrots, onions, broccoli, or potatoes) with olive oil, salt, and pepper, and spread them around the chicken breasts on your baking sheet. Roast everything together until the chicken is cooked through and the vegetables are tender. It's a real crowd-pleaser.
4.3 Foil-Wrapped Delights: Locking in Moisture and Flavour
Another fantastic option is to wrap your chicken breasts in foil. This creates a steamy environment that keeps the chicken incredibly moist. Simply place your seasoned chicken breasts in a piece of foil, fold the edges tightly to seal, and bake in the preheated oven. Foil-wrapped chicken breasts tend to cook a bit faster, so keep an eye on them and use your meat thermometer to ensure they’re cooked through.
Part 5: Oven chicken breast tips and Tricks: Mastering the Details
Now that you've got the basics down, let's dive into some handy tips and tricks that will elevate your chicken breast game to the next level.
5.1 Basting is Key: Achieving crispy skin and Juicy Meat
One of my favourite tricks for achieving crispy skin and juicy meat is basting. Every 10-15 minutes while the chicken is cooking, drizzle it with pan juices or melted butter. This keeps the chicken moist and helps to create that beautiful golden brown crust.
5.2 Rest for Best: Allowing the Juices to Redistribute
Once your chicken breast is cooked through, don't rush to cut into it right away. Let it rest for about 5-10 minutes before slicing. This allows the juices to redistribute throughout the meat, resulting in a more tender and flavorful chicken breast.
5.3 Sauce it Up: Finishing Touches for Maximum Flavour
Now, for the final flourish! Once your chicken is cooked and rested, you can add a delicious sauce to take your dish to the next level. Try a simple lemon-butter sauce, a creamy garlic sauce, or even a spicy sriracha sauce.
Part 6: oven chicken breast recipes: Inspiration for Your Next Meal
Ready to put your new knowledge to the test? Here are a few easy-to-follow recipes that will impress your taste buds.
6.1 Classic Roasted Chicken Breast: Simple and Delicious
For a simple yet satisfying recipe, try this classic roasted chicken breast:
- Preheat oven to 375°F (190°C).
- Season 2 boneless, skinless chicken breasts with salt, pepper, and your favourite herbs (such as thyme, rosemary, or oregano).
- Place the chicken breasts on a baking sheet lined with parchment paper.
- Roast for 20-25 minutes, or until the internal temperature reaches 165°F (74°C).
- Let the chicken rest for 5-10 minutes before slicing and serving.
6.2 Honey Garlic Chicken Breast: Sweet and Savoury Delight
For a sweet and savoury flavour, try this honey garlic chicken breast:
- Preheat oven to 375°F (190°C).
- In a small bowl, whisk together 2 tablespoons of honey, 1 tablespoon of soy sauce, 1 tablespoon of olive oil, 1 teaspoon of garlic powder, and 1/2 teaspoon of black pepper.
- Place 2 boneless, skinless chicken breasts in a baking dish and pour the honey garlic sauce over them.
- Roast for 20-25 minutes, or until the internal temperature reaches 165°F (74°C).
- Serve with rice or mashed potatoes.
6.3 Lemon Herb Chicken Breast: Light and Refreshing
For a light and refreshing flavour, try this lemon herb chicken breast:
- Preheat oven to 375°F (190°C).
- In a small bowl, whisk together 2 tablespoons of olive oil, 1 tablespoon of lemon juice, 1 teaspoon of dried oregano, 1 teaspoon of dried thyme, 1/2 teaspoon of salt, and 1/4 teaspoon of black pepper.
- Place 2 boneless, skinless chicken breasts in a baking dish and pour the lemon herb sauce over them.
- Roast for 20-25 minutes, or until the internal temperature reaches 165°F (74°C).
- Serve with roasted vegetables or a salad.
Part 7: Oven Chicken Breast Temperature Chart: A Handy Guide
To make things even easier, here’s a handy chart to help you determine the optimal cooking time for your chicken breasts based on their weight:
| Chicken Breast Weight (ounces) | Cooking Time (minutes) |
|---|---|
| 4-6 | 20-25 |
| 7-9 | 25-30 |
| 10-12 | 30-35 |
Keep in mind, these are just estimates. It's always best to use a meat thermometer to ensure your chicken is cooked through to a safe internal temperature of 165°F (74°C).
Part 8: Oven chicken breast faqs: Answering Your Questions
You've got questions, I've got answers! Here are some common questions about oven-baked chicken breast, answered in detail.
8.1 How do I know if my chicken breast is cooked through?
The best way to tell if your chicken breast is cooked through is to use a meat thermometer. Insert the thermometer into the thickest part of the breast, avoiding the bone. If the temperature reaches 165°F (74°C), it's cooked through. You can also check for doneness by making a small incision in the thickest part of the breast. The juices should run clear, not pink.
8.2 What happens if I overcook my chicken breast?
overcooked chicken breast will be dry and rubbery. To avoid this, make sure you use a meat thermometer and cook your chicken to the proper temperature. Also, avoid overcrowding the baking sheet, as this can lead to uneven cooking.
8.3 Can I cook chicken breasts with other ingredients?
Absolutely! Chicken breasts pair beautifully with a variety of vegetables, like broccoli, carrots, onions, and potatoes. You can also add herbs and spices to enhance the flavor.
8.4 Can I freeze cooked chicken breast?
Yes, you can freeze cooked chicken breast. Let it cool completely, then wrap it tightly in plastic wrap or aluminum foil. Store it in the freezer for up to 3 months. To reheat, thaw the chicken in the refrigerator overnight, then reheat in the oven or microwave.
8.5 What are some tips for keeping chicken breast moist?
Here are a few tips to help keep your chicken breast juicy and tender:
- Pat the chicken breast dry before cooking to prevent steaming.
- Rub the chicken breast with butter or olive oil before baking.
- Baste the chicken breast with pan juices or melted butter during cooking.
- Let the chicken breast rest for 5-10 minutes after cooking to allow the juices to redistribute.
There you have it! My ultimate guide to oven-baked chicken breast perfection. Now go forth and conquer the kitchen, armed with this newfound knowledge. Happy cooking!
Everyone is watching

Corn on the Cob: The Ultimate Guide to Perfectly Cooked Ears
Healthy MealsAh, corn on the cob. Just the name evokes images of sunny days, barbecues, and that sweet, juicy flavour that ...

Scallops: The Ultimate Guide to Perfect Cooking
Healthy MealsAh, scallops. Those delicate, sweet, and utterly delicious morsels of the sea. They hold a special place in my...

Spaghetti Squash: The Ultimate Guide to Cooking and Serving
Healthy MealsRemember that time you saw spaghetti squash at the supermarket, looking all bumpy and strange, and thought, "W...

Salmon Cooking Times: Perfect Guide for Every Recipe
Healthy MealsLet me tell you, cooking salmon is an art form. It's all about getting that perfect balance: juicy and tender,...

Ham Cooking Time: How Long to Bake, Smoke, or Boil a Delicious Ham
Healthy MealsAh, ham. It's a classic, isn't it? A real crowd-pleaser, especially around holidays. And when done right, it'...
