You've got a beautiful chicken breast staring back at you from the fridge, and you're picturing a delicious, healthy dinner. But then, the dreaded question pops up: "How long do I bake it for, and what temperature should I use?" I've been there, trust me! I've overcooked a few chicken breasts in my time, turning them into dry, rubbery nightmares. But after a lot of trial and error, I've finally cracked the code for perfect oven-baked chicken breast. Whether you're a seasoned chef or a kitchen newbie, I'm here to share my secrets for getting juicy, tender, flavorful chicken. Ready to elevate your chicken game? Let's dive in!
(Part 1) Prepping the perfect chicken Breast: Setting the Stage for Success
Remember that old saying, "Failing to prepare is preparing to fail?" Well, it holds true in the kitchen too! Before we even think about turning on the oven, we need to give our chicken breast the royal treatment. Let's talk about prepping for a winning chicken breast:
1. Choosing the Right Chicken Breast: Picking the Best Candidate
First things first, let's pick the perfect chicken breast. At the supermarket, give those breasts a good look-over. You're after firm, plump breasts with no discoloration or funky smells. Remember, you want juicy, tender chicken, so steer clear of anything that looks a bit off. Personally, I usually go for skin-on chicken breasts because the skin helps lock in moisture during cooking. But hey, it's your call!
2. Removing the Skin (Optional): A Matter of Preference
If you're like me and prefer skinless chicken breasts, we need to carefully remove that skin. Now, this is a delicate operation—you don't want to rip the breast open! Use a sharp knife and gently loosen the skin from the breast, working your way around it. I usually hold the chicken breast in one hand and use the other to pull the skin away. Once it's off, I toss it (but you can save it for making stock later).
3. Patting Dry: A Crucial Step for Even Browning
I know, it might sound a bit obsessive, but patting those chicken breasts dry is crucial. This step helps ensure even browning and prevents the chicken from steaming in the oven. Grab those paper towels and give those breasts a thorough pat down. Make sure they're completely dry.
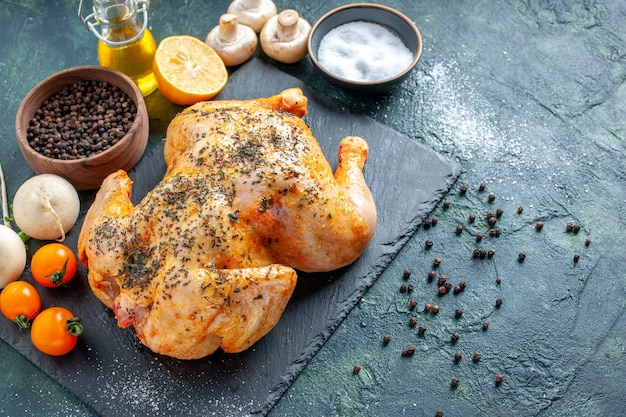
4. Seasoning with Love: A Flavorful Transformation
Here's where the fun really begins! Now we get to experiment with flavors. I love to keep things simple with salt, pepper, and maybe some garlic powder. But go wild! Experiment with herbs like rosemary, thyme, or oregano. My secret weapon is a good quality olive oil. It adds moisture and flavor to the chicken, plus it makes the skin nice and crispy.
(Part 2) Getting Ready to Bake: Oven Essentials for a Perfect Bake
Now that our chicken is prepped and ready to go, let's get that oven prepped. This is important because we want a nice, hot oven when our chicken goes in. Here's what we need to do to ensure a perfect bake:
1. Preheat That Oven: Setting the Stage for Even Cooking
The golden rule of baking is to preheat the oven to the right temperature. It's crucial for getting that perfect bake. Preheat your oven to around 375°F (190°C), which is a good general temperature for baking chicken breasts. This allows the chicken to cook evenly without drying out.
2. Picking the Right Baking Dish: Avoiding Stickiness and Ensuring Easy Cleanup
We don't want our chicken sticking to the baking dish, so let's choose the right one. A glass baking dish or a baking sheet lined with parchment paper are excellent choices. Glass is great because you can see how the chicken is browning. Parchment paper is fantastic for easy cleanup.
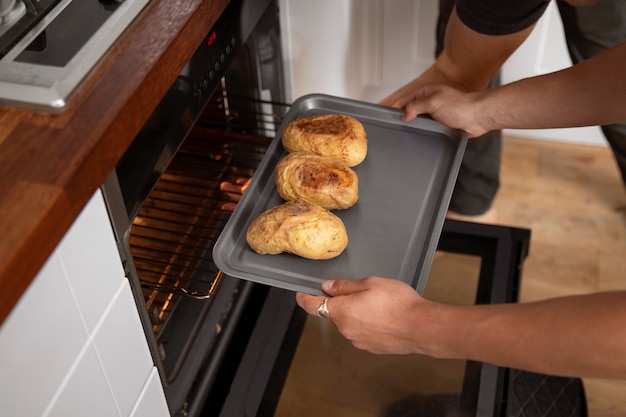
3. The Baking Process: Time to Let the Magic Happen
Okay, the oven is preheated, the chicken is prepped, and we're ready to bake! I usually put the chicken breasts in the oven for around 20-25 minutes. But remember, this is just a general guideline. We need to keep a watchful eye on our chicken to ensure it's cooked to perfection.
(Part 3) Master the Art of Checking for Doneness: Ensuring Perfectly Cooked Chicken
You've baked the chicken for 20-25 minutes, but you're not sure if it's done. How do you know? Don't worry, my friend, there are a few foolproof ways to check for doneness without cutting into the chicken just yet.
1. The Poke Test: A Simple and Reliable Method
This is my go-to method. Gently poke the chicken with a fork. If the juices run clear, it's cooked through. If they're still pink, it needs to bake for a bit longer. If you're unsure, it's always best to err on the side of caution and cook it a little longer.
2. The Internal Thermometer Test: For Those Who Want Precision
For those who want ultimate precision, a meat thermometer is your best friend. Stick the thermometer into the thickest part of the chicken breast. It should register 165°F (74°C). This is the safe temperature for cooked chicken.
(Part 4) Adjusting Cooking Time for Different Chicken Sizes: Tailoring Your Bake for Perfect Results
Remember, those cooking times are just a starting point. Different chicken breasts come in different sizes, so you might need to adjust the cooking time accordingly. If you have a particularly large breast, it might need a little longer. But if it's a smaller one, it might be done sooner. Here's a general guideline for adjusting cooking times based on chicken breast size:
Cooking Times for Different Sizes:
| Chicken Breast Size | Cooking Time |
|---|---|
| Small (under 5 oz) | 15-20 minutes |
| Medium (5-8 oz) | 20-25 minutes |
| Large (over 8 oz) | 25-30 minutes |
(Part 5) Avoiding a Dry, Rubbery Chicken Breast: Tips for Juicy and Tender Chicken
We all know the heartbreak of a dry, rubbery chicken breast. Let's avoid this culinary disaster with these essential tips:
1. Don’t Overcook It: The Key to Tender Chicken
One of the biggest mistakes people make is overcooking chicken breasts. Don't be tempted to keep baking it after it's done. Just like with other types of meat, overcooked chicken becomes dry and tough. Keep a close eye on it and take it out of the oven as soon as it's cooked.
2. The Resting Ritual: Letting the Juices Redistribute
This is a step I didn't know about for years, and it's a game-changer! After you take the chicken out of the oven, let it rest for about 5-10 minutes before carving it. This allows the juices to redistribute throughout the chicken, resulting in a more tender and flavorful breast. I always cover the chicken with foil while it's resting.
3. Add a Little Moisture: Keeping the Chicken Hydrated
You can also help keep your chicken breast moist by adding a little liquid to the baking dish. A splash of chicken broth or water can help create steam, which will keep the chicken from drying out. Just make sure the liquid doesn't cover the chicken completely.
(Part 6) Oven-Baked Chicken Breast Variations: Beyond the Basics
Okay, so you've mastered the basic oven-baked chicken breast. Now it's time to spice things up! Here are some tasty variations that I love:
1. Herb-Crusted Chicken: A Classic for a Reason
This is a classic for a reason. You can use a variety of herbs like rosemary, thyme, oregano, and parsley. Simply mix the herbs with a little olive oil, salt, and pepper, and rub it all over the chicken breast. You can even add a little lemon zest for a zesty kick.
2. Honey-Garlic Glazed Chicken: Sweet and Savory Delight
This is a sweet and savory option. Make a simple glaze with honey, soy sauce, garlic, and ginger. I like to brush it onto the chicken about halfway through the baking process for a nice caramelized crust.
3. Parmesan-Crusted Chicken: Cheesy and Crispy
This is a delicious and cheesy option. Use grated Parmesan cheese and bread crumbs to create a crunchy crust on the chicken. I like to add a little garlic powder and paprika to the bread crumbs for extra flavour.
(Part 7) Oven-Baked Chicken Breast: side dish Pairings: Completing Your Meal
A perfect meal needs some stellar side dishes, right? Here are a few ideas for serving your oven-baked chicken:
1. The Classic: Roasted Vegetables: A Timeless Combination
There's nothing like some crispy roasted veggies to accompany your chicken. Try roasting broccoli, carrots, Brussels sprouts, or potatoes with a little olive oil, salt, and pepper.
2. The Creamy Option: mashed potatoes: Comforting and Delicious
Who doesn't love a comforting serving of mashed potatoes? You can make them simple or fancy, with butter, cream, or even a touch of cheese.
3. The Healthy Choice: Quinoa or Rice: Light and Nutritious
Looking for a light and healthy option? A side of quinoa or rice is a great way to round out your meal. You can dress it up with a sprinkle of herbs or a drizzle of olive oil.
(Part 8) FAQs: Oven-Baked Chicken Breast: Answering Your Burning Questions
Here are some common questions about oven-baked chicken breast:
1. Can I use frozen chicken breasts?
You can definitely use frozen chicken breasts, but you'll need to adjust the cooking time. It's best to thaw the chicken breasts completely before baking. If you're short on time, you can bake them straight from frozen, but you'll need to add an extra 10-15 minutes to the cooking time.
2. How do I know if my chicken is cooked through?
The best way to check is with a meat thermometer. The internal temperature should reach 165°F (74°C). You can also check by poking the chicken with a fork. If the juices run clear, it's cooked through. If they're still pink, it needs to bake for a bit longer.
3. Can I bake chicken breasts with other ingredients?
Absolutely! You can bake chicken breasts with all sorts of ingredients, like vegetables, fruit, or even other proteins. I love baking chicken breasts with vegetables like peppers, onions, or broccoli. You can also add a little bit of chicken broth to the baking dish to create steam, which will help to keep the chicken moist and flavorful.
4. How long can I store leftover chicken?
You can store leftover chicken in the refrigerator for up to 3-4 days. Make sure to store it in an airtight container. You can reheat the chicken in the microwave or oven.
5. What are some tips for preventing dry chicken breasts?
The key to preventing dry chicken breasts is to not overcook them. Make sure to check them frequently and remove them from the oven as soon as they're cooked through. You can also help to keep the chicken breasts moist by adding a little bit of liquid to the baking dish. A splash of chicken broth or water can help to create steam, which will keep the chicken from drying out.
Everyone is watching

Corn on the Cob: The Ultimate Guide to Perfectly Cooked Ears
Healthy MealsAh, corn on the cob. Just the name evokes images of sunny days, barbecues, and that sweet, juicy flavour that ...

Scallops: The Ultimate Guide to Perfect Cooking
Healthy MealsAh, scallops. Those delicate, sweet, and utterly delicious morsels of the sea. They hold a special place in my...

Spaghetti Squash: The Ultimate Guide to Cooking and Serving
Healthy MealsRemember that time you saw spaghetti squash at the supermarket, looking all bumpy and strange, and thought, "W...

Salmon Cooking Times: Perfect Guide for Every Recipe
Healthy MealsLet me tell you, cooking salmon is an art form. It's all about getting that perfect balance: juicy and tender,...

Ham Cooking Time: How Long to Bake, Smoke, or Boil a Delicious Ham
Healthy MealsAh, ham. It's a classic, isn't it? A real crowd-pleaser, especially around holidays. And when done right, it'...