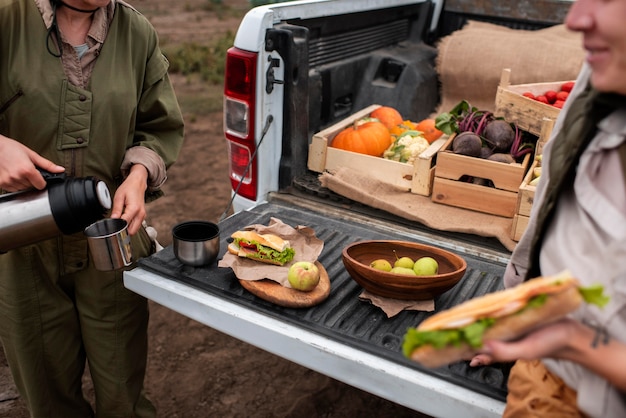
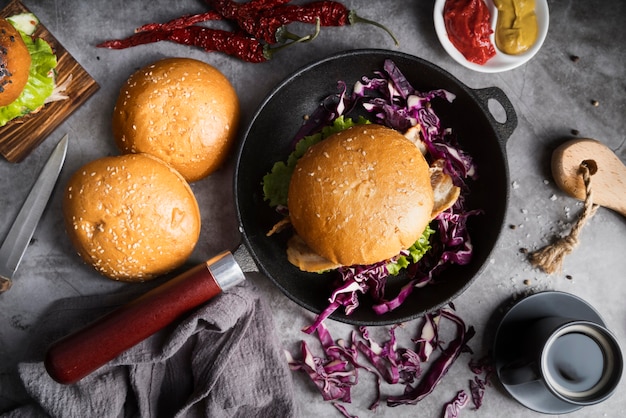
Let's talk burgers. We all love that sizzling sound, the aroma of smoky char, and the juicy perfection of a grilled burger. But sometimes, you just don't have the grill, the time, or the weather for a proper barbecue. That's where oven-baked burgers come in. They're a delicious and convenient alternative that can be just as satisfying as their grilled counterparts. And let me tell you, they can be just as juicy and flavorful!
(Part 1)
Why Oven-Baked Burgers Are a Game Changer

Now, I've been a grill aficionado for years. There's something magical about that smoky char, those iconic grill marks, and the whole outdoor cooking experience. But let's be realistic, sometimes the grill just isn't an option. Maybe it's pouring rain, maybe you live in a cozy apartment, or maybe you simply don't want to heat up your entire house. That's when the oven becomes your best friend.
Time-Saving Wonder
One of the biggest advantages of oven-baked burgers is the time they save. No waiting for the grill to reach scorching temperatures, no constant flipping to ensure even cooking. You simply pop them in the oven, set a timer, and let the magic happen. It's a lifesaver on busy weeknights when you crave a quick and delicious meal.
Mastering Precision
Another great thing about oven-baking is the level of control it offers. You can create a consistent, even heat that's perfect for cooking those patties to your desired level of doneness. No more guessing, no more overcooked edges, no more dry, crumbly burgers. It's all about precision, my friends.
Effortless Clean-Up
Let's be honest, cleaning a grill can be a real chore. Grease splatters, charcoal dust, and all those hard-to-reach nooks and crannies. Oven-baked burgers? A breeze to clean up. Just toss your baking sheet in the dishwasher, and you're done. You can thank me later.
Part 2: The Secret to juicy oven-baked burgers

So you're convinced about oven-baked burgers, but how do you achieve that juicy, flavorful, melt-in-your-mouth goodness? Here are a few secrets I've picked up over the years.
Choosing the Right ground beef
The foundation of any delicious burger is the beef. Look for ground beef with a higher fat content, like 80/20. This extra fat will keep your burgers juicy and flavorful. The fat renders as it cooks, adding moisture and richness to the patty. You can also experiment with different types of beef, like chuck or sirloin, depending on your taste preferences. But steer clear of ground beef labeled "lean" or "extra lean" as it tends to be dry and less flavorful.
The Importance of Seasoning
Don't be shy with the seasoning! A good mix of salt and pepper is a must, but don't stop there. Get creative and add your favorite spices. I like to sprinkle in a pinch of paprika, onion powder, garlic powder, or even a touch of cayenne pepper for a bit of heat. You can also use a pre-made burger seasoning blend for an easy flavor boost.
Forming the Perfect Patty
Form your burger patties by gently pressing the ground beef into a 1/2-inch thick patty. Don't overwork the meat, as this can make the burgers tough and dense. I like to make a slight indentation in the center of each patty. This helps them cook more evenly, preventing the center from bulging up as they cook.
Part 3: The Perfect Oven Bake: 425 Degrees Fahrenheit

Now for the magic number – 425 degrees Fahrenheit. This temperature is the key to beautifully cooked oven-baked burgers. At this temperature, the patties cook quickly and evenly, resulting in a crispy exterior and a juicy, tender interior.
Preheating is Crucial
Start by preheating your oven to 425 degrees Fahrenheit. This is a crucial step. It ensures the burgers cook evenly and quickly, preventing them from steaming in their own juices and becoming soggy. Once the oven reaches the desired temperature, it's time to get those patties in.
Baking Time: A Guide
For medium-rare burgers, bake for about 10-12 minutes. For medium, bake for 12-15 minutes. And for well-done, bake for 15-18 minutes. However, I highly recommend using a meat thermometer to ensure the burgers are cooked to your liking. This is especially important when you're aiming for a specific level of doneness.
Flipping for Even Cooking
You can bake the burgers on a baking sheet or on a grill pan. If you are using a baking sheet, you may want to flip the patties halfway through the cooking time to ensure even cooking. If you are using a grill pan, you can flip the burgers once they develop a nice crust on the bottom. The crust adds texture and flavor, while the flip ensures even cooking.
Part 4: Mastering the Meat Thermometer
A meat thermometer is your best friend when it comes to ensuring perfectly cooked burgers. It's the only way to guarantee that your burgers are safe to eat and cooked to your exact preference.
Using a Meat Thermometer Correctly
Insert the meat thermometer into the thickest part of the burger, making sure it doesn't touch any bones. Leave it in for a few seconds to get an accurate reading.
internal temperatures: A Guide
Here are some general guidelines for internal temperatures:
| Level of Doneness | Internal Temperature (°F) |
|---|---|
| Rare | 125-130 |
| Medium-rare | 130-140 |
| Medium | 140-150 |
| Medium-well | 150-160 |
| Well-done | 160 or above |
Remember, these are just guidelines. The desired temperature comes down to personal preference.
Part 5: The Art of the burger bun
No burger is complete without a good bun. But with so many choices out there, how do you choose the perfect one?
Toasted Perfection: Texture and Flavor
I'm a big fan of toasted buns. They add a nice crunch and soak up all those delicious burger juices, creating a symphony of textures and flavors. I love to toast mine in the oven or on the grill for a few minutes, just until they are golden brown. But if you are short on time, you can also toast them in a toaster or pan.
Bun Size: Finding the Right Fit
Choose a bun that's big enough to hold all your burger fixings, but not so big that it overwhelms the patty. I usually opt for a brioche bun for its soft texture and buttery flavor. It's a perfect canvas for all the delicious toppings.
The Butter Touch: Adding Richness
A little bit of butter on the bun before toasting adds extra flavor and richness. It's a small detail, but it makes a big difference. The butter melts and creates a golden crust that enhances the flavor of the bun.
Part 6: Building Your Burger Empire
Now that you've got your perfectly cooked burger and a toasted bun, it's time to build your masterpiece.
The Foundation: Essential Toppings
The beauty of burgers is the endless possibilities for toppings. But some classics always stand out:
- Cheese: Cheddar, Swiss, American, mozzarella, or even a blue cheese crumble are all great choices. Choose your cheese based on your taste preferences and the flavor profile of the burger.
- Lettuce: Crisp iceberg, romaine, or butter lettuce add a refreshing crunch. Choose a lettuce that won't wilt quickly and will hold its shape on the burger.
- Tomato: Thinly sliced ripe tomatoes are a must for a juicy burger. Avoid overripe tomatoes as they can become mushy.
- Onion: Red onion, white onion, or even caramelized onions add a nice bite. Choose your onion based on your preferred intensity of flavor.
- Pickles: Dill pickles or sweet gherkins add a tangy counterpoint to the richness of the burger. Choose your pickles based on your preference for sweet or sour flavors.
Beyond the Basics: Expanding Your Horizons
Of course, you can also add other toppings like:
- Bacon: crispy bacon adds a salty and smoky flavor. Choose thick-cut bacon for extra crispness and flavor.
- Avocado: Creamy avocado adds a healthy and delicious touch. Choose ripe avocados for the best creamy texture and flavor.
- Mushrooms: Sautéed mushrooms add an earthy depth of flavor. Choose your favorite mushroom variety and sauté them with butter and garlic for extra flavor.
- Sautéed Peppers and Onions: A classic topping for a juicy burger. Choose a colorful mix of bell peppers and onions and sauté them until they are soft and caramelized.
Creating Your Signature Burger: Let Your Creativity Shine
There are no rules here. Experiment, get creative, and create your own signature burger. And don't be afraid to try new things! You might just discover your next favorite burger combination.
Part 7: side dishes for Burger Bliss
No burger feast is complete without some delicious sides. Here are a few ideas to complement your oven-baked masterpieces:
Classic Sides: The Tried and True
- french fries: Crispy and golden, fries are a perfect match for any burger. Choose your favorite style of fries – thin, thick, crinkle-cut, or waffle fries.
- Onion Rings: A crunchy and flavorful treat. Choose onion rings that are thick-cut and battered for the best texture and flavor.
- potato salad: Creamy and refreshing, potato salad is a classic burger side. Choose your favorite recipe – creamy, tangy, or a combination of both.
- Coleslaw: A tangy and crunchy side that cuts through the richness of the burger. Choose your preferred coleslaw dressing – creamy, vinegar-based, or a mix of both.
Beyond the Ordinary: Elevate Your Meal
For something a little different, try:
- grilled corn on the Cob: A sweet and savory side that's perfect for summer. Grill the corn until it is slightly charred and the kernels are tender.
- Macaroni and Cheese: A cheesy and comforting side. Choose your favorite macaroni and cheese recipe – classic, baked, or loaded with your favorite toppings.
- sweet potato Fries: A healthier and sweeter alternative to traditional fries. Bake or fry the sweet potato fries until they are crispy and golden brown.
- grilled asparagus: A light and flavorful side that's perfect for spring. Grill the asparagus until it is tender-crisp and lightly charred.
Part 8: Oven-Baked Burger FAQ
Here are some of the most common questions I get asked about oven-baked burgers:
1. Can I use frozen patties?
Yes, you can use frozen patties, but it will take longer to cook. Just be sure to thaw the patties completely before baking. You can thaw them in the refrigerator overnight or in the microwave on the defrost setting.
2. Can I add cheese?
Absolutely! You can add cheese to your burgers during the last few minutes of cooking. Place a slice of cheese on each patty and bake for an additional 2-3 minutes, or until the cheese is melted and bubbly. You can also use shredded cheese or a cheese sauce for extra cheesiness.
3. Can I bake burgers in a cast iron skillet?
Yes, you can definitely use a cast iron skillet for baking. Just be sure to preheat the skillet in the oven before adding the burgers. This will ensure that the skillet is hot enough to create a nice sear on the burgers.
4. How do I store leftovers?
To store leftover burgers, let them cool completely, then wrap them tightly in plastic wrap or aluminum foil. You can also store them in an airtight container in the refrigerator for up to 3 days. To reheat, you can warm them in the oven, microwave, or on a grill. Reheating in the oven or on the grill will give you the best results.
5. What happens if my burgers are overcooked?
While it’s best to avoid overcooking, if they are, it doesn’t mean you need to throw them away! Overcooked burgers will still be safe to eat, but they will be drier. You can try adding some extra toppings to help add moisture and flavor, like a creamy sauce or a juicy slice of tomato. You can also add a little bit of broth or water to the burgers while they are reheating to help rehydrate them.
Part 9: My Final Thoughts:
So there you have it, my ode to the oven-baked burger. It's a simple, delicious, and versatile way to enjoy this classic dish. I encourage you to experiment with different seasonings, toppings, and sides to create your own perfect burger experience. Happy grilling (or baking!), friends!
Everyone is watching

Corn on the Cob: The Ultimate Guide to Perfectly Cooked Ears
Healthy MealsAh, corn on the cob. Just the name evokes images of sunny days, barbecues, and that sweet, juicy flavour that ...

Perfect Pork Roast Oven Cooking Time: A Guide to Delicious Results
Healthy MealsThere's something truly satisfying about a perfectly roasted pork. The aroma alone is enough to make your mout...

Ham Cooking Time: How Long to Bake, Smoke, or Boil a Delicious Ham
Healthy MealsAh, ham. It's a classic, isn't it? A real crowd-pleaser, especially around holidays. And when done right, it'...

Scallops: The Ultimate Guide to Perfect Cooking
Healthy MealsAh, scallops. Those delicate, sweet, and utterly delicious morsels of the sea. They hold a special place in my...

Spaghetti Squash: The Ultimate Guide to Cooking and Serving
Healthy MealsRemember that time you saw spaghetti squash at the supermarket, looking all bumpy and strange, and thought, "W...
