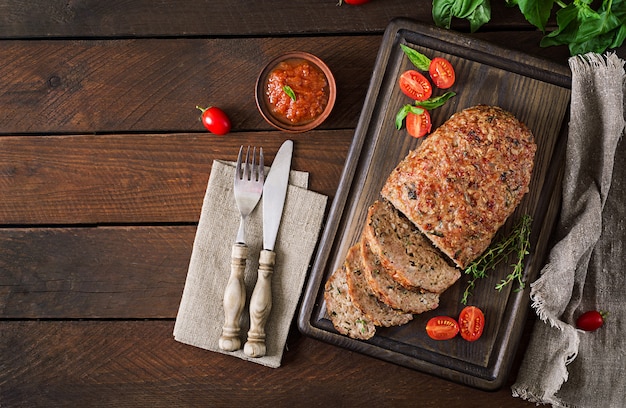
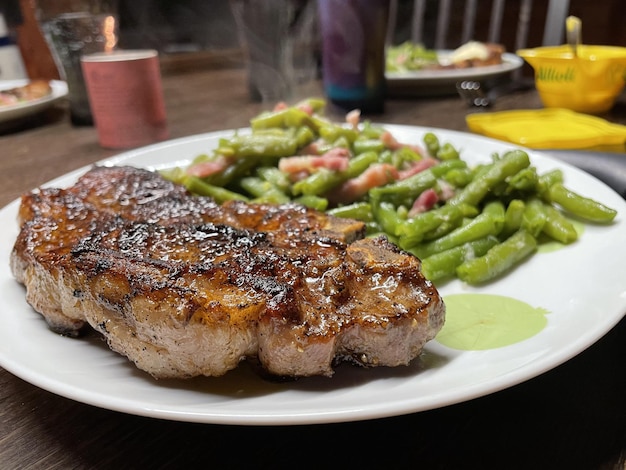
You're about to embark on a culinary adventure, and I'm here to be your guide. Let's talk new york strip roast - a cut of meat that's known for its rich flavour, beautiful marbling, and tender texture. It's a favourite in my kitchen, and with a few simple tips and tricks, it can be a favourite in yours too.
We'll cover everything from choosing the perfect roast to achieving that coveted crispy crust and juicy interior. I'll share my insider secrets, favourite recipes, and personal experiences – because, let's be honest, sometimes the best cooking advice comes from those who've been there, done that, and are ready to share their triumphs (and even a few mishaps). Ready? Let's get cooking!
(Part 1) Picking the Perfect New York Strip Roast

A good New York strip roast is the foundation of a delicious meal. It's worth putting in the effort to find a quality cut, and trust me, a little bit of searching goes a long way.
1. Decoding the Cut
First, let's clear up any confusion. A New York strip roast comes from the short loin of the beef, and it's often quite thick. What makes it special is that beautiful strip of fat that runs along the top, contributing to its flavour and juiciness. Think of it as a built-in moisture barrier. You want to see that lovely fat – it's a sign of a good roast, not something to shy away from.
2. Butcher's Choice
I'm a firm believer in building a relationship with a good butcher. They're experts, and they can guide you to the perfect cut for your needs. They can also explain different cuts and grading systems, so you'll be a confident shopper. But if you're heading to the supermarket, look for a roast with good marbling - those white flecks of fat throughout the meat. That's the sign of a tender and flavourful cut.
Avoid any roasts with too many sinewy bits or inconsistencies in the surface. You want a nice, even surface with that beautiful strip of fat running the length of the roast.
3. Sizing Up Your Feast
The size of your roast depends on how many people you're feeding. A 2-3 pound roast is usually perfect for a small family, while a 4-5 pounder is great for a bigger crowd. Remember, cooking times will vary depending on the weight of your roast. Don't forget to factor that in when planning your meal!
(Part 2) Preparing Your New York Strip Roast

You've got your perfect roast – now it's time to get it ready for the oven. This stage isn't complicated, but a few crucial steps can make a huge difference in the final result.
1. The Magic of Salt
Let's talk about salt. It's not just a seasoning; it's a transformative ingredient. Salt draws out moisture and intensifies flavour, resulting in a more tender and flavourful roast. My secret? I salt my roast at least a day in advance, and sometimes even a couple of days. I pat it dry with paper towels, then generously sprinkle salt all over, wrap it tightly in plastic wrap, and pop it in the fridge. The longer you salt it, the better.
2. Don't Salt Overboard
While salt is our friend, we don't want to overdo it. A little goes a long way. You want to enhance the flavour, not create a salty roast. Think of it as a gentle caress, not a forceful push.
3. Adding a Touch of Flair
Salt is the star, but feel free to add other seasonings. A good grind of black pepper is a classic companion. I also like to use garlic powder, onion powder, and even a touch of paprika for a hint of warmth. Experiment and find your favourite flavour combinations.
4. Let it Rest
Just before the roast goes into the oven, pat it dry with paper towels. This helps to achieve a beautiful crispy crust. You want a dry surface to encourage browning. And always remember to let the roast come to room temperature for about 30 minutes before cooking. This ensures even cooking.
(Part 3) Roasting Your New York Strip Roast to Perfection

Time for the grand finale! Get that oven preheated and let's create a masterpiece.
1. The Oven's Role
Start by preheating your oven to 450°F (232°C). This high heat sears the outside and creates that beautiful, crispy crust. Then, reduce the oven temperature to 325°F (163°C) for the rest of the cooking time. The lower temperature allows the roast to cook evenly and reach the desired doneness without overcooking.
2. Time is of the Essence
The exact cooking time depends on the size of your roast, but a good rule of thumb is 15 minutes per pound for medium-rare. That's my go-to level of doneness, but adjust it to your preference.
3. The Thermometer's Role
Don't rely on guesswork when it comes to cooking meat! A meat thermometer is your best friend. Here's a table that outlines the internal temperatures for different levels of doneness:
| Doneness | Internal Temperature (°F) |
|---|---|
| Rare | 125-130 |
| Medium-Rare | 130-135 |
| Medium | 140-145 |
| Medium-Well | 150-155 |
| Well Done | 160 |
4. Rest and Relax
Once the roast is cooked to your liking, take it out of the oven and let it rest for 15-20 minutes before carving. This allows the juices to redistribute throughout the meat, resulting in a beautifully tender and flavorful roast. Trust me, the wait is worth it!
(Part 4) Carving and Serving
The roast is cooked, rested, and ready to be carved. Now it's time to reveal the culinary masterpiece you've created!
1. The Right Tools for the Job
You'll need a good, sharp carving knife to achieve clean, even slices. A carving fork is also helpful to hold the roast steady while you carve.
2. Carving Techniques
Carve the roast against the grain, which means cutting the meat perpendicular to the muscle fibers. This makes the meat easier to chew and less stringy. You can slice the roast as thin or as thick as you like – it's your culinary canvas!
3. A Feast for the Senses
Serve the roast hot with your favourite sides. I love pairing it with roasted potatoes, asparagus, or a green salad. Don't forget to drizzle the roast with those delicious pan juices – they add a burst of flavour that's simply irresistible.
(Part 5) Tips for Extra Juicy and Flavourful Roast
Here's a few more tips to take your New York strip roast to the next level.
1. The reverse sear: A Culinary Adventure
For a truly impressive roast, try the reverse sear method. This involves cooking the roast at a low temperature for a longer period, followed by a high-temperature sear to create a beautiful crust. The result? A more evenly cooked roast with a juicy interior and a delicious, crispy crust. It's a bit of a culinary adventure, but well worth the effort.
2. Herb Rubs and Marinades: Flavour Fusion
Move beyond salt and pepper! Experiment with different herb rubs and marinades. I love a combination of rosemary, thyme, and oregano. You can also add garlic, onion, and even a hint of mustard. Let the roast marinade in the fridge for at least a couple of hours, or even overnight, to let the flavours infuse deeply.
3. Pan Juices: Culinary Gold
Don't waste those precious pan juices! They're packed with flavour. Use them to create a delicious gravy. Deglaze the pan with a little bit of wine or stock, and then thicken it with a cornstarch slurry. The gravy will add another layer of depth to your meal.
(Part 6) Leftover Magic: Transforming Your Roast
Leftover New York strip roast? Don't despair! There are plenty of delicious ways to use it up.
1. Sandwiches: A Hearty Treat
A hearty sandwich is my go-to for leftover roast beef. Pile it high with cheese, onions, and some of those amazing pan juices. For a more Italian flair, use a ciabatta roll.
2. Salads: A Boost of Protein
Add slices of leftover roast to a salad for a protein boost. It complements leafy greens, roasted vegetables, and a tangy vinaigrette.
3. Beef Hash: A Comforting Meal
Chop up the leftover roast and use it to make a hearty beef hash. Fry it with onions, potatoes, and your favourite seasonings. It's a satisfying meal and a great way to use up leftovers.
(Part 7) Serving the Perfect Feast: Presentation Matters
Now, let's talk about presenting your culinary masterpiece.
1. Elevate Your Presentation
For a special occasion, go all out with the presentation. Carve the roast into thin slices and arrange them beautifully on a platter. Garnish with fresh herbs like parsley or rosemary, and some lemon wedges for a pop of colour. It's about creating a feast for the eyes as well as the taste buds.
2. Sides to Savor
Choose your favourite sides to accompany the roast. Roasted vegetables like potatoes, carrots, and asparagus are classic pairings. A green salad adds a touch of freshness. And a creamy mashed potato or baked macaroni and cheese is always a crowd-pleaser.
3. Drinks and Dessert: Completing the Experience
Pair your roast with a hearty red wine like Cabernet Sauvignon or Merlot. For a lighter option, try a Pinot Noir. And for dessert, I recommend a classic apple pie or a rich chocolate cake.
(Part 8) FAQs
Have any lingering questions about New York strip roast? Let's clear them up!
1. Refrigerator Storage: Keeping Your Roast Fresh
You can safely store a New York strip roast in the refrigerator for 3-5 days. Wrap it tightly in plastic wrap or aluminum foil to prevent it from drying out.
2. Reheating Leftovers: A Simple Guide
The best way to reheat leftover roast is in the oven. Preheat your oven to 325°F (163°C). Place the roast in a baking dish and cover it with foil. Heat it for about 15-20 minutes, or until heated through.
3. Freezing for Future Feasts
Yes, you can freeze a New York strip roast. Wrap it tightly in plastic wrap and then aluminum foil. Freeze it for up to 3 months. Thaw it in the refrigerator overnight before cooking.
4. slow cooker Concerns: Not the Right Tool
I wouldn't recommend using a slow cooker for New York strip roast. Slow cookers are best for tougher cuts of meat. A New York strip roast is already tender and juicy, and slow cooking could make it tough and dry.
5. Finding Substitutes: Similar Delights
If you can't find a New York strip roast, you can substitute it with other cuts of beef like ribeye or sirloin. These cuts have similar marbling and flavour.
There you have it! Now you're equipped with the knowledge and confidence to tackle a New York strip roast like a pro. Get out there, choose your perfect cut, and create a culinary masterpiece that will impress everyone at your table. Happy roasting!
Everyone is watching

Corn on the Cob: The Ultimate Guide to Perfectly Cooked Ears
Healthy MealsAh, corn on the cob. Just the name evokes images of sunny days, barbecues, and that sweet, juicy flavour that ...

Perfect Pork Roast Oven Cooking Time: A Guide to Delicious Results
Healthy MealsThere's something truly satisfying about a perfectly roasted pork. The aroma alone is enough to make your mout...

Ham Cooking Time: How Long to Bake, Smoke, or Boil a Delicious Ham
Healthy MealsAh, ham. It's a classic, isn't it? A real crowd-pleaser, especially around holidays. And when done right, it'...

Scallops: The Ultimate Guide to Perfect Cooking
Healthy MealsAh, scallops. Those delicate, sweet, and utterly delicious morsels of the sea. They hold a special place in my...

Spaghetti Squash: The Ultimate Guide to Cooking and Serving
Healthy MealsRemember that time you saw spaghetti squash at the supermarket, looking all bumpy and strange, and thought, "W...
