Let's talk moonshine. The name conjures images of smoky backwoods stills, hushed whispers, and a taste of rebellious spirit. And it's true, there's a certain allure to this potent, unaged liquor. But making moonshine isn't just some hazy, wild-west adventure. It's a craft, a tradition, and yes, a bit of a secret passed down through generations.
I'm not going to sugarcoat it: this is a guide to making moonshine. While I'll explain the process in detail, remember that the legality of making your own moonshine varies, so always check local laws and regulations before embarking on this journey. I'm sharing this knowledge from my family’s own experience, passed down through generations. We've been brewing up this delightful concoction for years, and it's a real crowd-pleaser.
This guide will walk you through the whole process, from the basics of mashing to the final distillation. Think of it as your comprehensive moonshine manual, a roadmap to becoming a master distiller, one batch at a time.
(Part 1) Gathering Your Supplies
Let's start with the essentials. You'll be surprised at how many things you likely already have in your kitchen, but you'll also need a few specialized items.
Ingredients
Grain: This is the heart of your moonshine. It's where the flavour comes from. We're talking about corn, wheat, barley, rye, and even oats. The possibilities are endless. Personally, I prefer a good blend of corn and rye for a classic moonshine taste, but if you're feeling adventurous, experiment!
Sugar: Sugar is your sweetener, giving your mash a little extra oomph. You can use white sugar, brown sugar, or even honey for a more complex flavour.
Water: Water is crucial for the fermentation process. Use clean, fresh water for the best results.
Yeast: This is the magic ingredient that transforms the sugar in your mash into alcohol. There are different types of yeast available, but for moonshine, I recommend a good old-fashioned distiller's yeast. It's reliable, efficient, and readily available at most brewing supply stores.
Nutrients: This is optional, but adding nutrients like yeast nutrient or ammonium phosphate will give your yeast a boost and ensure it thrives. Think of it as giving your tiny alcohol factories the fuel they need to do their magic.
Equipment
Large Container: You'll need a large container to make your mash in. I prefer a stainless steel bucket or food-grade plastic container. Make sure it's large enough to hold at least 5 gallons of mash.
Measuring Cup: Essential for measuring your ingredients accurately. A big one is helpful for large batches.
Thermometer: You'll use this to monitor the temperature of your mash during the fermentation process. A digital thermometer with a probe is a good investment.
Hydrometer: This is a crucial tool. It measures the specific gravity of your mash, which helps you determine how much alcohol it's producing.
Airlock: This little device is vital for maintaining a safe environment for fermentation. It allows carbon dioxide to escape while keeping oxygen out. Without it, you'll have a bottle bomb on your hands.
Stirring Spoon: For obvious reasons.
Cheesecloth: Used for straining the mash before distillation, removing any solids that could burn in the still.
Still: The heart of your operation. There are various types available, from simple DIY stills to more sophisticated copper models. I personally use a copper still, as I find it produces a cleaner, more flavorful moonshine.
(Part 2) Preparing the Mash
Alright, you've got your supplies. Let's start making that moonshine!
1. Grinding the Grain
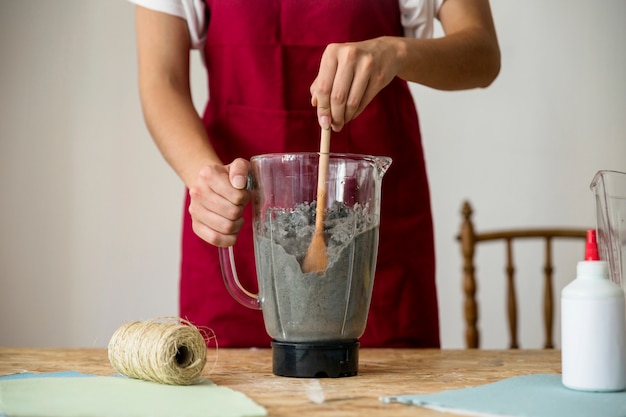
The first step is to grind your grain. If you're using whole grains, you'll need to grind them into a coarse flour. This allows the yeast to access the starches in the grain. You can use a food processor, a blender, or even a good old-fashioned grain mill. I prefer a mill, as it gives a more consistent grind and allows for larger batches.
2. Mixing the Mash
Now it's time to make your mash. Add your ground grain to your large container and fill it with water. The ratio of grain to water will depend on the type of grain you're using. For a standard corn mash, I usually use a ratio of about 1:4, one pound of grain to four gallons of water. But, it's always a good idea to consult a brewing guide for specific ratios.
3. Adding the Sugar
Once your grain and water are mixed, it's time to add your sugar. Add the sugar to your mash and stir until it's completely dissolved. Now, here's where you can play around a bit. If you want a sweeter moonshine, add more sugar. If you want a drier taste, add less.
4. Heating the Mash
The mash needs to be heated to activate the starches in the grain, making them easier for the yeast to break down. Heat your mash to about 150°F, but be careful not to let it boil. You can do this on a stovetop in a large pot, or use a heat source like a crockpot.
5. Cooling the Mash
After heating, let the mash cool down to a temperature of around 70°F to 80°F before adding your yeast. Yeast isn't a fan of extreme temperatures and will die off if it's too hot. You can cool it down by adding cold water or placing the container in a cold bath.
(Part 3) Fermentation
This is the heart of the process, where the magic of transformation happens.
1. Adding the Yeast
Once your mash is cooled down to the right temperature, you can add your yeast. This is the moment of truth. Follow the instructions on your yeast package for the optimal amount to use.
2. Keeping it Warm
Yeast loves a cozy environment, so it's important to keep your mash at a consistent temperature of around 70°F to 80°F for the best fermentation. This can take anywhere from a few days to a couple of weeks, depending on the type of yeast and the temperature. I often put the container in a room with a consistent temperature, or if it's colder, I might use a heat mat to keep things toasty.
3. Signs of Fermentation
You'll know your mash is fermenting when you see bubbles rising to the surface and hear a gentle bubbling sound. There will also be a slight sour smell, which is completely normal. It's the yeast hard at work, converting the sugar into alcohol.
4. Monitoring the Mash
You'll want to check on your mash regularly, taking note of the temperature, and if you have a hydrometer, the specific gravity. You can also take a small sample to taste and see how the fermentation is progressing. Over time, the mash will become clearer as the yeast consumes the sugars and produces alcohol.
(Part 4) Distillation
We've made the mash. Now for the final step, distillation.
1. Setting Up Your Still
This is where it gets a bit more technical, but don't worry, I'm here to guide you. You'll need a still for this process. There are various types available, from simple DIY stills to more sophisticated copper models. I personally use a copper still, as I find it produces a cleaner, more flavorful moonshine.
2. Straining the Mash
Before you start the distillation, you need to strain your mash to remove any solids. This will prevent them from burning during the distillation process. I use a large cheesecloth bag, but you can also use a strainer or a filter press.
3. Filling the Still
Once your mash is strained, you can fill your still. Make sure you don’t fill it too full, as you'll need space for the vapours to rise.
4. Heating the Still
Now, it’s time to heat your still. You can use a burner, a heating element, or even a wood fire. Heat your still slowly and gradually to prevent the liquid from boiling too quickly. The goal is to bring the temperature up to a point where alcohol vaporizes but water doesn’t.
5. Collecting the Spirits
As your still heats up, you’ll start to see vapours rising from the top of the still. These vapours contain alcohol, and you’ll need to collect them. You’ll do this using a condenser, which will cool the vapours and convert them back into liquid.
6. Monitoring the Process
Keep an eye on the temperature and the flow of your vapours. You’ll want to maintain a steady temperature to ensure a smooth distillation process.
(Part 5) The First Run
The first distillation is known as the "first run." It’s usually the strongest and most flavorful, but it’s also the most likely to contain impurities.
1. Heads
The first few drops of liquid that come out of the condenser are called the "heads," and they contain a lot of impurities like methanol and acetone. These are poisonous if consumed. You’ll want to discard these.
2. Hearts
The next portion of liquid that comes out is called the "hearts," and this is what you’ll want to keep. This is the actual moonshine, full of flavour and alcohol. I usually collect the hearts until the temperature at the condenser reaches about 180°F.
3. Tails
Once the temperature reaches about 180°F, the liquid will start to contain a lot of water and other impurities. This is called the "tails," and you can either discard it or use it in the next run.
(Part 6) The Second Run
I usually do a second distillation to refine my moonshine and remove any remaining impurities.
1. Combining the Hearts
The hearts from the first run are mixed together and then redistilled.
2. The Second Distillation
The second distillation is very similar to the first. You’ll heat the liquid, collect the vapours, and condense them. But, you’ll want to be more careful about collecting the hearts this time, discarding the heads and tails with even more precision.
3. The Result
After the second distillation, you’ll have a much purer and smoother moonshine. It’s ready to enjoy!
(Part 7) Bottling and Aging
Your moonshine is ready to be bottled. I usually use glass bottles with tight-fitting lids, but you can use any container that you like.
1. Bottling
I like to label my bottles with the date and the type of mash that I used. This helps me keep track of my moonshine.
2. Aging
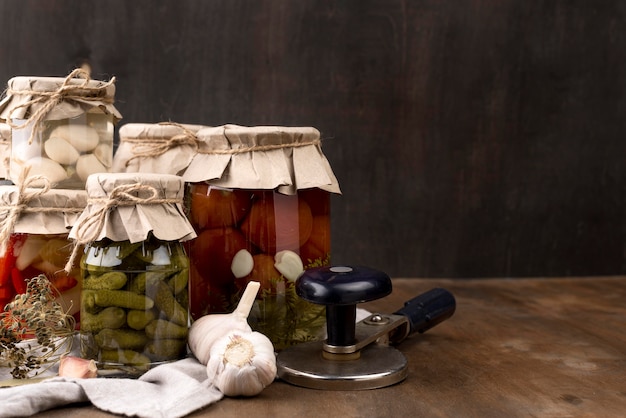
You can age your moonshine if you like. I usually age it for a few weeks or even months in glass jars, allowing the flavour to mellow and develop.
(Part 8) Enjoying Your Moonshine
Now, the moment you’ve been waiting for. It’s time to enjoy your hard-earned moonshine.
1. Neat
I love to sip my moonshine neat, but it’s also delicious on the rocks or mixed with a little bit of water.
2. Cocktails
Of course, moonshine is also perfect for making cocktails. It can be used in a variety of classics, like the “Moonshine Manhattan” or a "Moonshine Sour."
3. Food Pairings
Moonshine is surprisingly versatile when it comes to food pairings. I like to drink it with spicy food, barbecue, or even desserts.
(Part 9) Safety and Legality
Now, let's address the elephant in the room - safety and legality.
1. Safety First
Making moonshine can be dangerous if you’re not careful. Always make sure you’re using proper equipment and follow all safety guidelines. It’s also important to wear protective gear, such as gloves and goggles, when handling hot liquids and vapours.
2. Legality
In most places, it’s illegal to make moonshine without a license. Make sure you’re aware of the laws in your area before you start brewing. My advice? Stick to legal, small-batch distilleries if you're looking to buy moonshine. There’s a lot of talent out there making some truly great stuff.
(Part 10) Tips and Tricks
Over the years, I've picked up a few tips that might make your moonshine journey a bit easier.
1. Experiment
Don’t be afraid to experiment with different grains, sugars, and yeasts. You can create unique flavour profiles and try new things.
2. Patience is Key
Making moonshine is a process that takes time and patience. Don’t rush it. Let the fermentation and distillation happen at their own pace.
3. Don’t Be Afraid to Ask
If you’re unsure about anything, don’t hesitate to ask someone for help. There are lots of resources available online and in person.
4. Enjoy the Process
Most importantly, have fun! Making moonshine should be an enjoyable experience.
FAQs
Here are some frequently asked questions about moonshine:
1. Is moonshine dangerous to drink?
Yes, moonshine can be dangerous to drink if it’s not made properly. It can contain impurities like methanol and acetone, which can be poisonous. Always make sure you’re drinking moonshine from a reputable source, or if you’re making it yourself, follow safety guidelines and properly distill it.
2. How do you know if moonshine is safe to drink?
The best way to know if moonshine is safe to drink is to make sure it’s been properly distilled. If you're making your own moonshine, you'll want to make sure the heads and tails have been discarded and the hearts have been collected properly. If you're buying it, make sure it comes from a reputable source and has been properly labeled.
3. How long does moonshine last?
Moonshine can last indefinitely if it's stored properly. I recommend storing it in a cool, dark place in a glass bottle with a tight-fitting lid.
4. Can you age moonshine?
Yes, you can age moonshine, and it can actually improve its flavor. I usually age my moonshine for a few weeks or even months in glass jars.
5. What are some good moonshine cocktails?
There are lots of great moonshine cocktails out there. Some of my favorites include the Moonshine Manhattan, the Moonshine Sour, and the Moonshine Old Fashioned.
Now, you’re armed with everything you need to embark on your moonshine journey. Remember, it's about the journey, the tradition, and the delicious results. Happy brewing!
Everyone is watching

Corn on the Cob: The Ultimate Guide to Perfectly Cooked Ears
Healthy MealsAh, corn on the cob. Just the name evokes images of sunny days, barbecues, and that sweet, juicy flavour that ...

Perfect Pork Roast Oven Cooking Time: A Guide to Delicious Results
Healthy MealsThere's something truly satisfying about a perfectly roasted pork. The aroma alone is enough to make your mout...

Scallops: The Ultimate Guide to Perfect Cooking
Healthy MealsAh, scallops. Those delicate, sweet, and utterly delicious morsels of the sea. They hold a special place in my...

Spaghetti Squash: The Ultimate Guide to Cooking and Serving
Healthy MealsRemember that time you saw spaghetti squash at the supermarket, looking all bumpy and strange, and thought, "W...

Salmon Cooking Times: Perfect Guide for Every Recipe
Healthy MealsLet me tell you, cooking salmon is an art form. It's all about getting that perfect balance: juicy and tender,...