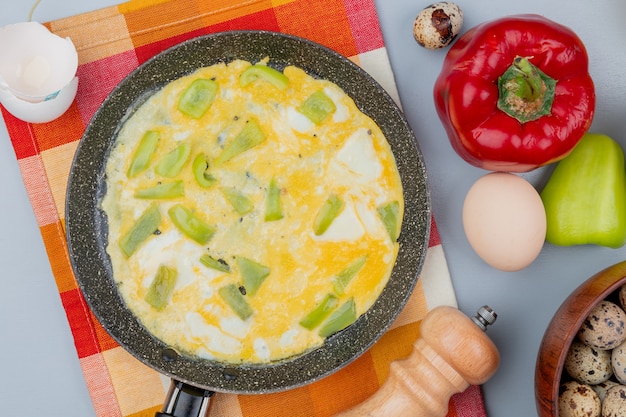
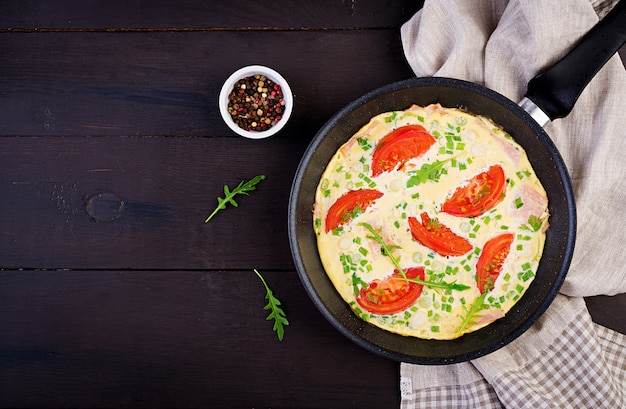
As a self-proclaimed foodie, I’ve always had a soft spot for a good omelette. There’s something utterly satisfying about folding open a fluffy, golden-brown masterpiece, revealing a symphony of flavourful fillings. But for years, my omelette attempts were a bit of a hit-and-miss affair. Sometimes they were fluffy and light, other times they were rubbery and dry. It wasn’t until I started to really pay attention to the details that I finally cracked the code – pun intended – and discovered the magic of the perfect omelette.
This article is more than just a recipe; it’s a journey into the heart of omelette-making, a culmination of years of experimentation and a touch of culinary wisdom. I’m going to take you through every step, from choosing the right pan to perfecting the flip, and in the process, I’ll share my personal tips and tricks, along with the occasional hilarious mishap. So, grab your apron, gather your ingredients, and get ready to master the art of the omelette, one delicious fold at a time.
Part 1: The Foundations of a Great Omelette

1. Choosing the Right Pan: The Canvas for Your Culinary Masterpiece
Let’s start with the foundation – the pan. The pan is the canvas for your omelette masterpiece, and choosing the right one is crucial. Forget those heavy, cast-iron skillets. For a truly perfect omelette, you need a pan with a few specific qualities.
Firstly, look for a non-stick pan. This will prevent your omelette from sticking, ensuring a smooth, effortless release. The last thing you want is to end up with a shredded omelette that clings to the pan like a stubborn child on a rainy day! Secondly, opt for a smaller pan, around 8-10 inches in diameter. This allows for the omelette to cook evenly and prevents it from spreading too thin. Imagine a thin, delicate pancake instead of a thick, fluffy omelette; not the desired outcome, right? Finally, the pan should be thin-bottomed, as this helps to distribute heat more evenly and prevents hot spots. Imagine those annoying burnt patches that leave your omelette tasting uneven. Yuck!
I’ve experimented with various materials, and my personal favourite is a stainless steel pan with a copper bottom. The copper core provides exceptional heat conductivity, ensuring the pan heats up quickly and evenly. It's like having a mini-oven on your stovetop! But ultimately, the best pan for you will depend on your preferences and your kitchen equipment. Just remember, the pan is your partner in this culinary adventure, so choose wisely!
2. The Power of the Eggs: From Fresh to Fantastic
Now, let’s talk about the star of the show – the eggs. It’s not just about using fresh eggs; there’s a little more to it than that. The secret lies in the age of the eggs. While fresh eggs are great for poaching or boiling, they can sometimes be a bit too thick for an omelette. Eggs that are a few days old (but still within their use-by date) have a more fluid yolk, which results in a smoother, silkier texture. It’s like the difference between a thick, lumpy smoothie and a silky, smooth one; you know what I mean?
I’m not suggesting you hoard your eggs for weeks on end, but a couple of days will do the trick. I usually keep a few eggs at room temperature, just for omelette emergencies. This allows the eggs to reach a slightly warmer temperature, which makes them easier to whisk and results in a more even consistency. It's like getting your eggs ready for a warm bath, preparing them for a smooth and comfortable whisking experience.
3. The Art of Whisking: A Symphony of Air and Eggs
Whisking the eggs is not simply about breaking them up; it’s about creating air and incorporating it into the batter. The key to a fluffy omelette lies in whisking vigorously and consistently. Think of it as a gentle massage for your eggs, coaxing them into a smooth, frothy consistency. It’s like transforming a simple mixture into a cloud of fluffy goodness.
I often find myself singing along to a catchy tune while I whisk, adding a touch of rhythm to the process. It’s a bit of a ritual, and it helps me to maintain a consistent pace. The goal is to achieve a light, airy batter with just a few, subtle bubbles. Don’t overwork it, though; excessive whisking can lead to a tough omelette. Remember, you’re not trying to whip cream here!
Part 2: The Omelette Technique: From Pouring to Folding

4. Prepping the Pan: The Secret to a Smooth Release
With your pan and eggs ready, it’s time to prep the pan. This step is crucial for achieving a perfectly cooked omelette that slides effortlessly out of the pan. First, heat the pan over medium heat. A hot pan is essential for searing the omelette and ensuring a crispy exterior. Imagine a perfectly golden-brown crust, like a delicious little sunbeam. While the pan is warming up, add a tiny bit of butter or oil to coat the bottom. This will prevent sticking and add a touch of richness to the omelette. It's like giving your omelette a warm hug, ensuring a smooth and comfortable cooking experience.
My personal tip is to use clarified butter. This is simply butter that has had the milk solids removed, resulting in a butter that can withstand higher temperatures without burning. It adds a lovely buttery flavour without any risk of burning or smoking. It's like a culinary magic trick, turning ordinary butter into a heat-resistant superstar.
5. Pouring the Eggs: Creating an Even Layer of Delights
Now comes the moment of truth! With your pan prepped and your eggs whisked, pour the mixture into the pan. This is where the magic truly happens. The key is to pour the eggs in a swift, even motion to create a thin, even layer. Avoid pouring the eggs in the centre of the pan, as this can lead to a thicker, denser omelette. Instead, pour the eggs towards the edges, allowing them to spread evenly across the bottom. Imagine a smooth, even blanket of egg goodness, not a messy, uneven pile.
Don’t be afraid to tilt the pan slightly as you pour the eggs. This encourages the eggs to spread evenly and prevents them from forming a thick, clumpy centre. Just a gentle tilt, no need to get dramatic with it. Think of it as a graceful dance, guiding the eggs to their perfect position.
6. The Art of the Flip: A Culinary Balancing Act
This is the moment where many omelette-makers experience fear and trepidation. But fear not! The flip, while daunting, can be mastered with a little practice. The goal is to flip the omelette without breaking it, creating a golden-brown exterior and a perfectly cooked interior. It’s like a culinary balancing act, a moment of truth where skill and precision are tested.
Here’s where my trusty spatula comes in. I use a thin, flexible spatula, ideally made of metal, to help me control the flipping process. Once the bottom of the omelette has set, but the top is still slightly runny, gently lift one side of the omelette with the spatula. This is where the non-stick pan comes in handy – the omelette should release easily. If it sticks, give it a gentle nudge, but be careful not to tear it. You’re not trying to wrestle a crocodile here!
Now, fold the omelette in half. You can do this with the spatula or with a gentle flick of your wrist. Some people prefer to fold it into thirds, but I find the classic fold to be the most visually appealing and the easiest to manage. It's like a culinary origami masterpiece, folding a flat surface into a beautiful three-dimensional creation.
7. Finishing Touches: Adding Flair and Flavor
The final step is all about adding the finishing touches and bringing your omelette to life. At this point, your omelette is essentially cooked, but it needs a little extra love. The first thing to do is remove the pan from the heat. You don’t want to overcook the omelette and make it rubbery. Imagine a chewy, rubbery texture; not what you’re going for, right?
Now, add your fillings. The possibilities are endless! You can go classic with cheese and ham, or experiment with mushrooms, spinach, tomatoes, or even some leftover roasted vegetables. The key is to add the fillings strategically. I usually add them to the cooked side of the omelette before folding it in half. This prevents them from getting too soggy and ensures that they cook through without the need for further heat. It's like a culinary puzzle, fitting the pieces together perfectly.
Finally, don’t forget the seasoning. A pinch of salt and pepper are essential for adding flavour, but you can also get creative with herbs like parsley or chives. It's like a final touch of magic, bringing out the hidden flavours and making your omelette sing.
Part 3: Beyond the Basics: Elevate Your Omelette Game

8. Mastering the Fillings: A Culinary Playground of Possibilities
The fillings are where you can really express your creativity. You can use fresh ingredients, pre-cooked meats, or even leftover vegetables from last night's dinner. It's like a culinary playground, where you can experiment and create your own unique flavour combinations. But there are a few tips to keep in mind:
- Pre-cook your fillings: This ensures that they are cooked through and prevents them from making your omelette soggy. Imagine a mushy, watery mess; not ideal, right?
- Chop them finely: Small pieces of fillings cook more evenly and prevent the omelette from becoming bulky. Imagine a thick, cumbersome omelette that’s difficult to fold and eat. Not very appealing, is it?
- Don’t overcrowd the omelette: Too many fillings will make the omelette difficult to fold and can lead to a messy presentation. Think of it as a balancing act, ensuring that your omelette is packed with flavour without becoming a culinary disaster.
- Consider flavour pairings: Think about how different ingredients will complement each other. Imagine the perfect symphony of flavours, a harmonious blend that tantalizes your taste buds.
Here are a few of my favourite omelette fillings:
| Filling | Description |
|---|---|
| Classic Cheese and Ham | A timeless combination that never disappoints. It's like a classic love song, always a hit. |
| Mushroom and Spinach | Savoury and earthy, with a hint of greenery. It's like a walk in the woods, a delightful combination of flavours. |
| Tomato and Basil | Fresh and vibrant, with a Mediterranean touch. It's like a sunny day on the coast, a bright and cheerful combination. |
| smoked salmon and Cream Cheese | Rich and decadent, for a special occasion. It's like a luxurious spa day, a treat for your taste buds. |
9. Omelette Variations: Beyond the Classic
The classic omelette is a delicious and versatile dish, but it can also be adapted in countless ways. Here are a few ideas to inspire your culinary creativity:
- Spanish Tortilla: A thick, potato-based omelette that’s packed with flavour. It's like a hearty, comforting hug on a cold day.
- French Omelette: A thin, delicate omelette that’s often served with a béarnaise sauce. It's like a refined, elegant dance, a delicate symphony of flavours.
- Frittata: A baked omelette with fillings that’s perfect for a crowd. It's like a culinary party, a delicious gathering of flavours.
- Sweet Omelette: For a breakfast treat, you can make a sweet omelette with fillings like fruit, chocolate, or nuts. It's like a dessert disguised as breakfast, a sweet surprise in the morning.
Part 4: Omelette Troubleshooting: Turning Disaster into Delight
10. Solving Common Omelette Problems: A Culinary Guide to Recovery
No matter how much we practice, there will always be those moments when our omelettes don’t turn out quite as we envisioned. Don’t despair! With a little knowledge and a few troubleshooting tips, you can turn even the most disastrous omelette into a delicious success. Think of it as a culinary rescue mission, saving your omelette from a fate worse than rubbery!
- The omelette is sticking: This usually happens if the pan isn’t hot enough or if you didn’t use enough oil or butter. It's like a culinary tug-of-war, with the omelette desperately trying to escape the pan.
- The omelette is rubbery: This can happen if the eggs are overcooked. Try cooking them over a lower heat for a shorter amount of time. Imagine a chewy, rubbery texture; not what you’re going for, right?
- The omelette is too thin: This can happen if you used too many eggs for the size of the pan. Think of it as a culinary balancing act, finding the perfect ratio of eggs to pan size.
- The omelette is too thick: This can happen if you didn’t whisk the eggs enough. Imagine a thick, dense omelette, lacking the airy lightness of a perfect creation.
- The omelette is too salty: This can happen if you used too much salt. Try adding a pinch of sugar to balance the flavour. It's like a culinary balancing act, finding the perfect harmony of flavours.
11. Omelette FAQs: Answering Your Burning Culinary Questions
Now, let’s address some of the most common questions I get asked about making the perfect omelette.
- Q: Can I use egg whites instead of whole eggs?
- A: Absolutely! Using egg whites will result in a lighter, airier omelette. You’ll need to adjust the amount of egg whites you use as they have a different consistency than whole eggs. Imagine a fluffy, cloud-like omelette, a delightful contrast to the denser texture of a whole-egg omelette.
- Q: What kind of cheese is best for omelettes?
- A: It depends on your personal preference! Some popular choices include cheddar, Swiss, mozzarella, and feta. You can even use a combination of cheeses. Imagine a cheese symphony, a harmonious blend of flavours that tantalizes your taste buds.
- Q: How do I make a cheese omelette without it getting rubbery?
- A: The key is to add the cheese at the end, just before folding the omelette. This gives the cheese a chance to melt without overcooking. Imagine a perfectly melted cheese, a delightful contrast to the slightly rubbery texture of overcooked cheese.
- Q: What if I don’t have a non-stick pan?
- A: You can still make a delicious omelette, but you’ll need to use a bit more oil or butter to prevent sticking. Make sure to use a thin, flexible spatula to help release the omelette from the pan. It's like a culinary dance, a delicate movement to prevent sticking and ensure a smooth release.
- Q: How do I store leftover omelette?
- A: Leftover omelette can be stored in an airtight container in the refrigerator for up to 3 days. You can reheat it in the microwave or in a pan on the stovetop. Imagine a delicious leftover omelette, ready to be enjoyed for breakfast, lunch, or dinner.
Part 5: The Omelette Experience: More Than Just a Meal
Making omelettes is more than just cooking; it’s an experience. It’s about embracing the simple pleasures of food, experimenting with flavours, and creating something beautiful and delicious. It's like a culinary journey, a voyage of discovery where you can explore your creativity and indulge your senses.
Remember, the key to making a perfect omelette is not just following a recipe, but understanding the principles behind it. It’s about experimenting, learning from your mistakes, and celebrating the beauty of a well-cooked egg. So, go forth, embrace the challenge, and enjoy the journey to omelette mastery.
I’m confident that with a little practice and a dash of enthusiasm, you’ll be whipping up culinary masterpieces in no time. Happy cooking!
Everyone is watching

Corn on the Cob: The Ultimate Guide to Perfectly Cooked Ears
Healthy MealsAh, corn on the cob. Just the name evokes images of sunny days, barbecues, and that sweet, juicy flavour that ...

Scallops: The Ultimate Guide to Perfect Cooking
Healthy MealsAh, scallops. Those delicate, sweet, and utterly delicious morsels of the sea. They hold a special place in my...

Spaghetti Squash: The Ultimate Guide to Cooking and Serving
Healthy MealsRemember that time you saw spaghetti squash at the supermarket, looking all bumpy and strange, and thought, "W...

Salmon Cooking Times: Perfect Guide for Every Recipe
Healthy MealsLet me tell you, cooking salmon is an art form. It's all about getting that perfect balance: juicy and tender,...

Ham Cooking Time: How Long to Bake, Smoke, or Boil a Delicious Ham
Healthy MealsAh, ham. It's a classic, isn't it? A real crowd-pleaser, especially around holidays. And when done right, it'...
